This blog aims to clarify the differences between Git, GitHub and GitHub Desktop, including how they can be used together to manage code both on your local machine and on GitHub.
Git - a software that enables the user to track version changes to a file or a folder of items. Git needs to be installed on your local machine in order to get going - instructions of how to do this on Mac, Linux and Windows can be found here.
GitHub - a website used for storage, management and sharing of code. It’s ideal for collaboration, and provides version control. Make an account here.
GitHub Desktop - a desktop app that can be thought of as a communicator between your local machine and your GitHub account. When changes are made to the local file, these changes can be ‘pushed’ to GitHub, with the version changes being recorded. Likewise, when there are differences in the code on GitHub to that on your local machine (for example, a colleague has edited the code on GitHub), you can ‘pull’ these changes to your local machine, updating your local code. The version changes are also recorded in your local project folder, in the .git folder. Download GitHub Desktop here.
Key Terminology
Repository - a place where you can store code, files and the version history of various files. There are two types of repository - local and remote. A local repository exists on a local machine. A remote repository is a repository that exists somewhere cloud-based - in today’s case, the remote repository we are referring to is stored on GitHub.
Branch - a branch is a parallel version of the whole contents of a repository. We begin with a master (aka 'main' or 'primary') branch, and the option to create more branches. A new branch is created from a source branch, wherein the new branch will start as a ‘duplication’ of the source branch. Any existing branch can be selected as the source branch. The project can then be edited and tested in the new branch without affecting or breaking any code or files in the other branches. Multiple branches are especially helpful when there are multiple people working on a project, and when the project is still in development.
How to manage and share code on GitHub
Initialising a local repository
We will be using the folder My Project Folder as our repository. My Project Folder contains a .txt file called My Code.txt. Initialising a repository means that version control will be implemented for that entire folder.
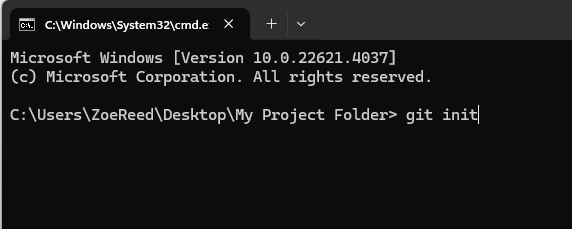
- Open command line and enter the file path of My Project Folder. To initialise a repository, type the command git init and enter. You will then see a .git folder appear in My Project Folder. Version changes, amongst other items, are recorded in this .git folder.
Setting up a remote repository on GitHub
We will now set up a repository on GitHub, and push My Code.txt from our local machine to the GitHub repository.
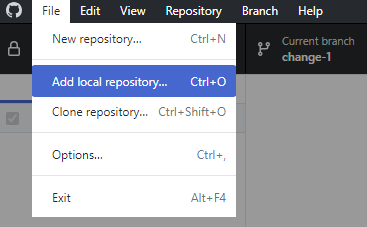
- In GitHub Desktop, go to File > Add local repository.
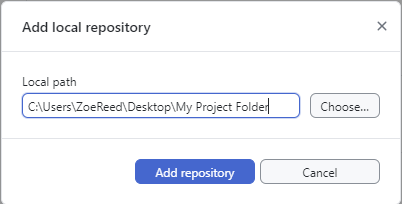
- Enter the local file path to My Project Folder, and click Add repository. This allows us to view and interact with the repository in the GitHub Desktop interface.
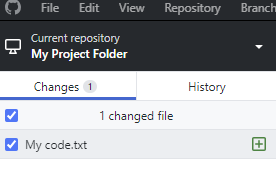
By default, we will be working on the Master branch in GitHub Desktop.
In GitHub Desktop, we can see that My Code.txt is in My Project Folder.
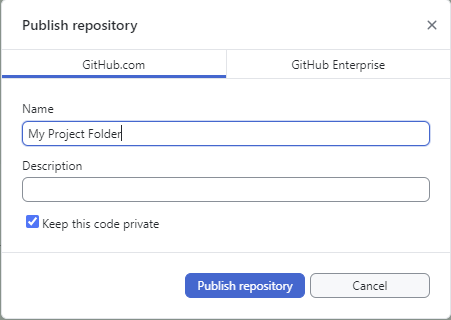
- In GitHub Desktop, click the Publish repository button.

This will create a project folder on GitHub.
You will be asked to name and describe the repository. Once these details have been entered, we can click Publish repository, which creates a new, empty remote repository on GitHub.
- Heading over to GitHub, we can see that a new repository has been published. However, the repository is empty, so now we need to push the file My Code.txt to GitHub.

In order to do this, we will head back to GitHub Desktop.
- With My Code.txt selected in the Changes section, click Commit to master.
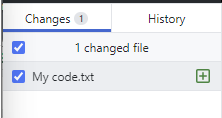
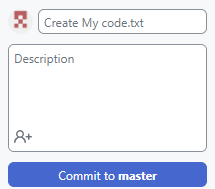
Commits are like saving a file. When we make a Commit, a snapshot of that branch of the repository at that moment in time is recorded. When a commit is made in GitHub Desktop, it is not automatically reflected on GitHub. For the changes that form the commit to be reflected on GitHub, go to Repository > Push.
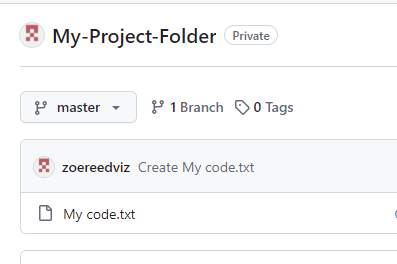
The changes that exist within the commit will then be pushed to GitHub!
What about the other way round - what if there are changes to the remote repository that we would like to be reflected in our local repository?
In this case we will need to ‘pull’ from GitHub.
- Open your repository on GitHub Desktop. Click Fetch origin.

‘Fetching’ informs us as to whether there are any differences between the local and remote repository. It doesn’t affect the files on our local machine, or tell us what the differences (if they exist) are.
Here, there has been 1 commit to this branch of the remote repository that does not exist on our local machine. This is indicated by the icon seen below:

- To save this version of the repository to our local repository, click Pull origin. ‘Pulling’ effectively replaces the current version of the local repository with the current version of the remote repository. All the changes being made to the local repository are recorded, so that previous versions can still be accessed.
Our local repository now has the same versions of all the files as the remote repository!
