Updating your data automatically, by automating when your workflow runs can save you time and extra work, allowing you to focus on other things.
I will explain how you can automatically run your Alteryx workflow, using the function schedule on Alteryx Server.
The first step would be to log into Alteryx Server.
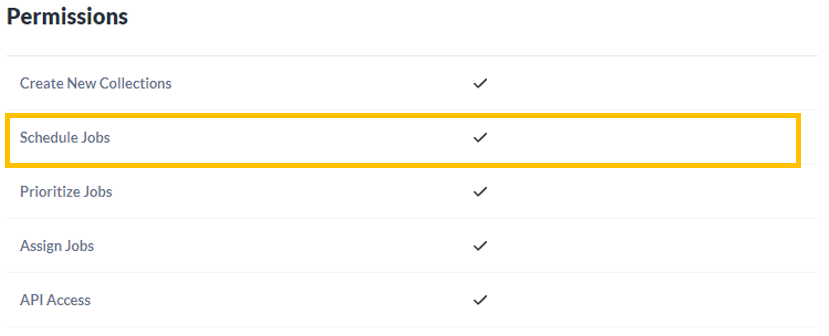
To schedule a workflow, you have to ensure you have the correct permissions.
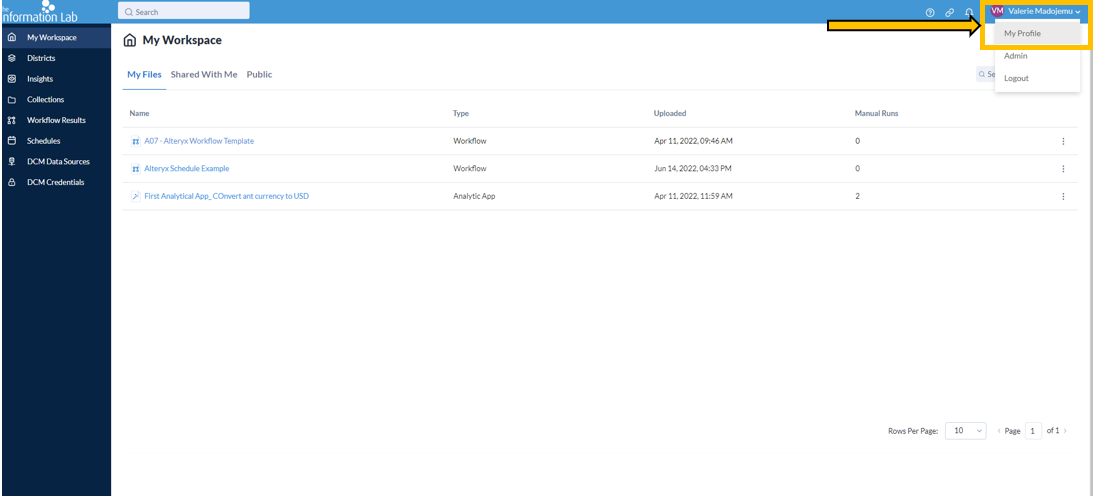
To check if you have the correct permissions, go to your profile, scroll down and verify you have the correct permissions to Schedule jobs.


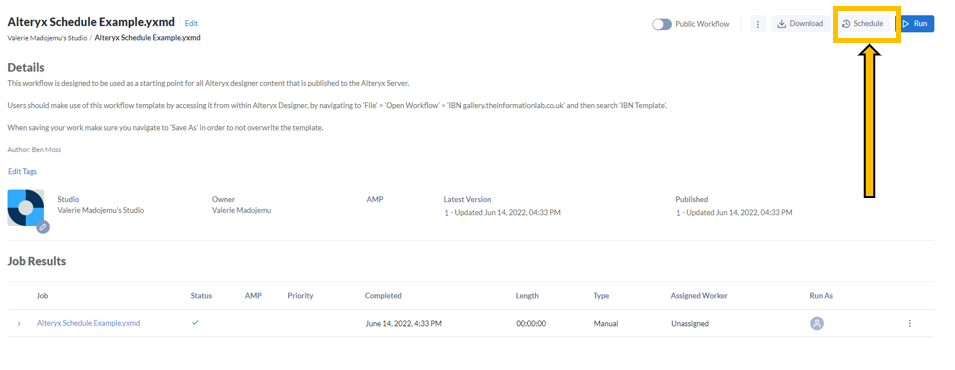
After checking your permissions, go to where your workflow is saved on the server click on it and in the top-right corner, you'll see a schedule button.


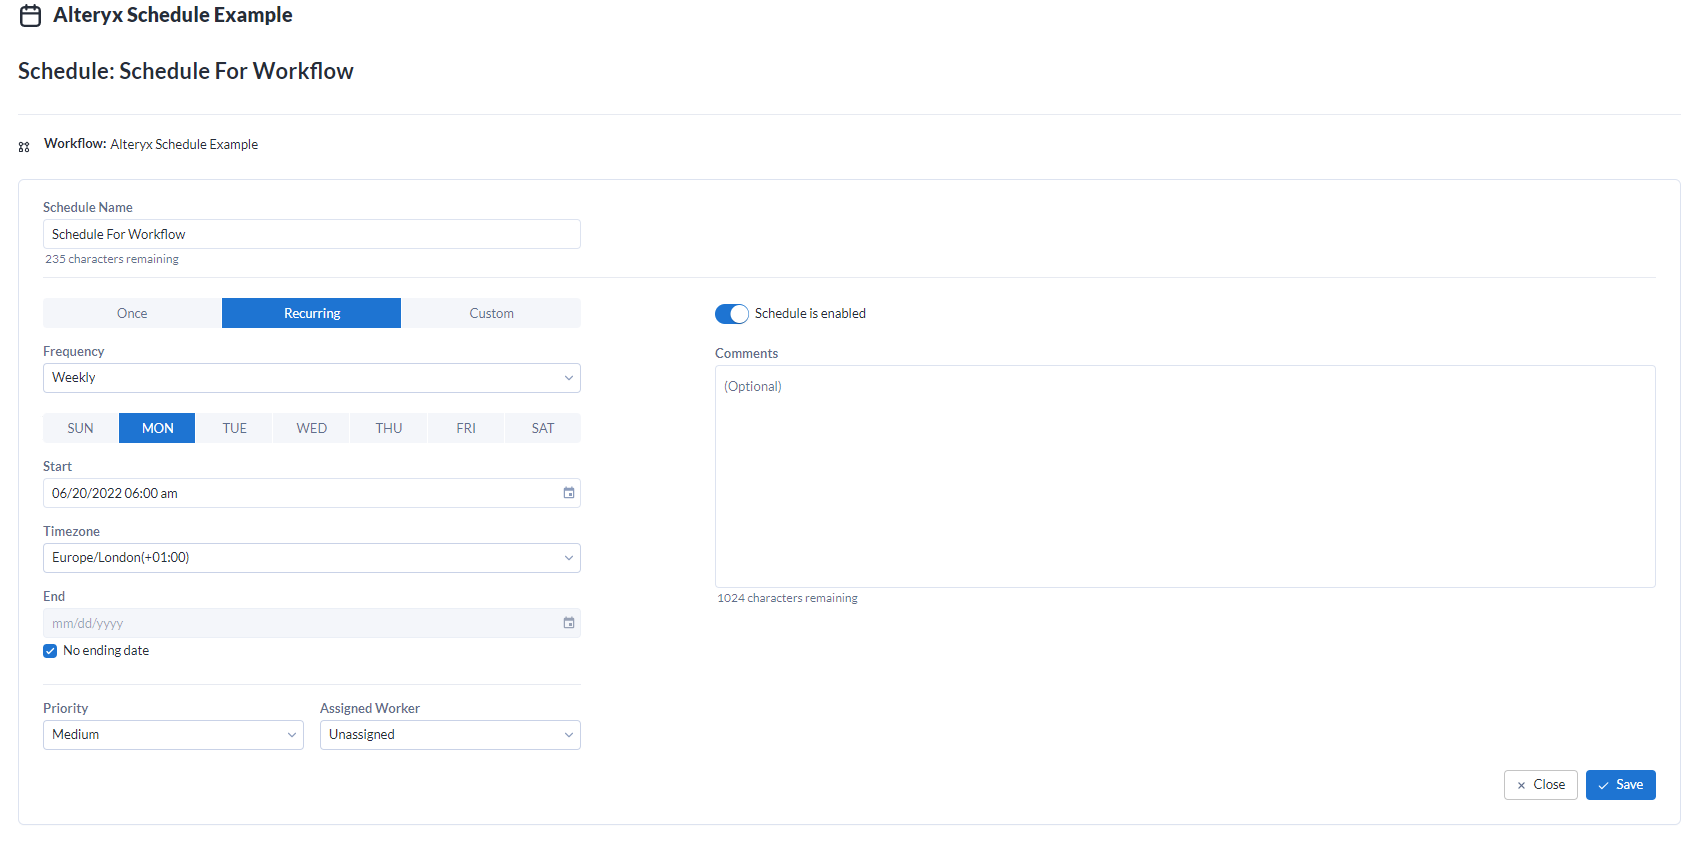
Clicking this button will allow you to set up your criteria for your schedule. Here you can set your schedule to run once, recurring or custom e.g. my schedule is set to run my workflow every week on Monday morning at 06:00 AM with a priority of Medium Priority.
There are 4 classes of Priority: Low, Medium, High and Critical, each criterion allows you to prioritise a workflow job. When there are multiple jobs in a queue the jobs with the highest prioritise will run first - See Alteryx documentation for more information, https://help.alteryx.com/20212/server/schedule-workflow.
If I wanted my schedule to end at a particular date, I would click on custom and set an end date.

To check your schedule is up and running head to the Schedules tab, so I can see my workflow will next run on the 20/06/2022 and every week thereafter.

