


Snowflake is a cloud based data platform within which users can store, process, and analyse their data.
Its SQL based interface for data querying is simple and easy to use, with a number of more commonly utilised functions also built into the graphical user interface (GUI).
Additionally, because Snowflake separates out it's compute (query) resources and storage resources, it offers greater efficiency and scalability to handle workloads of various sizes. In this guide, you will be walked through how to create a table in Snowflake, as well as how to load data into that table, utilising Snowflakes built in features that will allow you to get up and running quickly.
Creating a Schema
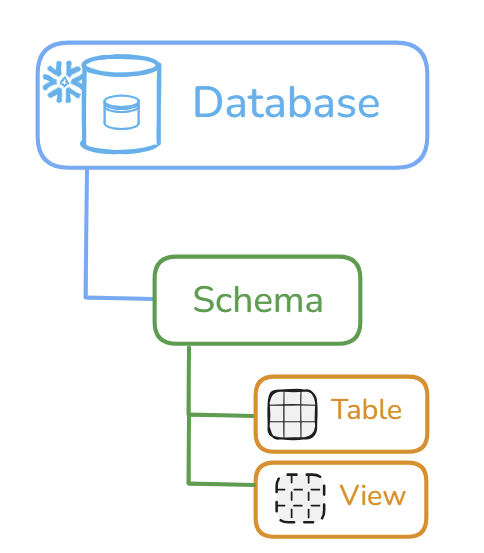
In Snowflake, a schema is basically a way to group together related database objects like tables and views. It is useful to set up before you start creating your tables so they are kept and grouped somewhere logical.
To create your schema, you need to first have a database set up, which is typically done by your system administrators. A database is a grouping of related schemas.
If you already have a schema, feel free to skip the following steps.
You can create a schema in two ways;
1. Via the UI
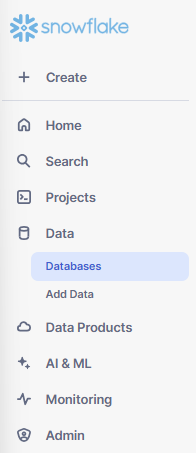
- Navigate to your database via the data tab on the left hand side of the interface and select it
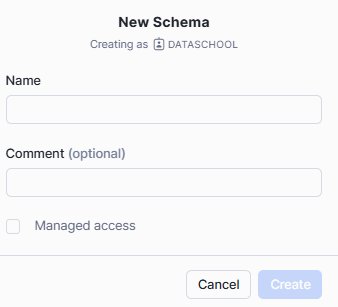
- Your interface should now be displaying the details of your database. Beside the emboldened name of your database, click the blue "+ Schema" button. You need to have access to do this via the role you have been granted in Snowflake.

- Give your schema a name and a description
Your schema should now be created and ready to add database objects to.
2.Via SQL
Enter the below query and run in your SQL worksheet, replacing SCHEMA_NAME with your name of choice.
create or replace schema SCHEMA_NAMEThis creates a new schema if a schema with this name doesn't exist, and if one with the same name already exists, replaces it.
Creating a table
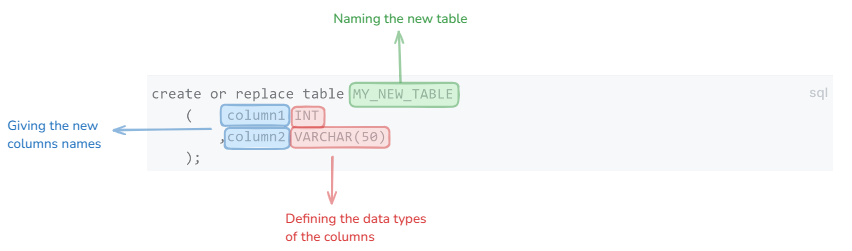
When you first create a brand new table in Snowflake you need to define how you would like Snowflake to structure your table.
Firstly - your new table will need a name, and secondly, it will need to know what columns to create and what data type those columns should be.
See the SQL statement below to see how this is structured in a query;
create or replace table MY_NEW_TABLE
    (    column1 INT
        ,column2 VARCHAR(50)
    );
If successful, you should see this message appear in the results are at the bottom of the screen.

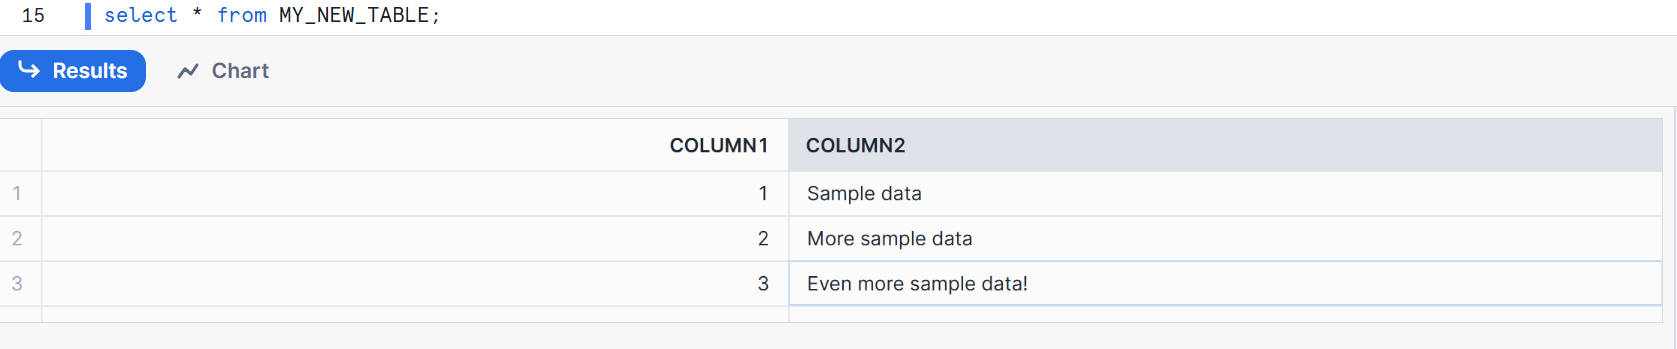
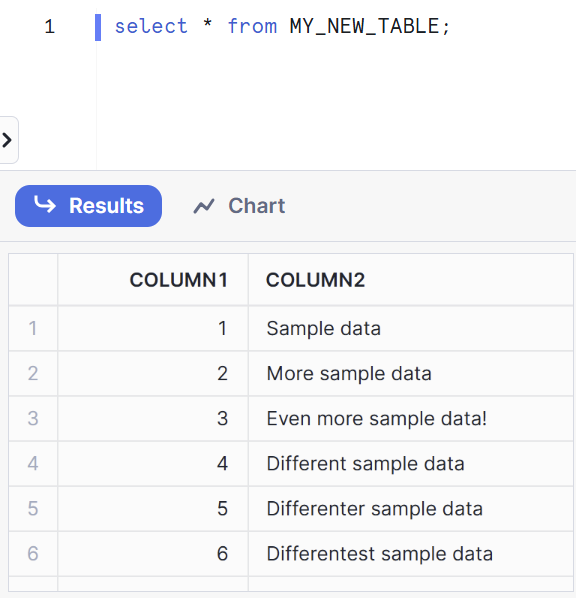
To check the contents of the table we can run the below query to select everything in the table;
select * from MY_NEW_TABLEHowever you may notice that your query produces no results. This is because we haven't yet populated it with any data.

Which brings us to...
Loading Data into a Table
Snowflake offers numerous tools that allow you to seamlessly load in data from external sources. This blog will walk you through how to insert data via a SQL query and secondly from a local file on your machine.
... manually via SQL
In Snowflake SQL, you can load data into your new table using the insert into statement. This requires you to specify your table name and the columns that you want to insert data into, followed by values and then the actual data that you want to insert in each row;
insert into MY_NEW_TABLE(COLUMN1,COLUMN2)
  values
     (1,'Sample data')
    ,(2,'More sample data')
    ,(3,'Even more sample data!')
;
Now when we run our select statement to return everything in our table we now have some data!
... from a local source
Manually populating tables using the method described above is not always ideal, especially if you have a data file stored locally on your device that you want to load into Snowflake. Fortunately, you can easily upload this data using Snowflake's GUI;
I have a CSV that I created in excel with a few rows of data that I need to add to the table we created earlier, that looks like this;

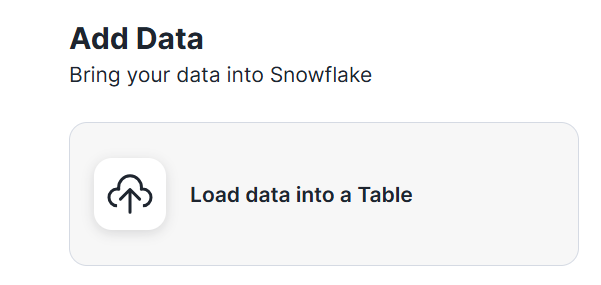
- Via the menu on the left hand side of your screen select the "+ Create" button and from there select "Add data"

- Next select "Load data into a Table". This will allow use to load data into the table we created earlier.
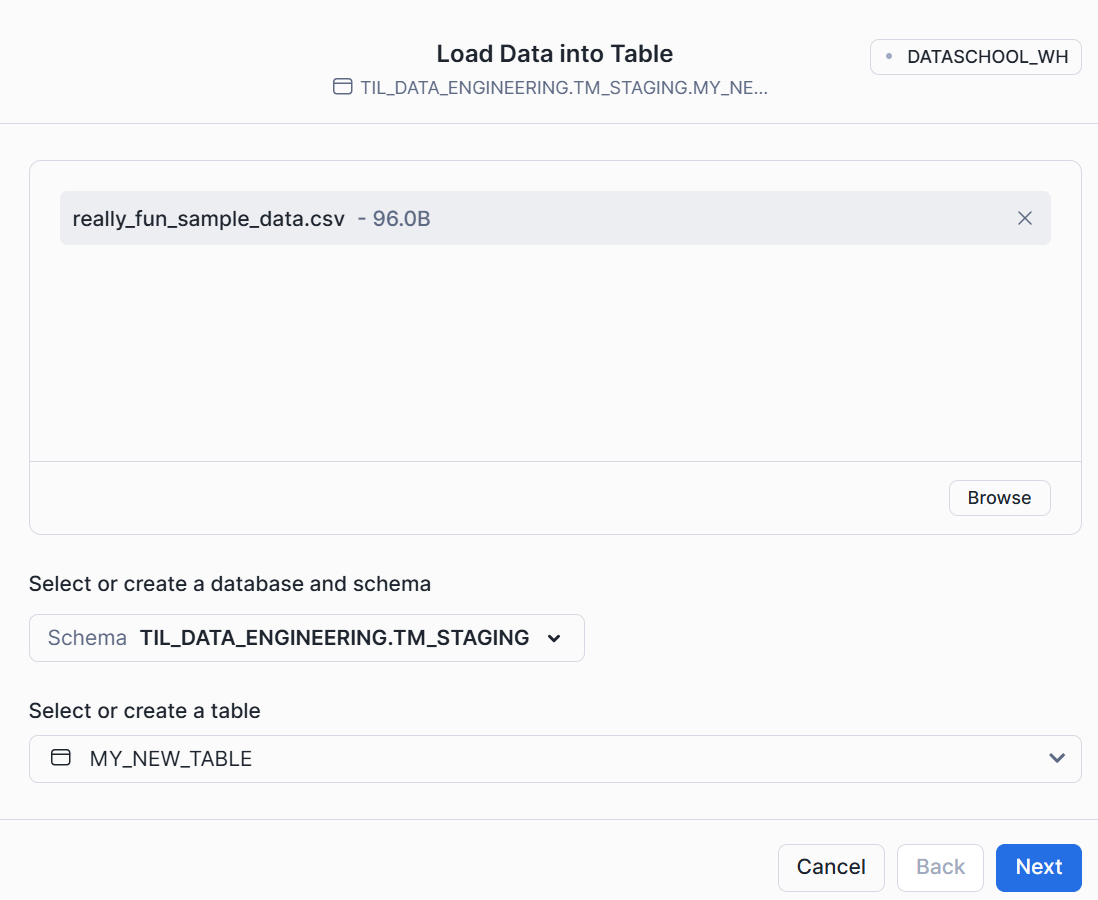
- Select the database and schema that you used earlier to create your table and also select your table.

- Then use the browse or drag and drop feature to select your local file. There is a file size limit of 250MB and the supported formats are: CSV/TSV, json, orc, avro, parquet
- Now use the interface to select the options that align to your data that you are pulling in.
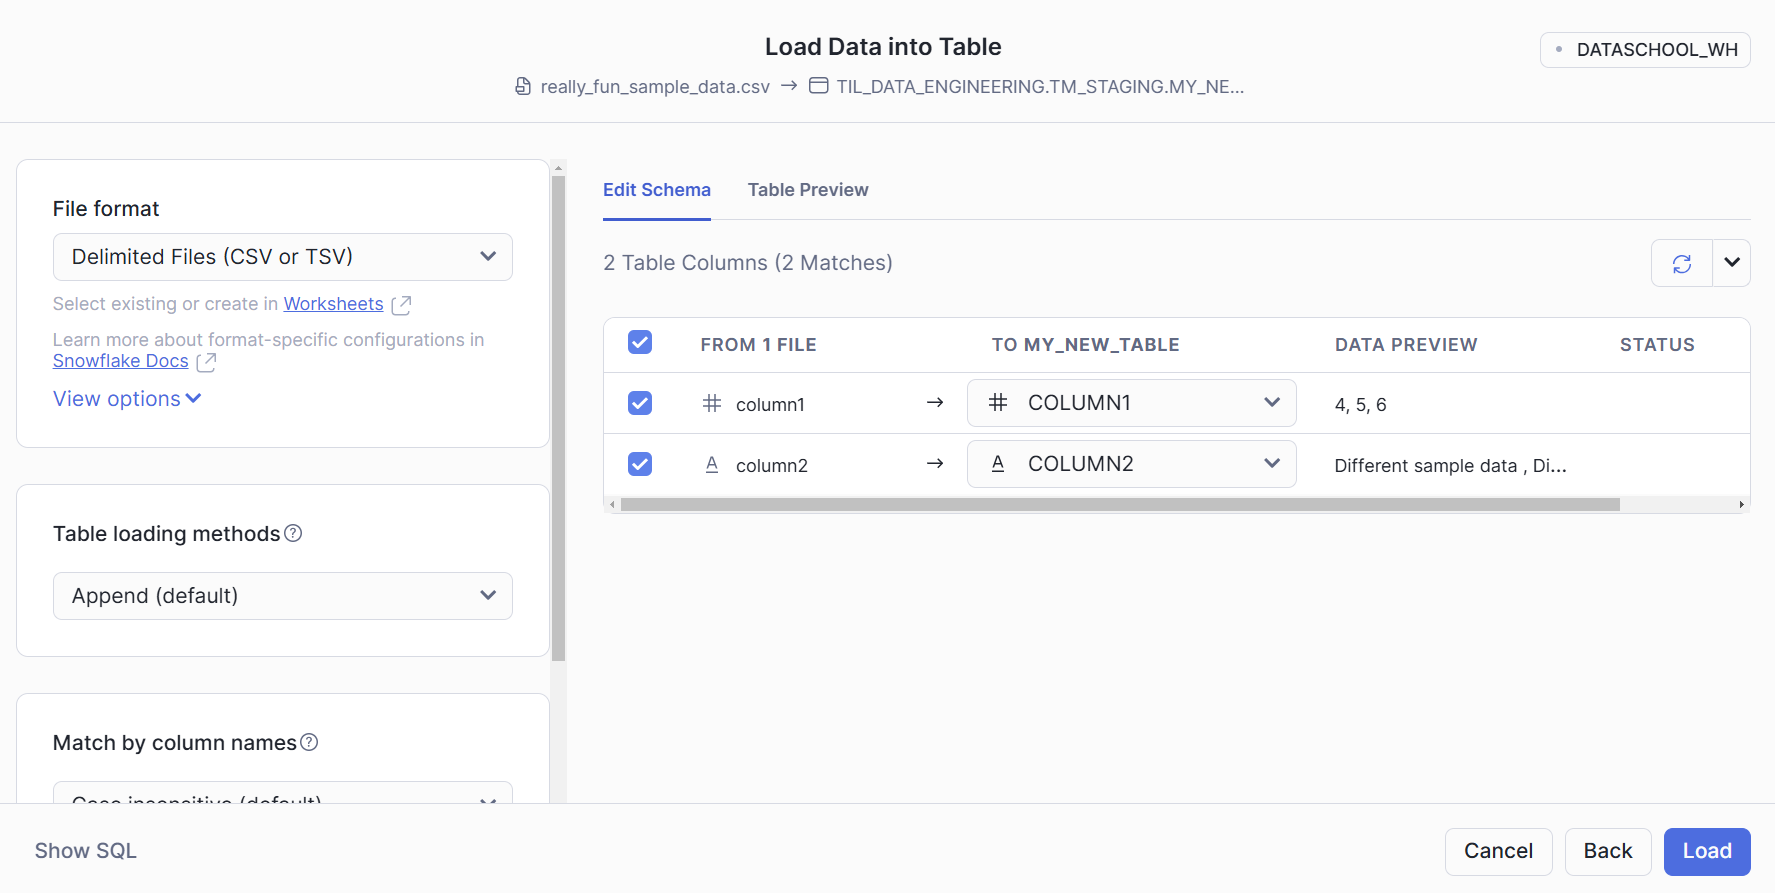
As my table is a CSV these are the options I have selected;
- File format = Delimited Files (CSV)
- Table loading methods = Append(default) - because I want to append this data to the data that I loaded into my table earlier.
- Match by column names = Case insensitive (default)
- What should happen if an error is encountered while loading a file? - Only valid data from file
- Click on load data to load your data into your table

- Now if we run a query again to select all the data from our table we can see that it now has the extra data that we added.
Congratulations! You can now create tables and load them with data in SQL snowflake - happy querying !