


In my last blog about Creating Tables in Snowflake, we learned how to manually create a table inside a schema. We also covered what namespaces are, so I recommend reviewing that blog before getting started with this one.
In this tutorial, I will walk through how to upload a flat file, such as a CSV or TSV file, into Snowflake and convert it into a table. The end result will be very similar to the previous project—you will have a new table created within your desired schema. Note that some file types, such as Excel files, are not supported here. The full list of supported formats can be found in step 4.
In this tutorial, I will use a dataset about pokemon from Kaggle and load it into a new schema called POKEMON in Snowflake.
Let’s get started!
Step 1: Locate your file

In your computer, locate the file you want as a table in Snowflake.
Step 2: Identify the Schema you want your new table to exist in
For this example, I created a new schema called POKEMON where I will store and manage my new table.
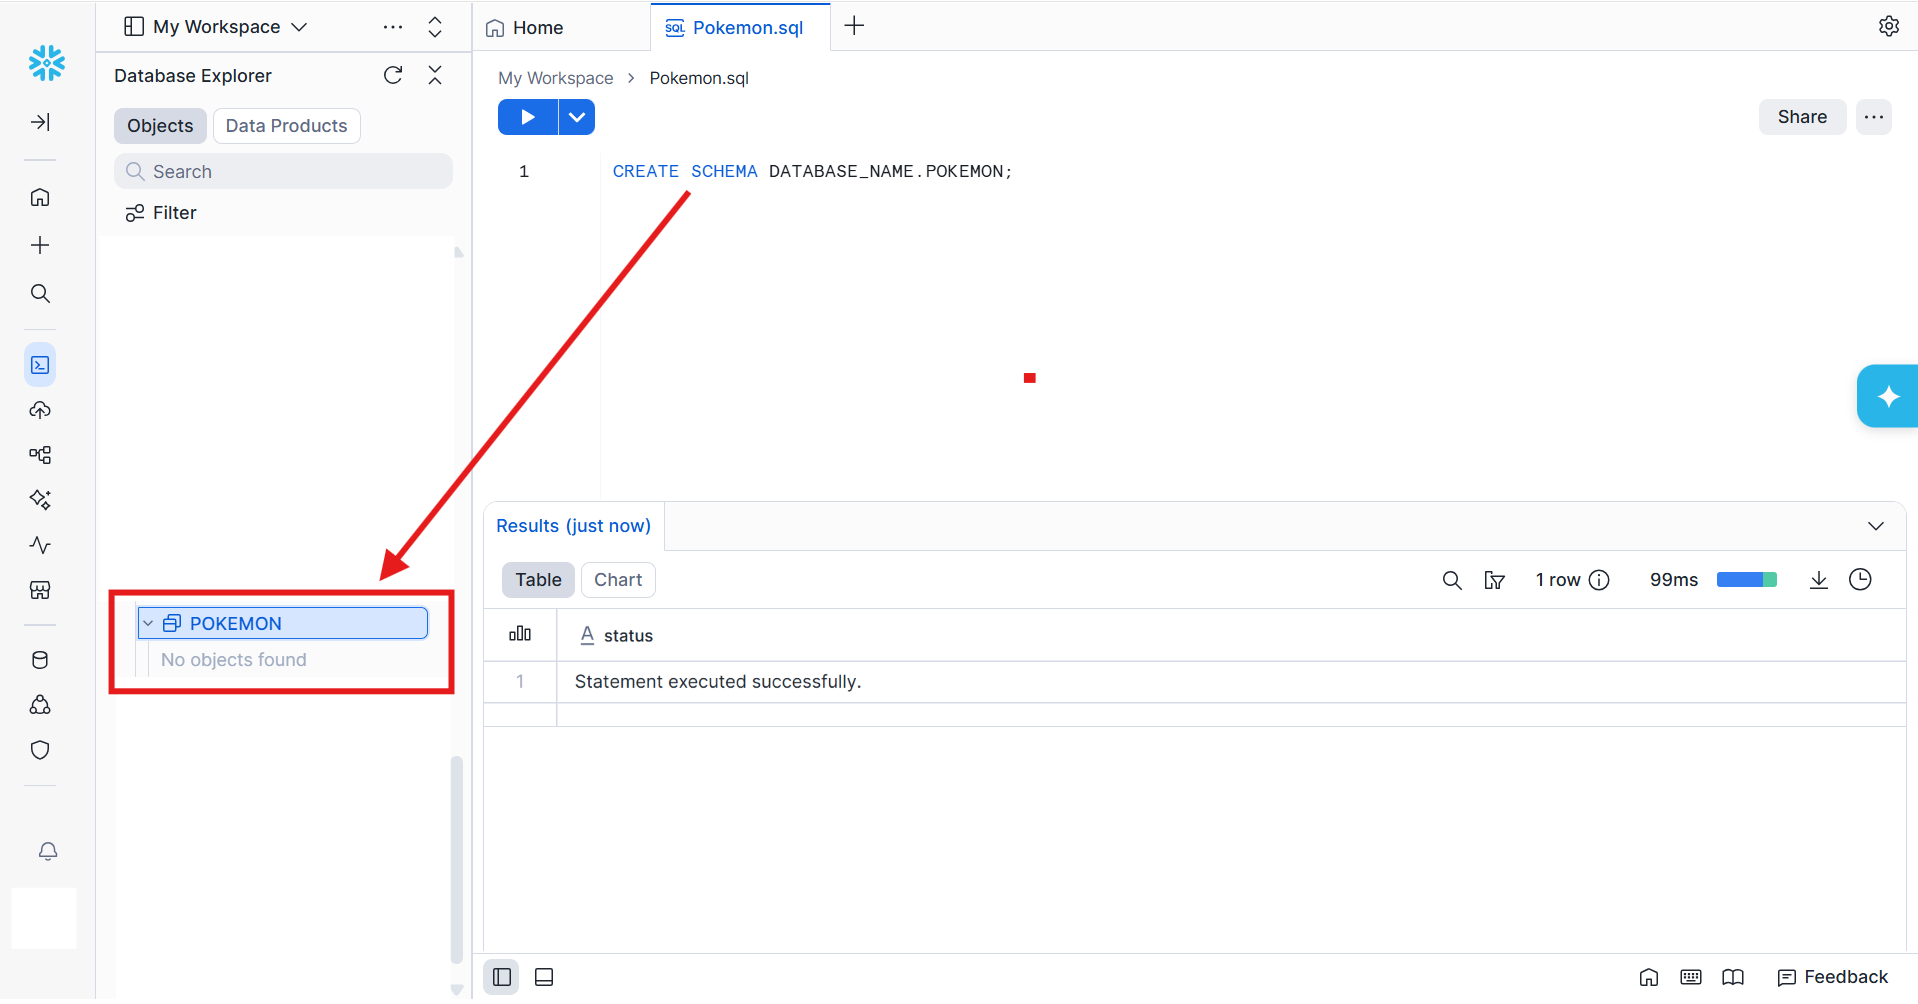
In this step, you need to identify which database your schema is located in, since you will need to specify both the database and schema when loading the flat file and creating a new table.
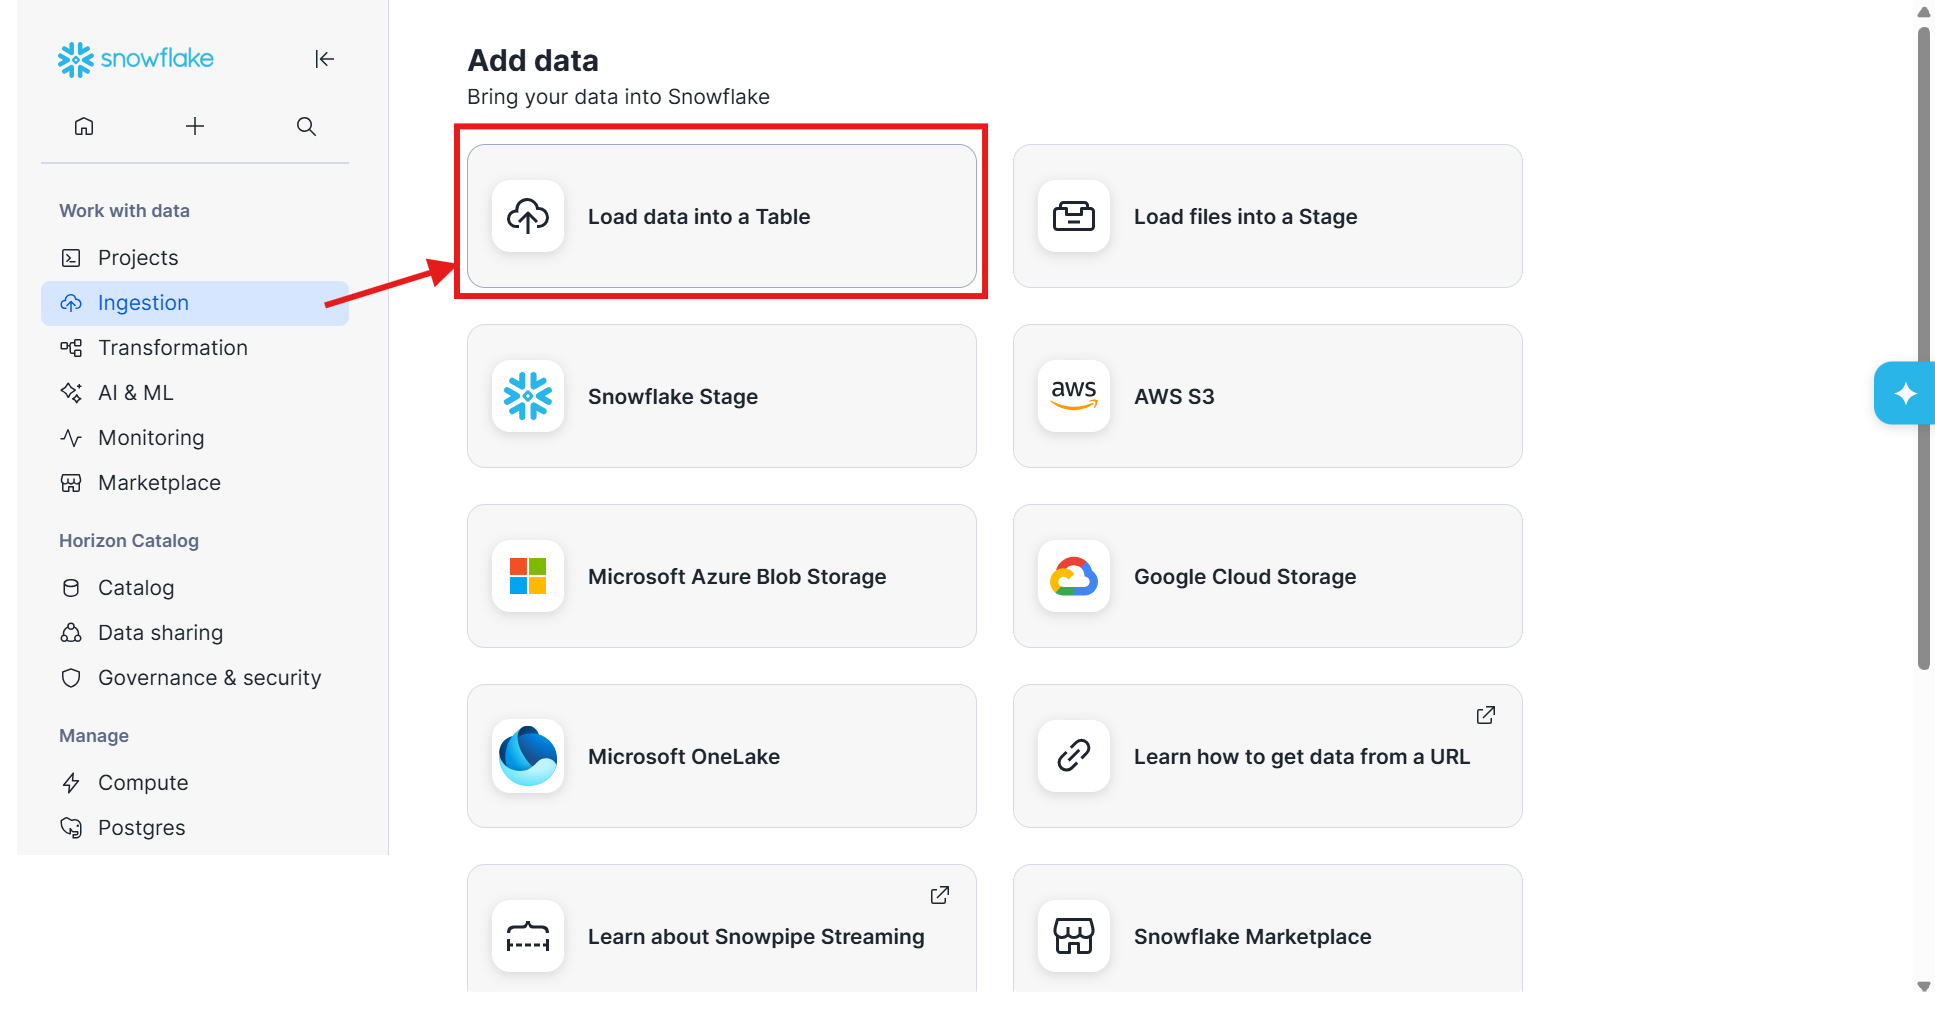
Step 3: Load data into a Table
On the left-hand menu in Snowflake, navigate to Ingestion and select Load data into a Table.
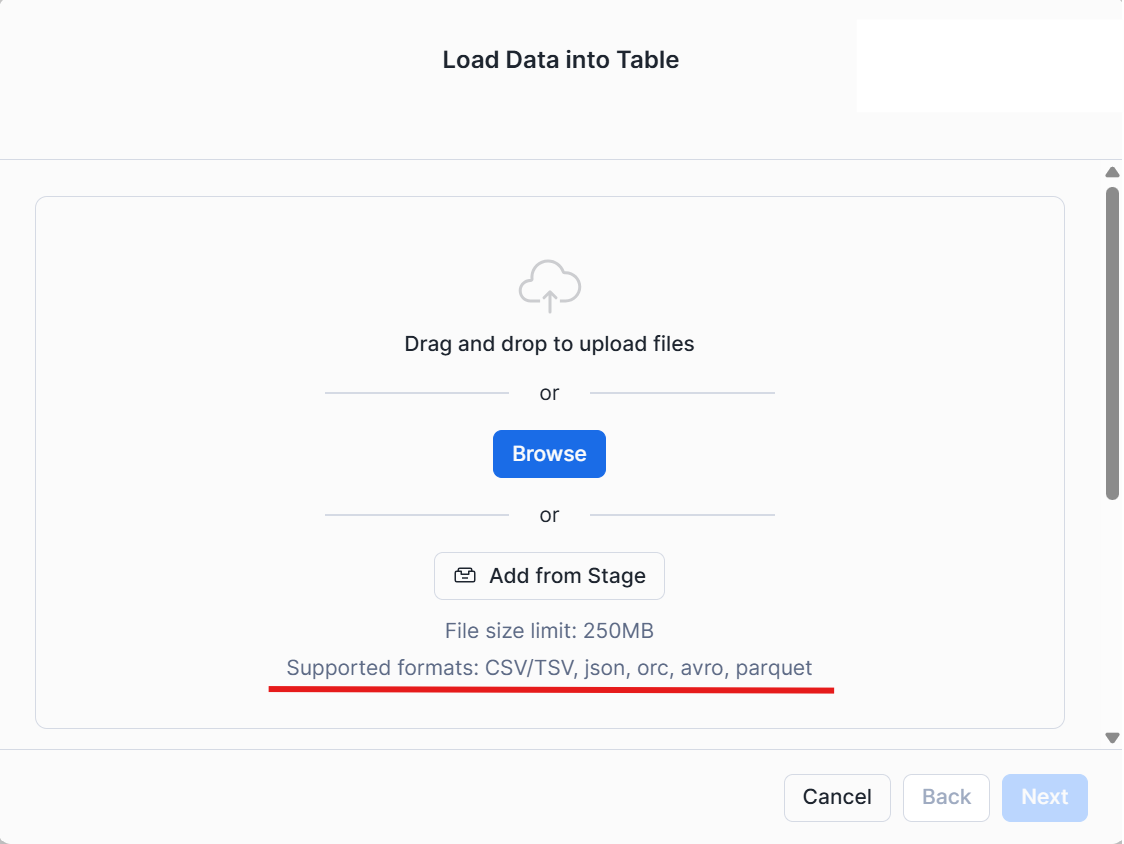
Step 4: Upload the file
Locate your flat file and drag and drop it, or browse to upload it into a table. You can also see here the list of all file formats supported by Snowflake, as mentioned earlier.
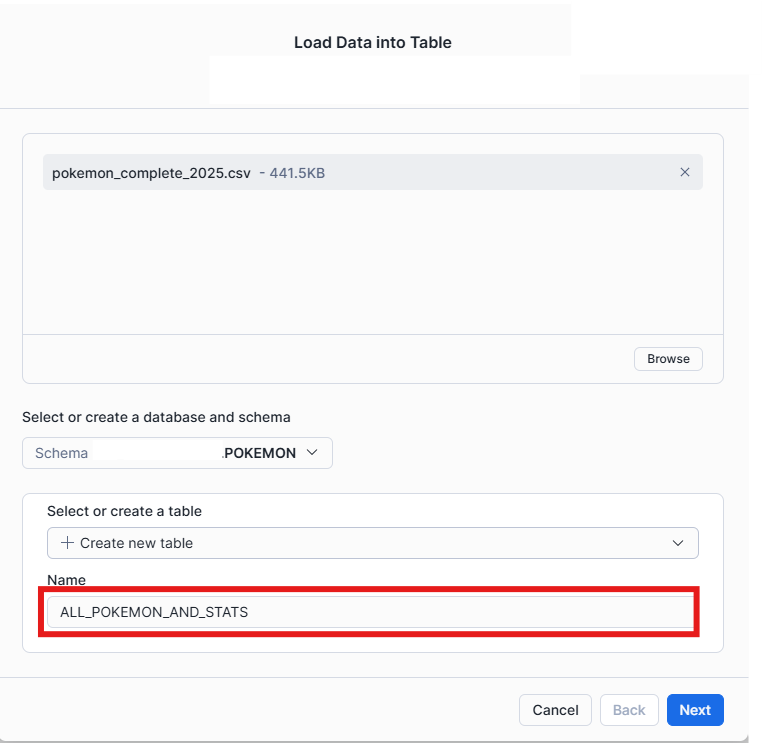
Once you upload the flat file, you can define the database and schema where the new table created from that file should be stored.

Then, you specify the name for your new table and click Next.
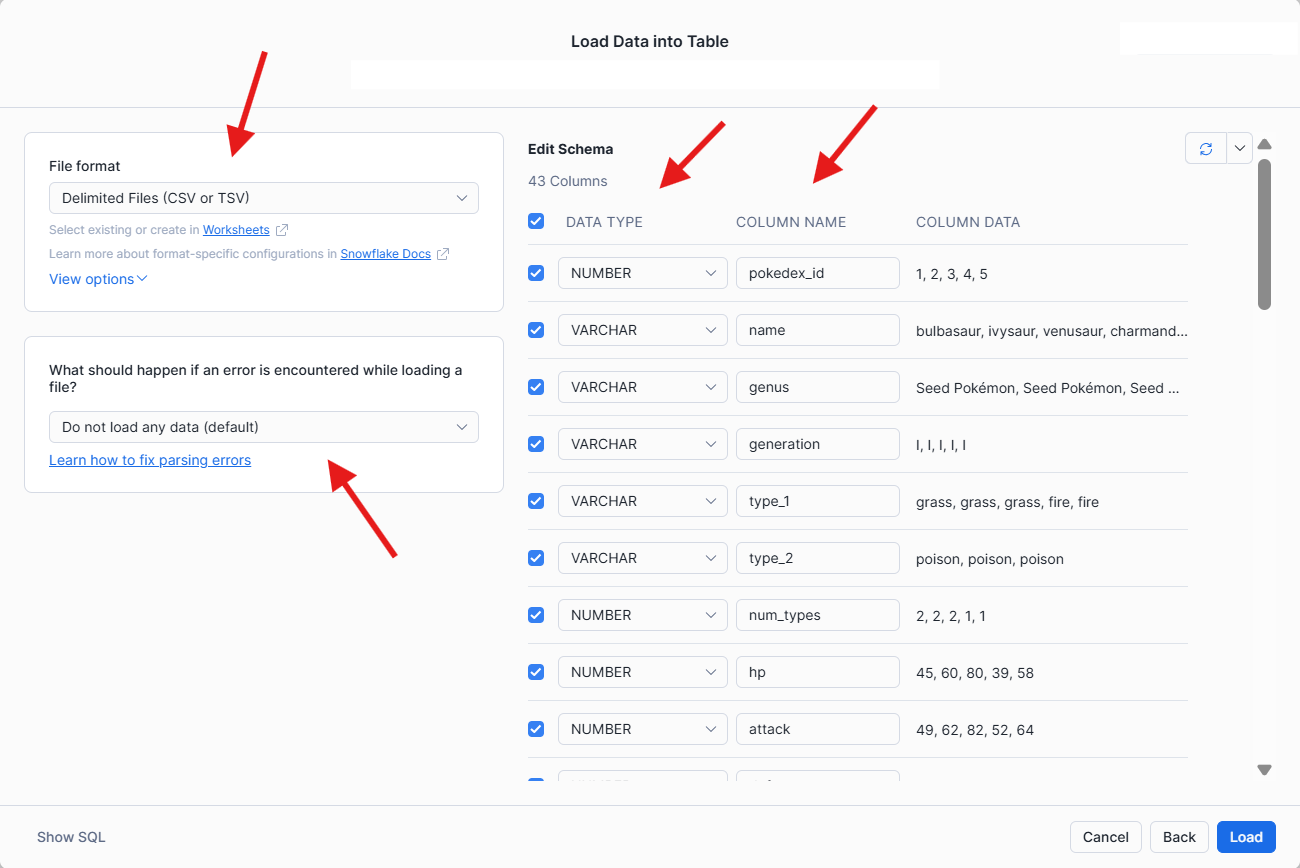
Step 5: Specify data types and customize table
In this pane, you can specify or change the file format, data types, and column names. You can also choose not to load certain columns by unchecking the blue checkbox. If everything looks good, click Load.
Step 6: Generate SQL from table
If the data was in its proper format, you should now see this pop-up.
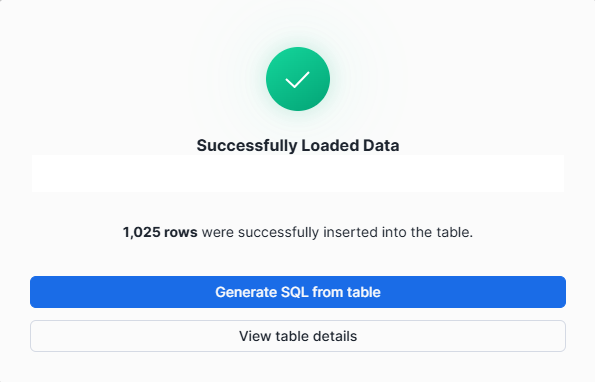
Congratulations, your flat file data is now in a table in Snowflake!
If you click on Generate SQL from table, it will generate a new SQL worksheet connected to the table you created, where you can verify the table by running queries in that worksheet.
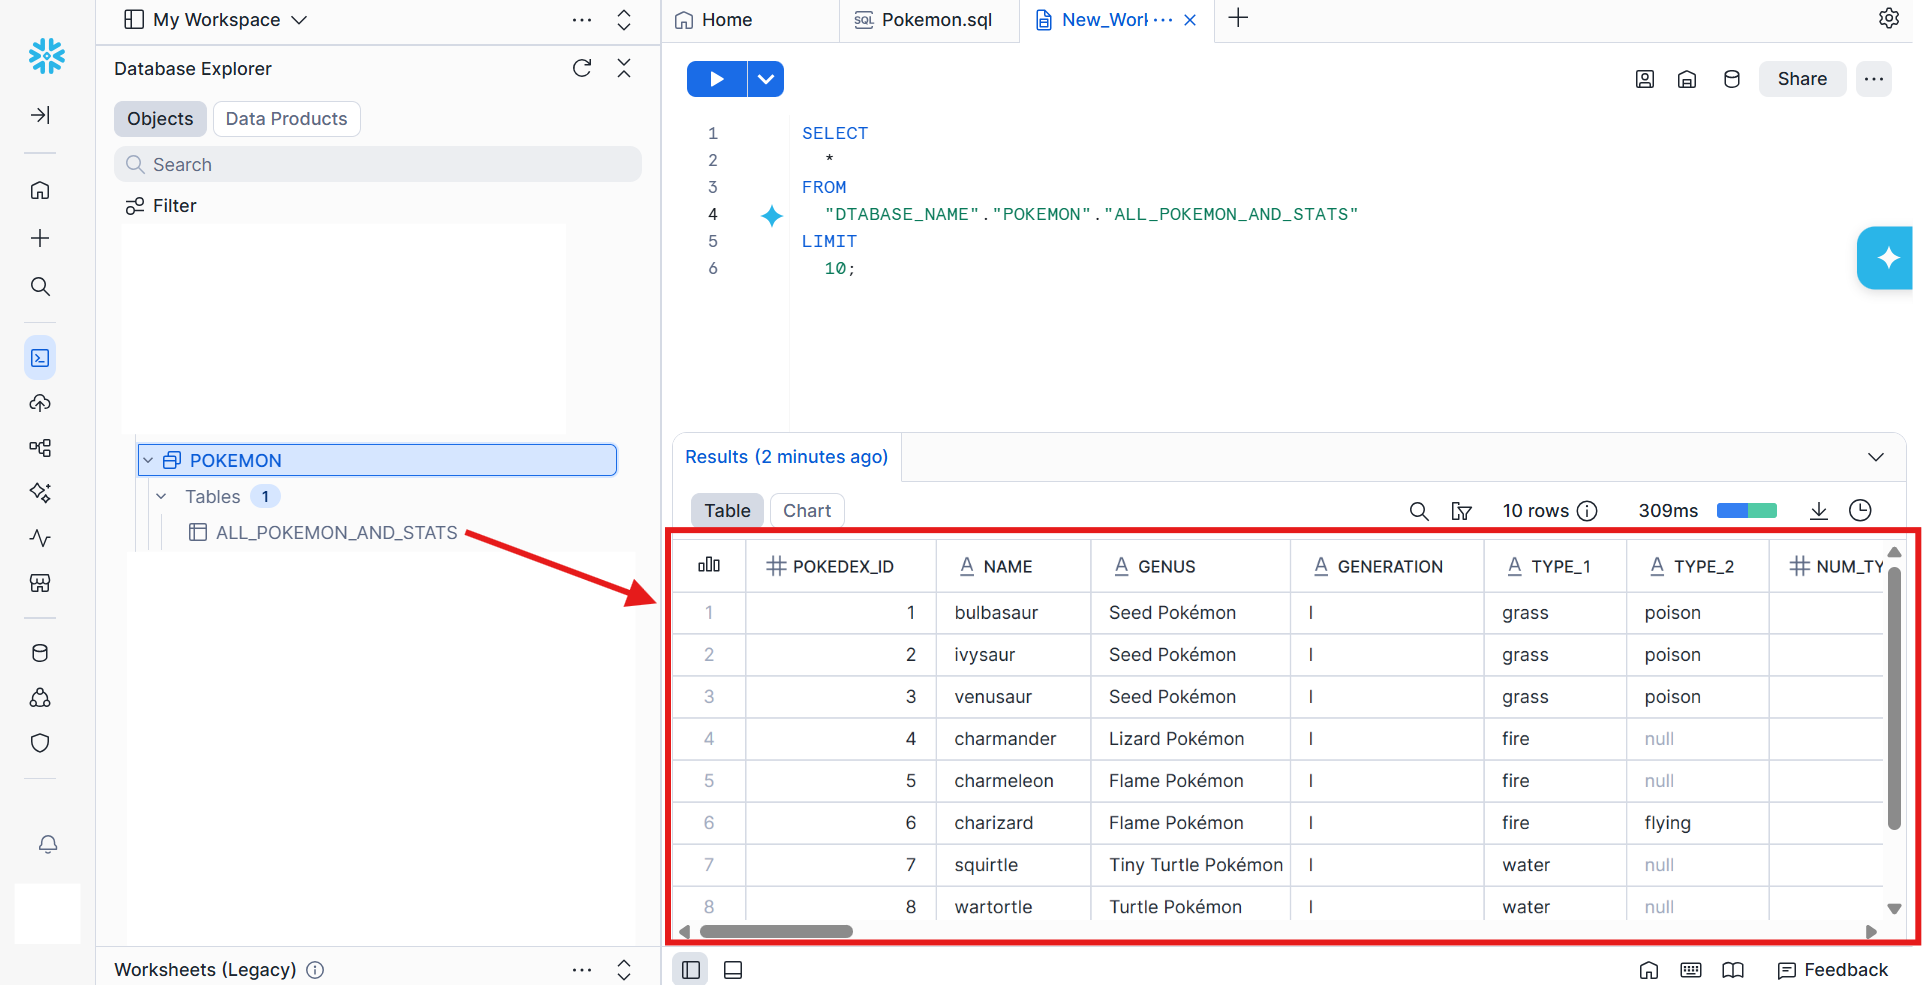
Now you know how to convert flat files into tables in SQL using Snowflake. Your data is now structured in a database, where it can be efficiently queried, managed, and accessed using SQL.