


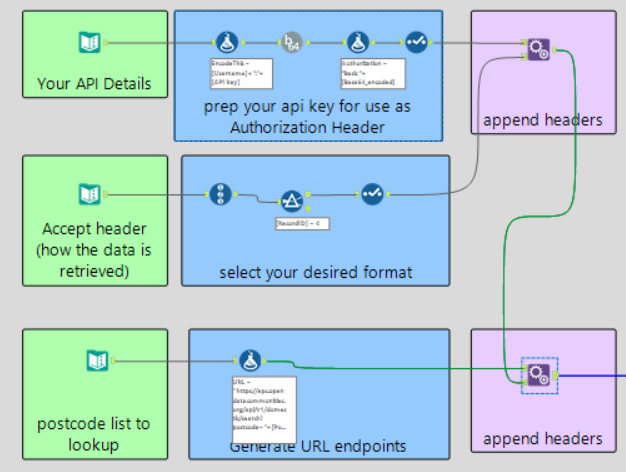
An Example Workflow detailing how to connect to an API:
(the Domestic EPC API)
In this guide, we’re going to build an Alteryx workflow that connects to an API that provides Energy Performance Certificate (EPC) data based on postcodes.
By the end, you’ll know how to authenticate, structure API requests, download the data, and parse the JSON response into a usable format.
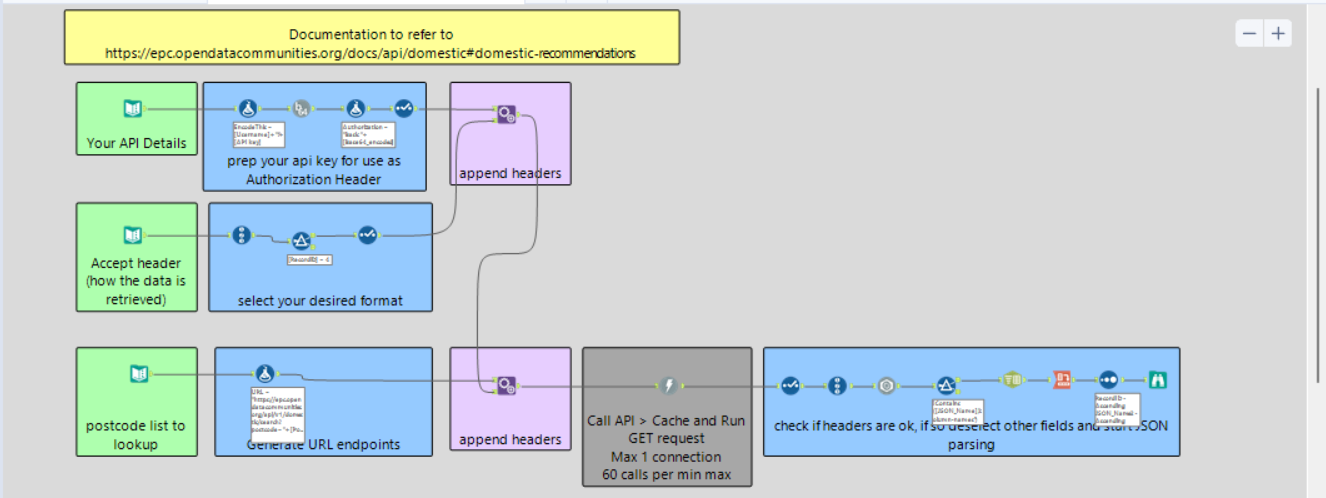
Step 1: Setting Up Authentication
APIs often require authentication before giving you access to data. This API uses Basic Authentication (Basic access authentication is a method for an HTTP user agent (eg a web browser) to provide a username and password when making a request), meaning we need to send our email and API key in a special encoded format.
1.1 - Store Your Credentials
Tool: Text Input
Why? We need a place to store our Email Address and API Key so we can use them in the request.
🔹 How to Configure:
- Create a Text Input tool.
- Add two columns:
- EmailAddress/Username (your registered email).
- API Key (your unique API key from the service).
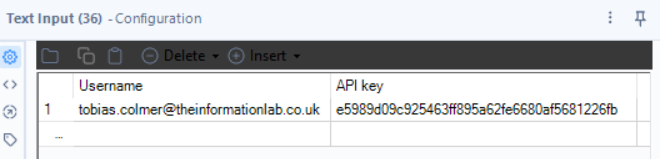
At this point, it's just plain text—we'll process it next.
1.2 - Format the Credentials
Tool: Formula
Why? Before we can use these credentials, we need to format them correctly.
🔹 How to Configure:
- Add a new column: EncodeThis
- Use the formula:
- [EmailAddress] + ":" + [API Key]
This puts the email and API key together in the format the API expects:
email:APIKey
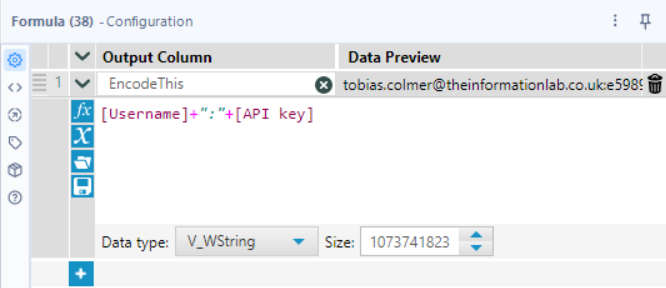
Still just plain text, but now in the right structure!
1.3 - Encode the Credentials in Base64
Tool: Base64 Encoder
Why? APIs don’t accept credentials in plain text—they require Base64 encoding for security.
🔹 How to Configure:
- Select the EncodeThis field that we made in the prior step.
- The tool will output a new field called Base64_Encoded, which contains the encoded credentials.

1.4 - Create the Authorization Header
Tool: Formula
Why? The API needs the credentials sent in a special Authorization header that looks like this:
Basic <Base64_Encoded>
🔹 How to Configure:
- Create a new column: Authorization
- Use the formula:
- "Basic " + [Base64_Encoded] (notice the space after Basic is included!)

Now we have a correctly formatted header for authentication!
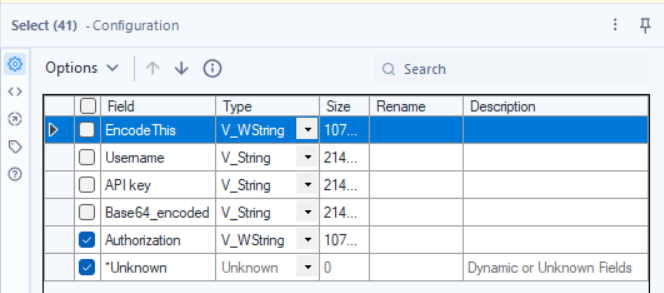
1.5 - Keep Only the Necessary Fields
Tool: Select
Why? We only need the Authorization field moving forward.
🔹 How to Configure:
- Keep: Authorization
- Deselect everything else.
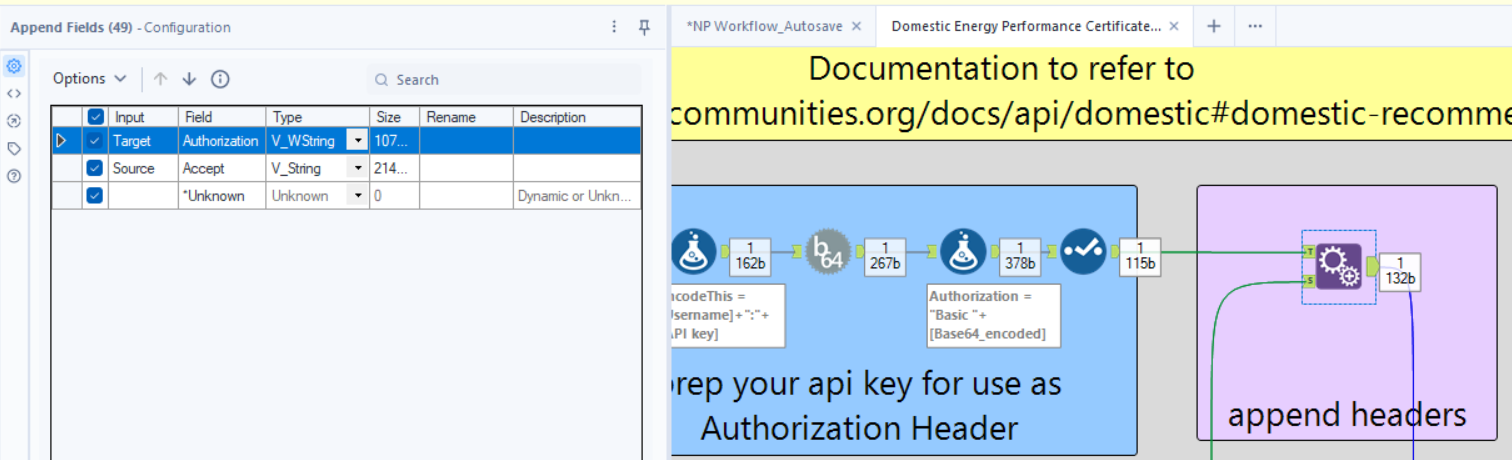
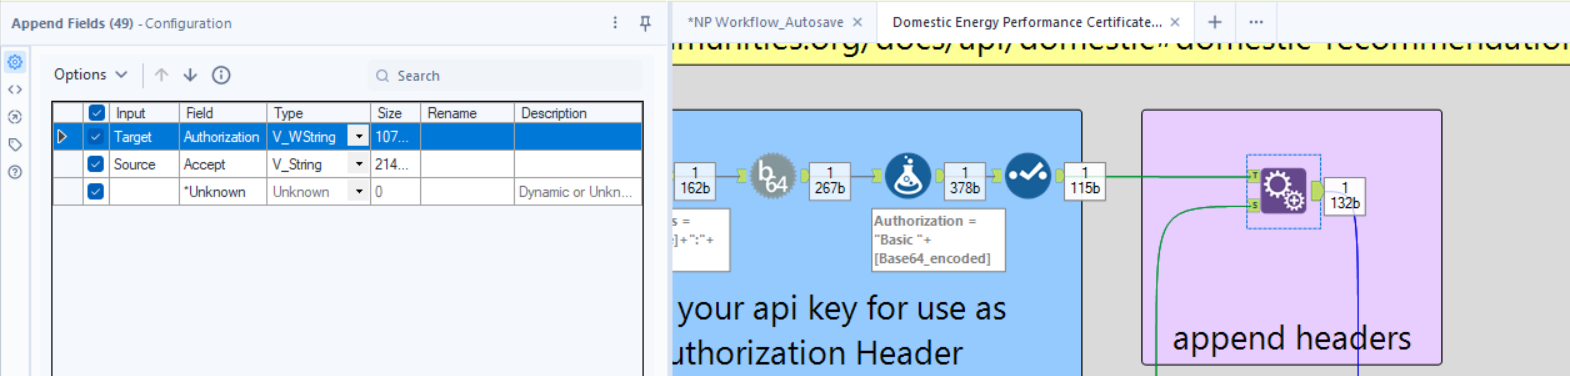
1.6 - Attach the Authorization Header to Future Requests
Tool: Append Fields
Why? This ensures every API request we send will include the Authorization header.
🔹 How to Configure:
- Connect this to the Target Input of the Append Fields tool.
- We’ll attach this to additional request details in the next steps.
Step 2: Defining the Response Format
APIs often allow you to choose the format of the response (JSON, CSV, Excel, etc.). This API does that using an Accept header.
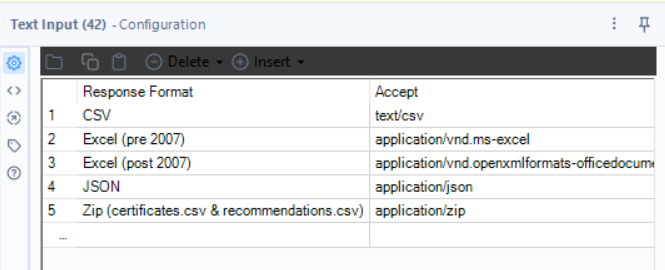
2.1 - List the Available Formats
Tool: Text Input
Why? This gives the user a choice of output formats.
🔹 How to Configure:
- Two columns:
- Response Format → The user-friendly name of the format of response(e.g., JSON, CSV, Excel).
- Accept → The corresponding MIME type (A media type, also known as a Multipurpose Internet Mail Extensions, indicates the nature and format of a document, file,).
- Rows (Options):
- JSON, application/json
- CSV, text/csv
- Excel (post 2007), application/vnd.openxmlformats-officedocument.spreadsheetml.sheet
- Zip, application/zip
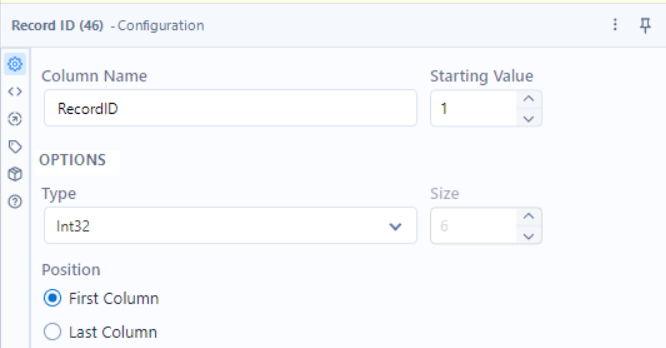
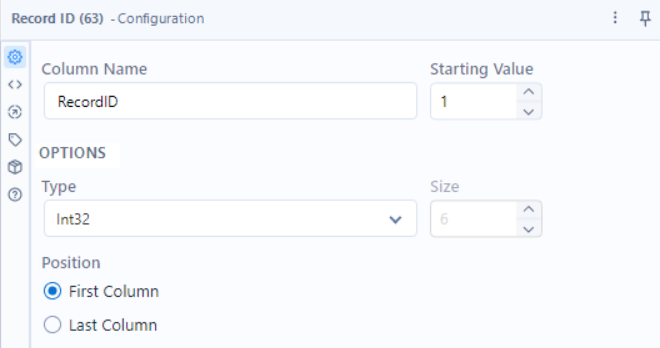
2.2 - Assign a Unique ID to Each Format
Tool: Record ID
Why? This lets us filter for the format we want (in this case, JSON).
🔹 How to Configure:
- Field Name: RecordID
- Starting Value: 1
- Type: Int32
2.3 - Filter to Select JSON
Tool: Filter
Why? We only want the API to return JSON data, so we filter for RecordID = 4. If we wanted a different format we would make the RecordID = the Record ID of the corresponding format type.
🔹 How to Configure:
- Basic Filter Condition:
- RecordID = 4

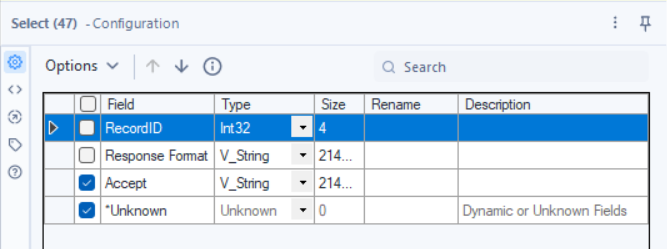
2.4 - Keep Only the Accept Header
Tool: Select
Why? The API only needs the Accept header—we don’t need the user-friendly names.
🔹 How to Configure:
- Keep: Accept
- Remove: Everything else.
2.5 - Attach the Accept Header to Requests
Tool: Append Fields
Why? This ensures that all API requests include the correct Accept header.
🔹 How to Configure:
- Target Input: Authorization (from Step 1).
- Source Input: Accept.
Step 3: Building the API Request URL
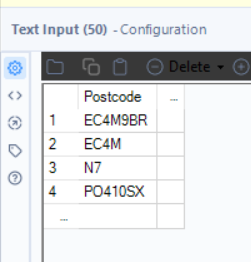
3.1 - Enter Postcodes to Query
Tool: Text Input
Why? The API returns EPC data based on postcodes, so we provide a list that we’re interested in.
🔹 How to Configure:
- Column: Postcode
- Rows:
- EC4M9BR
- EC4M
- N7
- PO410SX
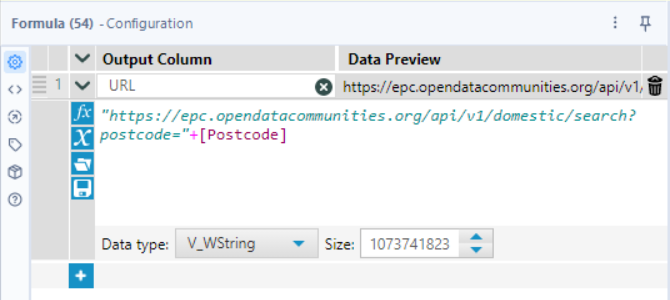
3.2 - Create the API URLs
Tool: Formula
Why? We need to structure the API request URLs correctly.
🔹 How to Configure:
- New Column: URL
- Formula:
- "https://epc.opendatacommunities.org/api/v1/domestic/search?postcode=" + [Postcode]
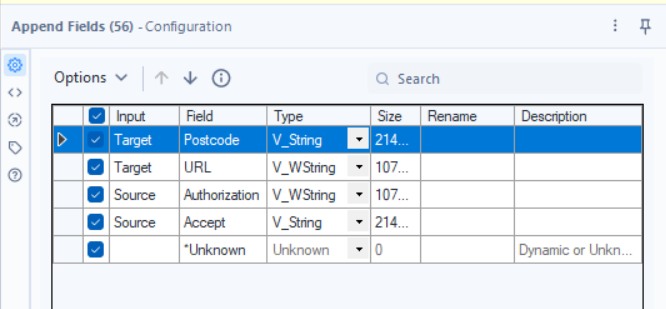
3.3 - Attach Headers to the API Requests
Tool: Append Fields
Why? This combines the Authorization, Accept, and URL into a complete request.
Step 4: Sending the API Request
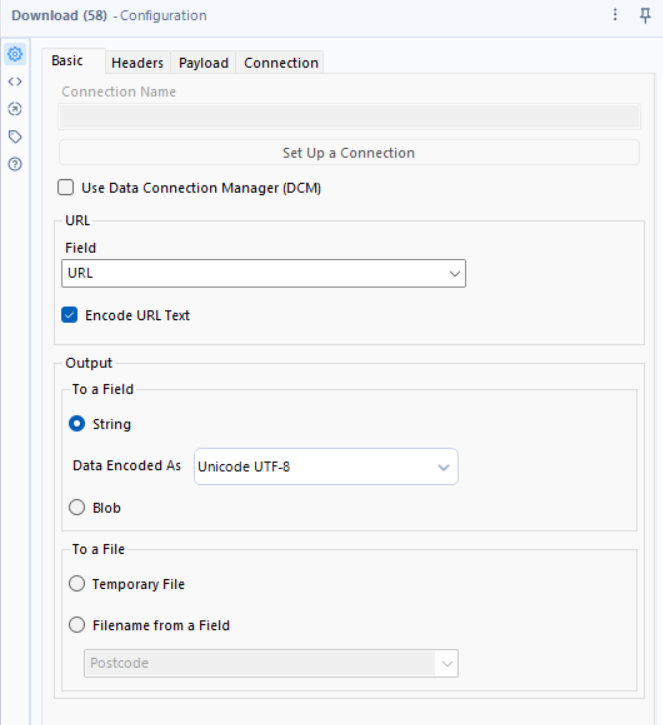
4.1 - Download the Data
Tool: Download
Why? This sends the API request and retrieves the response, this is how we get the data we’re looking for, by generating DownloadData. This step is quite important hence why a single tool is receiving an entire section.
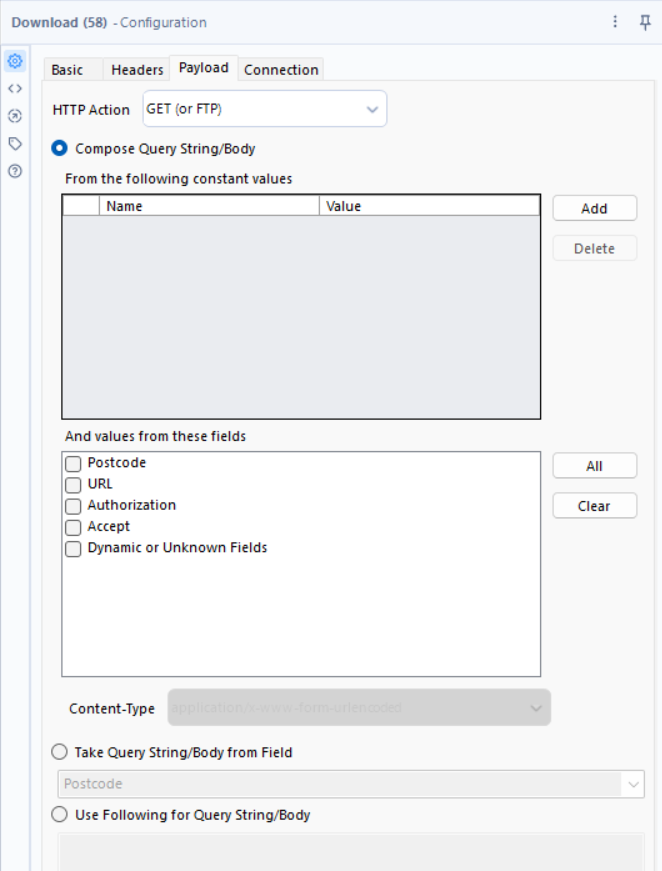
🔹 How to Configure:
- URL Field: URL
- Headers: Authorization, Accept
- HTTP Method: GET
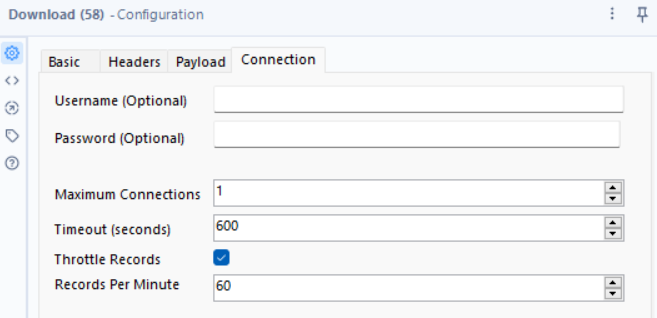
Finally, we limit the speed at which it can download data:
Finally, we Cache & run at this step in the workflow (by right clicking on the tool and selecting the option "Cache & Run").

Why would we do this at this step?
-Every time you run the workflow, it would send a request to the API. If you're making small changes (e.g., tweaking field selections or filters), you don't want to waste API requests.
-Downloading data repeatedly takes time. Caching allows you to work with the same data while making adjustments to later steps (like parsing, transforming, or filtering).
-Since the next steps involve parsing JSON and transforming the response, you need real API data to see if everything works properly.
Step 5: Parsing the JSON Response
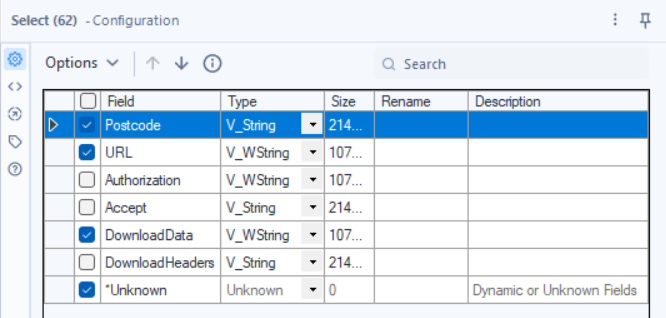
5.1 - Removing Unnecessary Fields
Tool: Select
Why? To remove superfluous fields.
Just like in previous steps with the select tool we're simply removing fields that we no longer need.
5.2. Record ID Tool – Assigning Unique IDs to Each Response
Tool: Record ID
Why? Helps track and organize JSON records during processing.
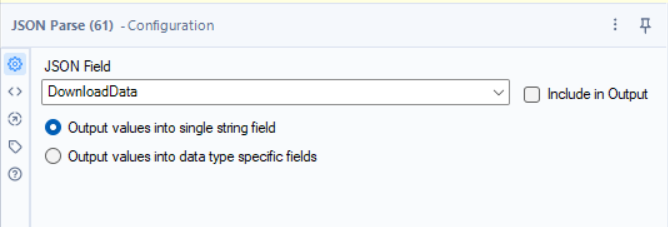
5.3 - Extract Data from JSON
Tool: JSON Parse
Why? Converts the API’s JSON response into a structured table.
Due to us filtering it out to Record ID 4 (see step 2.3), our data is being formatted as a JSON, so this step will only be valid providing your data will also be outputted in the same way.
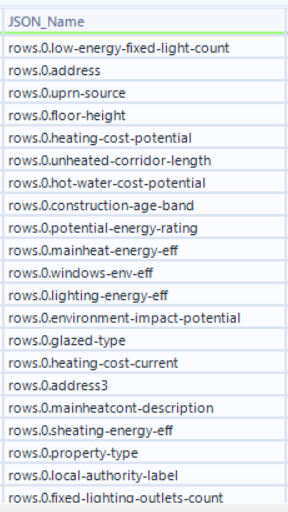
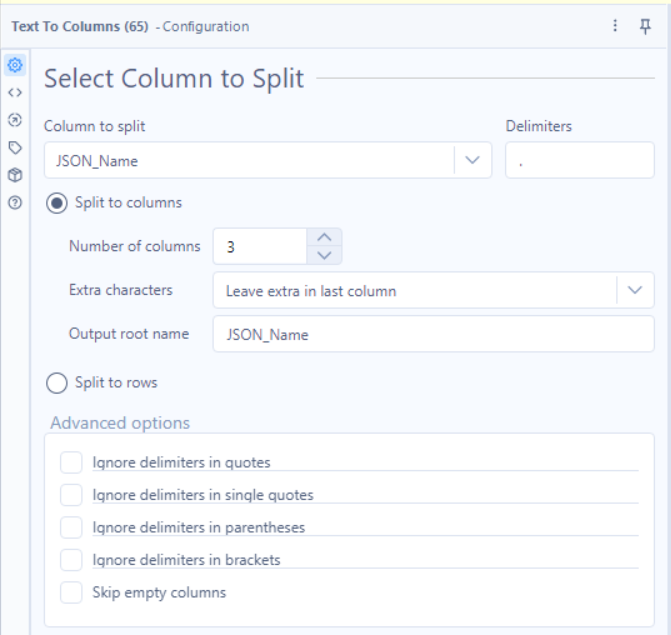
5.4 - Splitting Values for Data
Tools: Text to Columns,
Why? Transforms the JSON keys into proper fields.
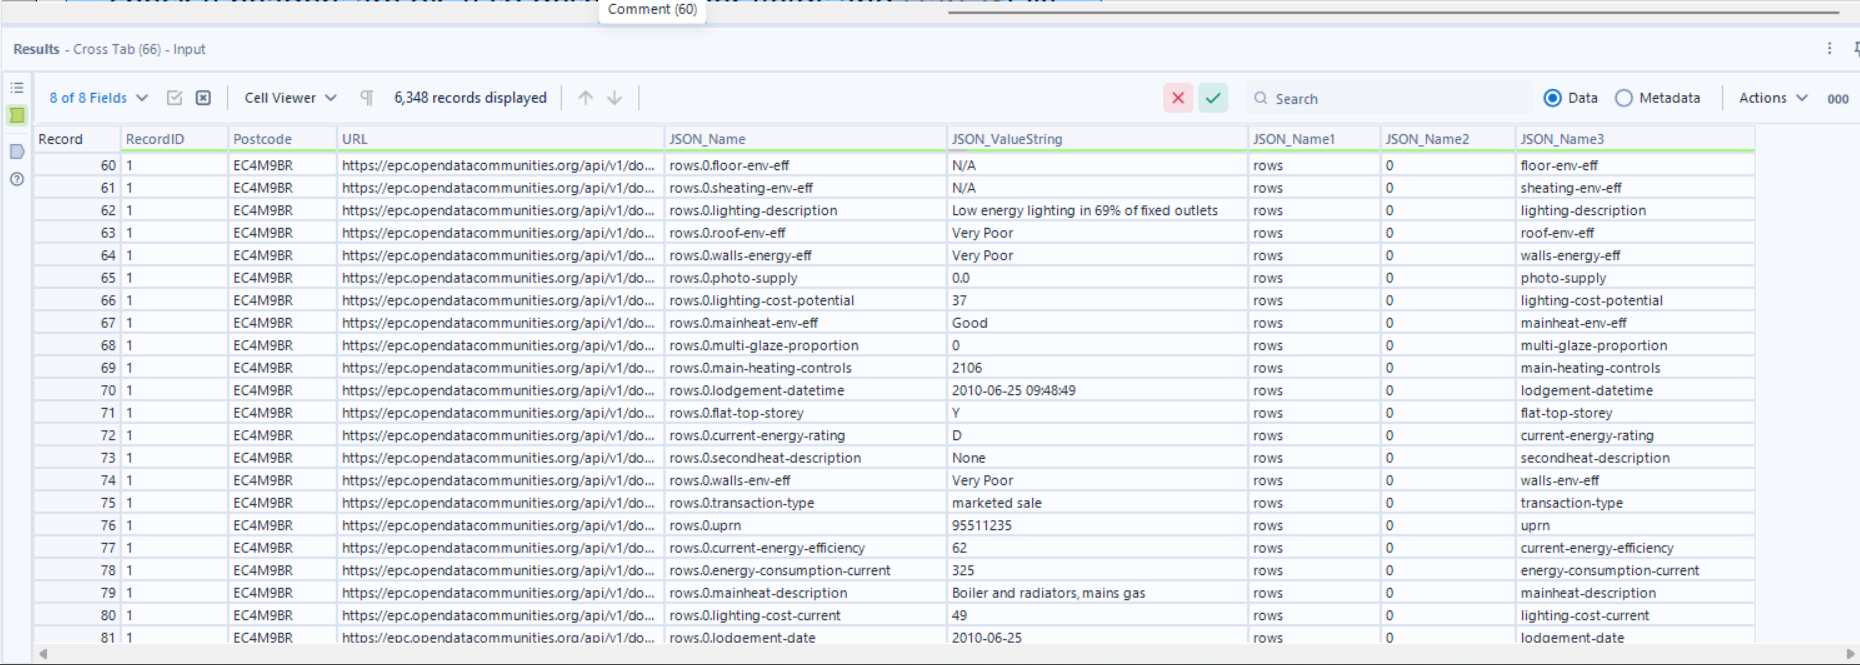
We need to gain some information from our data, as we can see here:
5.5 - Transforming and Pivoting our Data
Tools: Cross Tab
Why? We’re looking to pivot our data, creating new headers with values populated by the pre-existing data within our dataset, in this case in JSON_ValueString, with our JSON_Name3 containing the useful information for our headers (see picture).
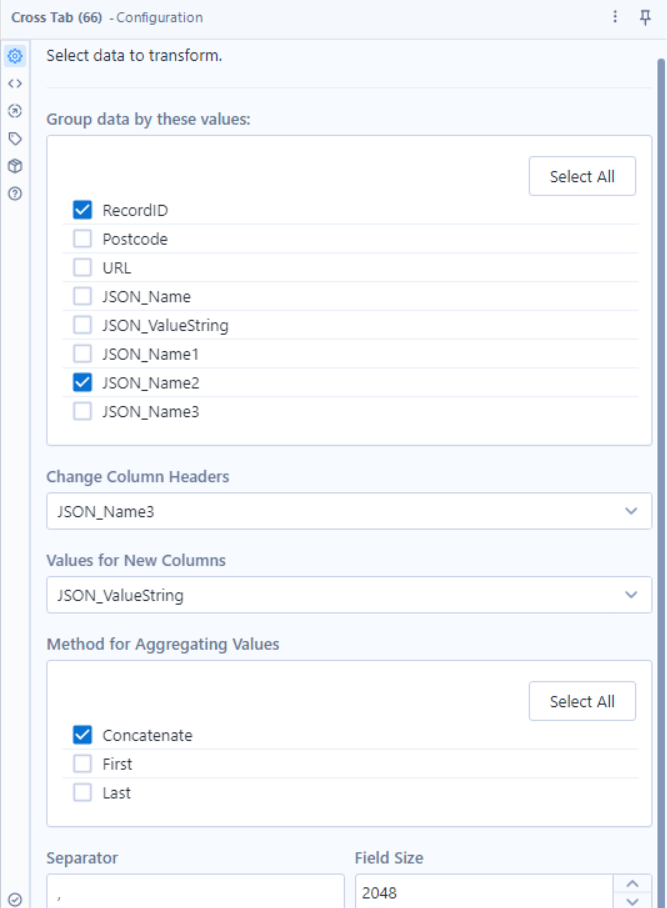
It allow us to transform our data from 8 fields & 6348 rows of data, to 94 Fields & 69 rows of data that are far more organized.

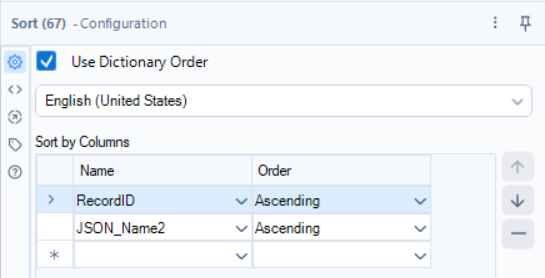
5.6 - Sort Data for Usability
Tool: Sort
Why? Makes the final dataset easier to read.
That’s it! You’ve now successfully connected Alteryx to an API, downloaded data, and structured it into a usable format.
I appreciate that was a lot of reading for the workflow, but this was intended to be a real breakdown in the steps required to utilize an API. Not all APIs will require this and you should consult the documentation to grant you as much guidance as possible.