I have only been using Alteryx for a couple of months now, but already I’m starting to come across some of those little things that make you think: “I can’t believe I didn’t know this”. In the following I’ve compiled a list of some of those knacks and quality of life improvements which I’m sure a lot of people have been using for ages, but some might find new and useful.
Start at the Beginning
Alteryx can take quite some time to start up at times, and until very recently I had no idea you could simply click anywhere in the Alteryx splash screen to make it go away. For those moments where you just don’t want to sit idly for those 10 extra seconds.
Running Workflows
Below are a couple of handy techniques that can help save you a lot of time and/or nerves when running your workflows.
CTRL+R to Run Workflow
This one is fairly obvious – hit CTRL+R to run your current workflow.
Cache and Run Workflow
A great feauture that was introduced with Alteryx 2018.3 is caching workflows. Right-clicking a tool and selecting “Cache and Run Workflow” will run the entire workflow and cache the output of the selected tool. The bubbles around the tools show you up to what point your workflow has been cached.
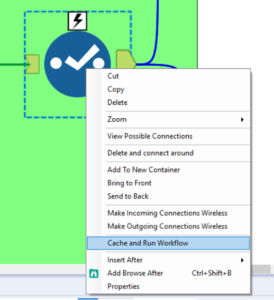
This will Run and Cache the Workflow
This is extremely useful when you are dealing with large amounts of data or tools that take a long time to run such as elaborate macros, predictive tools etc. Caching your data means that the next time you run your flow, Alteryx will start where you selected and use the cached data. This way you don’t need to output your data and bring it in again at the required step. However, those bubbles will pop easily: Making ANY changes to the workflow prior to the cached tool – even something as simple as deleting a browse tool – will delete the entire cache, meaning you will need to run the workflow again.
Disabling Output Tools
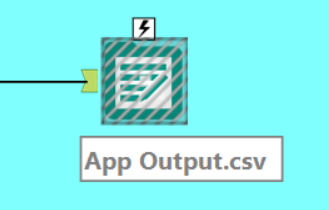
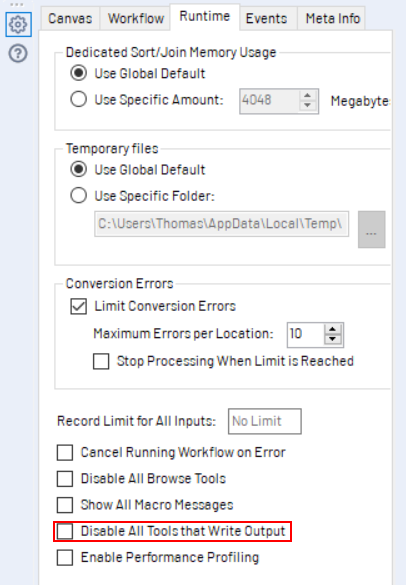 A common way to disable tools is to put them in containers and disable those. If you only want to keep your workflow from saving its output, you can click anywhere in the canvas, go to the Runtime tab in the Configuration window and check the option “Disable All Tools that Write Output”. All Outputs tools will now appear shaded to show that they’ve been disabled.
CTRL+SHIFT+B to Add Browse Tools
This hotkey will add a browse to every output of the tool currently selected so you don’t need to drag them onto the canvas manually.
Navigation
Below are a couple of techniques that are great to adapt as they will help you navigate your canvas much more easily.
Zooming
There are two easy ways to zoom in and out of your workflow: Hold CTRL and use the Mouse Wheel to zoom in and out. Alternatively, you can right click and lasso a section of your canvas to bring it into view, just as you would if you selected several tools.
Scrolling and Panning
Scrolling the mouse wheel will move you up and down the canvas. To move horizontally, hold shift and scroll the mouse wheel. Finally, click and hold the mouse wheel button to freely pan across your workflow.
Workflow Arrangement
A neatly arranged workflow does not only look satisfying. Whoever needs to open your wokflow and understand what’s happening in it will be grateful if what they see doesn’t look like when the cat got nan’s yarn tangled up in a knot. Having tools grouped and arranged in a logical order makes understanding the processes a lot easier. Also it looks pretty, so there’s that.
Canvas Grid
If you like your canvas a clean lily white, then you had best skip to the next point, but if you go to Options>User Settings>Edit User Settings and select the Canvas tab, there is an option to display a grid to help you align tools on the canvas. There is a second option called “Snap Tools to Grid” that is checked by default and makes tools snap in place even when the grid isn’t visible. If you’re a free spirit, uncheck this option to move your tools freely on the canvas. You can also play with the size of the grid and see what option works best for you.
Connection Shape
In the same control panel, you can choose how you want your tools to be connected: In the Connection Type dropdown, you can change the default curvy Bezier connections to either perpendicular or (*shudder*) straight lines.
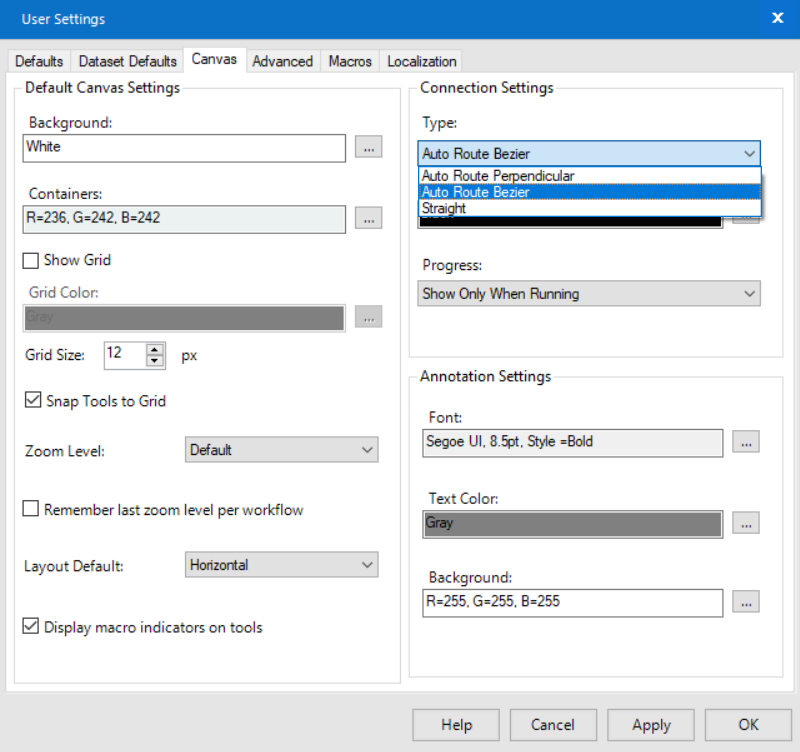
User Settings Window
If you want to get rid of a connecting line entirely, you can do so by either right-clicking the connection and selecting “Make Connection Wireless”, or by right-clicking a tool and making all incoming or outgoing connections wireless. The tool’s anchor will then display a wireless icon to show that there is a wireless connection. Selecting a tool on either end of the connection will make it appear as a faint line.
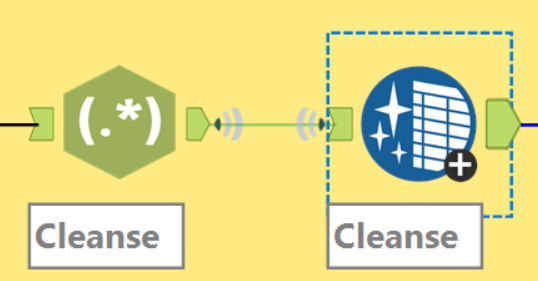
This is great whenever you need to connect two tools that lie far apart on the canvas without drawing endless lines across your canvas.
Aligning Tools
A huge pet peeve of mine is tools that aren’t aligned properly. Despite the grid, sometimes two tools just will not sit on one line.
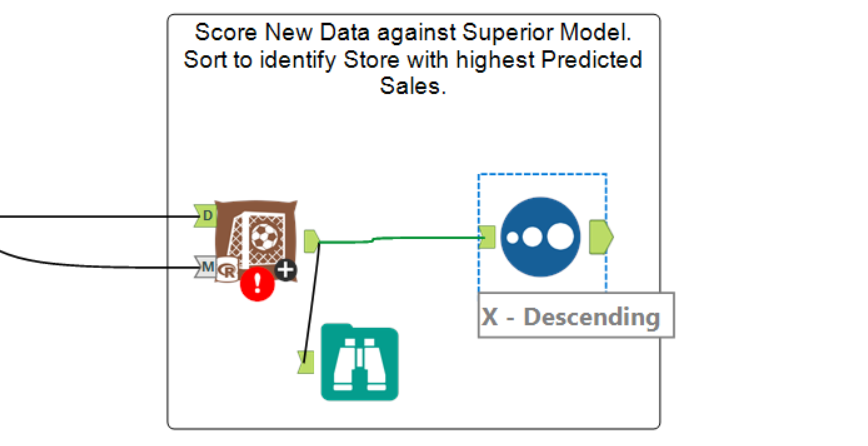
The worst.
To get a tool to align, hold CTRL and use the arrow keys to move it one pixel at a time, regardless of grid size. To align several tools at once, select them all, hold CTRL+SHIFT and use the – key to align them horizontally, or + if you want them aligned vertically (getting it wrong leads to interesting heaps of tools, this is where CTRL+Z is your friend).
Documentation
Even more important than having a well arranged workflow is thorough documentation. Consistently naming and describing the steps you take in your process will help tremendously when you or someone else needs to pick up your work later on. Below a couple of things that will help you documenting your work.
Containers and Comment Boxes
Adding tools to a container is a quick way to group them, with the added bonus that you can disable the container if you don’t need that specific part of the workflow to run. However, their drawback is that they can’t be resized – their size depends on the position of the tools inside them. Using comment boxes can be a good alternative: Drag in a comment box, resize it as required and send it to the back of your canvas by right-clicking anywhere in the box. Both boxes and containers can be shaded with different colours and labeled to help you differentiate between the steps in your workflow.
Live Website Connections with Explorer Box
The Explorer Box tool allows you to add a live connection to a website inside your workflow. Drag the tool onto the canvas and enter the URL in the configuration window. This is great if you supplement your workflow with additional data from the web, as you can show at a glance where you have got that data from.
Annotations and Comments
By default, annotations will contain the formula or similar that is applied in the respective tool (if any). I don’t find those particularly intuitive, so I like to replace them with a description of the action the tools performs. In that way, I can group tools into comment boxes and label them to describe the overall steps in the logic, while annotations give me a step-by-step overview of what’s happening. You can edit annotatios by clicking on the tag symbol in any tool’s configuration window.
Do you have any other tips, hacks or quality of life improvements? Feel free to share them in the comments below.
