The final part to the mini series is batch macros.
Here's a recap of what each macro looks like- don't worry we are going to look at batch now:

What is a Batch Macro?

The best way to understand this was told to me by a washing machine analogy.

Example
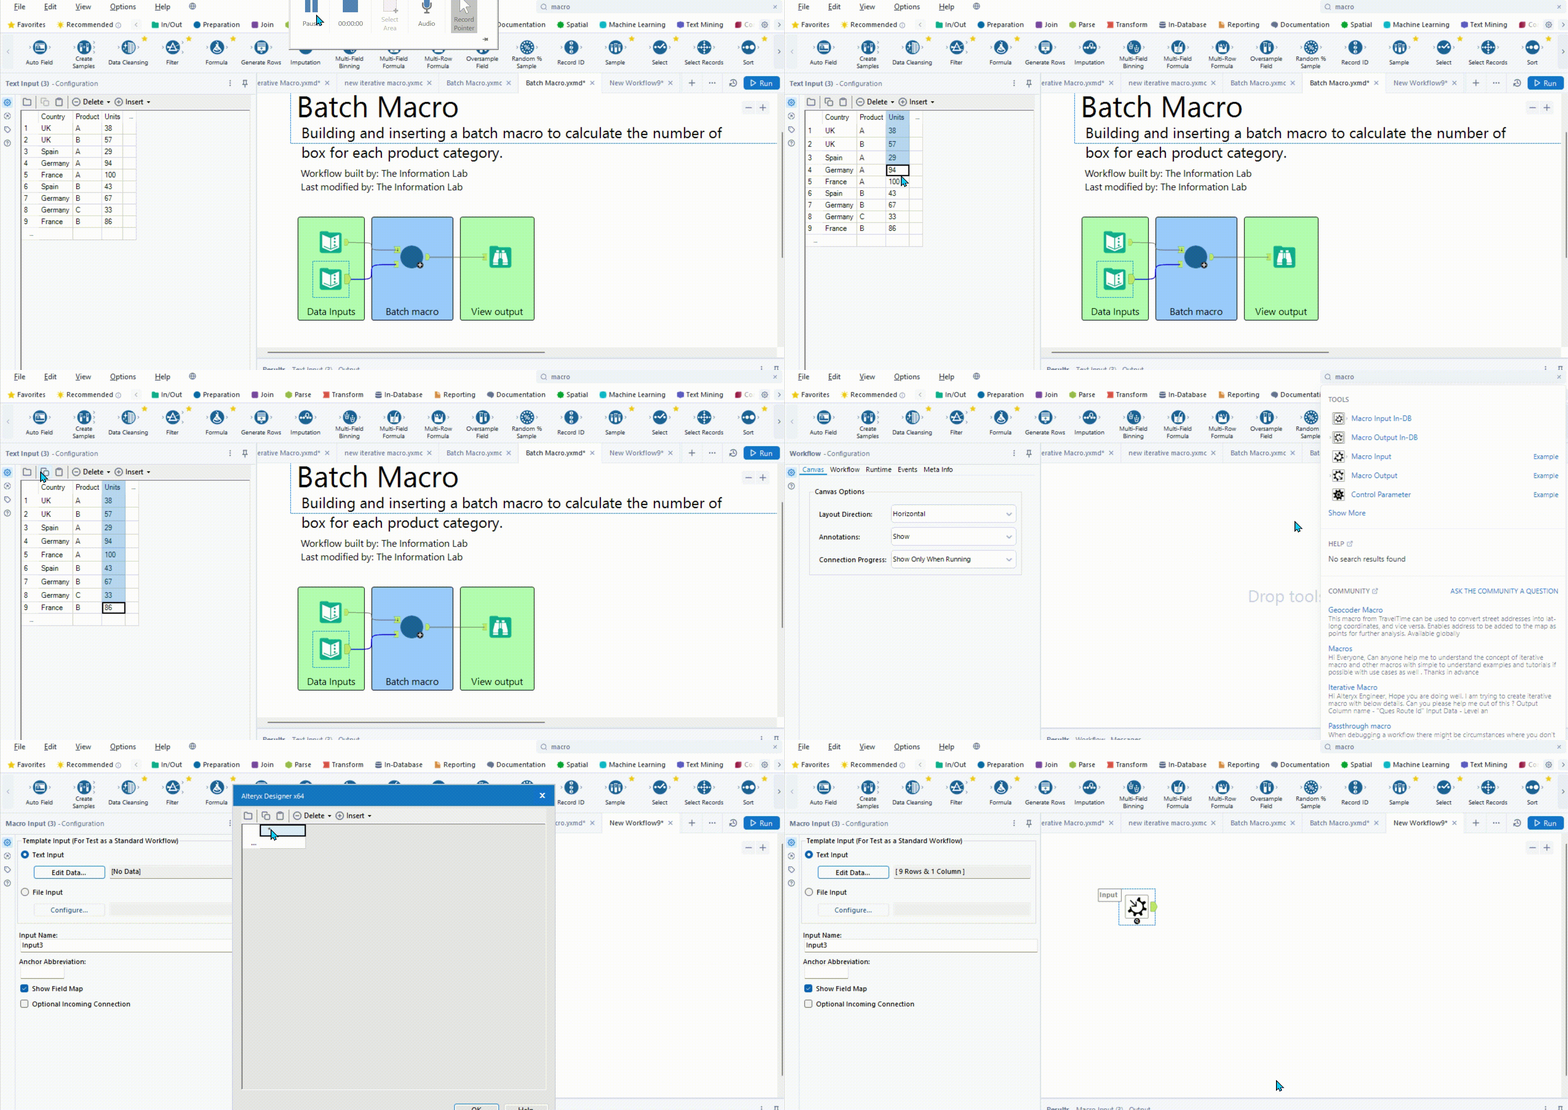
Below shows the starter and what the macro is we are trying to create.


So for this we have two data sets that look like the following.

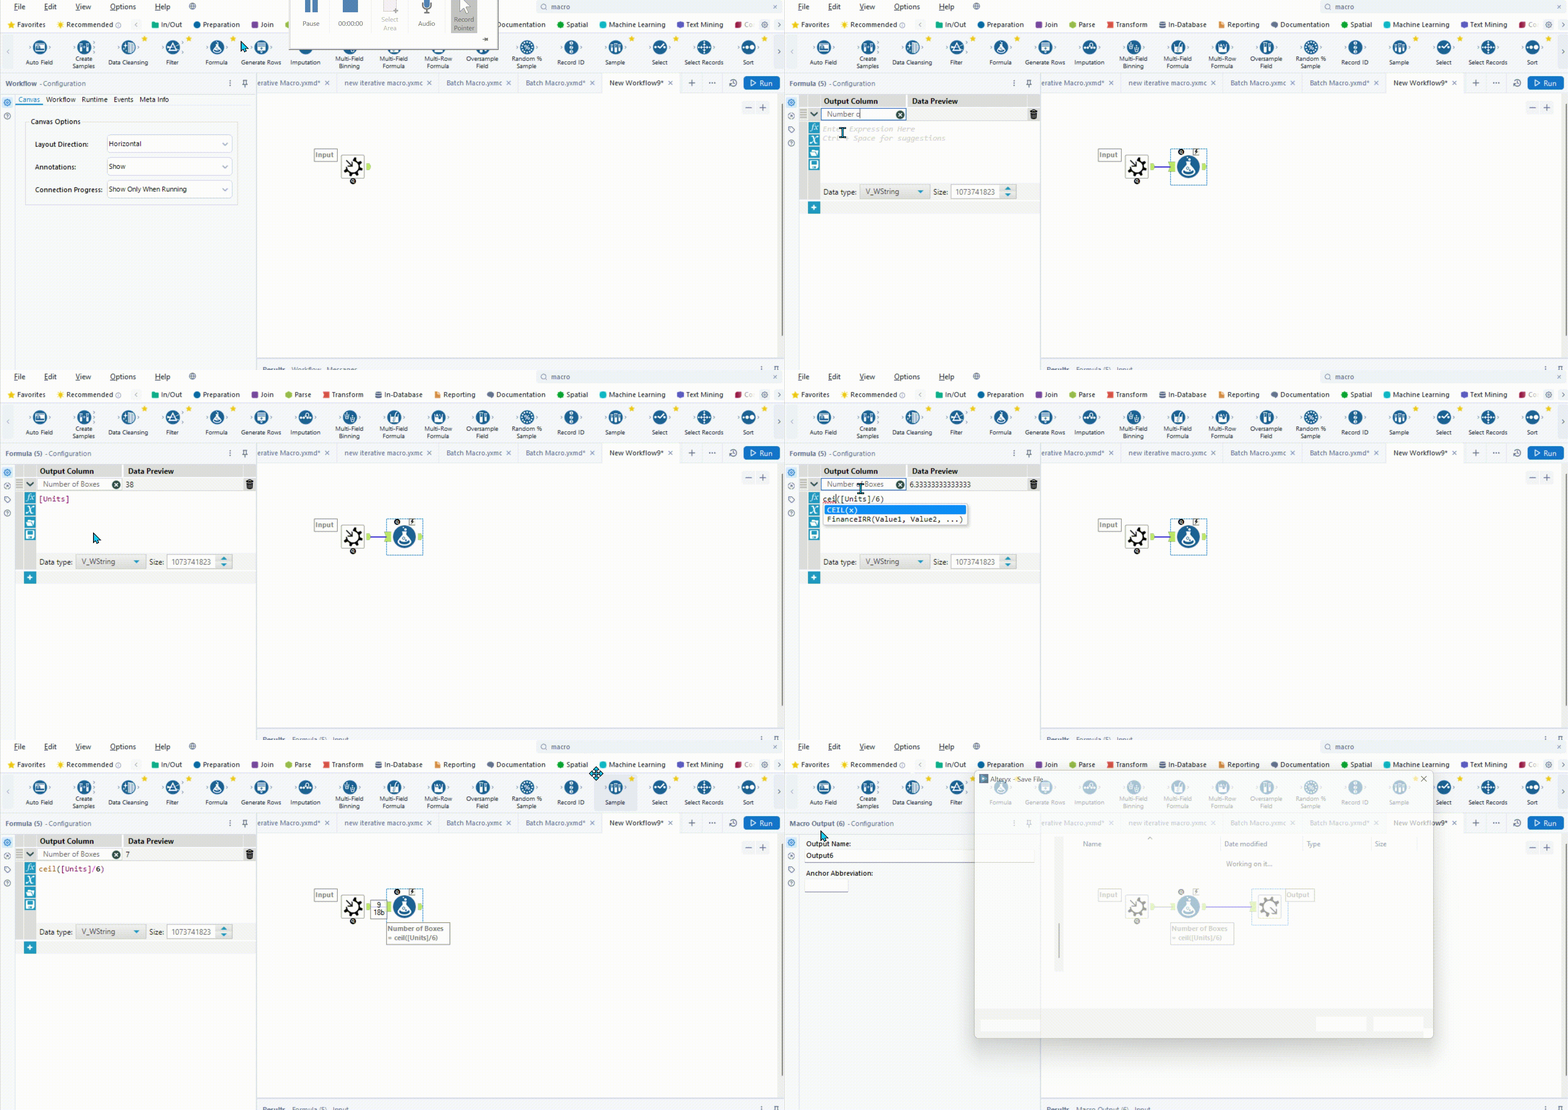
So what we want to try work out is the box size needed for each country base on each product. So for this macro all we will need is units, so if we copy the units column then open a new workflow. Next step is to drag on a macro input in the workflow and then edit the text input- this will allow you to paste the units into this.

Next what we need to do is create a formula tool which divides units by the number of boxes- we are going to use 6 as a place holder as that was the first box size in the table above. Because we can't get a part of a box we are going to put this function in a ceil as this will round up. Once this is done we can add a macro output.

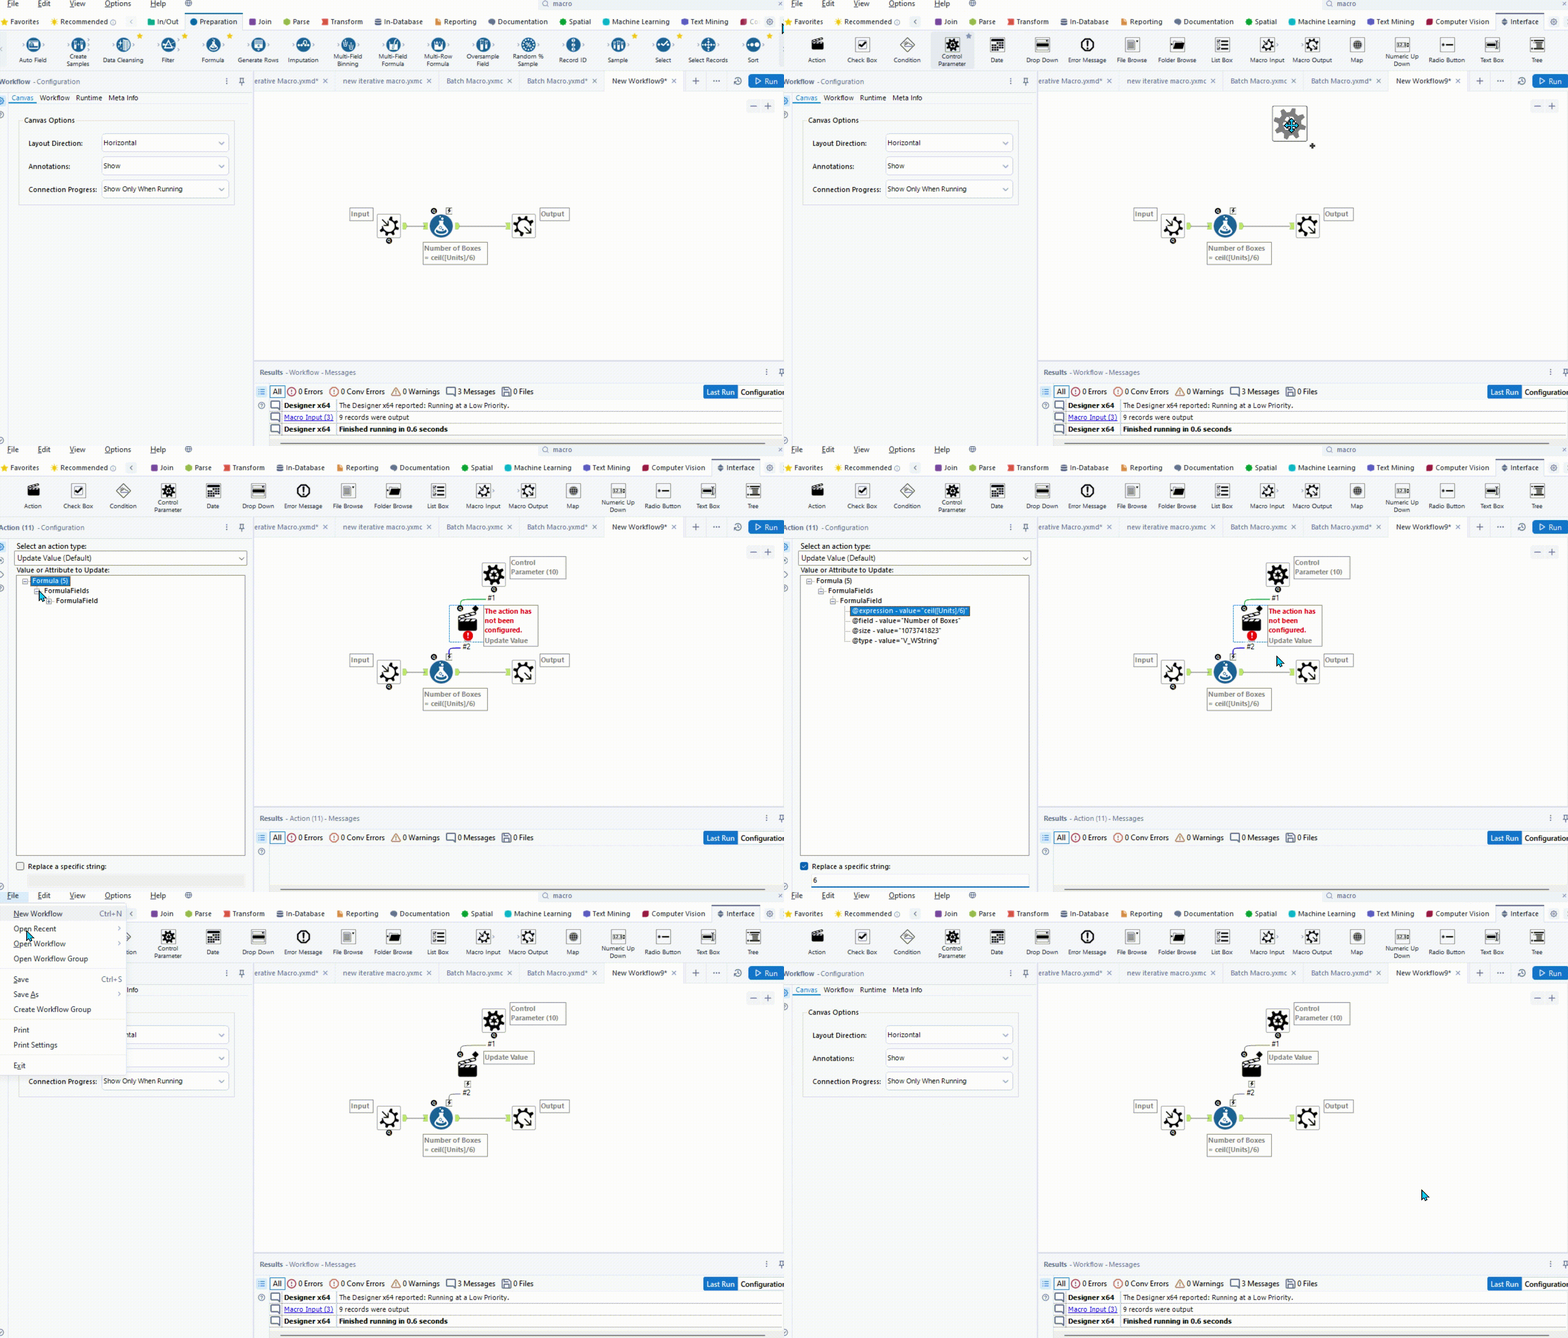
Now to make this a batch we must add a control parameter onto the page. Once again if you remember for the standard macro we need to connect the q to the lightning bolt for this action to appear. We now need to go find the expression with our calculation in so that we can replace our placeholder which was 6.

Don't forget to save.
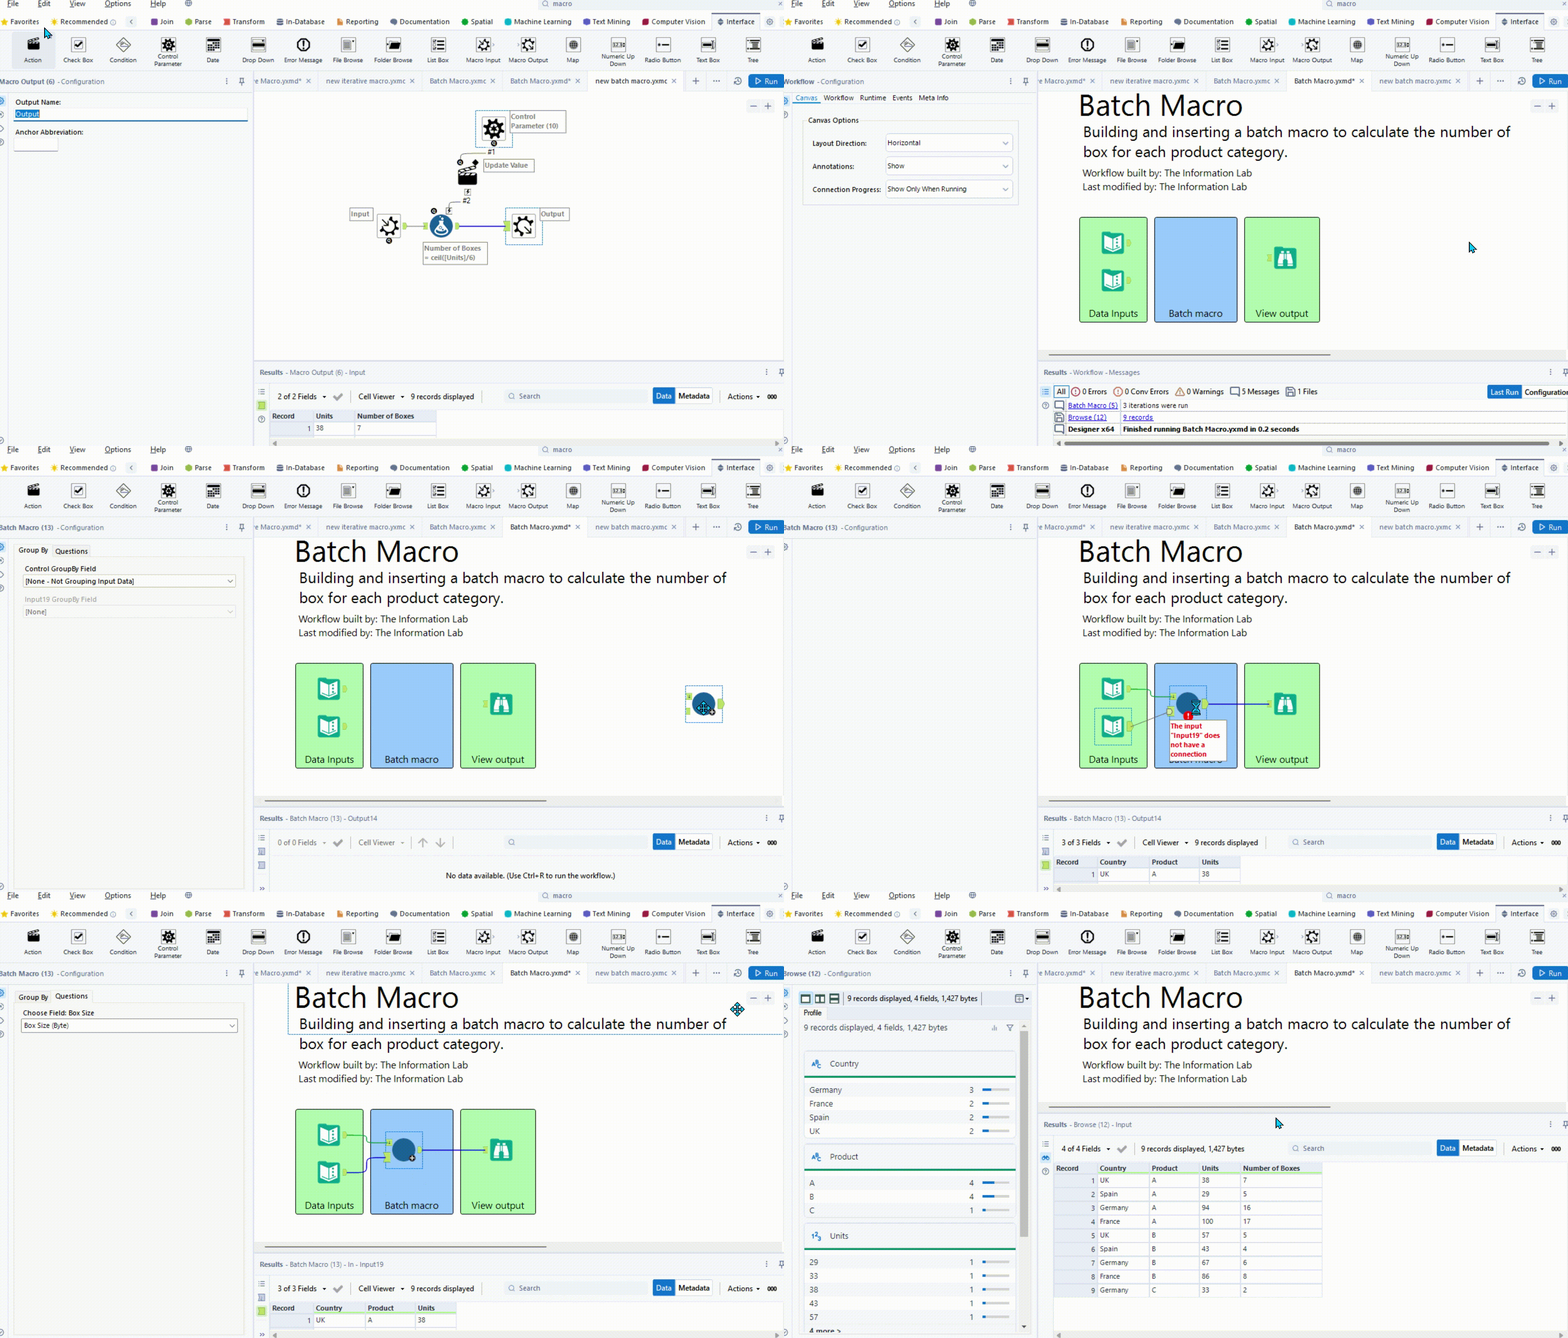
Now lets add this back into our starter sheet and insert the macro. When we join the macro up we can see that the configuration window has some new fields. So first we want to group by product as this is what in both tables. Next we want to press question and choose box size as that is what we were configuring in our macro.

Finally after we run our results we can see that each product that was grouped by product A has divided by 6, B has divided by 12 and finally C by 24. This shows clearly different batches like when it comes to washing we may want to group by colour as shown above.

