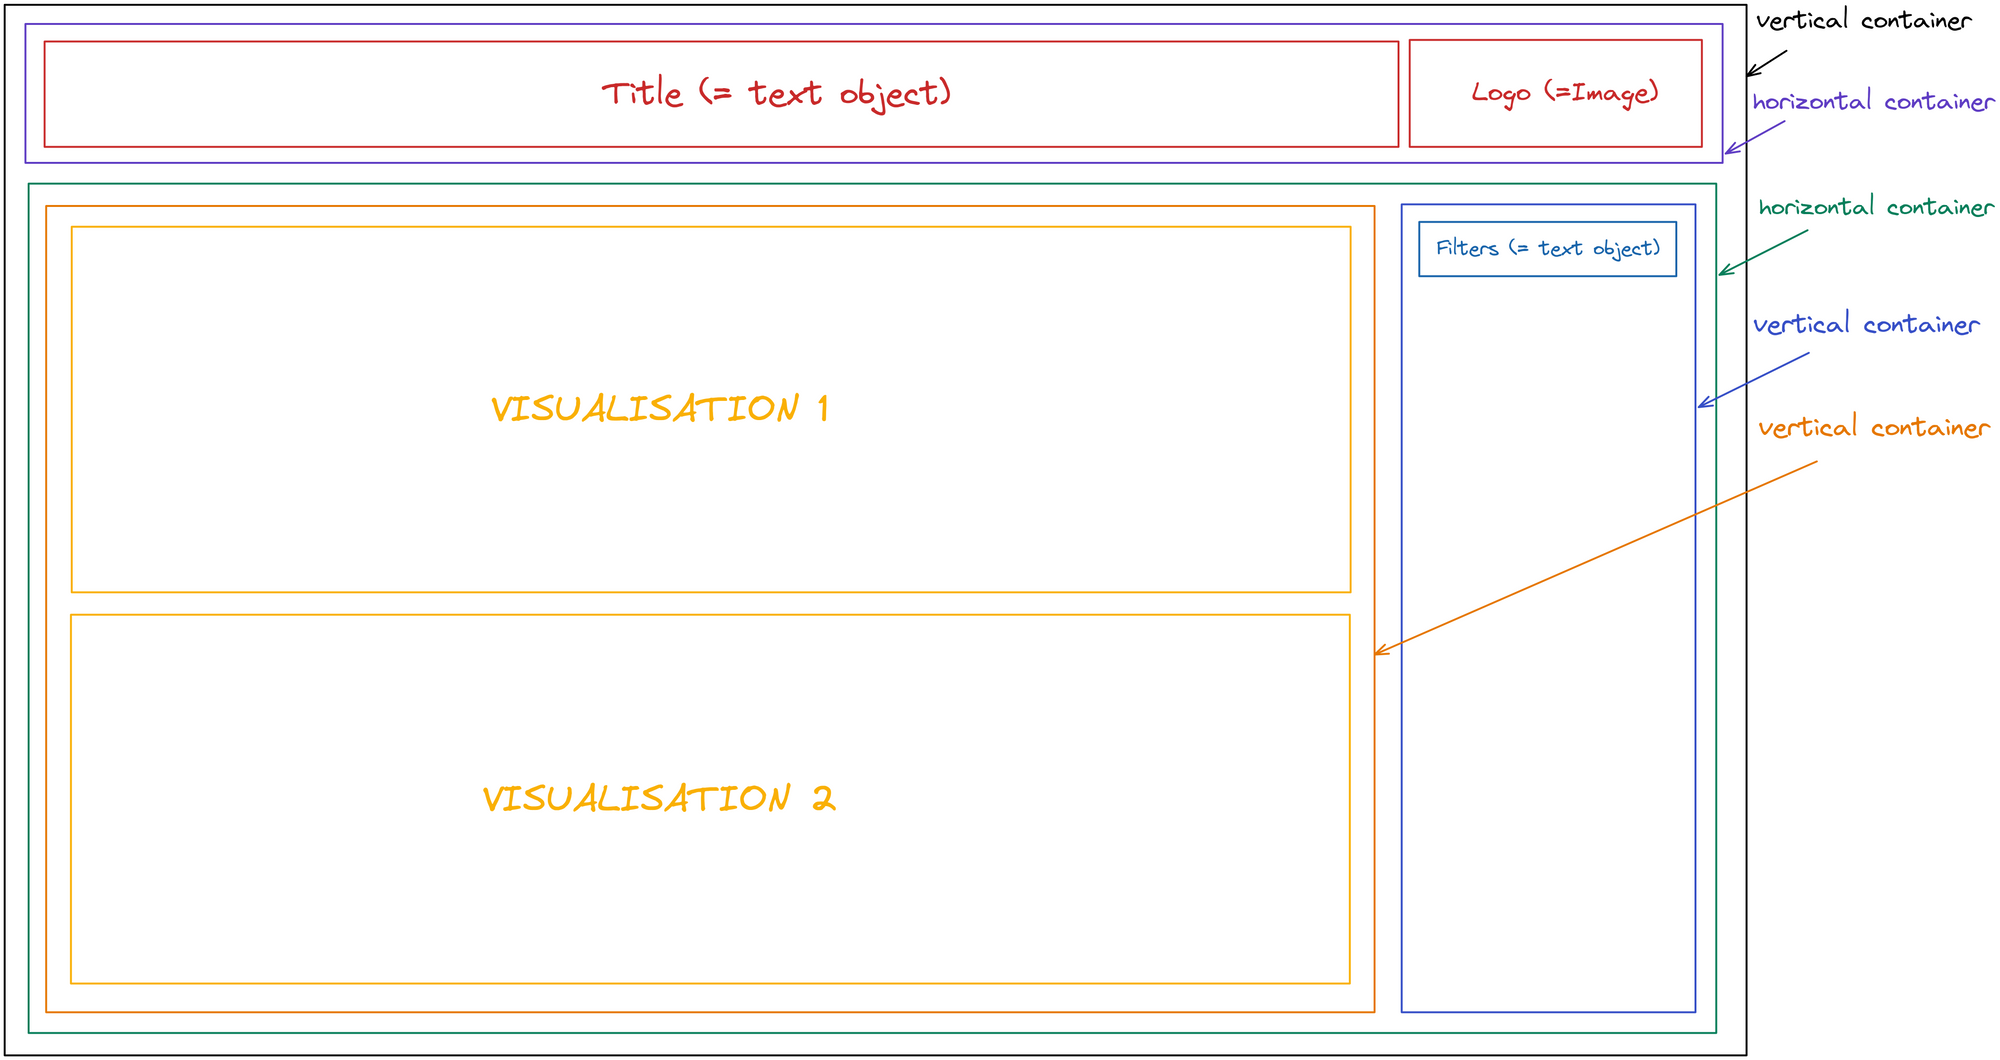
One of the things that makes Tableau nice and user friendly is the number of times you can simply drag something and drop it wherever you want and it’ll look somewhat between “quite nice” and “that’ll do”. But if you want to level up your dashboarding skills you will definitely want to use containers when creating a dashboard. Containers are a bit difficult to define but actually really easy to understand – they basically define an area of a dashboard and this way help you to structure your layout. It does also help to sketch out your container layout before you get lost in all the vertical and horizontal containers in your hierarchy:

So in this example we start with a vertical container (black). Some people also work with tiled containers as a first layer but from my experience starting with a floating vertical or horizontal container gives you a bit more control in the further steps. Also it minimizes the amount of Tableau randomly creating horizontal containers which will mess up the layout hierarchy later on. So in our first vertical container we can put in a blank container which will help showing you the position of the next container you’ll put in. Sometimes it can be also helpful to add a border to your containers so that you can see their position. This will be a horizontal container (purple) for the title and the logo (red), which will go above the blank support container. In that we put a text object and an image object and then we’re already done with the upper part of our dashboard. Below our text/logo container we drag in another horizontal container (green) which will contain an area for the filters and another one for the visualisations. Now we can also delete our blank support container or maybe move it into our latest horizontal container (green) to help place the next layers. On the right side we’ll place a vertical container (blue) for the filters and on the left side we’ll have another vertical container (orange) in which we can drag our visualisations.
Dashboarding with containers gives you a good way to structure your layout and if needed you can manually adjust the width or height of the object and this way you’ll be able to exactly size objects instead of just approximately make them the same size.
