


Starting Note: We will be using Sample Superstore for the example for this blog, feel free to open that up and follow along.
The idea behind this is to use bar chart drill downs to act as a hierarchy. This helps to make it more interactive, the client can take information from the dashboard as he pleases and to make your dashboard a little less cluttered.
For example, if we have 3 fields called Category, Sub Category and Product, the bar chart drill down using set actions would create the hierarchy and keep expanding the bar chart as you click on it.
The highest hierarchy here is category (that is the field we want to drill down and essentially create our set on).
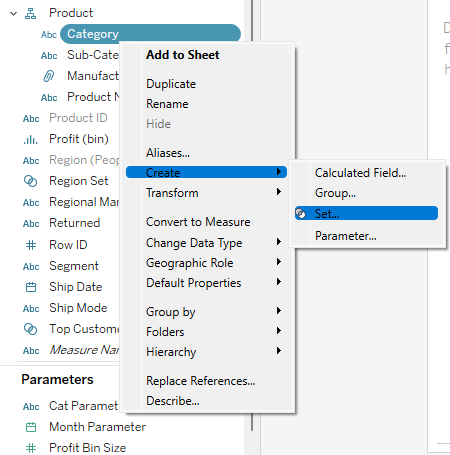
Step 1: Create a set on category by right clicking Category -> Create -> Set.
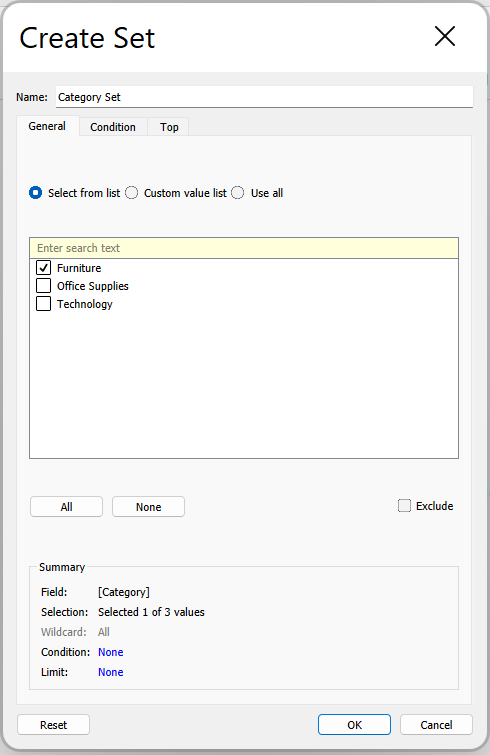
Step 2: The 'Create Set' box will appear in which you can configure your set. Rename your set as you please (very essential in keeping track of your work) and my recommendation is to click one of categories on the list so than when you build the next step, you can check if it is working or not. Click OK.
Step 3: We need to create a calculated field.
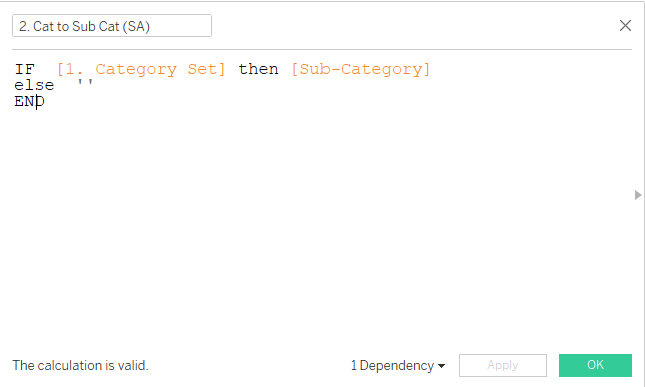
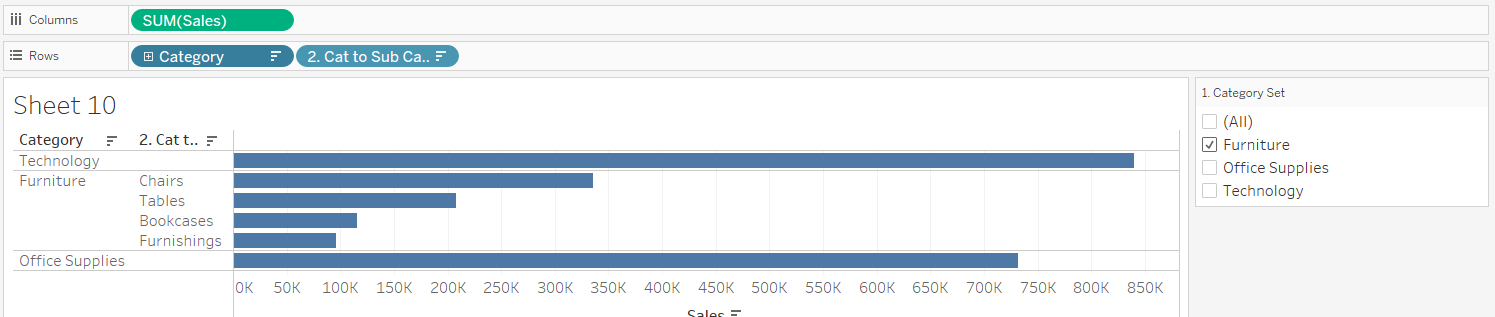
Explanation: If something is in that set, then we want to return the Sub-Category, otherwise we just want to return an empty string; aka., ' '. Drag Category and your IF statement 2. Cat to Sub Cat (SA) to your rows.
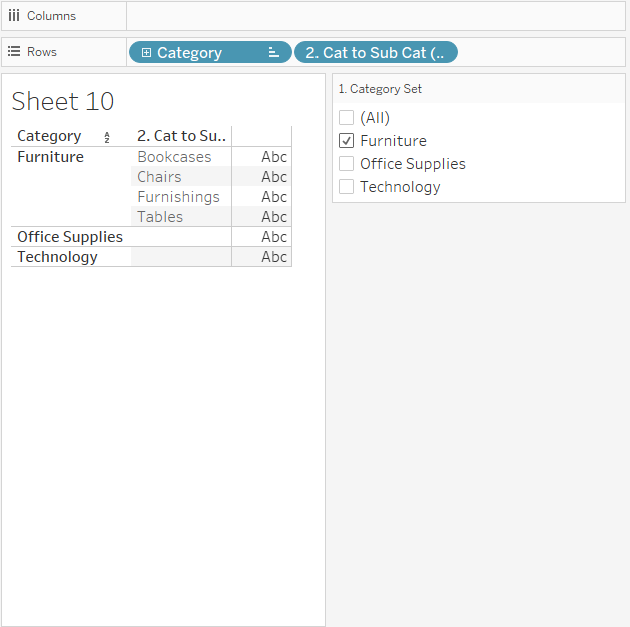
Result: Because we had check marked 'Furniture' in Step 2: you can see that the furniture has been broken down into its Sub-Category. You can check if it is working for all by right clicking your Category Set -> Show Set.
Step 4: Lets drag a measure to create a bar chart. Drag Sales to your columns. Now you've got a simple looking bar chart that has your categories and showing you subcategories for the category you highlights (for me, that is furniture, it could be different on your screen).
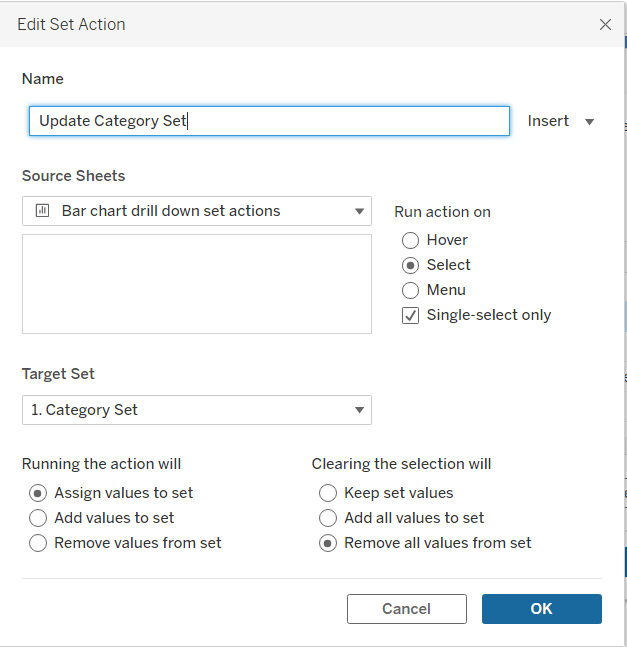
Step 5: We need to 'set-up' our set actions so it can applied through this worksheet. Click Worksheet -> Actions -> Add Action -> Change Set Values.
Recommendation: Very important to give you actions, calculated fields, sets and parameters good names so you can understand and find them a lot easier.
Explanation:
- We have named our set action - Update Category Set (as we are updating our category set)
- Source Sheet - our sheet name
- Run action on - We clicked select here as everytime we click on a cateogry it will drill down to a sub category. I have also clicked 'single-select only' as that enables the user to only click on category at a time. If you would like your user to drill down two categories at a time, go ahead and untick that.
- Target Set - what set are we targeting? It would be the set we created for this exercise (Category Set).
- Running the action will - Once we run the action (or click), what will happen? We want it to assign the values to the set.
- Clearning the selection will - Once we unclick or deselect, what would you want to happen to your dashboard? If we click 'keep set values' and if we deselect, it will keep the values from the selected category. I chose to 'remove all values from set' as I would like it to deselect and essentially have a fresh start for my user.
- Click OK and click on OK again.
Result: Now if you click on category, you will see that it drills down to sub category. Have a try and see what happens!
Recommendation: If you'd like to deselect from a particular category, click it again!