


In today's blog I'll be walking through the "Rank" feature in Tableau prep, by the end of this blog you will know:
- How to create a basic ranking system
- How to group rankings
- How to create nested rankings
- The difference between Rank & Dense Rank
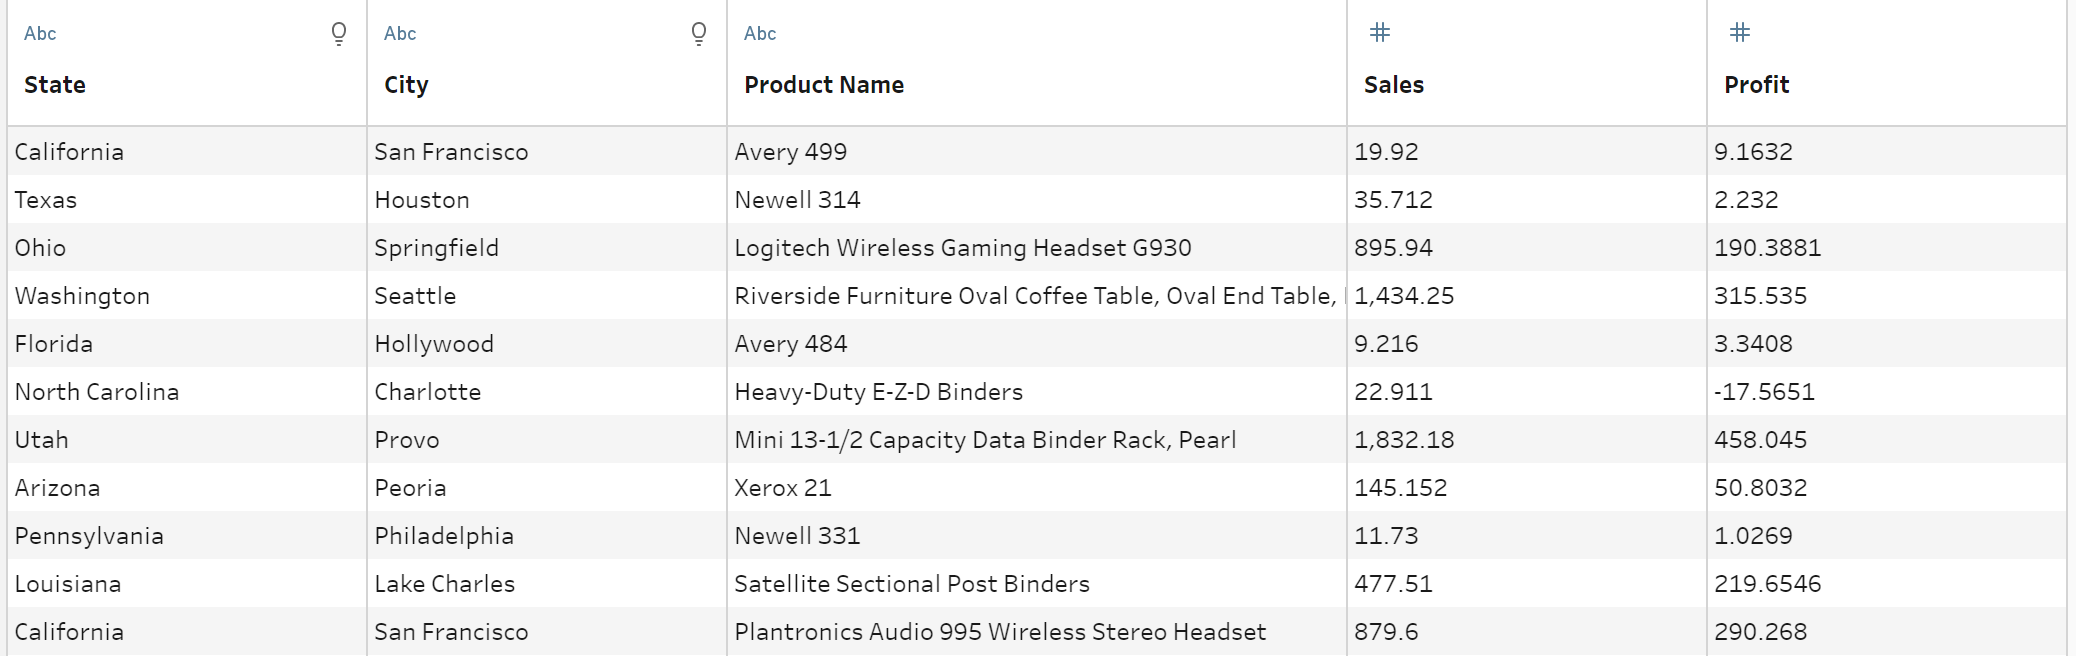
The data set I will use for this tutorial is a condensed version of the famous Sample Superstore dataset where each row represents the total sales and profit for one product within a city within a state.
Part 1: Creating a basic ranking system
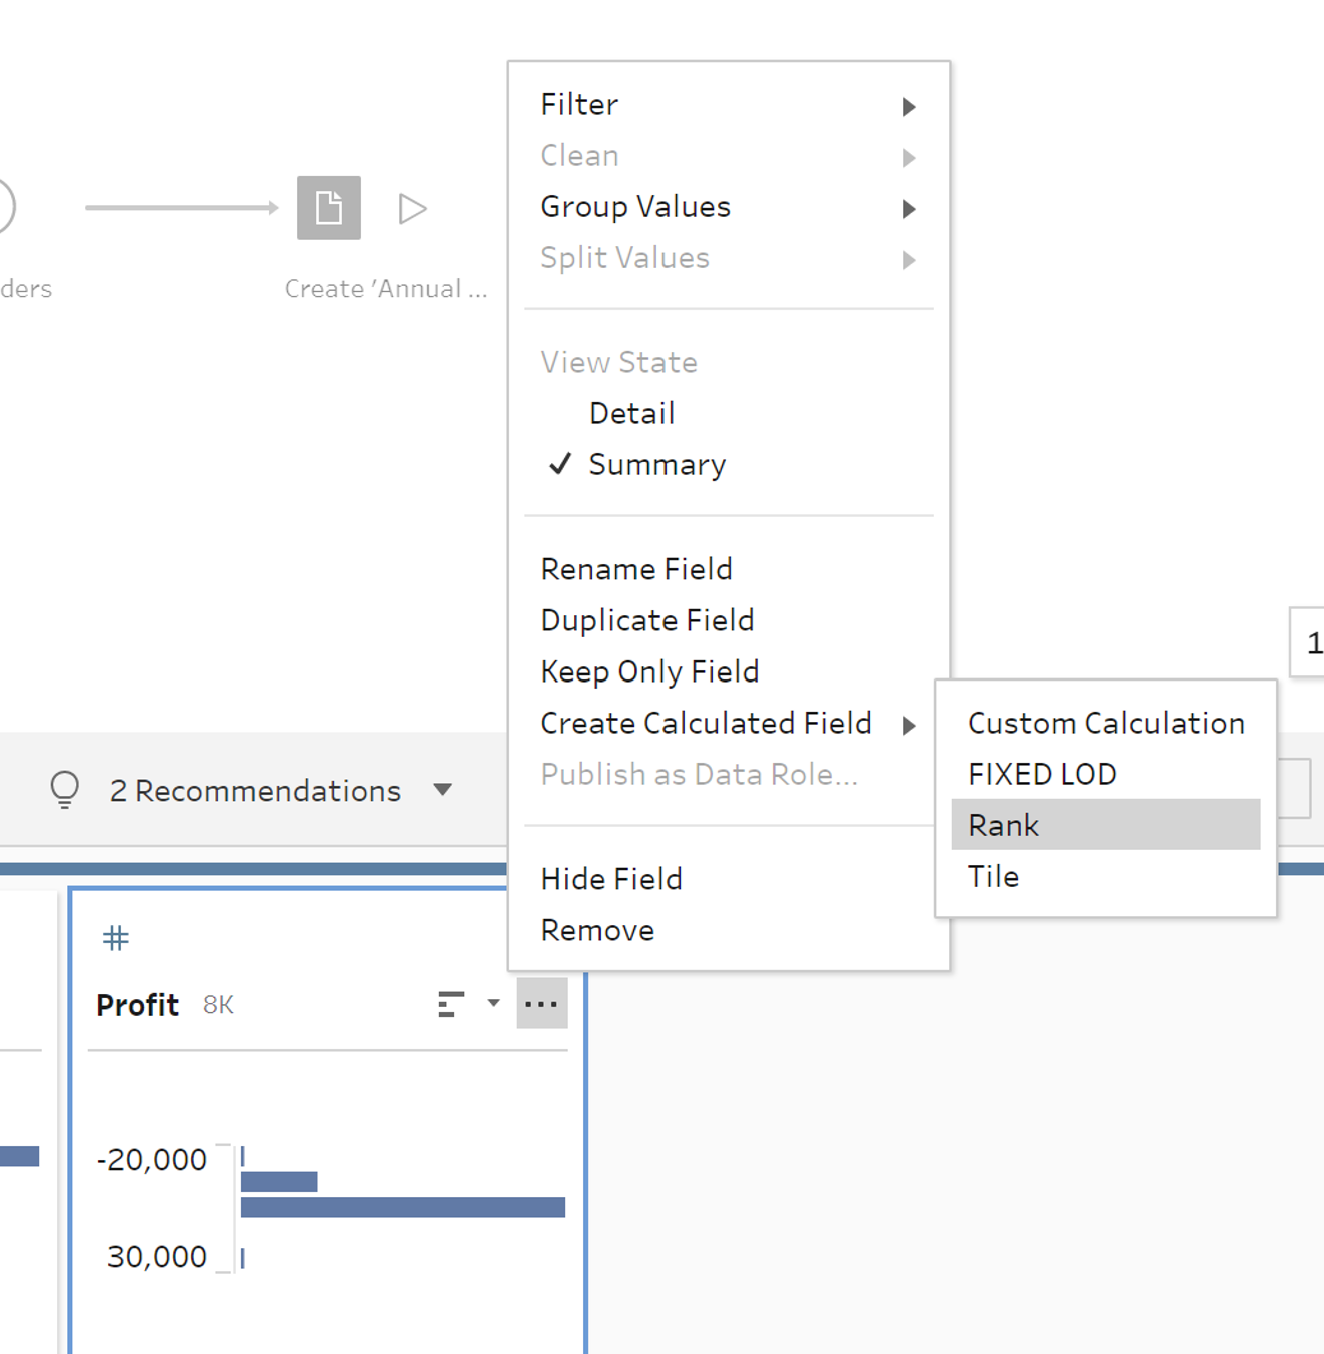
Hover over the column you wish to rank, click on the "3 dots" button and select Rank from within the Calculated Field options as below:
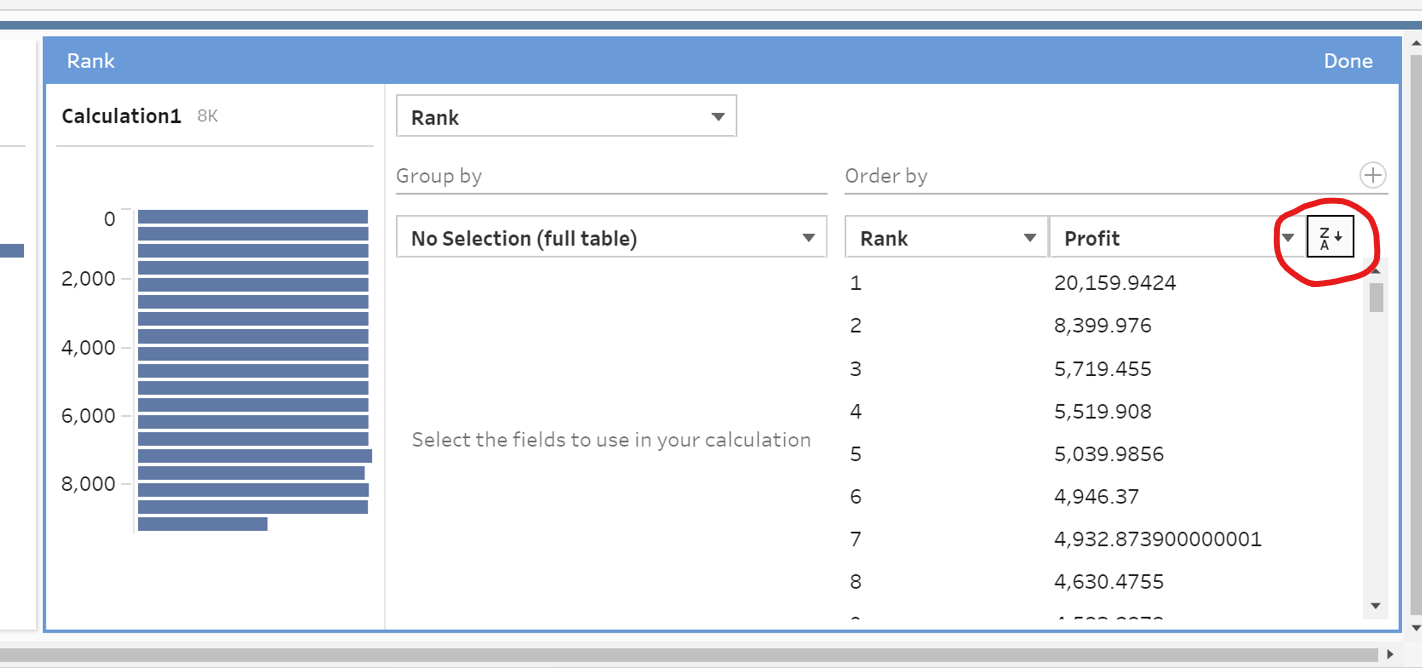
When the rank tool opens, all you need to do now is select which order you would like the rank to go in (Ascending or Descending) using the direction button in the top right and click done. Your basic ranking is ready.
Part 2: Grouping your rank
When you select a column to group by, you're instructing the tool to partition your rank into the selected groups. In this example I will group by State which will result in an independent ranking within each state, rather than a rank across the whole dataset. Select State from the group by drop down and the tool should now look like this:
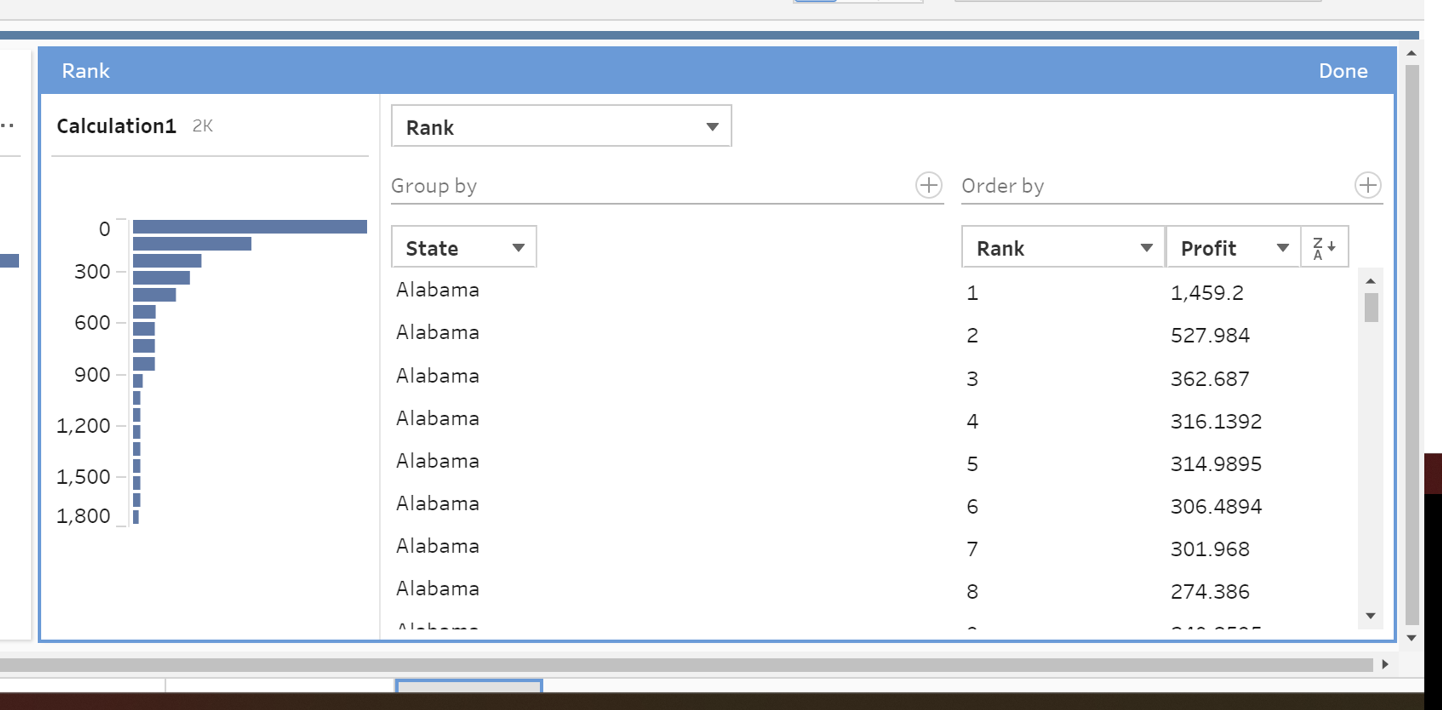
As you scroll down the list, every time the state changes the rank should reset from 1.
You'll notice there is a plus sign in the top right of the Group By Pane, this will allow you to add a nested group by column to further partition the ranking. E.g. by City within State.
Part 3: Nested Ranking
In the top right of the Order By pane in the ranking tool, there is also a + sign which allows you to add another column to use in the order of the ranking. This is called nested ranking and is useful when you have a lot of values with the same rank.
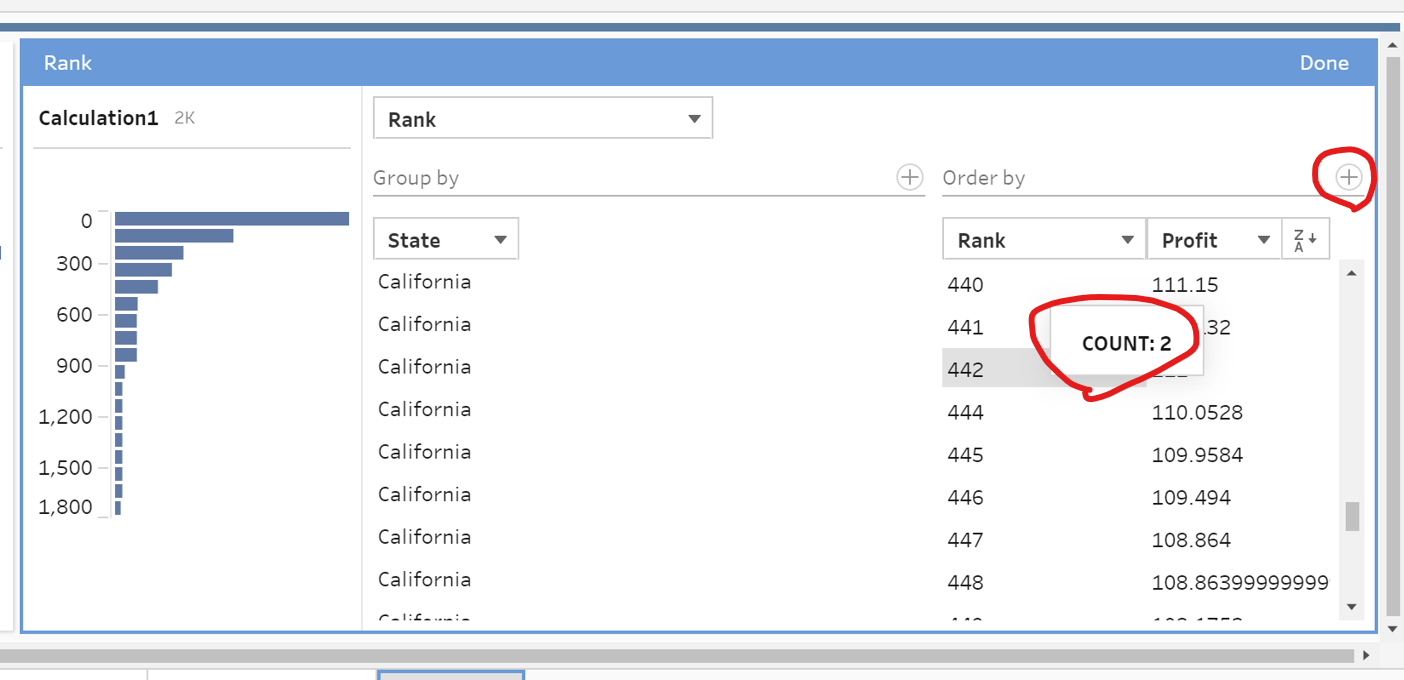
In our example we have 2 products with the rank 442 in California. This likely occurs multiple times through the data set and to separate them out we're going to nest our ranking with the sales field.
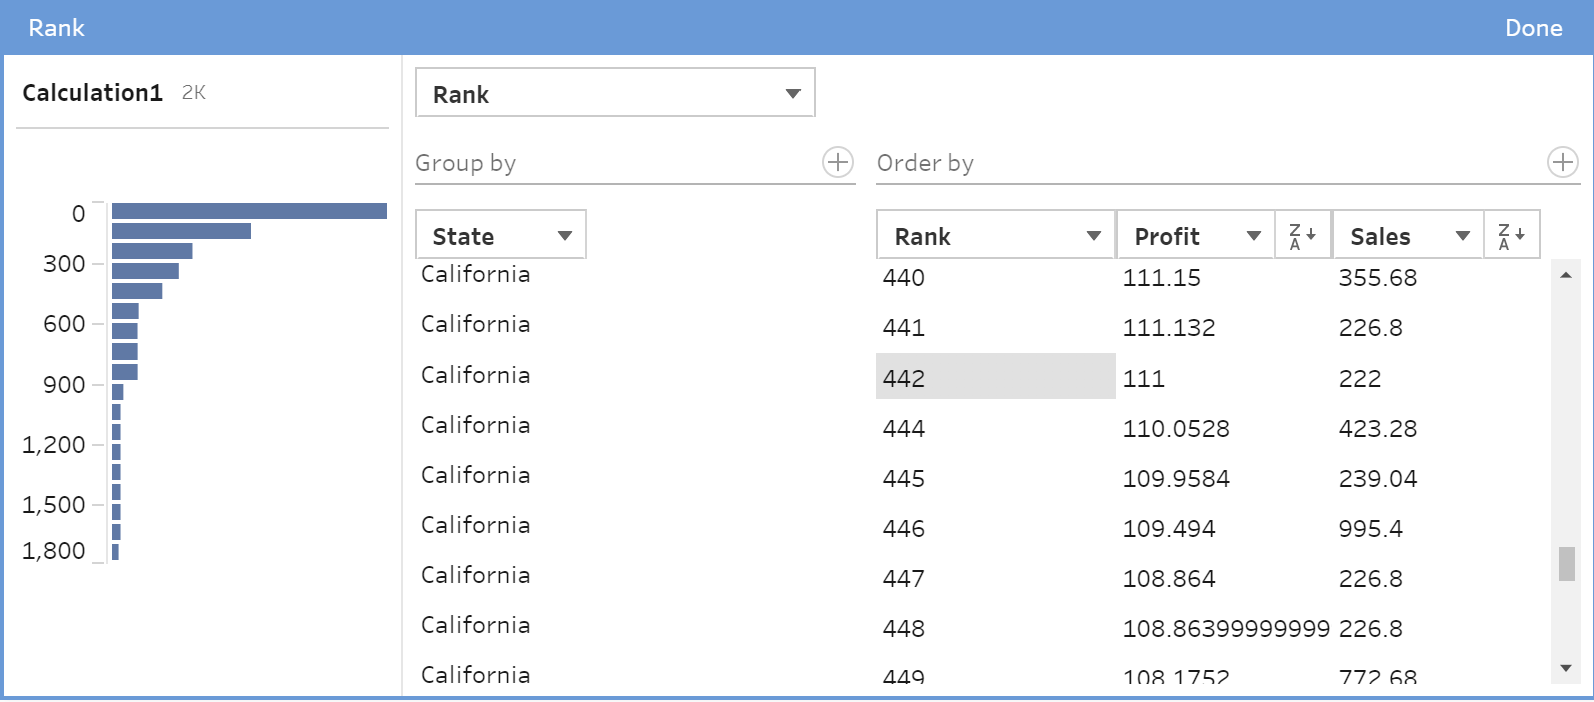
In this case this makes no difference as due to the nature of the sales / profit relationship the sales for both of these products are also the same. So what other options do we have if we don't want a gap in our ranking?
Part 4: Dense Rank
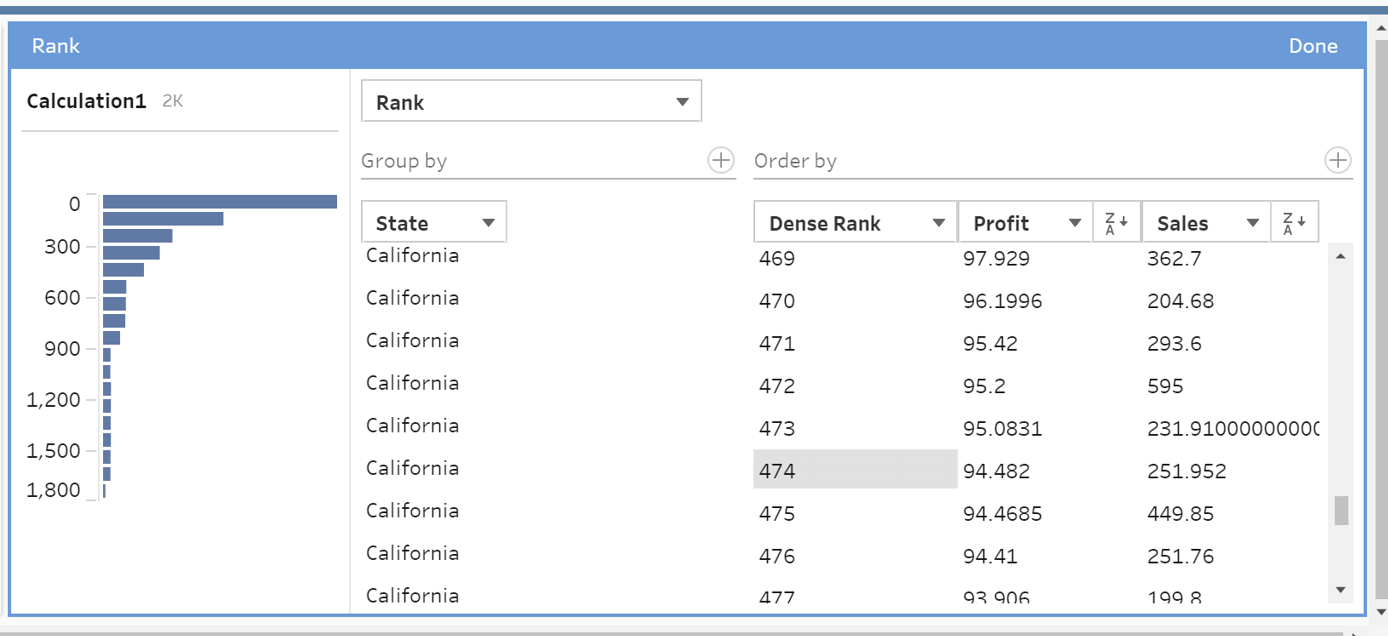
If we click the Rank type dropdown we have the option to select Dense Rank.
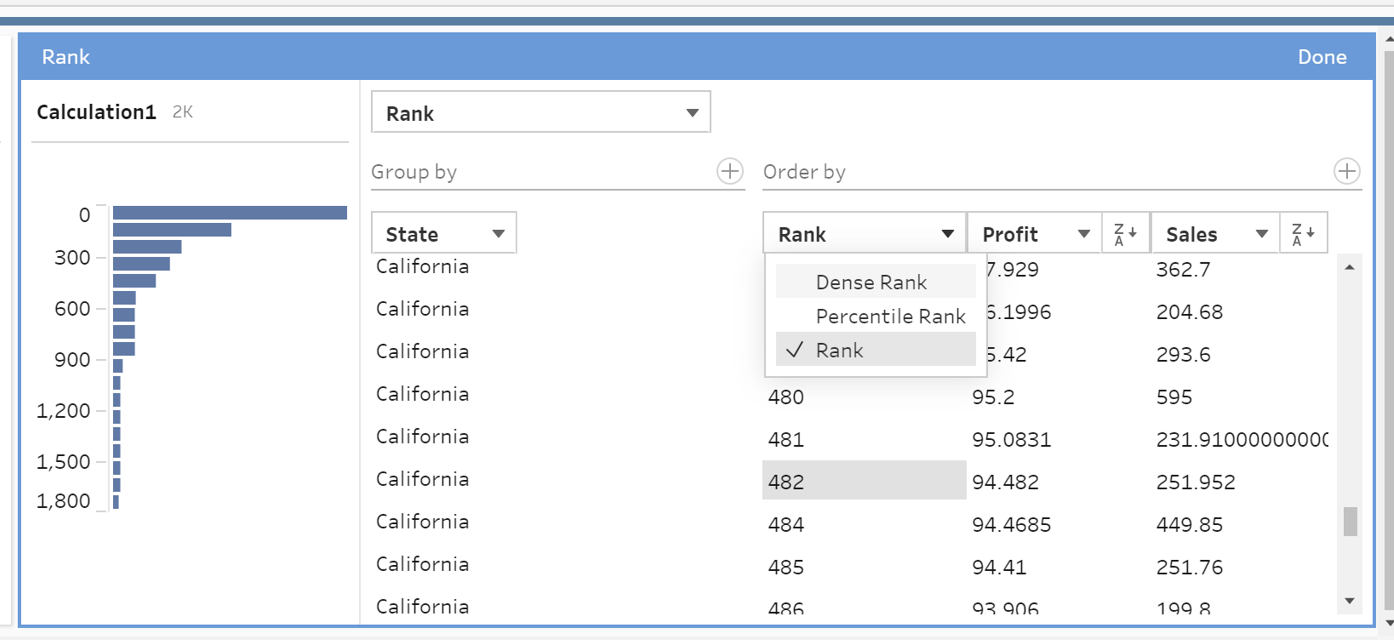
When Dense Rank is selected, instead of leaving a gap after a rank that is occupied by mor than one row, it will move on directly to the next rank in the list.
I hope this was helpful!