Sets are a finite list of values within a field and refer to a Boolean (values chosen are either in or out of the field). They can only be created from discrete dimensions however, not from measures. We can use set actions to change or navigate the view, they cannot be ran through multiple data sources as they are data source dependent. Let's look at some cool worksheets we can create using set actions!
Set Action Window
To start off with, let's explore how to operate using the window to assign set actions.
- Source sheet: this will be the selected worksheet or dashboard you want the ser action to apply to
- Run action on: hover or select are self explanatory, menu will give the user an option to add the record to a set and single select means that you cannot select multiple values
- Target set: this should be the set created based on the dimension in the view
- Running action will: assign values to set means selected records will be momentarily added to the set. Adding and removing values do as such from the set
- Clearing the selection will: keep values will allow the selected records to stay in the set. Adding and removing is the same as running action will but this is dependent on the user selection.
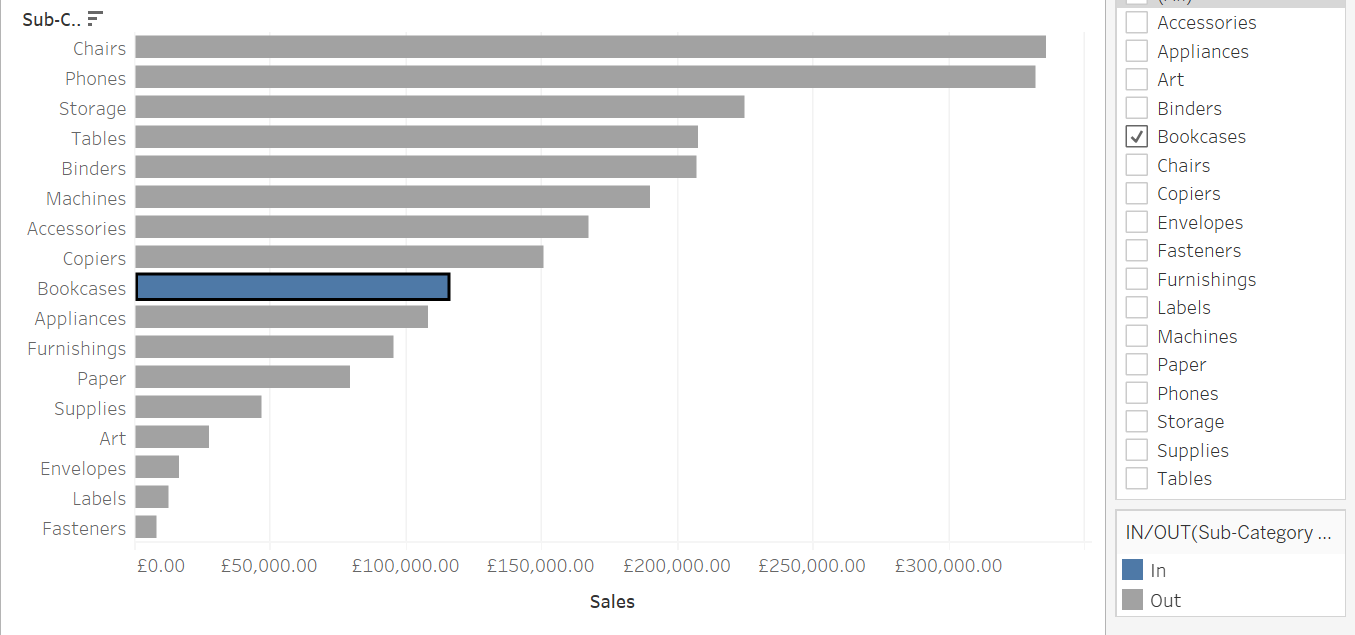
Highlighting Bars
We have Sub Category against Sales, what we can do is create a set and apply set actions to highlight bars which are selected by the user.
- Create a Sub Category Set and place into the colors mark
2. Create a Set Action and select the configurations need which are:
- Select source sheet as the worksheet you are working on
- Target set: Sub Category set
- Run action on: select
- Running action will: add values to the set
- Clearing the selection will: remove all values from set
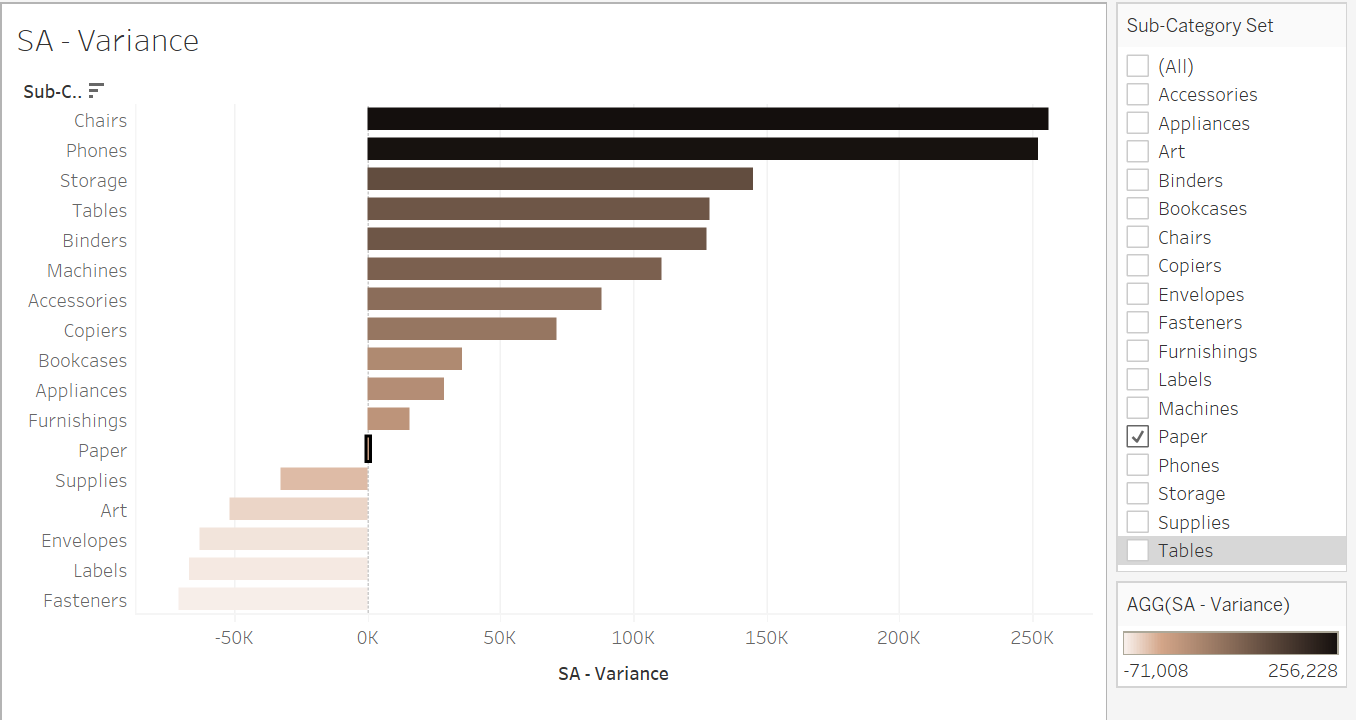
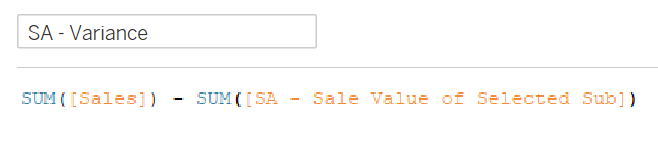
Variance
Again we have Sub Category against Sales but we want to choose a record within Sub Category to compare Sales values against.
- Use the Sub Category set again and place into the details mark
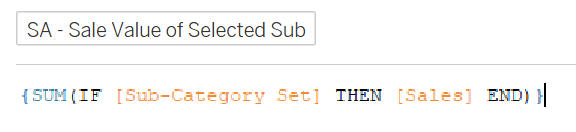
- Create a calculated field with an IF Statement which allows any selected record of the set to be equal to any record of the dimension and place this onto the detail mark
- Note that we must wrap the IF Statement in an LOD otherwise Tableau will do a row based calculation
3. Create another Calculated field which minus' the sales value of the selected record from the set from the sales values of the non - selected records and place this onto the color mark
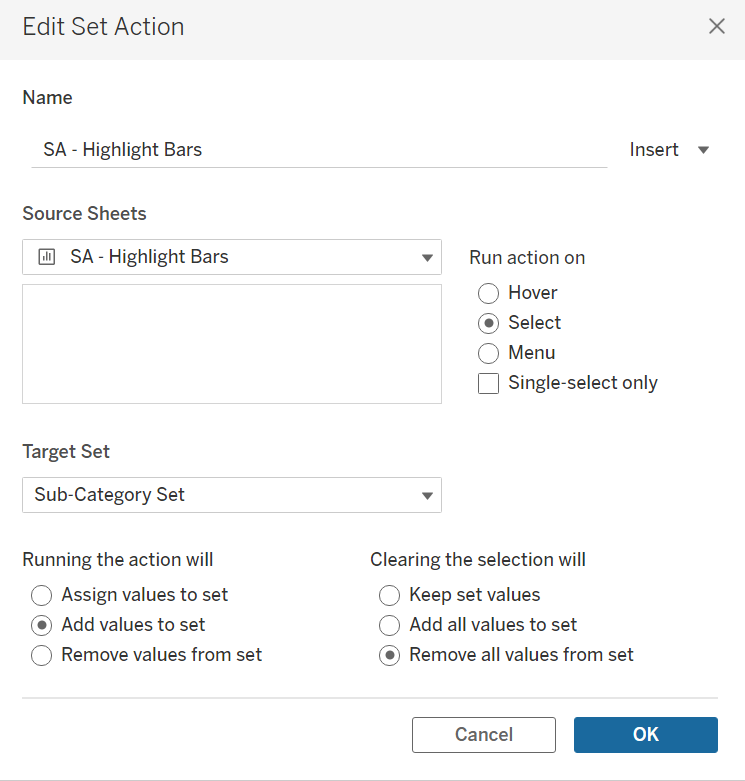
4. Create the set actions with the configurations as such:
- Source sheet: worksheet you are working on
- Target set: Sub Category set
- Run action on: select and single select only
- Running the action will: assign values to the set
- Clearing the selection will: keep set values