When building multi-page dashboards in Tableau, clear and intuitive navigation is essential. Whether you’re switching between pages or directing users to explore specific views, having a well-designed landing page makes the user experience significantly smoother. In this blog, I’ll walk through how to create a simple and effective navigation landing page, including forward and backward navigation, and dynamic update timestamps.
Step 1: Create Your Navigation Buttons
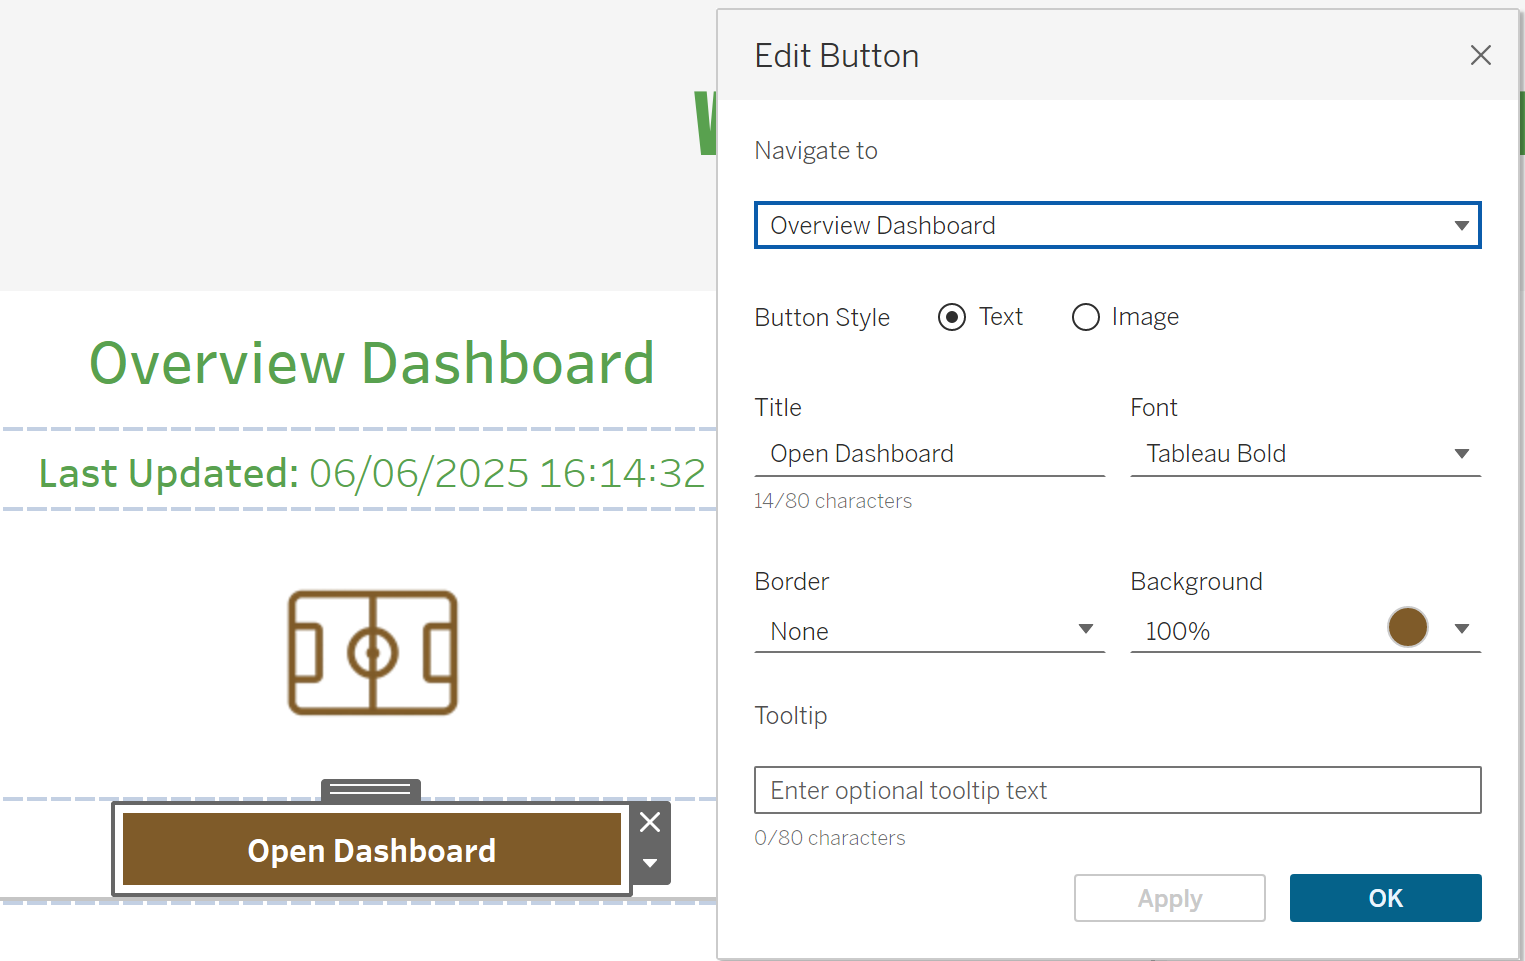
Navigation in Tableau is built using Navigation Buttons, found under the Objects pane on a dashboard.
- Drag a Navigation Button onto your dashboard layout.
- In the Button menu, choose the destination dashboard you want it to navigate to.
- You can customise the button label, formatting, or use an image to create a different shape of button instead.
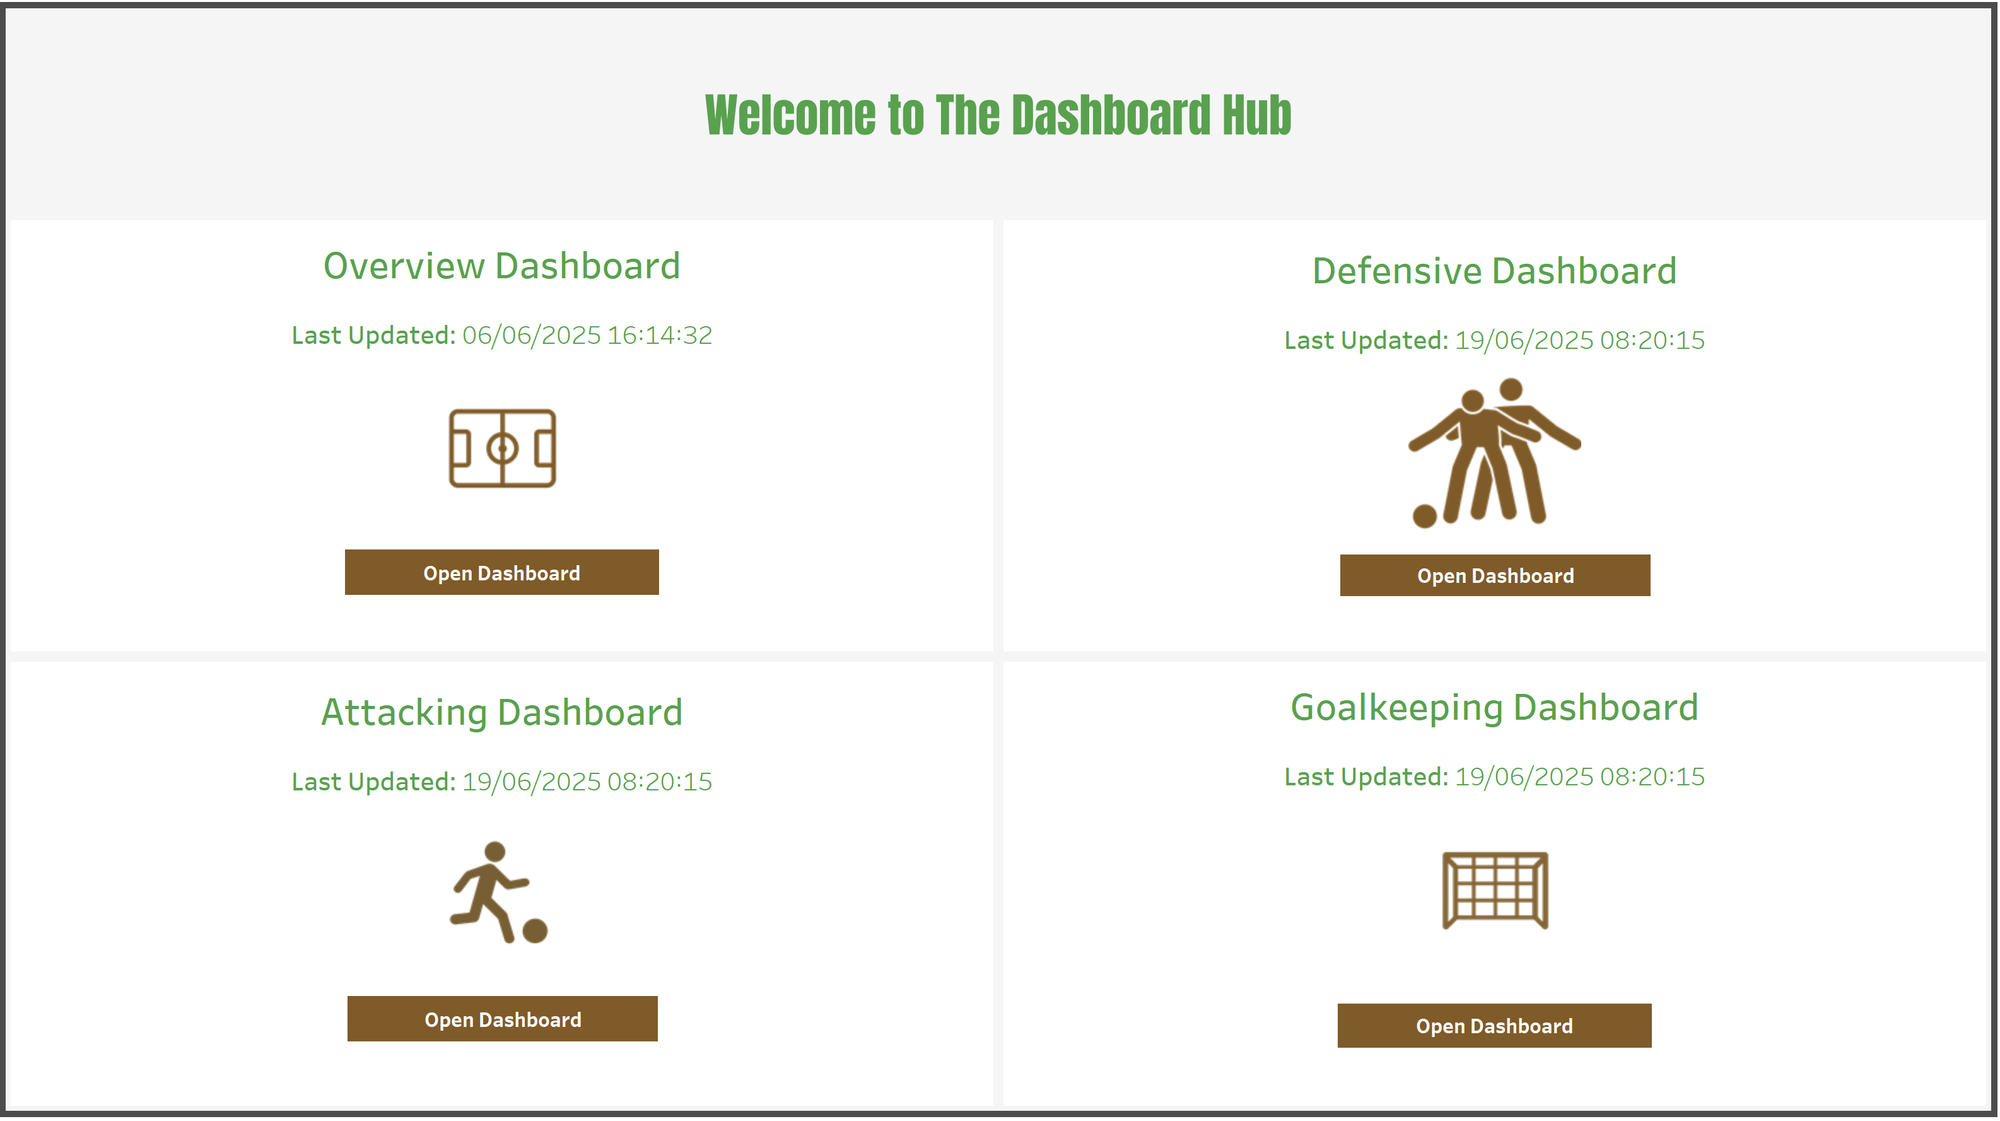
You can repeat this process to create buttons for each of your dashboard sections—for example, “Overview”, “Attacking”, “Defensive”, and “Goalkeeping” dashboards.
Step 2: Build a Landing Page Layout
Design your landing page using either:
- Icons with button functionality (great for intuitive, visual navigation), or
- Text-based buttons styled for simplicity.
Group navigation elements with a consistent layout, spacing, and colour theme. I used PNG icons for design purposes, but used simple buttons as the navigation tool, displaying "Open Dashboard"
Step 3: Add Return Navigation
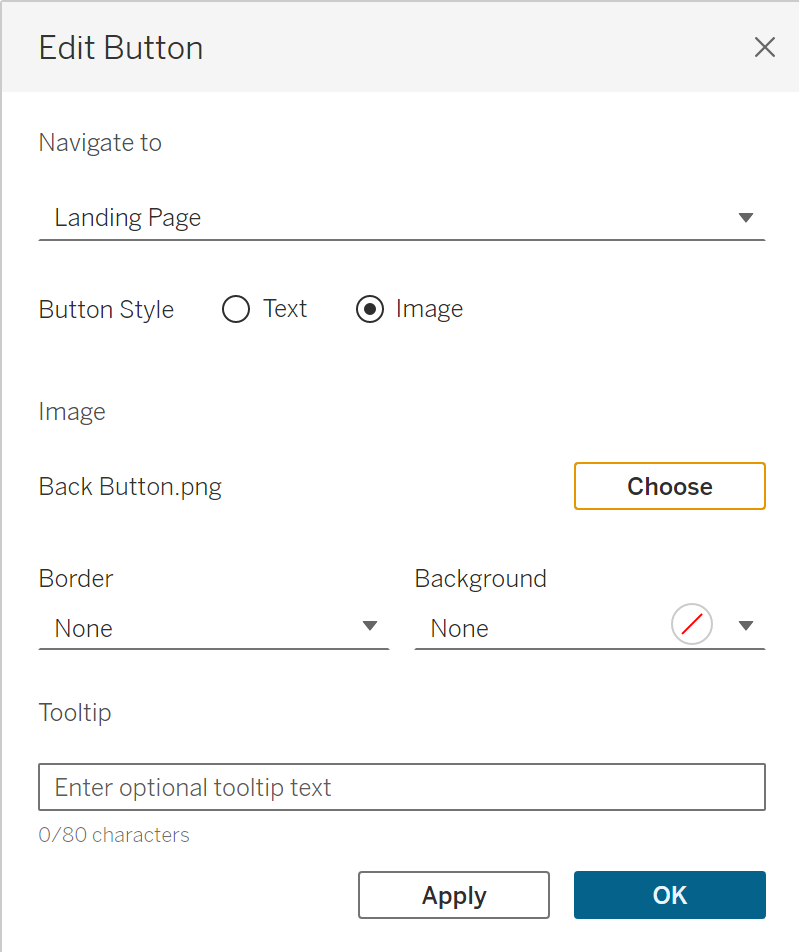
Every individual dashboard should include a back button that brings users back to the landing page. Repeat the process:
- Drag a Navigation Button to the target dashboard, ie. the Attacking Dashboard.
- Set the target as the landing page.
- Use a return button icon as I have done in this case, or “Back” text to make it clear.
Consistent placement of these return buttons helps reinforce familiarity across all your dashboards.
Step 4: Display a “Last Updated” Timestamp
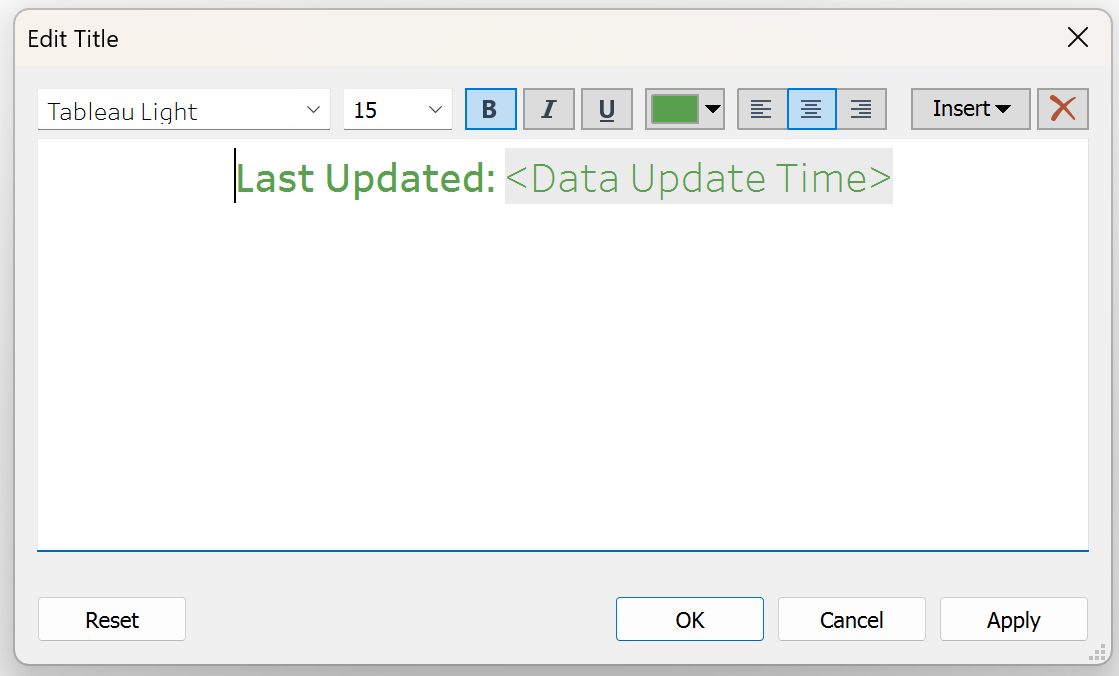
To show when your data was last refreshed, you can use Tableau’s built-in <Data Update Time> placeholder.
Here’s how:
- Create a new worksheet. In the view bring in something that is used for the data source you want to reference.
- In the title of the sheet (double-click), write something like:
Last Updated: <Data Update Time> - Add this sheet to each of your dashboards, formatting it as needed.
This method dynamically reflects the time the data source was last updated, which is especially useful for stakeholders who rely on timely data.
Done! After repeating for all of your dashboards, you should now have a simple navigation landing screen that looks something like this: