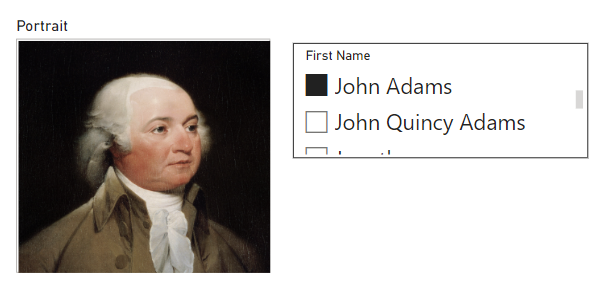
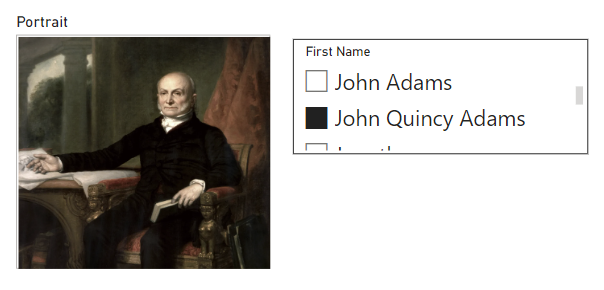
In some specific cases, analytical dashboards may require inclusion of photos corresponding to respective values. They can add additional context to the information being presented, helping users relate data to the corresponding real-world element, or simply aid users in identification of the areas of focus. This is particularly useful when images we want to pull into visualisations are stored on a website that PowerBi can connect to. All that's needed is a list of file names corresponding to the images. (Guide on how to extract a list of file names can be found here.)
The table can contain as little as 3 columns with:
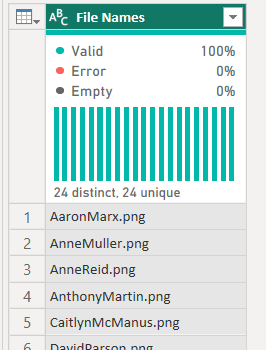
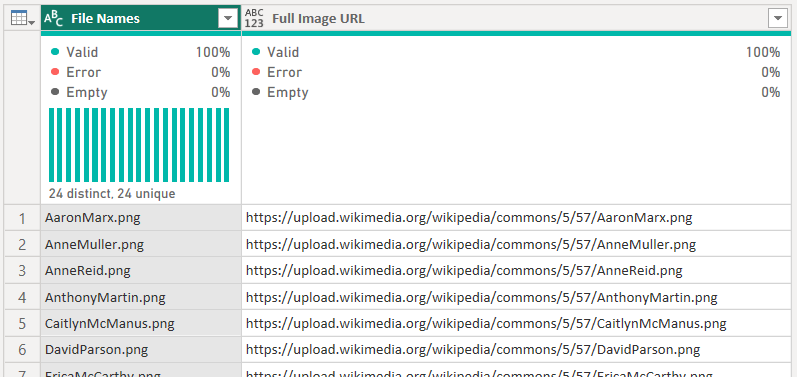
- Image file names
- Corresponding URLs
- Distinct values represented by image (which can be later used for either joining or creating relationships between tables)
- Upload the table containing image file names to PowerBI.
- Open the Power Query Editor.
- Open your internet browser and find the website that contains the images of interest.
- Right-click on one of the image and select "Open Image in New Tab" from the drop-down menu.

- Copy the URL address without the file name part.

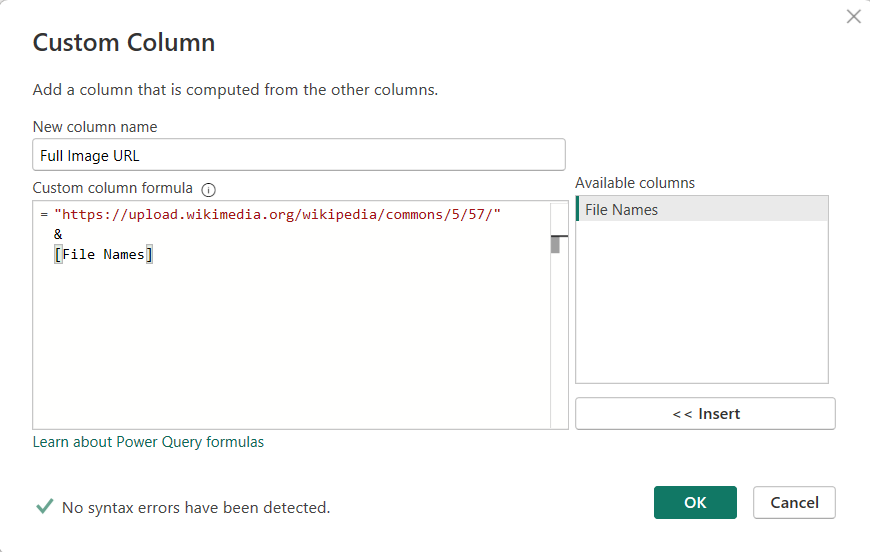
- Go back to Power Query Editor, and create a new column in your table with a calculation that combines the base URL (which was just copied) with the image file names (from the existing column):
All that needs to be done from this point is addition of column (or columns) that will be used for the establishment of relationships between tables. If image file are well documented, this can be simply done by duplicating the column containing file names and cleaning it up to the desired format:

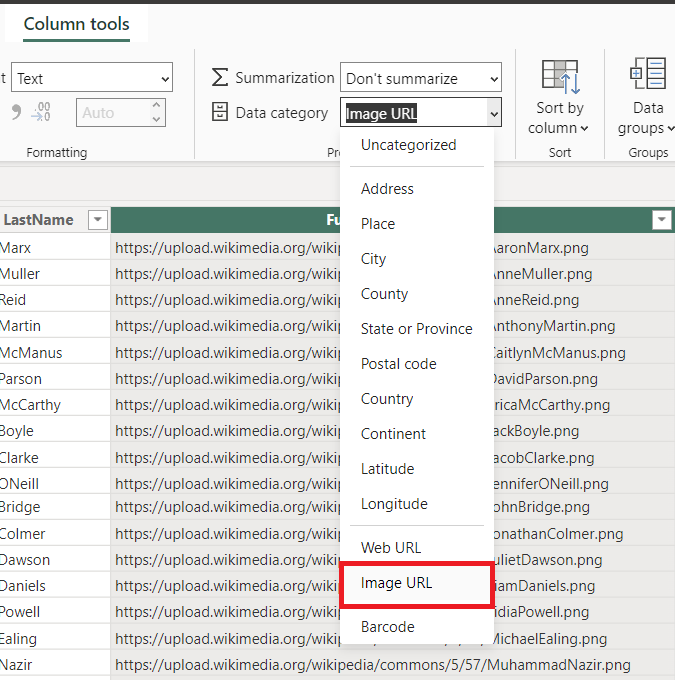
Changes in Power Query Editor can now be applied and you can go back to PowerBI Desktop. But in order for the Full Image URL's to work the data category needs to be specified:
- Go to the Table View.
- Select Full Image URL column.
- Navigate to the Column Tools tab.
- Open the Data Category drop down menu ("Uncategorized" by default) and change the value to "Image URL".
From now on, values from Full Image URL will show up as their corresponding images when used in your reports.