


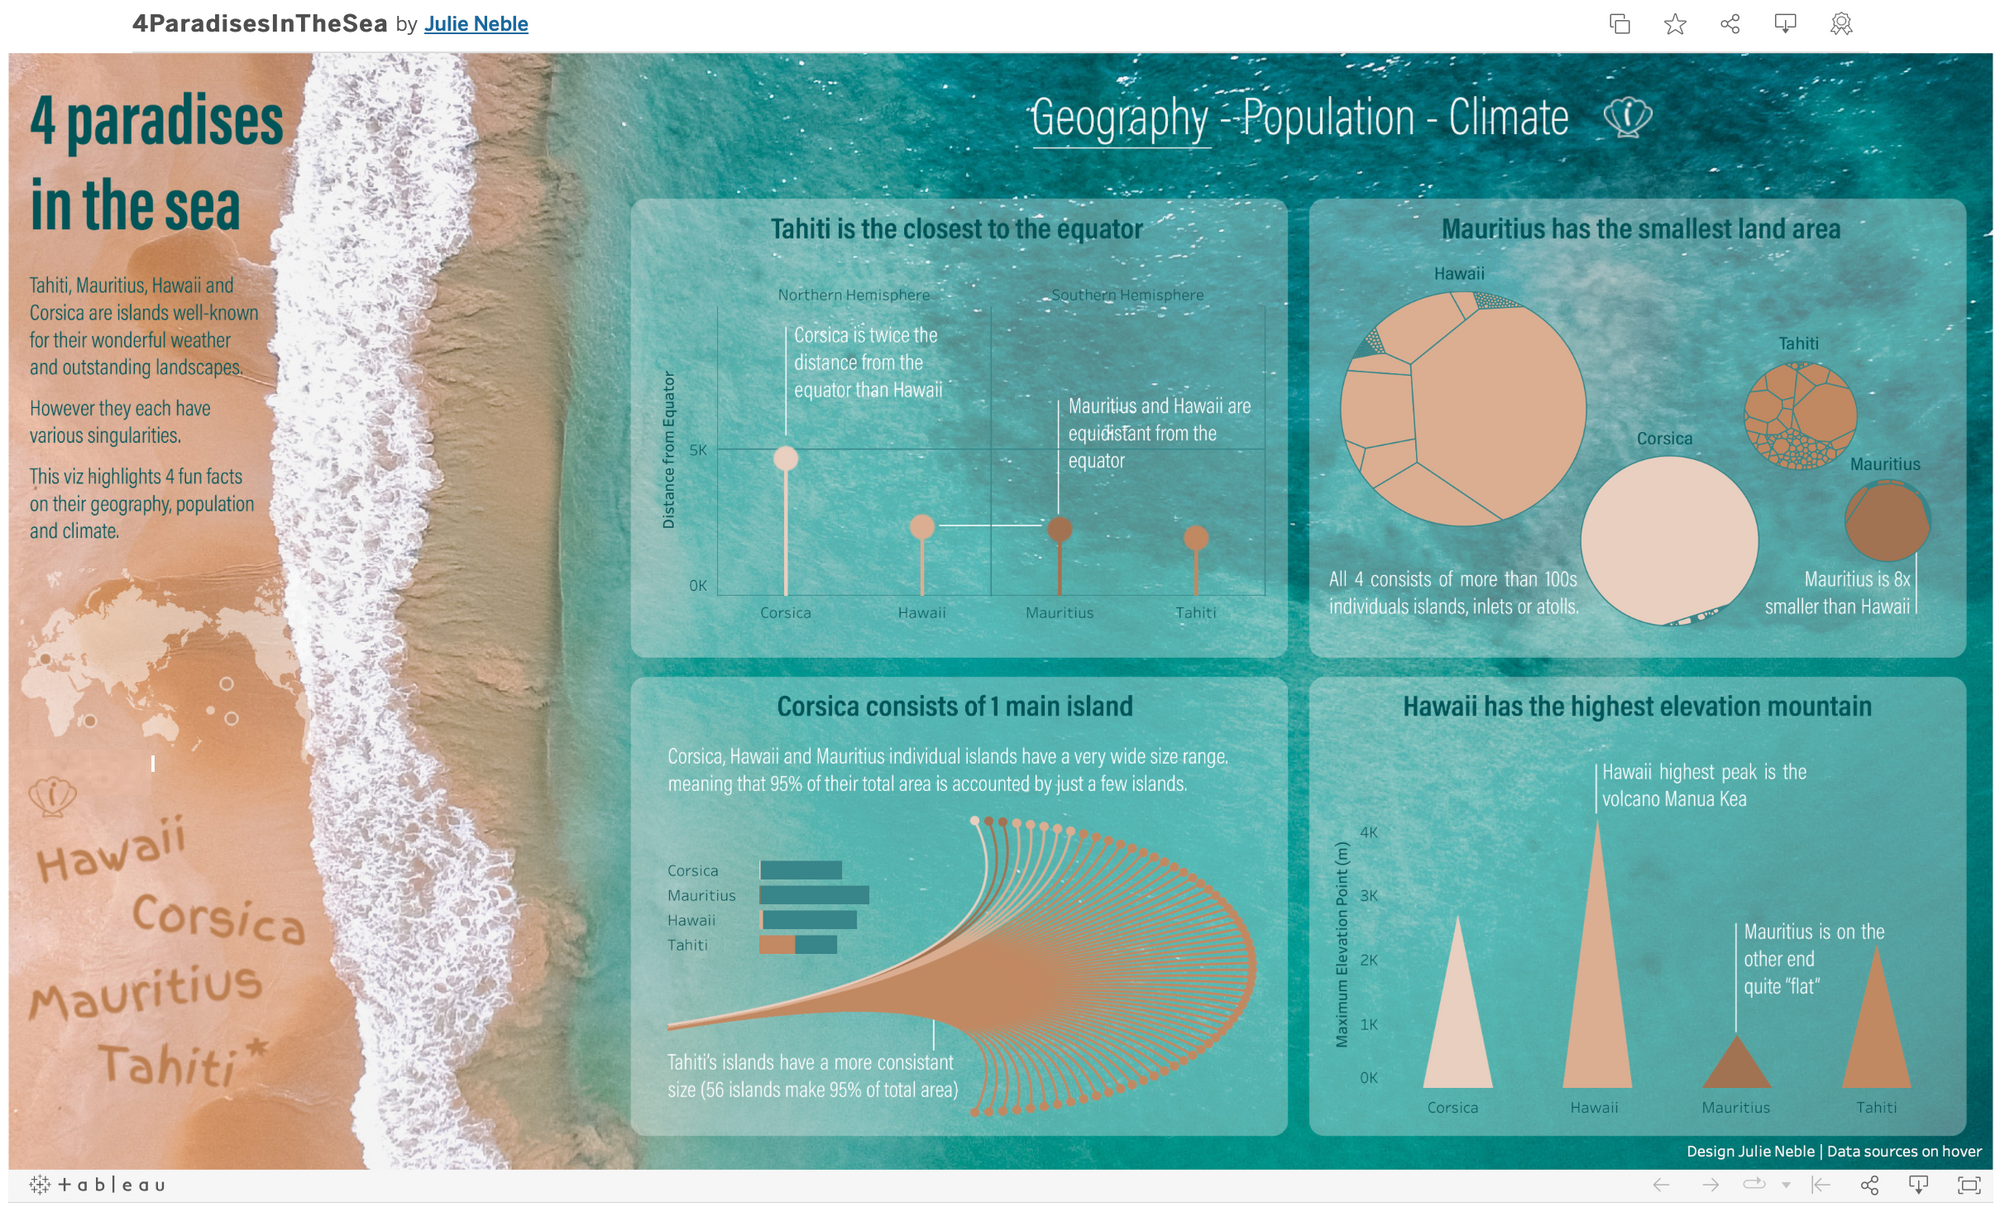
Have you ever played around with the idea of pepping up your dashboard with a nice looking image, but then struggled to make it look good and ultimately threw in the towel on the whole concept? No? Well anyway, now that you're here you'll hopefully be spared the experience. The image above shows the dashboard "4 Paradises in the Sea" by Julie Neble by the way, and I find it a good example for how a well chosen background image can add something exceptional to a dashboard.
I just learned some simple steps for how to include an image to a dashboard. They might not constitute the best way to add a background image to a presentation, but they work and it's a quick way to arrive at a decent looking result. Hopefully they are of use to someone:
- Convert your outermost dashboard container to a floating container if it isn't already.
- Manually resize it using the layout pane to add some space for the image. E.g. set 'x' and 'y' to 50, and subtract 50 from both 'w' and 'h'. You should now have evenly spaced borders on all sides.
- Crop the image that you want to use to the exact size of the dashboard (not the container you just resized).
- Switch back to the dashboard pane and drag in an image object. Choose your file.
- Drag the image to the back (=top) in the item hierarchy of the dashboard.
- Select the floating main container and add a white background to it.
- Now play around with the opacity of the container background until you're happy with the amount of transparency of your dashboard relative to the image.
- Alternatively apply the background to selected parts of the dashboard only, as Julie has done in the example above.