


R is a programming language that was developed at Bell Laboratories by John Chambers and colleagues (according to the page r-project.org). R is really helpful if you are working with statistical data or forecasting data. R is a free software, you can download R from this page.
In some complicated problems in statistics like ANOVA, regression, T-test, and normality test, you can use R or Python to solve the problem. In the previous blogs, I shared how to apply Python script in Tableau Desktop. If you haven't read them yet, you can read them here (Part 1, Part 2).
In this blog, I am going to share:
1/How to install R, install packages, run R script in R
2/How to connect Tableau Prep Builder, Tableau Desktop with Rserve
3/ Data Structure when input/output the data in the R script on Tableau Desktop
4/ How to write the R script to return values
Are you ready to start with R now? Let's get started!
1/ Install R, packages and run R script in R
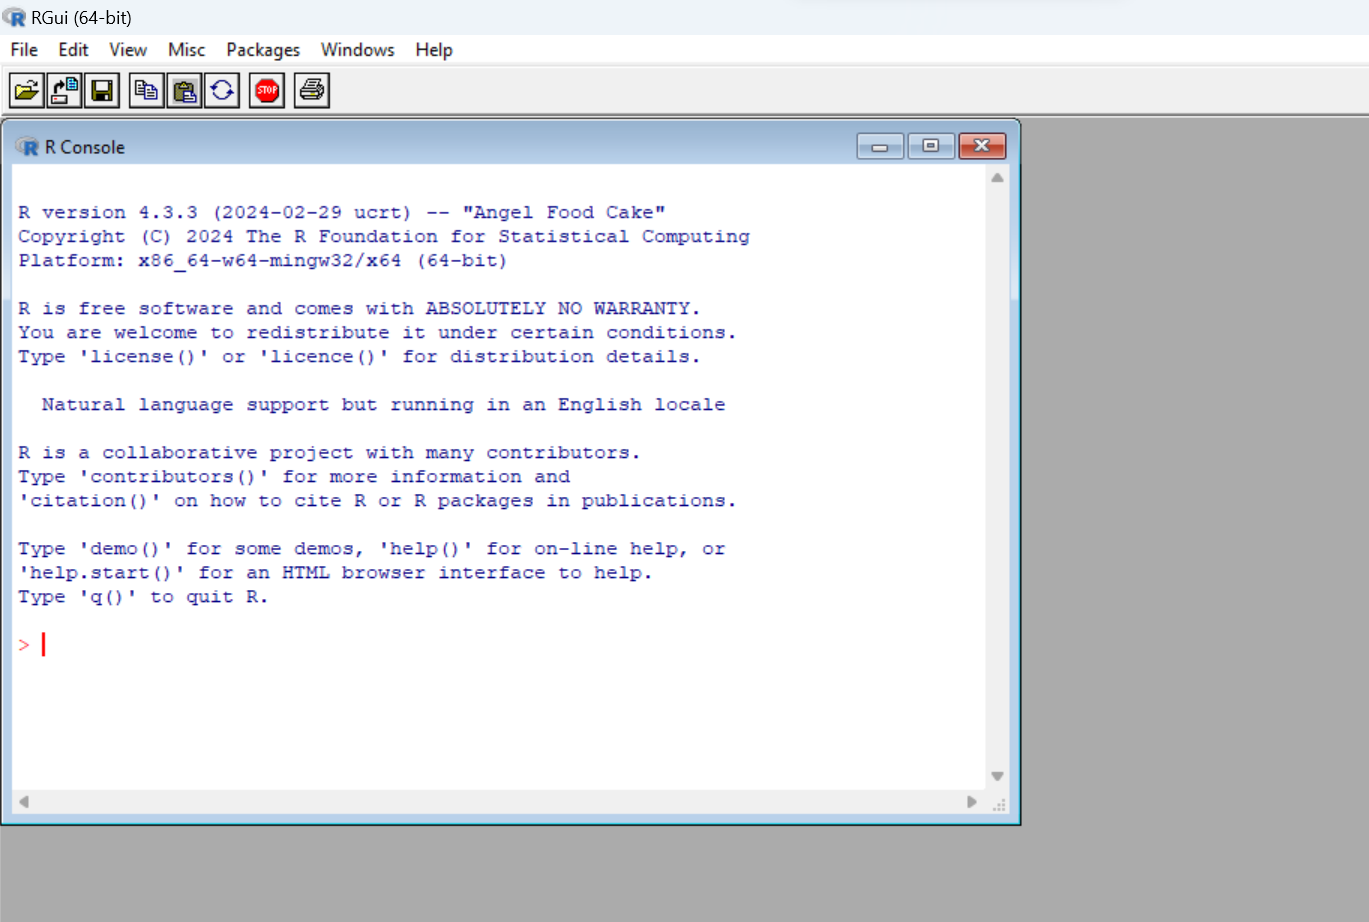
You can start downloading R and install it from this link. After installing R on your computer, open the R executive file. The R Console interface would be the same as Figure 1 below.
Next, we are going to install some R packages and launch the package. There are 2 ways to do that:
Option 1: Install and load R packages from the menu
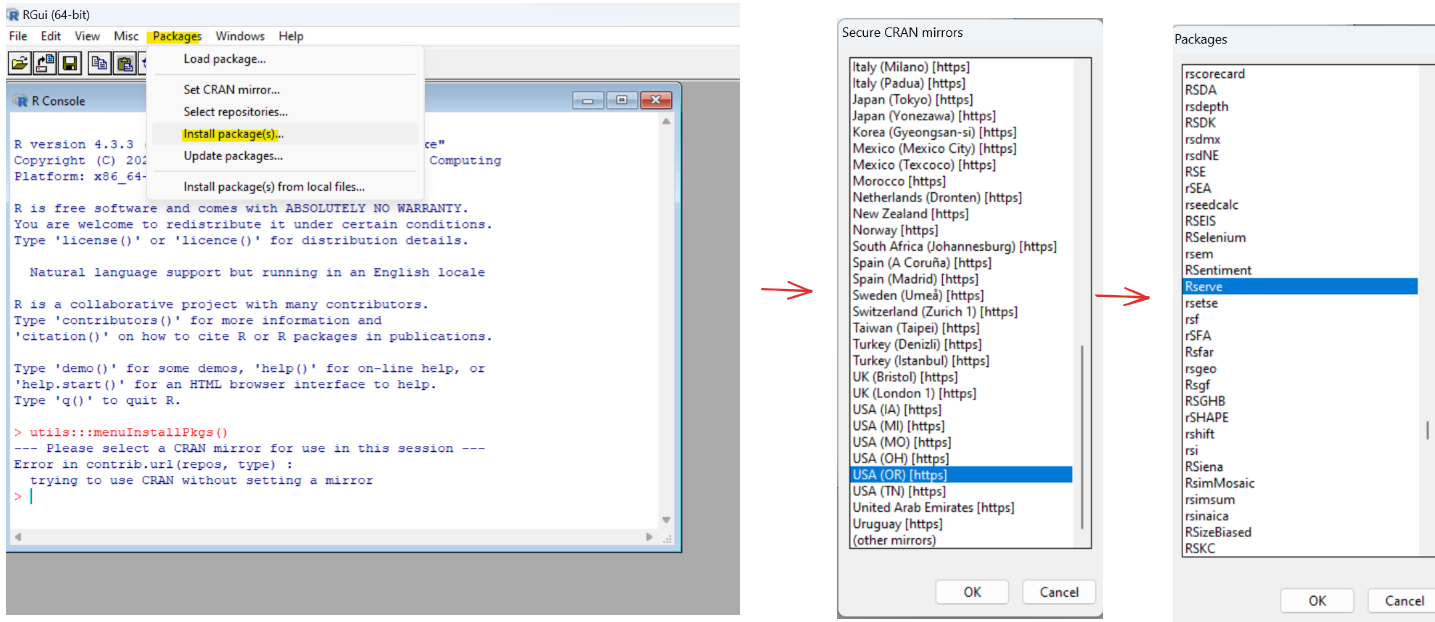
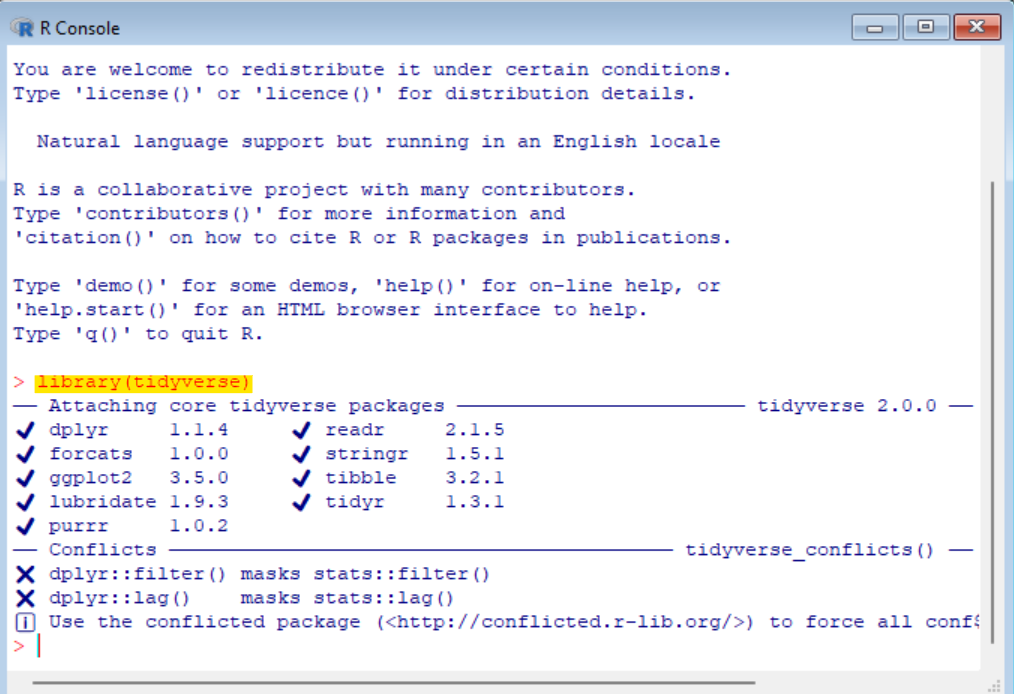
On the top menu, click on Packages menu > Install packages(s) to choose your closest location > then choose the packages you want to install. You must install Rserve package to run R Script on Tableau Desktop. Besides that, I also install tidyverse, dplyr package (Fig. 2).
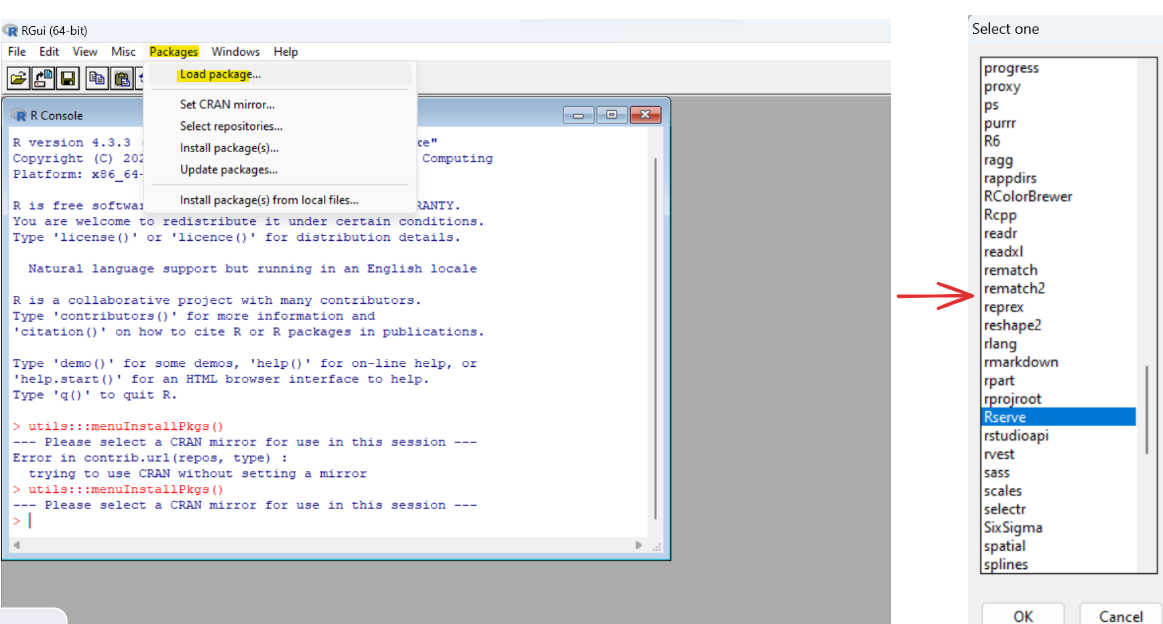
After you install the package, you don't need to install it again when you open R. However, you need to load the package whenever you use the function in that package. To load the package, you also go to the Packages menu on the top > Load package ... > then choose the package from the list that you installed (Fig. 3).
Option 2: Install and load R packages by typing the command line
Another option to install and load R packages is typing the command line in the R Console.
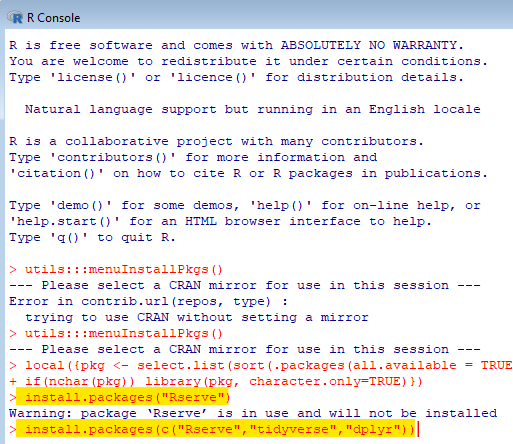
- To install only 1 package, you can use the command: install.packages("<name_of_package>") (Fig. 4, first highlighted line)
- To install more than 1 package, you can use the command: install.packages(c("<package_1>", "<package_2>",...)) (Fig.4, second highlighted line)
After installing the package, you don't need to install it again when you open the R console. Next, we are going to load the package. It is the same as when you import the library in Python. In R, we use the command: library(<name_of_package>) (Fig. 5).
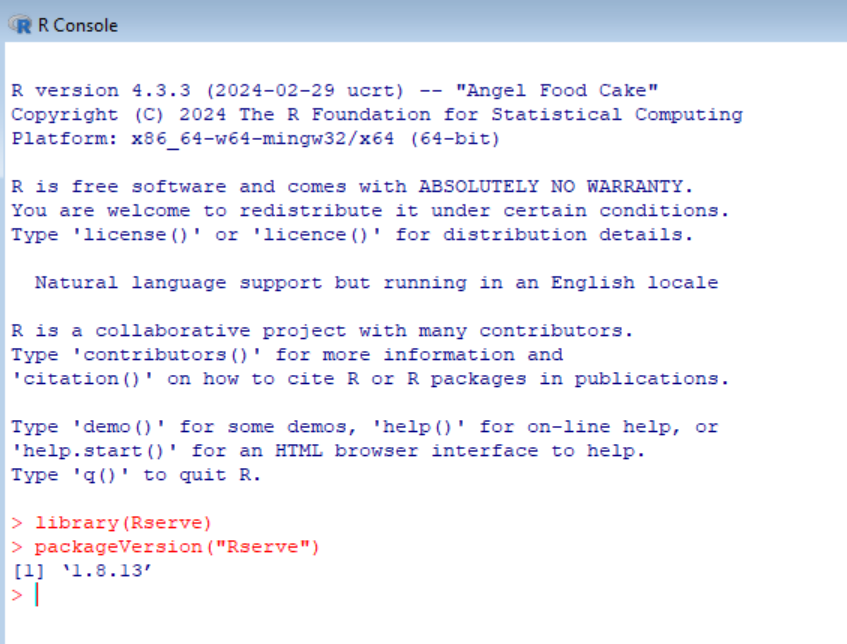
Depending on the library, it will show the package version after loading the library. Usually, it won't show the package version. In R console, to show the package version, we type: packageVersion("<name_of_package>") (Fig.6)
Now, we installed the package and loaded the package in R Console. Next, we need to run Rserve() function to run Rserve on your local machine. In R Console, you only need to type Rserve() (Fig. 7)
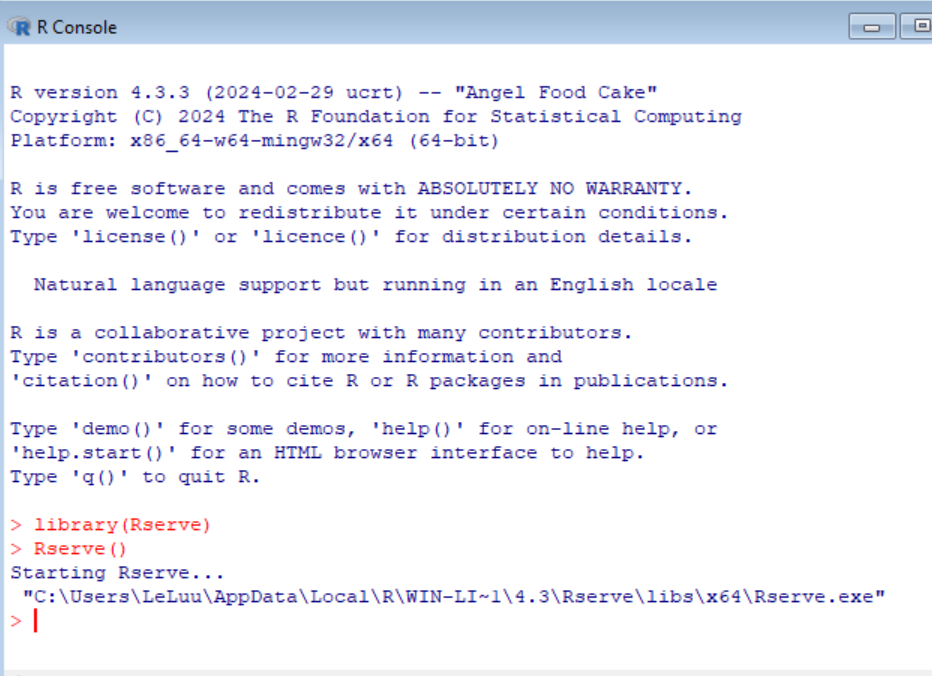
Then it will show a line Starting Rserve to let you know that R Console is running the Rserve executive file from a directory path in your local machine.
2/ Connect Rserve in Tableau Prep Builder and Tableau Desktop
We can run the R script in both Tableau Prep Builder and Tableau Desktop. However, there is one difference point in writing R script between Tableau Prep Builder and Tableau Desktop that I will mention later in another blog (part 2).
Important note: You must load Rserve package on R Console or R Studio and run the Rserve executive file before opening Tableau Prep Builder or Tableau Desktop to connect with Rserve.
Tableau Prep Builder
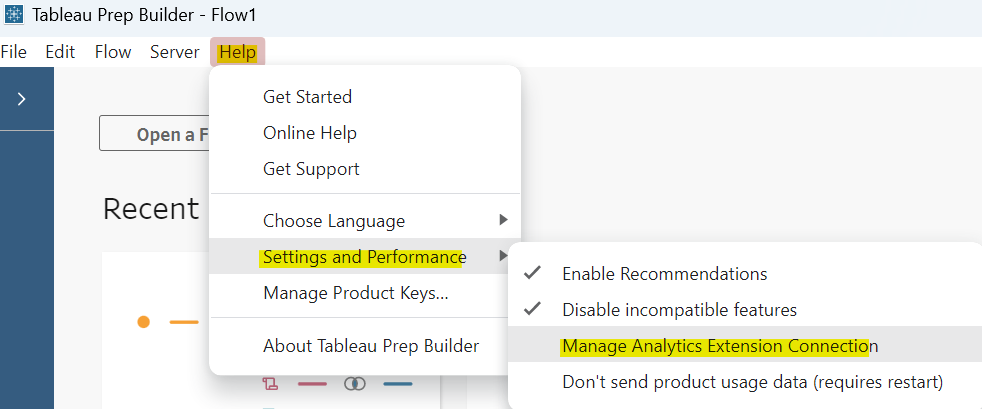
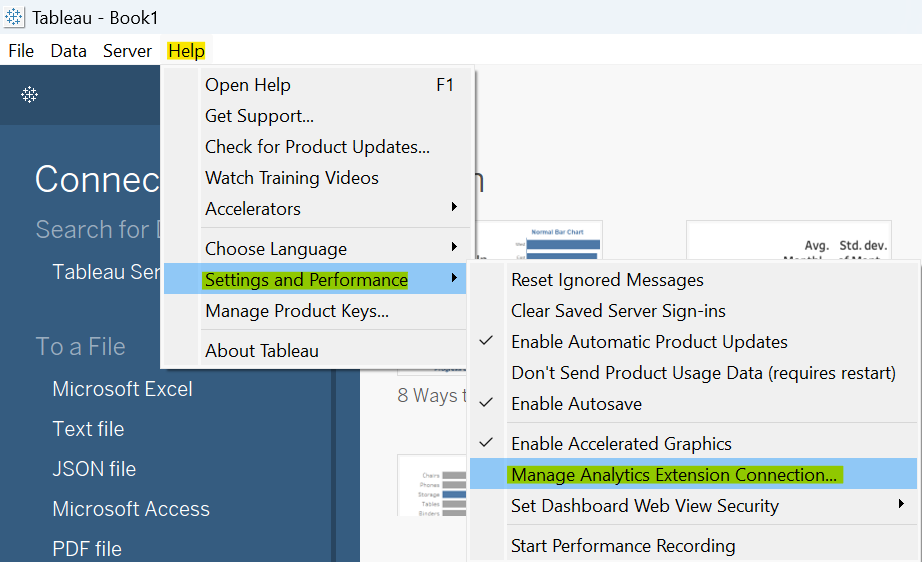
Open Tableau Prep Builder, on the top menu, choose Help > Settings and Performance > Manage Analytics Extension Connection (Fig. 8)
Then, the Analytics Extension Connection window opens. In the "Select an Analytics Extension" drop-down menu, choose Rserve. By default, if we run Rserve on our local machine, we put localhost in the Server box and with Port 6311. (Fig.9)
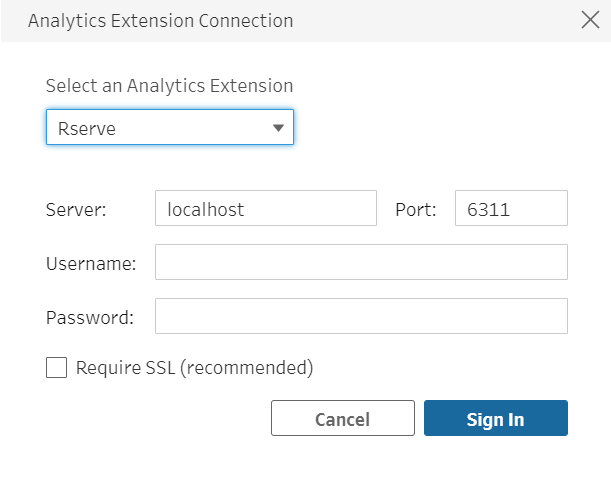
Note that, in Tableau Desktop, we have a Test Connection button. But in Tableau Prep Builder, we don't have that button to let you know whether it was successfully connected or not. So we only need to click on the Sign In button.
Tableau Desktop
In Tableau Desktop, I also do the same steps as I did in Tableau Prep Builder. I go to the Help menu > Choose Settings and Performance > Choose Manage Analytics Extension Connection ... (Fig.10)
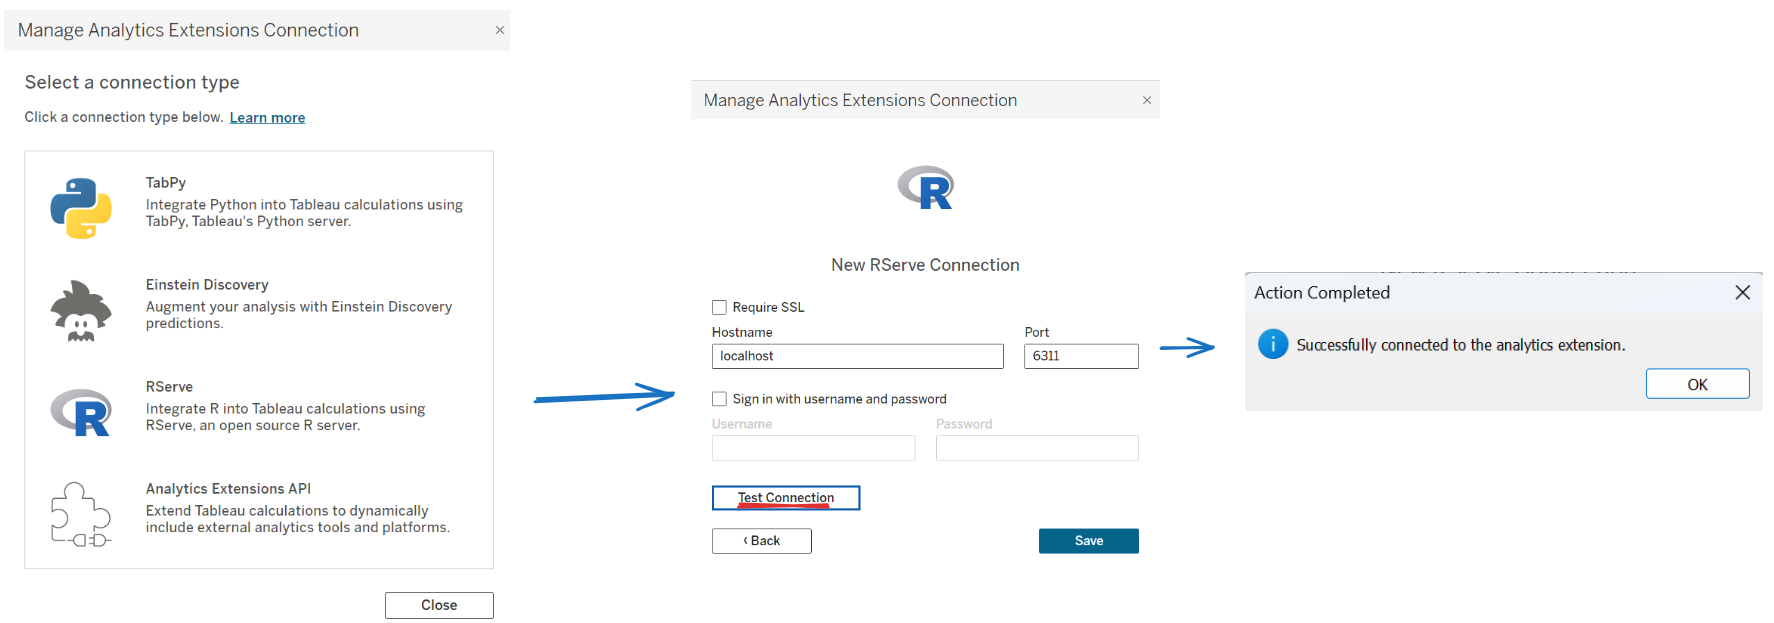
The Manage Analytics Extension Connection window opens, choose Rserve > type localhost in Hostname and 6311 for Port > click on Test Connection. If you see the pop-up window showing successfully connected to the analytics extension, it means you connected to Rserve already (Fig.11).
Now, you are ready to put the R script into Tableau Prep Builder or Tableau Desktop.
In this blog, I shared how to install, load packages, and run the Rserve executive file in R. In Tableau Prep Builder and Tableau Desktop, I also showed how to connect to Rserve with the hostname and port number.
In the next blog, I am going to share the data structure when inputting/ outputting data from R and how to write the R script to return values in Tableau Prep Builder and Tableau Desktop.
I hope this blog is helpful to you. See you soon in the next blog!