First Steps with Alteryx
Today I had my first encounter with Alteryx, with the help of Alteryx Ace, Chris Love. It consisted mainly of introducing DS9 to the basic functions of Alteryx and its importance. By the end of the day, I was able to:
• pivot data
• change data types
• remove unwanted/irrelevant fields
• cleanse data, to create identical text formats for Tableau to analyse correctly
• change nulls to zero
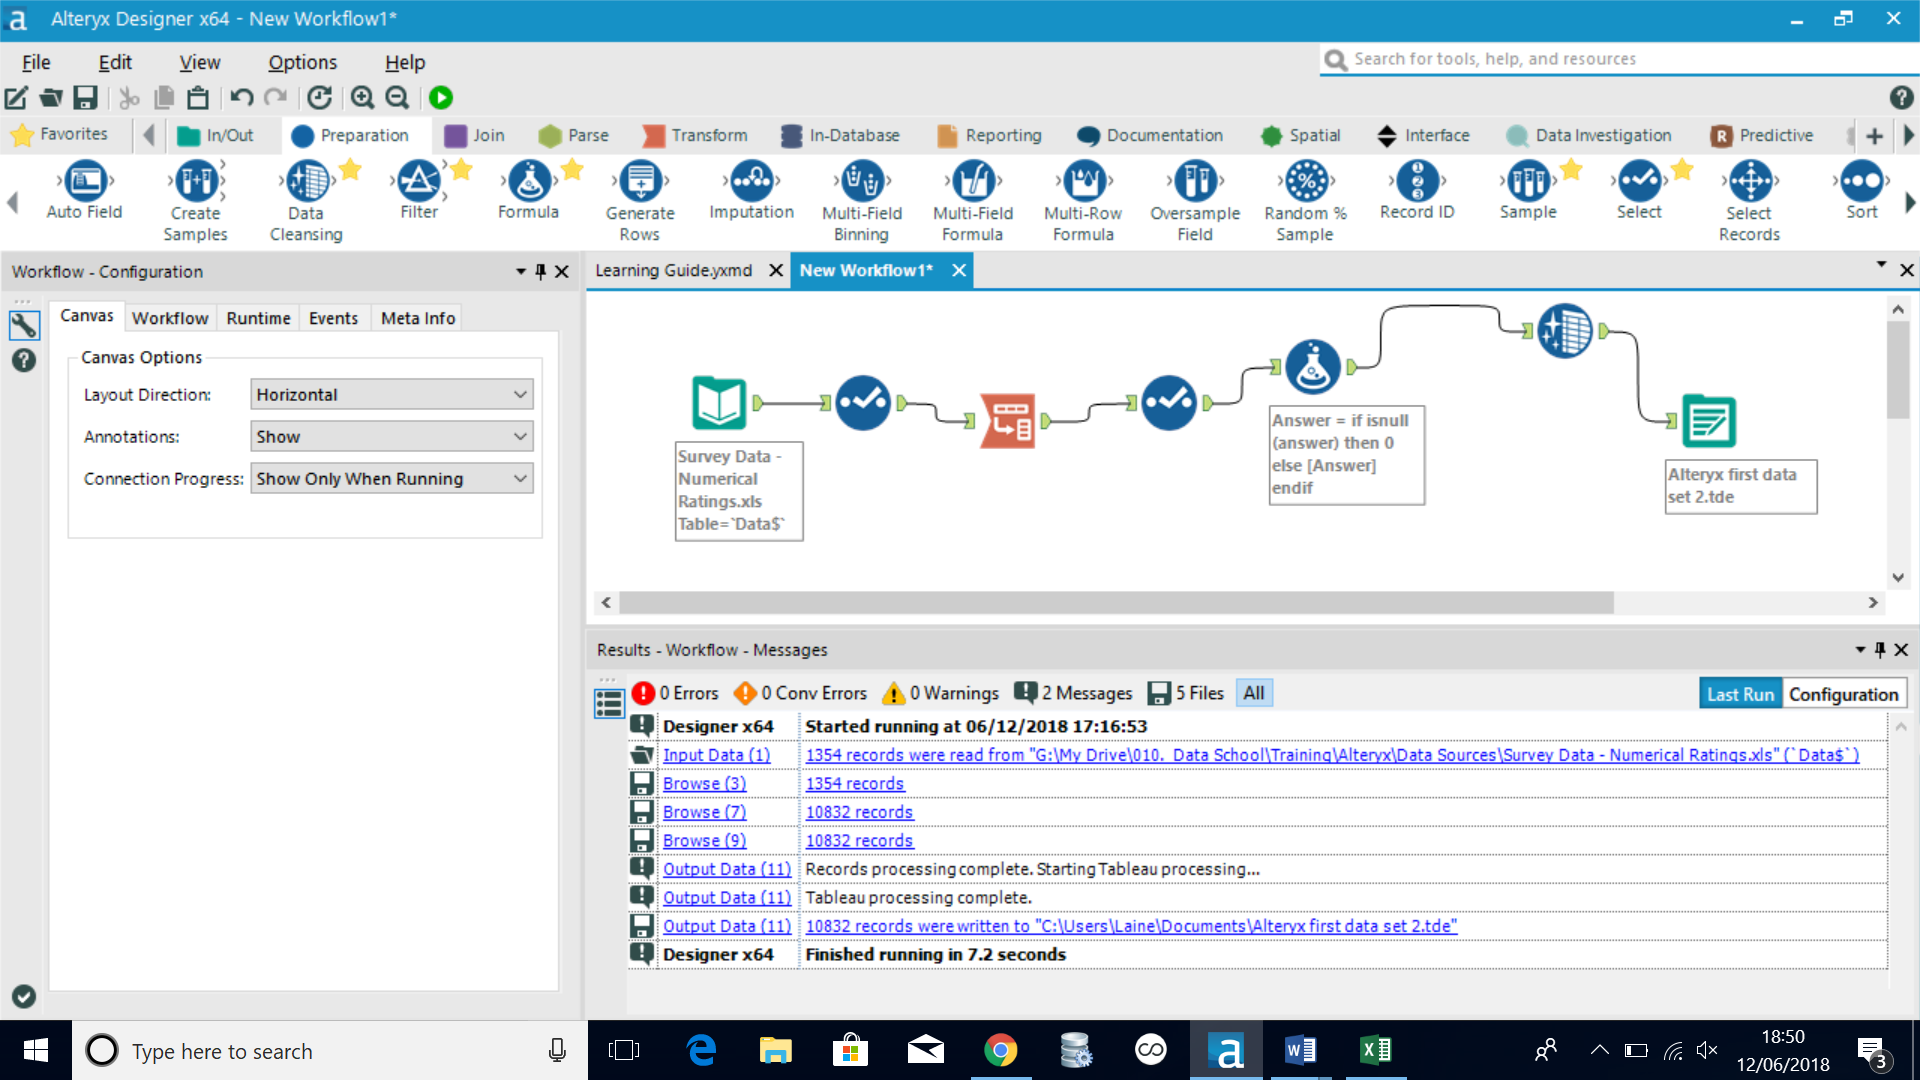
This is what my first workflow book looked like, which encompasses all the skills I learnt above.

1) Pivoting
First, you would need to use the input tool to add the original dataset. Second, drag the ‘transpose’ tool from the toolbar onto the view. In the configuration box on the left, under ‘Key Fields’, select all the fields that you don’t want to pivot, but you would want to keep in your data. Next, under ‘Data Fields’, select the fields you want to pivot. Then go ahead and click ‘Run’ to make sure it all works.
Pivoting in Alteryx is much better than doing it in Tableau, as you can only pivot several fields in one time whereas, in Tableau, you would need to do it one data set at a time.
2) Changing data types
To change data types, you need to drag the ‘Select’ tool into the view and link it to the chain. In the table on the left-hand side, under ‘Type’, you can then change the data type.
Tip: when changing data into integers, consider using an appropriate size e.g. ‘Int 16’, ‘Int 32’ and ‘Int64’. The higher the number, the higher number you can use e.g. 3,000,000,000. However, to save memory space, ensure that you adjust the integer size, either 16, 32 or 64 to make the right fit for your data.
3) Remove unwanted fields
You can do this in 2 ways. First, you can do this at the very beginning, using the ‘Select’ tool. You can then easily deselect the field you don’t want in your final dataset. On the other hand, you can also do this alongside the ‘Transpose’ tool, when pivoting. You can do this by simply leaving out the unwanted field when initially selecting fields under the ‘Key Fields’ section.
4) Cleansing Data
One problem that I faced when analysing this data on Tableau was that some of the data names were capitalised and others not. This caused it to view the data as two separate entities, rather than being part of the same data entry. To rectify this, you can select the ‘Data Cleansing’ tool under ‘Preparation’ and drag onto the view. On the configuration box, you select the field and click on the box at the bottom ‘Modify Case’, and finally select ‘Title Case’.
5) Changing Nulls to Zero
One way to get rid of nulls is through filtering. However, we have only been taught to filter out fields as a whole and not just the data inside them. One way to get around this problem is by changing the nulls into zero. To do this, you need to use the ‘Formula’ tool.
You then use the following formula:
* If isnull [Value] then 0 else [Value] endif *
Once you do this, you then up with a workflow like my first one
I look forward to learning more about Alteryx this week and to see what else I can do with further data analysis tools.
