For the final day of my dashboard week, I made a dashboard where users can pick from a selection of appearance features, and a boy icon on the dashboard will change to fit their selections. It is quite tricky to match shape files to rows in Tableau; therefore, I figured I would write it down in case anyone is interested.

Link to my dashboard: https://public.tableau.com/app/profile/karina.chan/viz/Doyouhaveabillboardtasteinboys/Billboard
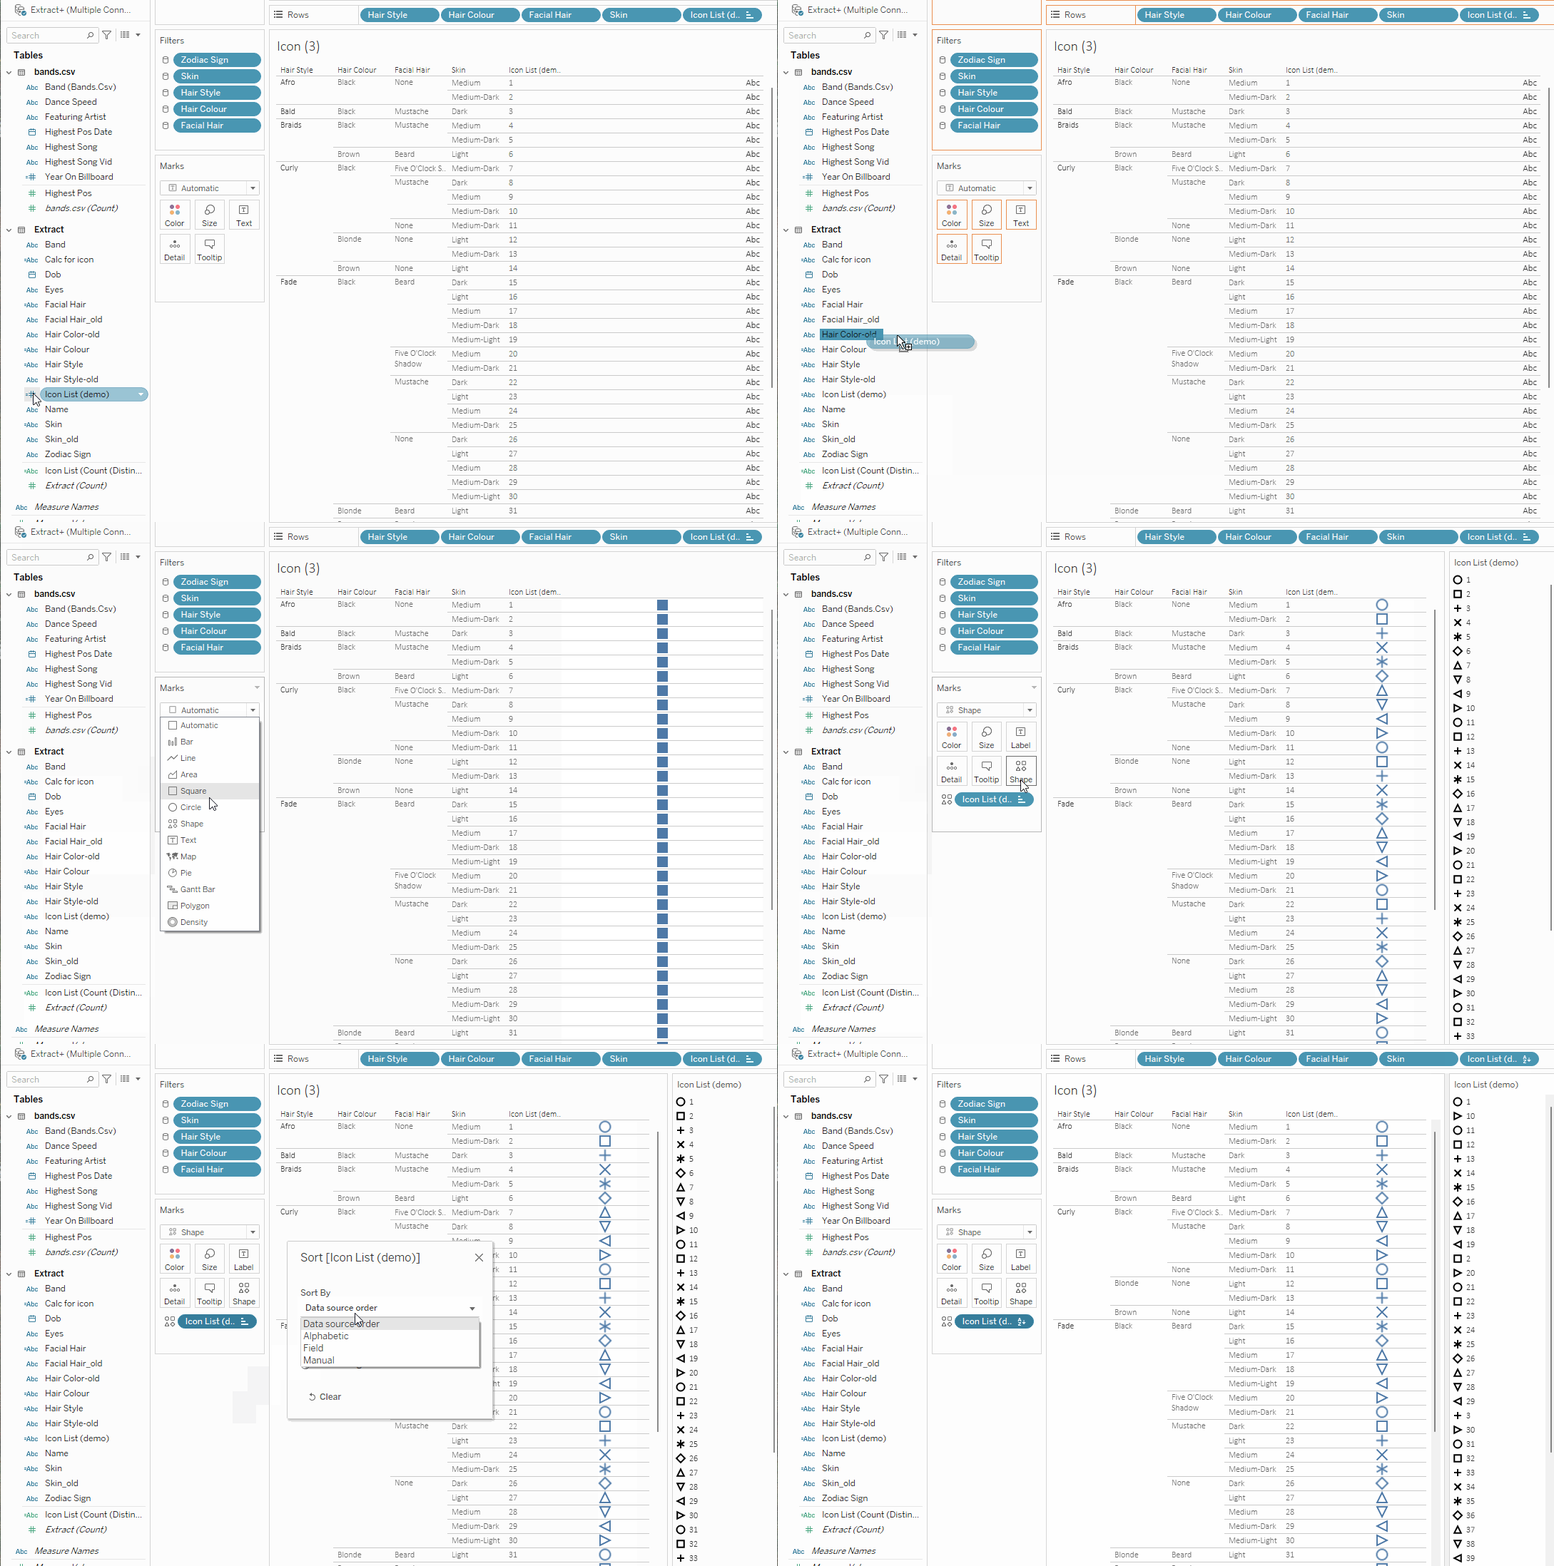
It goes without saying that you first need to collect all the shapes you need. In my case, I have one icon for each combination of appearance features. When assigning shapes for rows, the order of which the shapes are saved is very important. And you should decide it from the beginning. I started this step by pulling all the dimensions I need onto a sheet in Tableau, and that is the order that I'll be assigning my shapes, from top to bottom.

After you have your list ready, you need to give the table an ascending list of row id. The row id will be used to assign the shapes to the rows, so it has to be unique for each row. And the reasons it has to be an ascending list is because you want to keep the same order in the legend when you pull in shapes.
I made my list of numbers in Alteryx by sorting the table the same order as in Tableau, and then add a record id starting from 1. At this point you can output the table, and then join it to the original data set in Tableau so you can use the record id. But because I do not want to add an extra data source into Tableau, I wrote a formular in Alteryx to generate a list of calculations that I can then use in Tableau to generate my row id.
'ELSEIF [Hair Style] = "' + [hair_style] + '" AND [hair_color] = "' + [hair_color] + '" AND [Facial Hair] = "' + [facial_hair]'" AND [Skin] = "' + [skin] + ' THEN ' + ToString([Icon Order])

You should now have a list of numbers attached to your table. And this is the order that you want to save your shapes. In my file, 1.png is matching the description of the 1st row. Remember to save your shape file as number like how I did, or else Tableau will not read the files as the order you arranged. When the file is ready, drop the file in Document -> My Tableau Repository -> Shapes.


Once the custom shapes are ready, follow the following three steps.
- Change the data type of the row id to string.
- Put row id onto the sheet as shapes.
- Sort the row id by alphabetical order.

You'll notice that the order in the legend changed to 1 ->10 ->11, which is what we want, because this is how Tableau reads in the shape files. After that, it is simply the case of using the Assign Palette function in Edit Shapes, then you are good to go! I hope you find this tutorial helpful.

