Coming from a non-coding background, thinking about building an app certainly freaks me out a little. Fortunately, Alteryx has built in tools that will help you exactly with that.
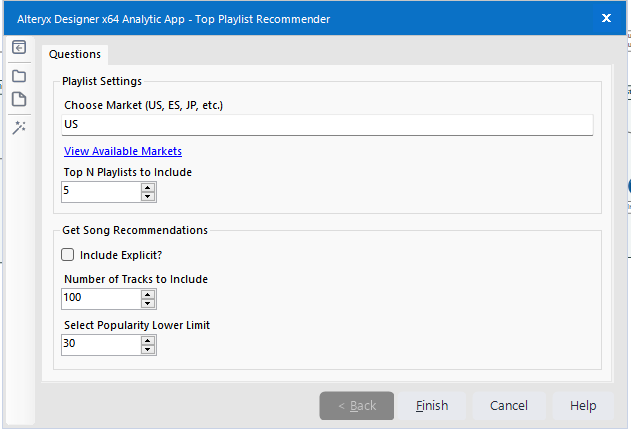
An Alteryx Analytic App will look like this when it is opened. Using regular Alteryx workflows, we are able to use Interface Tools to build an Analytics App, which basically runs a preset workflow and pulls data for the user – all without having to go into the Alteryx Designer.
The example I'm using is an app I've made by scraping data from Spotify's API, it contains data on the top recommended playlists from Spotify. This blog will touch on the Text Tool, Numeric Up Down Tool, Checkbox Tool and Error Message Tool.
Interface Tools- How they look like and where to find them?
First thing's first, what are the components to designing an app? Alteryx has the Interface Tab which provides an array of tools that could be used to configure how you want your app to look like.

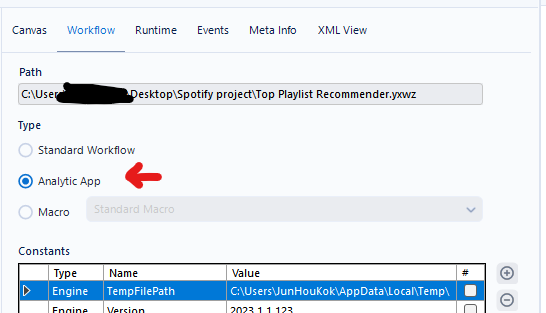
When you drag an interface tool (except macro tools) into the view, Alteryx will switch modes to Analytic App. Note that you can simply change it back to a standard workflow if you want.
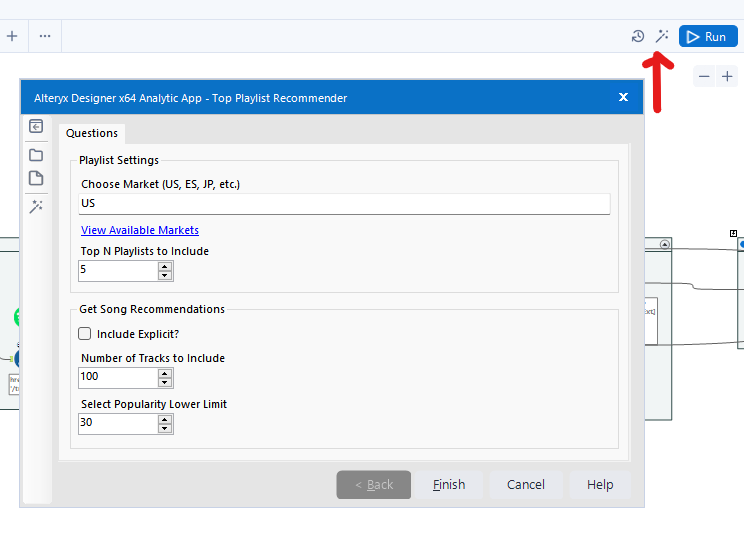
After that happens a wand icon will appear next to your run button. That allows you to run your app, and an app window will pop up.
Configuring Interface Tools- How do they work?
First you'll have to drag the tool into the canvas. In this step, I've pulled the Text Box tool into the view. Other workflow tools in the view will normally have two configuration options on top: a "Q" and a "lightning bolt".
The Q and lightning bolt both accept inputs and relay information to the tool, telling it how to work. The only difference is that the Q accepts zero to many inputs values; whereas the lighting bolt, used more commonly allows a more flexible way to configure how the update action works.
When connected to the lightning bolt, an Action tool will pop up and that will be the way you can configure how the update action works.
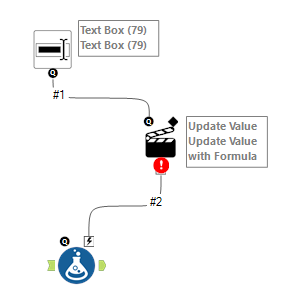
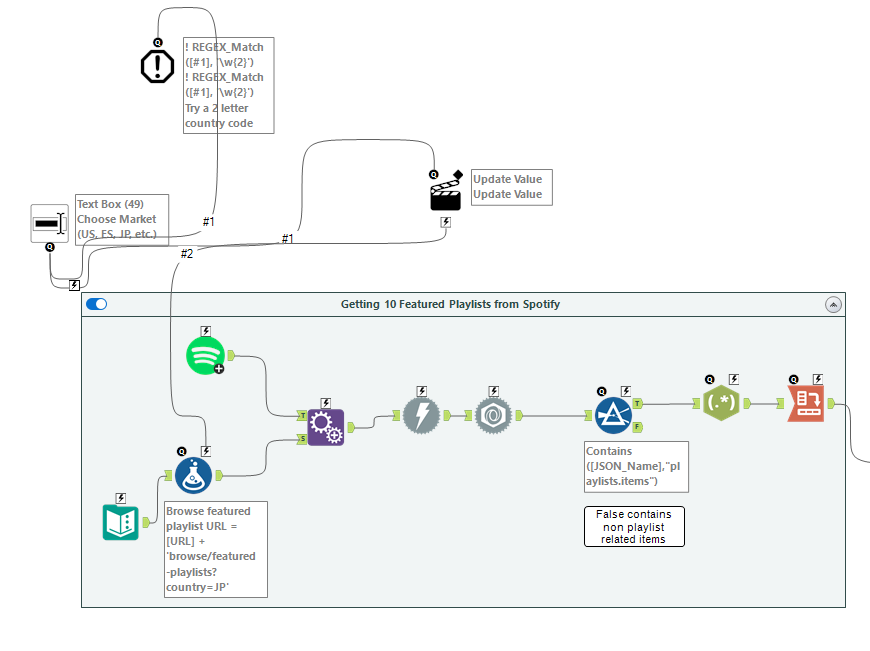
A sample workflow with some Interface tools configured will look like this:
Textbox Tool- Let your user input their answer.
As the name suggests, the Textbox Tool allows the developer to let their user input text into the app. The shows a workflow that extracts 10 featured playlists from Spotify. The Textbox Tool is configured in a way that lets the user change the available market they want to extract from.
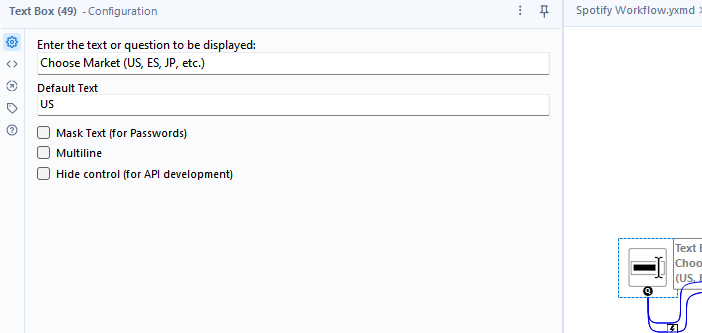
Looking at the configuration pane with the Textbox Tool selected, the developer can enter a text or question to be displayed, and also include default text as sort of a user experience measure.
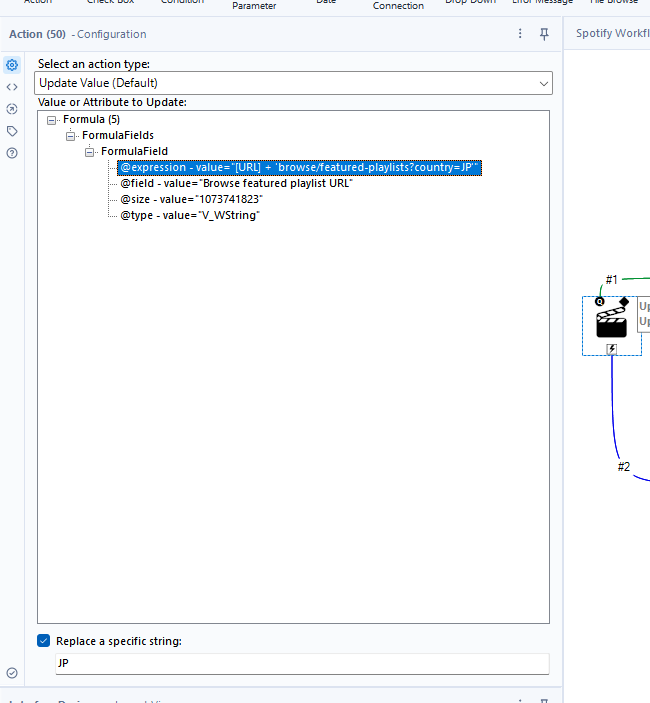
The action tool's configuration when looked at shows the developer the option to choose and manipulate which section of the tool it is connected to. The example below shows that the action type is set to "Update Value" and the field that is being updated is a specific string within the formula field of the Formula tool.
Numeric Up Down Tool- Let your user choose a number
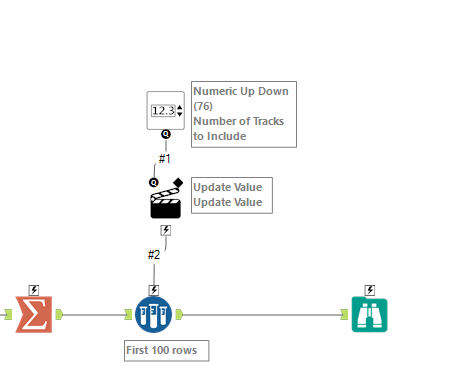
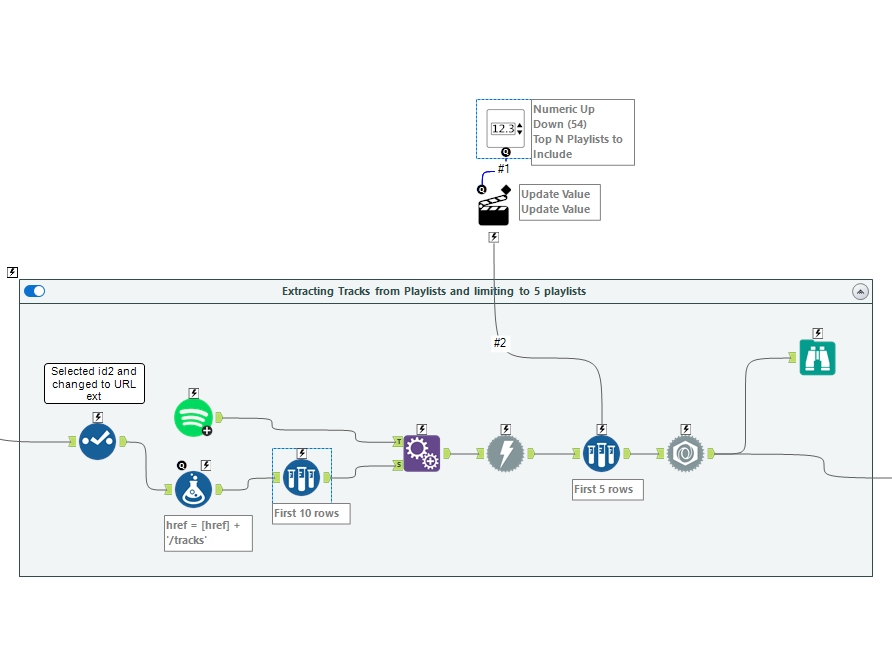
This tool is fairly simple in the sense that it is purely about letting your user choose what number they want to use for their extract. The workflow below lets the user choose the number of playlists they want to limit to extracting for their final output result.
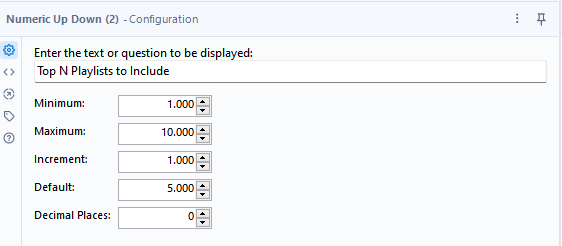
Looking at the configuration pane, you will again be able to select how the text/question appears and fine tune how you'd want the user to interact with the tool.
Checkbox Tool- Useful for Boolean type flows
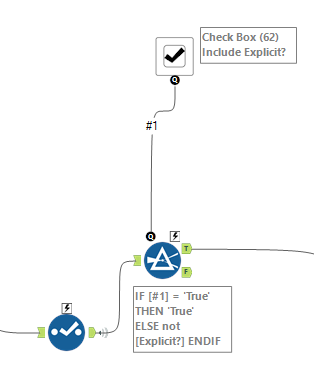
This tool will appear on your Analytic App as a simple button, albeit simple it is a powerful tool that is mostly used to switch the flow of your workflow. Attached to the Q anchor below, it does the job by simple switching between true or false. In this case, the user can choose if they want to include explicit material or not.
In the configuration pane, other than setting the text that will be displayed, you can also set a default value or have it collapse within the Analytic App when deselected, giving a less cluttered look to your app.

Since it is linked to a Q anchor, an action box isn't required.
Error Messages- Let your user know what went wrong
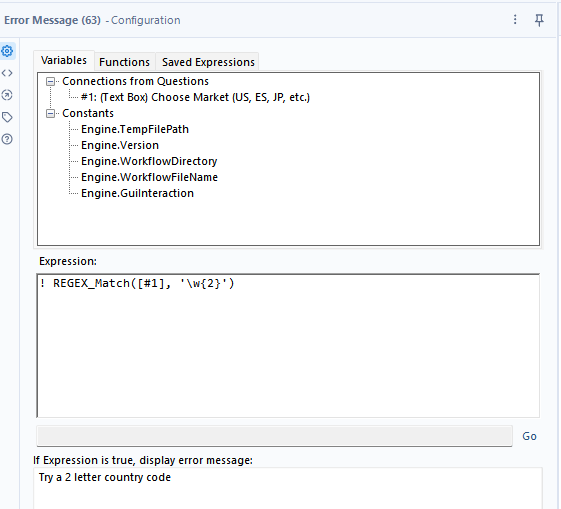
Configuring error messages are vital but often overlooked. When things go wrong, or simply, when your workflow receives values that it doesn't recognize you get the opportunity to relay a message to your user and tell them "Hey, something isn't right." or "Let's try it this way- ".
The error message is connected to your Interface tools.
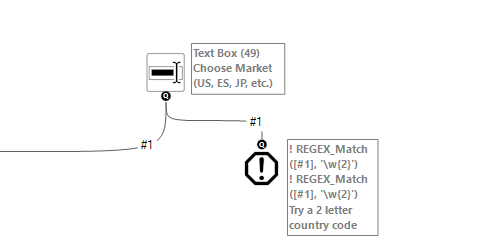
In the configuration pane, you'd normally have to set up an expression. For the example below, I've set up a RegEx expression that say, if the Textbox tool receives any input that is NOT a 2 letter word, then let this Error Message tool run TRUE and display my error message.
That's sort of it for making a simple and functional tool, never ever forget to configure your error message tool and have fun!
