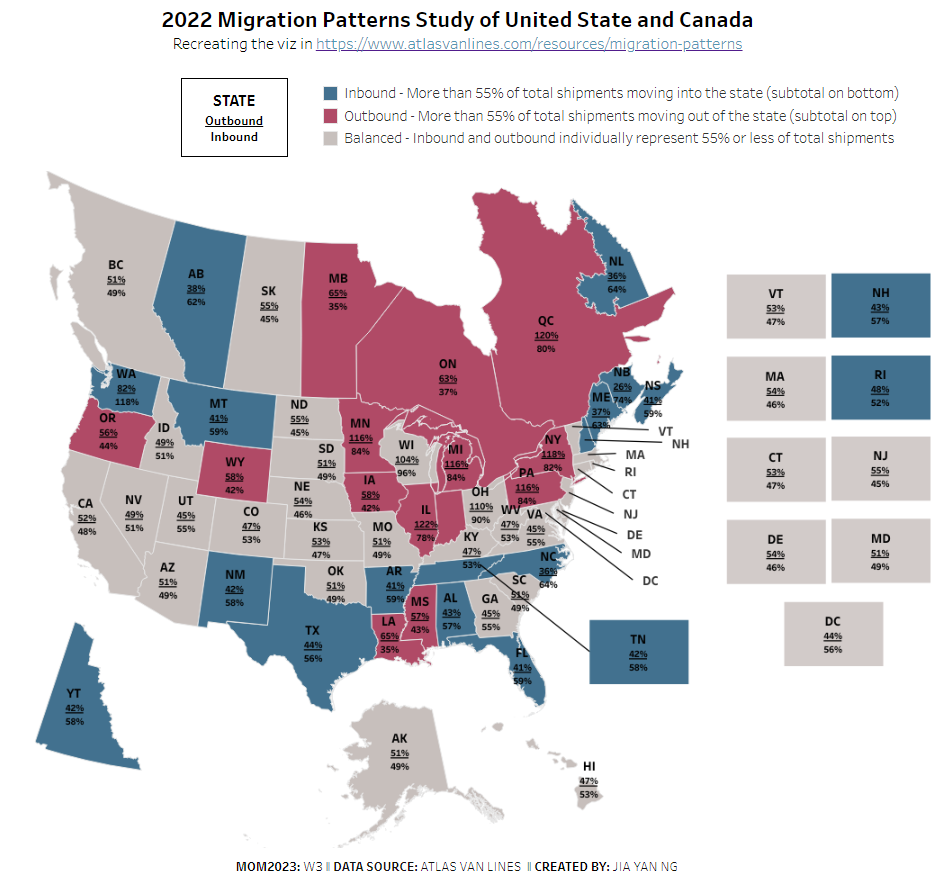
If you have plotted maps in Tableau, you've probably found your limits with the default map configuration. This past weekend, as I worked on the third week of MakeoverMonday, I attempted to recreate the map shown in the original article in Tableau. It is an alternative map projection that eliminates the effect of Alaska, Hawaii and Yukon (Canada territory) by relocating them to the bottom of the other states. I created that using QGIS.
If you're like me and using QGIS for the first time, you may stumble in the software while navigating through these existing blogposts on the subject since the plugin they used so many years ago is no longer supported in the latest QGIS version.
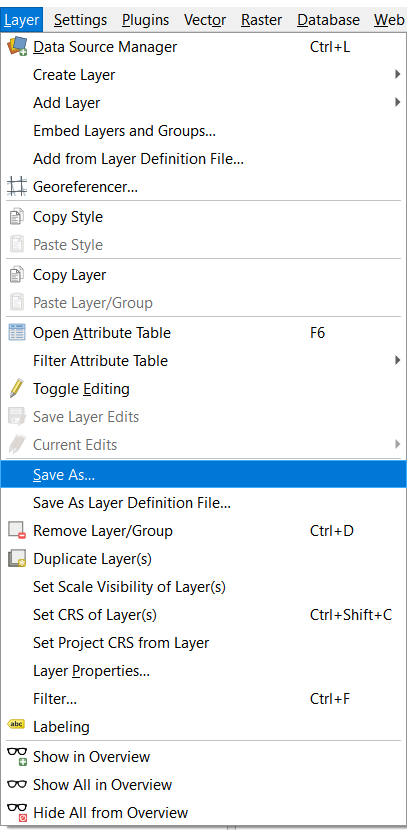
In this blogpost, I will walk you through how I created the US and Canada map in the latest QGIS 3.28.2. First of all, I downloaded the combined US and Canada shape file from this website and input the shape file into the software: Layer >> Add Layer >> Add Vector Layer and then change the projection into the preferred coordinate system by clicking the bottom right button. In this case, I used the Lambert Conformal Conic as it matches the original visualization that I was trying to replicate.
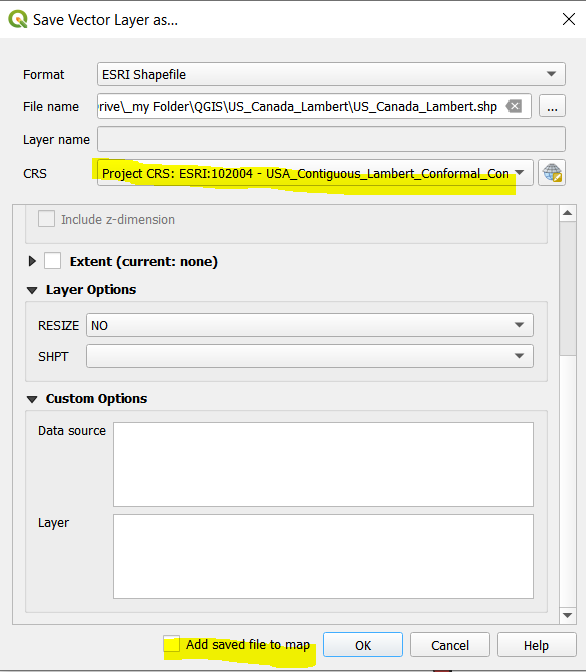
Then save the projected map into shape files: Layer >> Save As... then uncheck the "Add saved file to map" and make sure you set the CRS to your preferred coordinate system.
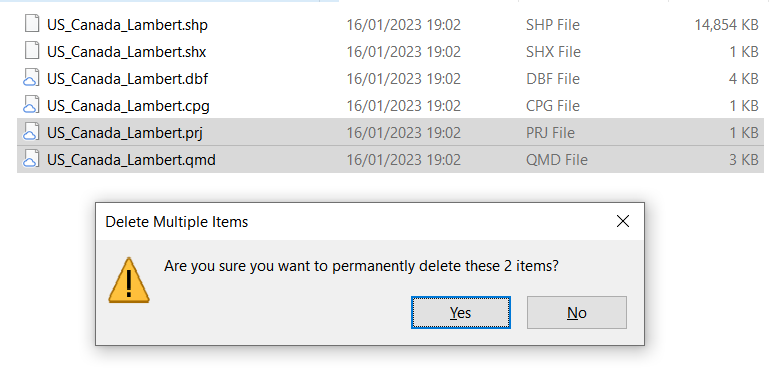
Next, we need to trick QGIS to "forget" the actual coordinates of the states we want to move around, so go to the folder where you save the shape files, then delete .prj and .qmd files.
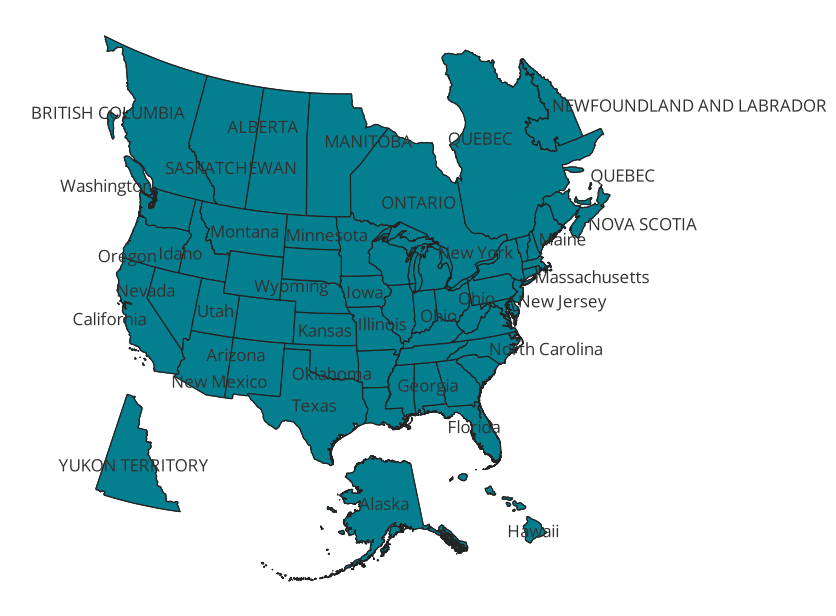
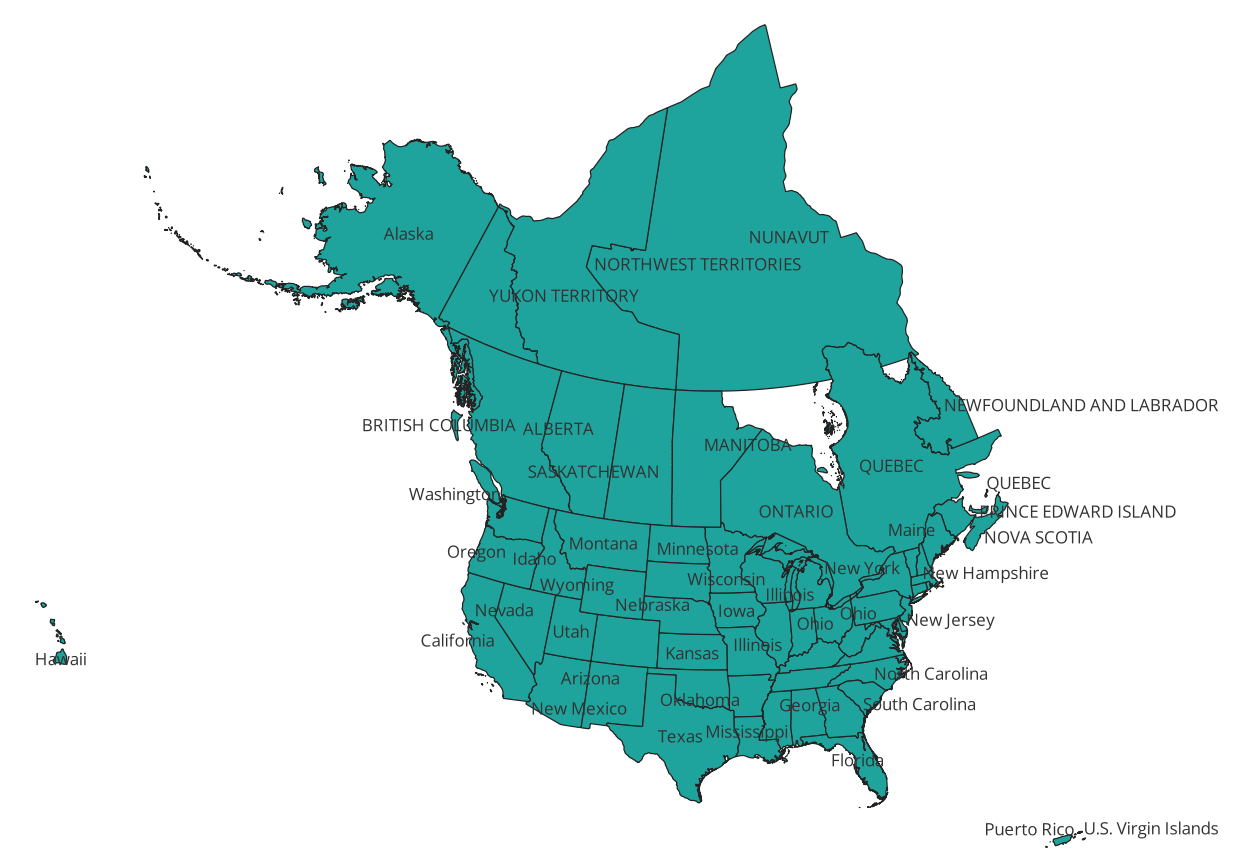
Open the newly saved shape file with the same way mentioned above, right click on the layer and click on "Show Labels", then you can see the image as below.
In order to "move" one of the states "out" of the current layer, click on "Select Features by Area or Single Click" and a single state will be highlighted.

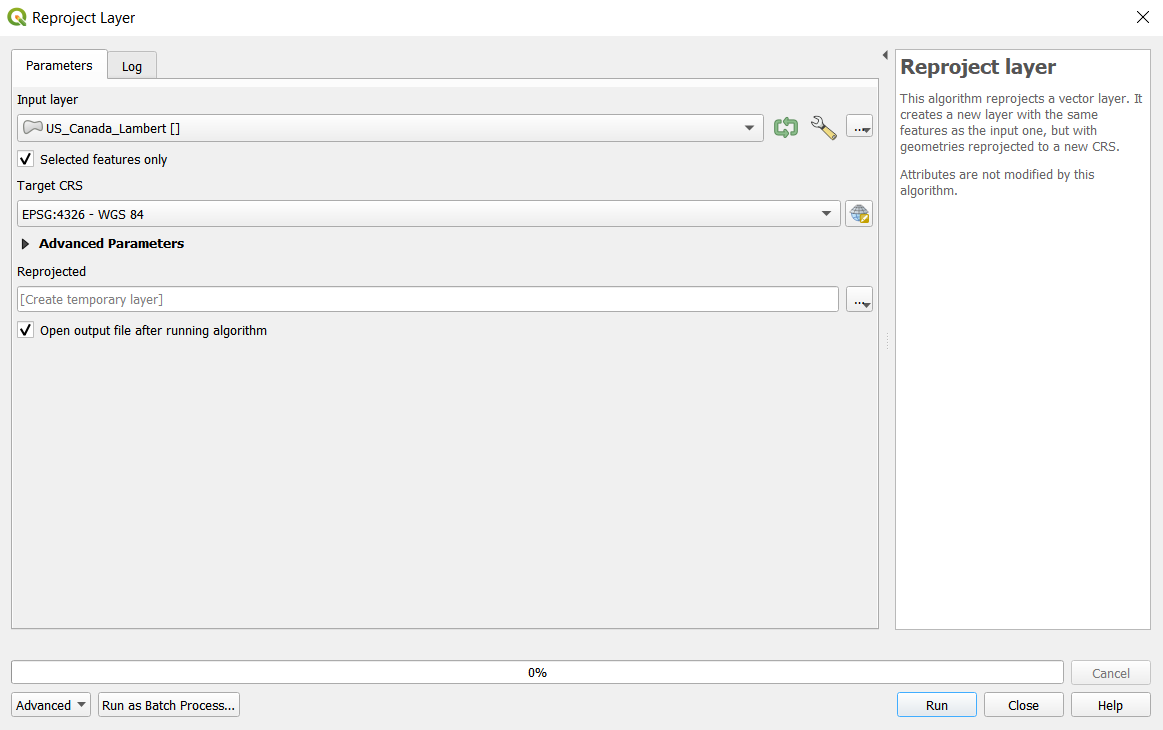
We need to reproject the layer with the selected features to "cut" Alaska out of the current map as a new layer. Click on Processing >> Toolbox and search for "Reproject layer" and then double click to execute.
In the window, make sure the correct input layer is selected and then check "Selected features only". Under Target CRS, leave it to the default: EPSG:4326 - WGS 84 and then click run. A new layer called "Reprojected" is then created.
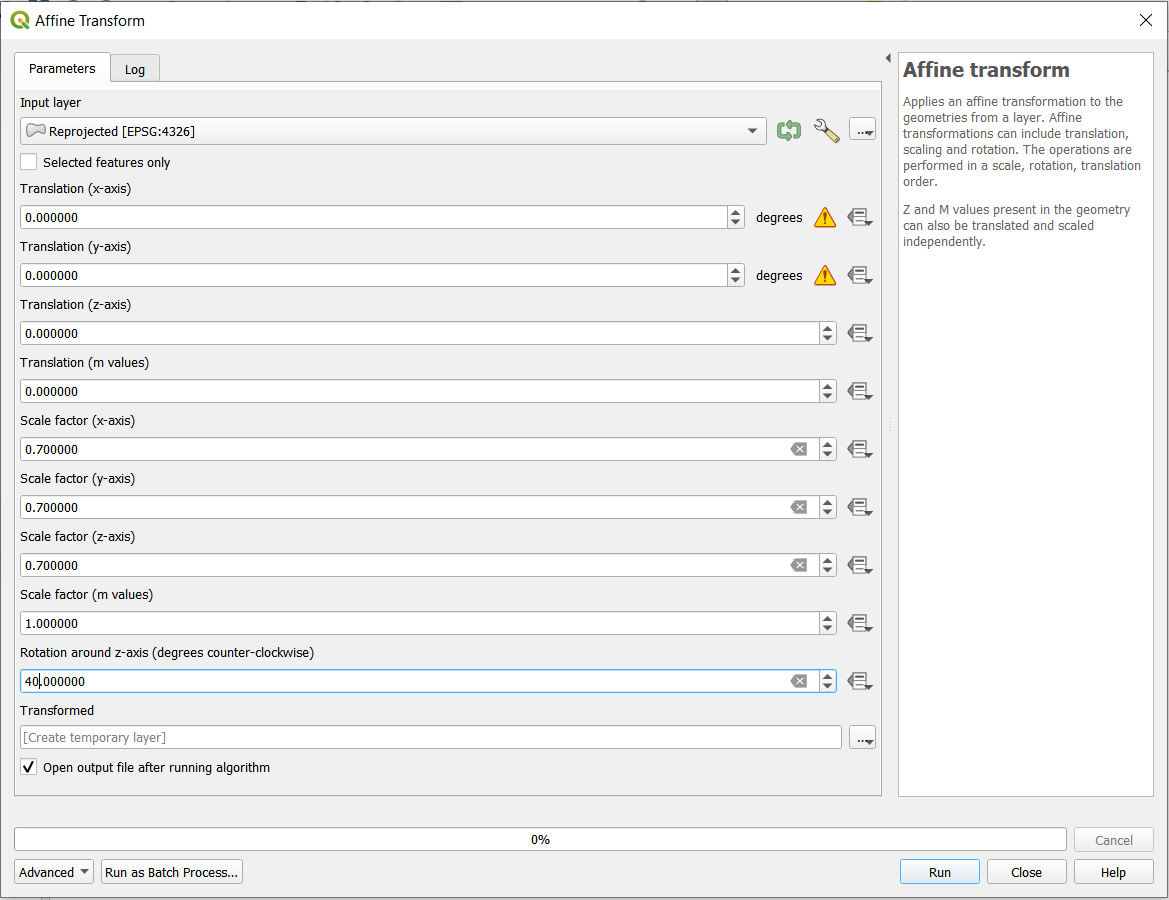
We can then move the layer to the bottom of the base map. Before that, I would like to rotate and resize the Alaska state to match how it looks like in the original viz. Under the Processing Toolbox, search for "Affine transform" and then resize the layer for all axes under the Scale Factor and rotate around z-axis. A new layer called "Transformed" is then created.
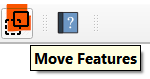
Finally, we just need to move the layer to the bottom. Click on "Move Features" and a window will pop out as following:
Make sure the current layer is selected under "Features To Be Moved". Under the Source Coordinates, click on "..." then click on where the transformed Alaska layer is and under the Target Coordinates, click on "..." to select the destination.
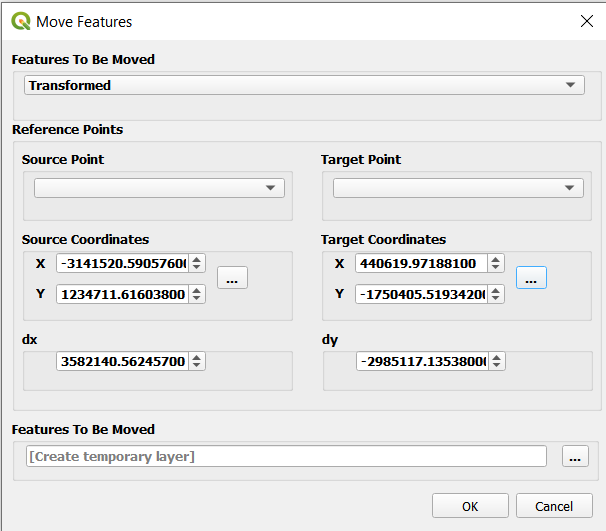
Another new layer will then be created. After that, repeat the same steps for the other states.
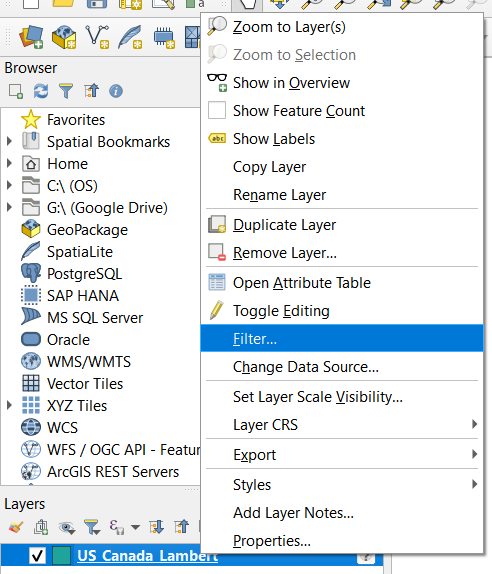
In the dataset for MakeoverMonday Week 3, there are no data for Northwest, Nunavut, Puerto Rico - U.S. Virgin Islands. So I need to get rid of those states as well as the states ( Alaska, Yukon and Hawaii ) that were moved to the bottom. We can do that by filtering out them. >> Right click on the layer and click on "Filter..."
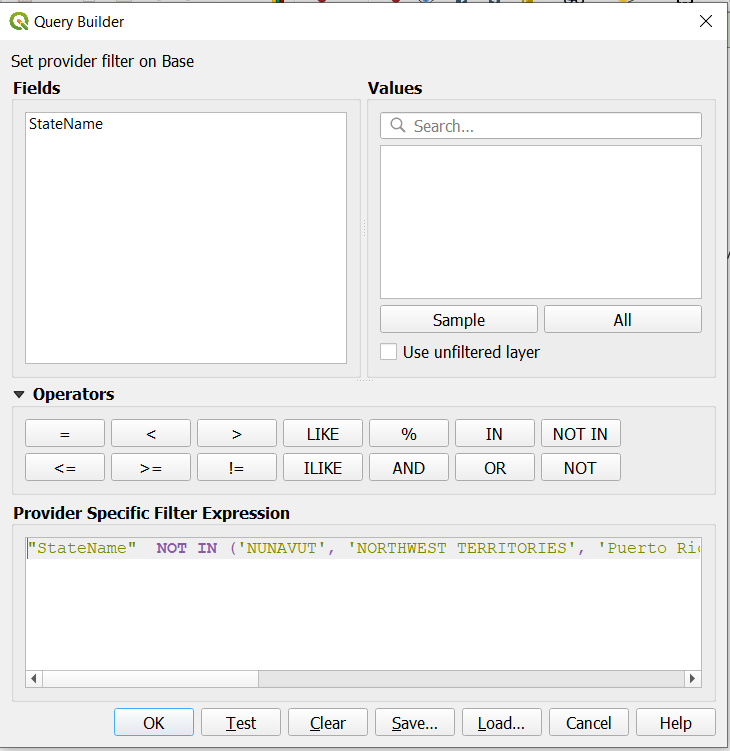
Apply this expression in the window:
"StateName" NOT IN ('NUNAVUT', 'NORTHWEST TERRITORIES', 'Puerto Rico', 'U.S. Virgin Islands', 'YUKON TERRITORY', 'Hawaii', 'Alaska')
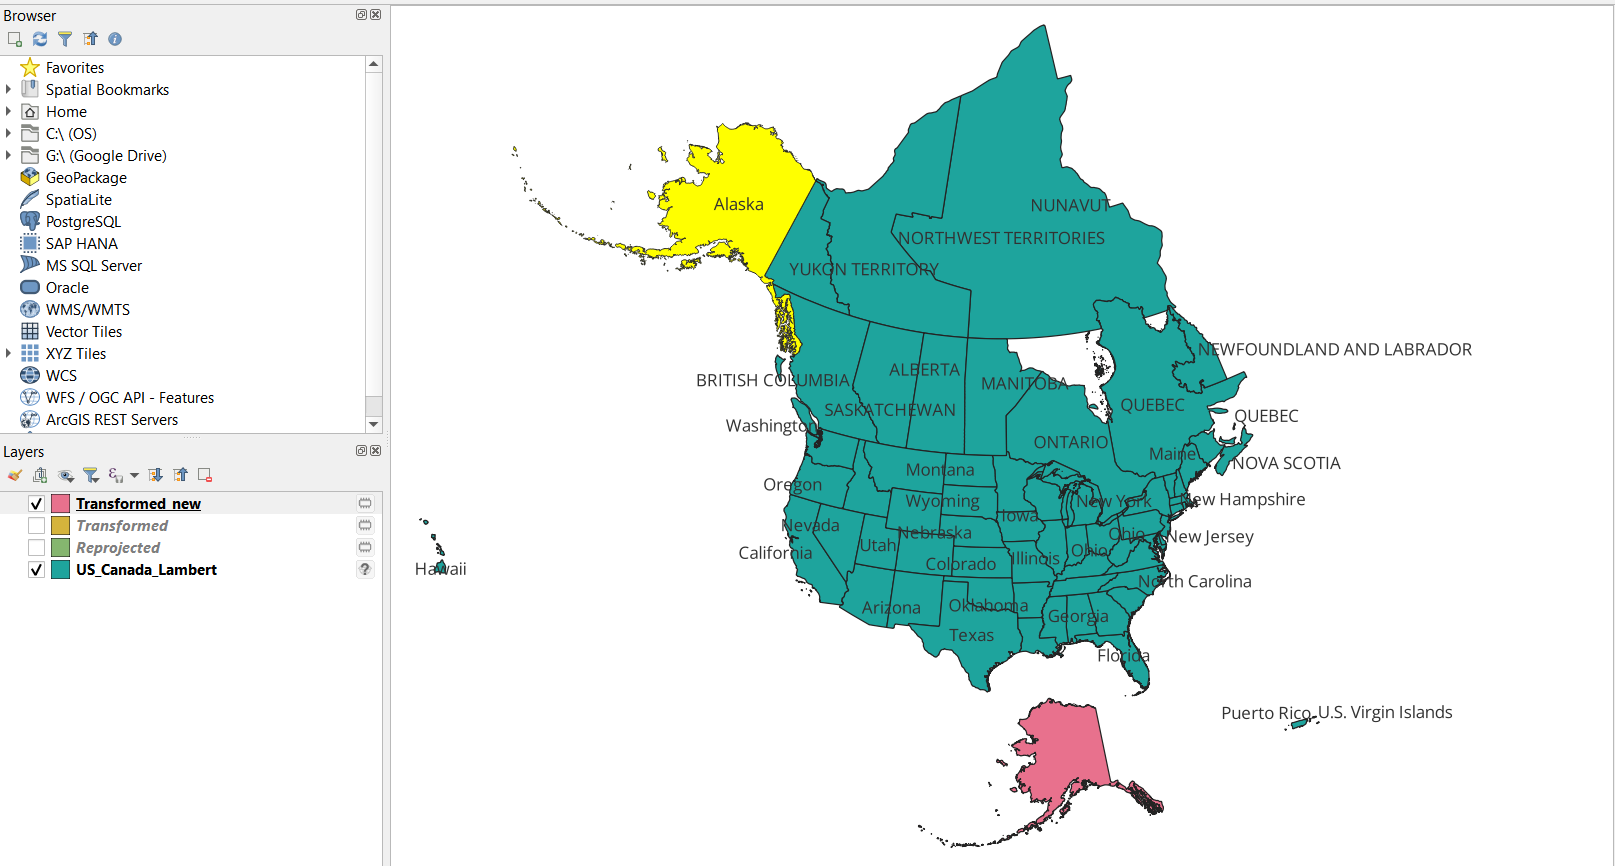
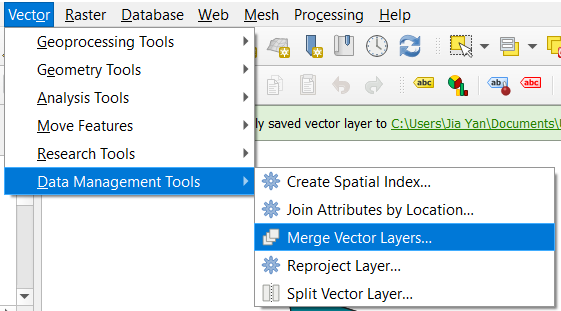
Then Voilà! We can get the map as shown in the first image! Before saving the layers to the shape files we need to merge them all into a single one as only one layer get to be exported to the shape files. Go to Vector >> Data Management Tools >> Merge Vector Layers
Save the merged layer as described before but set the coordinates system to "EPSG: 3857 - WGS 84 /Pseudo-Mercator in order to make Tableau thinks that this is in Web Mercator coordinates. Keep the "Add saved file to map" check this time. Import the shape files to Tableau and make sure all the background map layers are off and the washout (%) is set to zero.
You can then create a map like this: