The Tableau Embedding API that allows developers to integrate Tableau visualizations, dashboards, and reports into external applications, websites, or portals. Embedding a dashboard into an existing application can be useful for several reasons:
- To integrate Tableau visualizations into your existing applications or portals, providing a consistent user experience.
- To allow interaction between Tableau dashboard and front-end components, providing the user with control on filters, parameters, and other user interactions.
- To provide real-time data updates, providing the user with the most recent information.
Common use cases include embedding Tableau dashboards, present data-driven stories, single sign-on (SSO), and live data updates and visualizations.
This blog will show you how to create a simple static website and embed a Tableau dashboard with the Tableau Embedding API.
Contents:
- Embedding with tableau-viz component vs JS vs combined
- Creating a simple static webpage
- Embedding a Tableau dashboard in a website with tableau-viz component
- Embedding a Tableau dashboard in a website with JavaScript
- Using a hybrid approach to embed a Tableau dashboard in a website
Embedding with tableau-viz component VS JavaScript VS Combined

- Using JavaScript gives you more control over the embedded view. It allows both the Tableau dashboard and the website to interact with each other, such as by selecting data points, extracting or filtering data from the datasource, resizing and more.
- Using the
tableau-vizcomponent is simpler and easier to use. You don't need to know JavaScript to use thetableau-vizcomponent. You can simply add the component to your HTML code and specify the view URL. - Using a hybrid approach combining JavaScript and the
<tableau-viz>web component to embed the view has the advantages of both methods described above - simple HTML with the efficiency of JavaScript.
Creating a Simple Webpage for Tableau Embedding
It is recommended that you speak to a web developer or your developer team if you plan to embed a dashboard to your existing web or mobile application.
Pre-requisites
- Download and install Visual Studio Code .
- Install the following extensions in VS Code: Live Server (from Ritwick Dey) and Prettier (from Prettier).
- Have a Tableau Public dashboard to embed.
Quick Introduction
A website is primarly made of 3 key files:

- A .html file (usually called
index.html) that contains the "structure" of the website (i.e. the web layaout and components such as buttons, containers (div's), links, text, etc.) - A .css file (e.g.
styles.css) that contains the website's styles such as background colors, text alignment, box shadows, box borders, grid layouts, etc. - A .js file (e.g.
script.js) that contains the website's "logic" and responses to events (i.e. button clicks, scrolls, web loads, input management...), as well as allowing you to modify and interact with html components.
Step-by-Step Guide on Creating a Static Website
Here are the steps to create a simple webpage to embed your Tableau dashboard:
1. Create a new folder with the name of your project (e.g. myTableauEmbedSite)
2. Create 3 files inside the folder as shown below

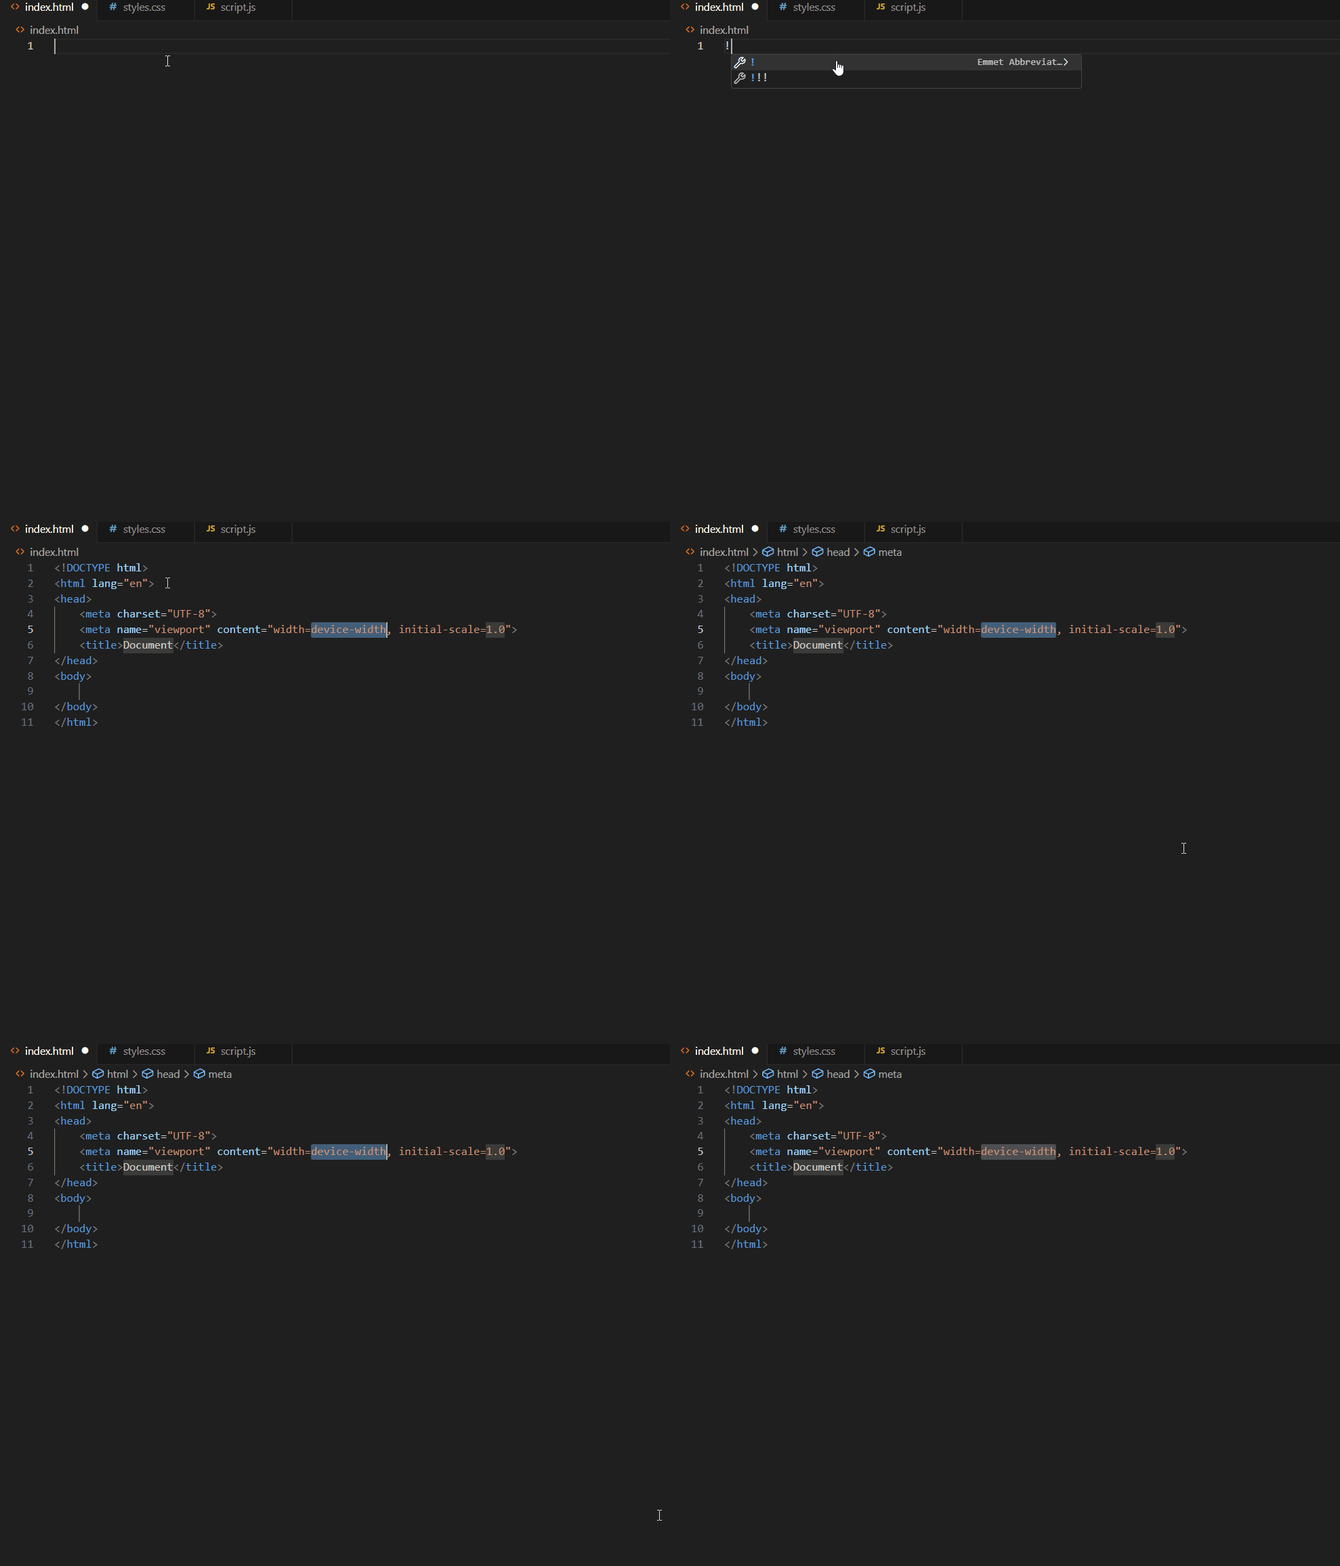
3. Create a basic HTML structure with <!DOCTYPE html> declaration and the opening and closing <html>, <head>, and <body>. Note: A quick shortcut is to write "!" followed by pressing the Enter key as shown below

4. Link your styles.css and script.js to your .html file. For the styles.css, add <link rel="stylesheet" href="styles.css" /> inside your <head> tags and for the script.js <script type="module" src="script.js"></script> just before the </body> tag

5. Edit the <title>, <meta>, and <body> contents. You can copy and paste the below or use a free template from external sources too.

index.html
Note: For this example, we use Bootstrap CDN (a distribution of the most popular CSS framework) to help with styles and already made components such as buttons, dropdowns, toggles, and more. Imported in the <head> tags as a stylesheet from https://cdn.jsdelivr.net/npm/bootstrap@5.3.0/dist/css/bootstrap.min.css.
<!DOCTYPE html>
<html lang="en">
  <head>
    <meta charset="UTF-8" />
    <meta http-equiv="X-UA-Compatible" content="IE=edge" />
    <meta name="viewport" content="width=device-width, initial-scale=1.0" />
    <title>myTableauEmbedSite</title>
    <meta
      name="description"
      content="Simple static webpage for Tableau Embedding"
    />
    <link rel="icon" href="favicon.ico" />
    <link
      href="https://cdn.jsdelivr.net/npm/bootstrap@5.3.0/dist/css/bootstrap.min.css"
      rel="stylesheet"
      integrity="sha384-9ndCyUaIbzAi2FUVXJi0CjmCapSmO7SnpJef0486qhLnuZ2cdeRhO02iuK6FUUVM"
      crossorigin="anonymous"
    />
    <link rel="stylesheet" href="styles.css" />
  </head>

  <body>
    <nav class="navbar fixed-top background-main">
      <div class="container">
        <div class="row navbar-row-div">
          <div class="nav-logo-div col-4 col-lg-4">
            <a class="navbar-brand fs-2" href="#">myTableauEmbedSite</a>
          </div>
          <div class="nav-buttons-div col-8 col-lg-8 text-end">
            <a class="hyperlinks fs-4 me-3" href="#" target="_blank">Page 1</a>
            <a class="hyperlinks fs-4" href="#" target="_blank">Page 2</a>
          </div>
        </div>
      </div>
    </nav>

    <main class="main-content container" style="margin-top: 100px">
      <section class="viz-section">
        <h1 class="text-center">myTableauEmbedSite</h1>
        <div class="viz-div">
          <p>Tableau dashboard goes here</p>
        </div>
      </section>
    </main>
    <!-- TABLEAU EMBEDDING V3 -->
    <script
      type="module"
      src="https://public.tableau.com/javascripts/api/tableau.embedding.3.latest.min.js"
    ></script>
    <!-- CUSTOM SCRIPT FILES -->
    <script type="module" src="script.js"></script>
  </body>
</html>
styles.css
.background-main {
  background-color: aqua;
}
.navbar-row-div {
  width: 100%;
}
.nav-buttons-div {
  align-self: center !important;
}
.hyperlinks {
  text-decoration: none;
  color: black;
  transition: 0.5s;
}
.hyperlinks:hover {
  text-decoration: underline;
  color: white;
  transform: scale(1.1);
}
.viz-div {
  border: solid black 1px;
  min-height: 600px;
}
Embedding a Tableau dashboard in a website with tableau-viz component
Step 1: Add the Embedding API library (a JavaScript ES6 module) <script> tag below before the </body> tag
For Tableau Server (replace "my-server" with your server name),<script type="module" src="https://my-server/javascripts/api/tableau.embedding.3.latest.min.js"></script>
For Tableau Public, <script type="module" src="https://public.tableau.com/javascripts/api/tableau.embedding.3.latest.min.js"></script>

Step 2: Add the tableau-viz component to your HTML, where src is the URL of your view
<tableau-viz id="tableauViz"
  src='https://my-server/views/my-workbook/my-view'>
</tableau-viz>
Embedding a Tableau dashboard in a website with JavaScript
Step 1: Import JS classes in the script.js file.
import {
  TableauViz,
  TableauEventType,
} from 'https://my-server/javascripts/api/tableau.embedding.3.latest.min.js';- For Tableau Server (replace "my-server" with your server name),
"https://my-server/javascripts/api/tableau.embedding.3.latest.min.js" - For Tableau Public,
"https://public.tableau.com/javascripts/api/tableau.embedding.3.latest.min.js"
Step 2: Add a <div> with the id="tableauViz" in the HTML
<div id="tableauViz"></div>Step 3: In the script.js file, set constants and initialise the viz. In the code below, we first set some web constants where we specify the viz's URL and the HTML element to append the viz to. Then, we initialise the viz specifying the attributes we want the viz to have (e.g. toolbar, height, width, etc. - full list in table of properties and values for embedded objects) when the page finishes loading shown by the DOMContentLoaded event listener.
import {
  TableauViz,
  TableauEventType,
} from 'https://my-server/javascripts/api/tableau.embedding.3.latest.min.js';

const viz = new TableauViz();
const vizURL = "<VIZ-URL>";
const tableauVizElement = document.getElementById('tableauViz');

document.addEventListener("DOMContentLoaded", function () {
  _initViz();
});

function _initViz() {
  viz.src = vizURL;
  viz.toolbar = "hidden";
  viz.hideTabs = true;
  viz.hideEditButton = true;
  viz.hideEditInDesktopButton = true;
  viz.suppressDefaultEditBehavior = true;
  viz.height = 600;
  viz.width = 800;

  tableauVizElement.appendChild(viz);
}
For examples and guidance on Interactive Embedding (filtering the dashboard, getting data from the view, resizing, customization, etc.) see my other blog on Interactive Tableau Embedding with JavaScript.
Using a hybrid approach to embed a Tableau dashboard in a website
Repeat step 1 and 2 from the 'Embedding a Tableau dashboard in a website with tableau-viz component' section.
Your script.js file should look almost the same as the previous version (we just remove the new TableauViz() as this time we are using the tableau-viz web component - so we do not need to create it in JS).
import {
  TableauViz,
  TableauEventType,
} from 'https://my-server/javascripts/api/tableau.embedding.3.latest.min.js';

const viz = document.getElementById('tableauViz');
const vizURL = "<VIZ-URL>";

document.addEventListener("DOMContentLoaded", function () {
  _initViz();
});

function _initViz() {
  viz.src = vizURL;
  viz.toolbar = "hidden";
  viz.hideTabs = true;
  viz.hideEditButton = true;
  viz.hideEditInDesktopButton = true;
  viz.suppressDefaultEditBehavior = true;
  viz.height = 600;
  viz.width = 800;

  tableauVizElement.appendChild(viz);
}
For all cases described above we should have a simple website that looks like below:

If you are interested on embedding an interactive Tableau visualization with JavaScript and allow user interactivity (e.g. filtering the dashboard, getting data from the view, resizing, customization, etc.) between the dashboard and the website see my other blog on Interactive Tableau Embedding with JavaScript.
Resources


