


As preparation for my first placement, I am going back to the basics of Alteryx and aim to attempt the Alteryx Advanced certification some time in July. While I review, I would also like to create a series of blogs covering everything from the basics of Alteryx to the more advanced functions of Alteryx.
Alteryx Designer Interface

The tool palette contains all the tools organized into categories such as In/Out (contains Input and Output tools), Preparation (contains Filter, Formula, and several other tools to clean and prep the data), Join (contains the Join, Append, and Union tools among additional tools), etc.
There are two special categories within the tool palette: Favorites and Recommended. Favorites contains the tools that are frequently used while Recommended suggests tools that the user might use next in the workflow being built out.
To build a workflow, users have 2 options:
- Drag and drop the tool from the tool palette onto the canvas
- Right-click on the canvas, select Insert, and select the tool from the list of tool categories
Right, so I mentioned the “canvas”, but what is the canvas?

The canvas is the area where the workflow is built. As mentioned above, dragging and dropping these tools onto the canvas and connecting them together creates a workflow that can perform different actions to process data and produce different results. These results then appear below in the Results Window.

The results window provides a preview of the data output from any tool at any point in the workflow. In the results window, users can also click between the data and metadata to view the data type, field name, descriptions, size, and source of the different field(s) within the data.

In the results window, we can also see any errors or warnings that may have occurred during or resulted from running the workflow.
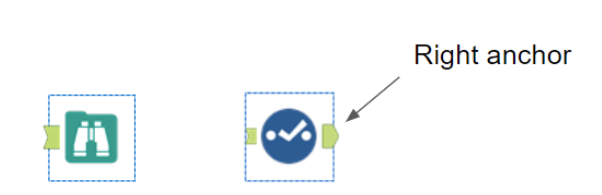
To view the results after running a workflow, select the right side anchor on a tool or view the results through a Browse tool:
On the right hand side of the interface, there is a configuration window:

The configuration window displays the possible options, parameters, and configurations available for the selected tool in the workflow. How the tool or workflow is configured tells the tool(s) or workflow(s) how to behave and process the data. For some tools, the default will be okay, whereas for other tools like the JOIN and Union tools, for example, will show different options. Even the input tool will show different configuration options as compared to what is shown above:

In this case, the configuration window allows the user to set up a connection, select record limits, file format, etc. The file format selected also changes the possible parameters and options the user can choose. For example, an Excel file versus a SQL database.


Understanding the Alteryx Interface is important as this is where the work begins. The tool palette contains all the tools we’ll use and become familiar with while the canvas is where we build out workflows. The configuration window is where we’ll set up our tools to process the data we want it to process while the results window is where we’ll…well… see the results of our hard work!
Let’s continue on this journey to understand Alteryx together and let’s analyze away!