


Orchestration is an important part of the data engineering lifecycle, allowing engineers to structure and run parts of the ingestion process. There are many examples of orchestration tools from Apache Airflow to Microsoft Task Scheduler but in this blog we'll be focusing on Kestra.
We'll work through an example using a modularised python script that extracts data from the TFL BikePoint API and uploads the data to an AWS s3 bucket. The code has been saved to a GitHub repository.
Here's the sample YAML code we'll be working through:
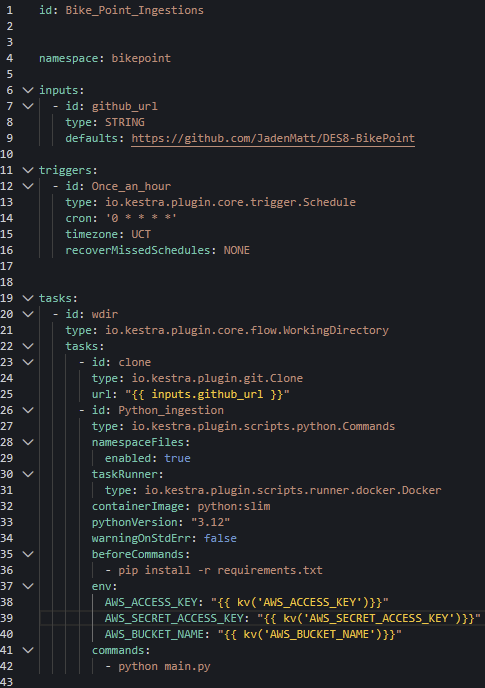
Quick note on YAML, indentation is important!
Creating a Flow
To start, create a flow in Kestra and you will be greeted with some friendly looking YAML code. You can delete this if you want, or just edit it based on the task at hand. Completely up to you.
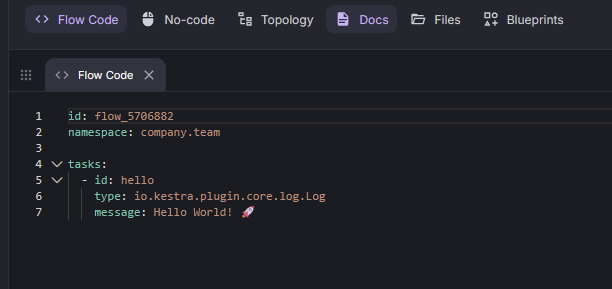
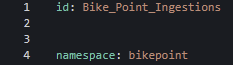
You can change the id to whatever you like to name the flow. The namespace is just an organisational folder which we'll come back to, but again, you can name this whatever you like.
Defining Parameters
Next, we want to add our input parameter. This will just allow us to change the GitHub repository URL when we run the flow manually. It will default to the link that you put in the code.

Triggers and Scheduling
Now we want to set up our schedule. This will tell Kestra how often you'd like to run the flow and what to do if any scheduled runs are missed (recoverMissedSchedules). To set the schedule, we're going to use cron which is a time based scheduler. You can view the cron syntax here -> cron syntax.
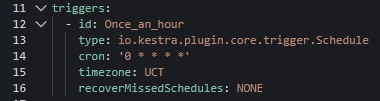
Note that recoverMissedSchedules is set to 'NONE' which is telling Kestra that if a flow is skipped, do not attempt this flow again. Other options include 'LAST' and 'ALL'. This will depend on your preference, but may be something to consider. If you have a schedule that runs every 30 minutes and Kestra is down for a couple of days, you may not want all of those missed flows to be attempted when you reopen it.
Creating a Working Directory
The next thing to do is setting up your working directory. This is basically a shared temporary workspace folder that allows all subtasks to work within this isolated area.

Now that the working directory has been set up, we can start writing our tasks.
These will include:
Cloning the code present in GitHub to our working directory
This step just clones the code directly from the GitHub repository into our working directory so any other listed tasks can access it.
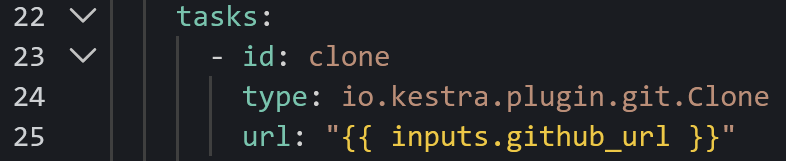
Python Ingestion (which includes)
- Creating an isolated Docker container to allow our script to run in it's own clean Python environment (similar to a virtual environment)
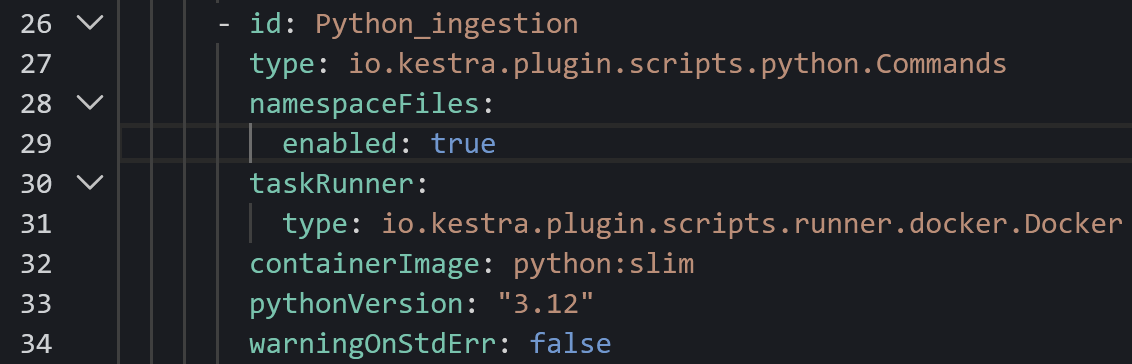
- Installing any required packages
- Accessing our API and AWS keys and secrets
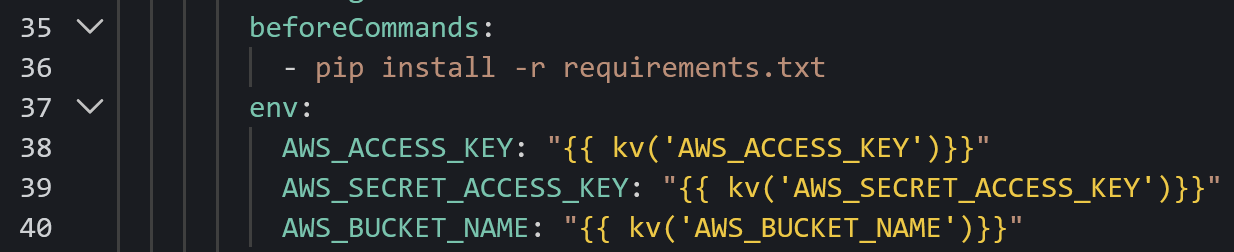
Run the Script
All that's left to do is run the script!

Namespace and Key Values
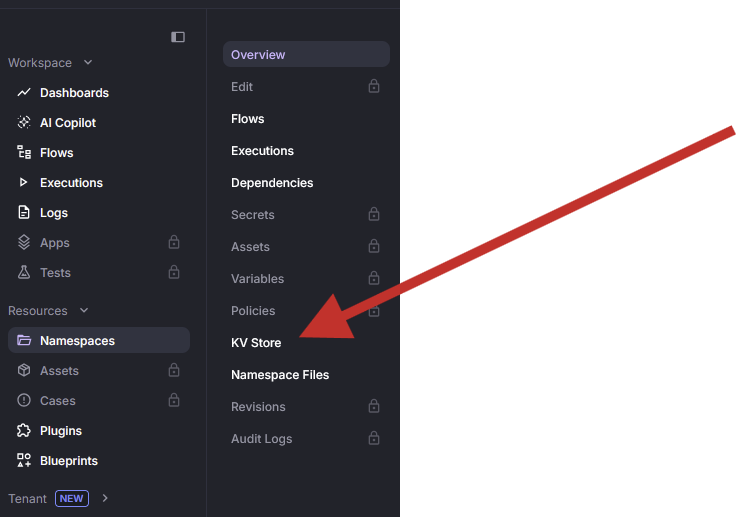
Now that we're done, we can hit save. Because we've defined our namespace in the code, Kestra will establish the namespace. This is where you'll add your access and secret keys which we referenced in the code. May seem backwards to do it in this order but we need to create the flow in order to create the namespace. Namespaces are in the Resource tab on the left.
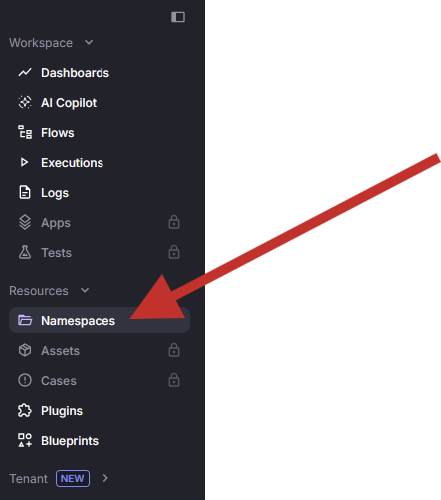
You then want to navigate to Key Values and then add all of your values you've reference in the code. Make sure to name them the same thing to avoid any errors.
Once you've done this, your flow should be ready to run. Navigate back to flows and click the execute button and voila!
Whether you're scheduling hourly API extractions like our TFL BikePoint pipeline or building multi-stage ETL workflows, Kestra gives data engineers the control and visibility needed to keep pipelines running reliably in production.