


What is Git?
- Git is a version control system. It’s something you can download onto your computer for free.
- It works by storing a history of your files --> .sql, .py, .txt, .pdf, .jpeg
- Git essentially tracks changes made to a file once you save, or 'commit', them
- Having Git means you can:
- Look at historical versions of the same piece of work
- Collaborate on the same file with others simultaneously
- Document changes in code and know who created these changes
- Git is not to be mixed up with GitHub - GitHub is an online platform that hosts Git repositories, making it easier for people to collaborate on projects.
What is a Git Repository (aka Git Repo)?
- A git repo is essentially the overarching folder for a project. It contains all code and files within it
- It also contains the entire history of a project within it (you can see older versions of all files here too)
- Stored as a .git folder
Step-by-step example process using Git
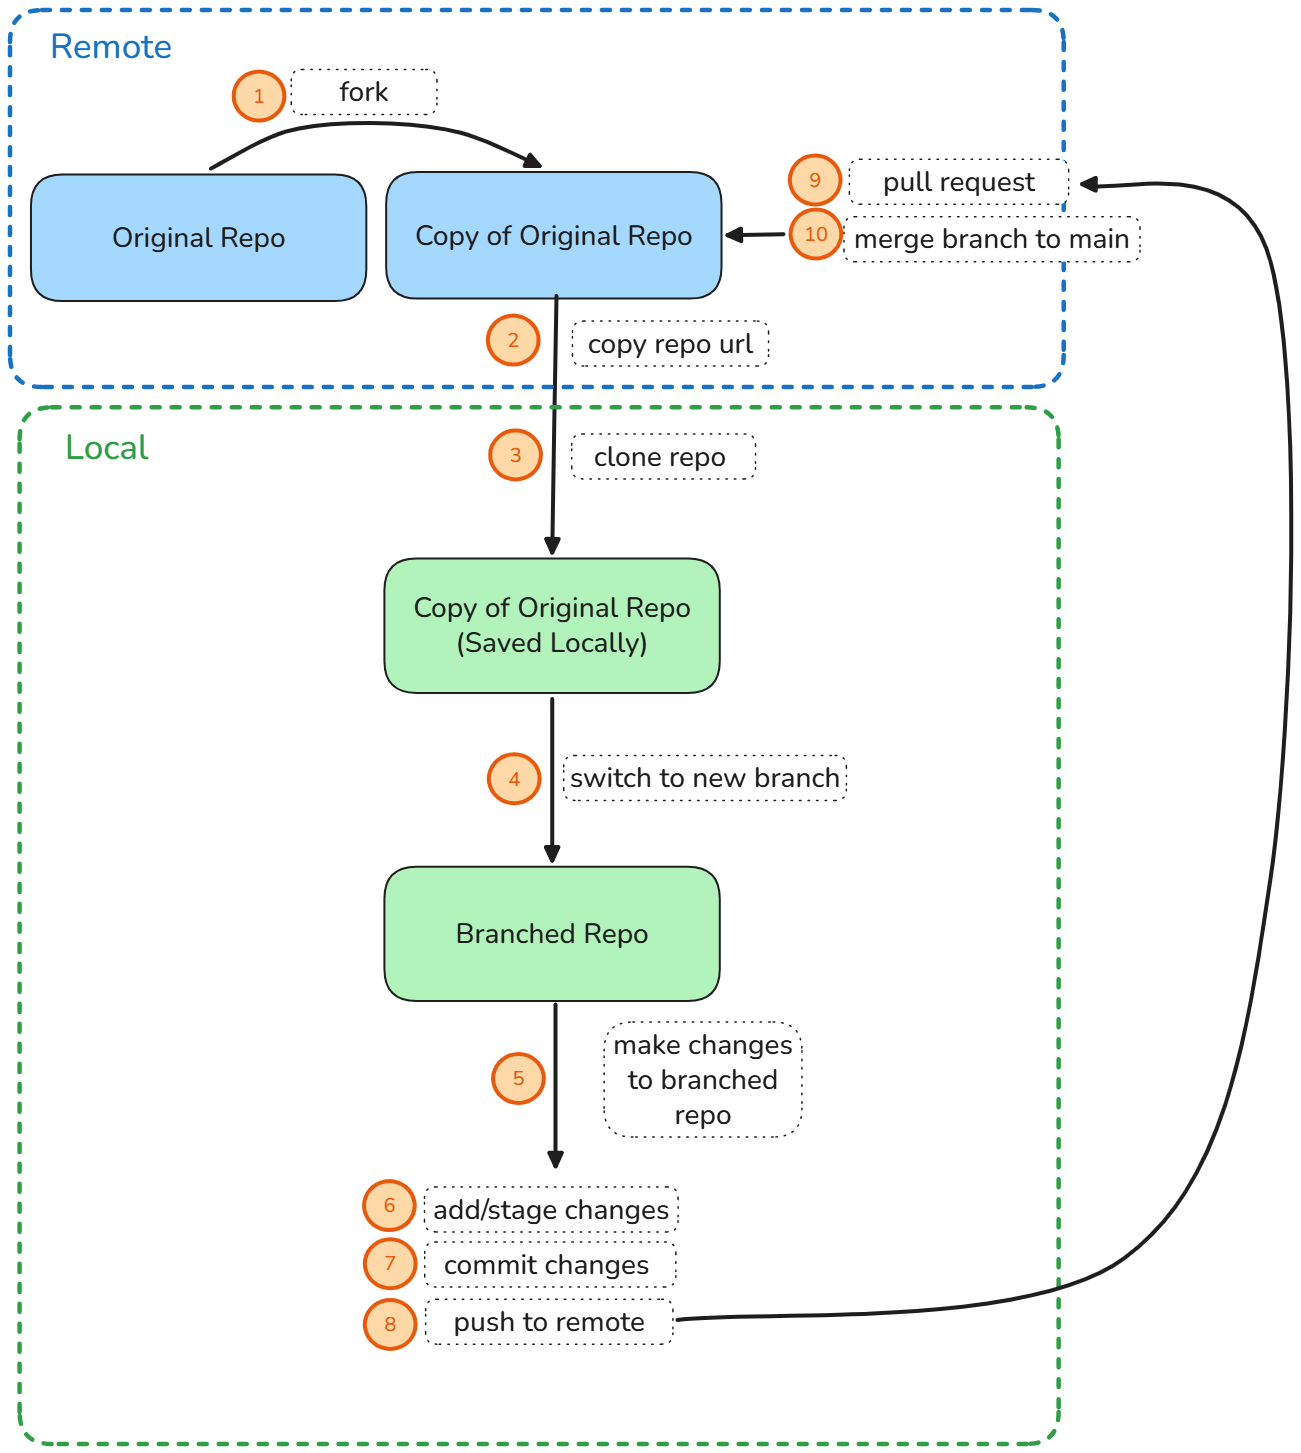
In training we reviewed the basics of working on a project using Git. Below is a useful infographic to summarise the process. As well as this, I'll walk through each step of the process whilst explaining any key terminology.
One key concept to understand is that there are 2 key environments in git:
Remote = this is an environment on git that's hosted online, either on a server or cloud-based platform. This is where you can collaborate with others on projects.
Local = this is the git environment that's hosted within your device. Changes you make on your local device are not automatically synced online, which is why these environments can differ.
Step 1 - forking a repo
When on Github online, there are thousands of repositories. You can create your own one, or perhaps you'd like to start by using an existing project. When using someone else's project, however, it's important not to make unwanted changes to their work. Forking a repository is a way of copying someone's repo so it sits under your profile, and you can then make changes without impacting their project.
You can simply press the fork button on the top right when looking at someone's repository to do so.

Step 2+3 Copying and cloning a repo
Now you have your own repository, you'll want to make changes to it on your local device. To do this, you essentially want a copy of your whole repo saved to your local device. This can be done in 2 steps, with the first part done online, and the second done locally.
Copying the repo:
Press the green button (pictured) and copy the URL to your clipboard. The word 'copying' in this context simply means copying the web address for the repo. It doesn't mean it has been saved to your device yet.
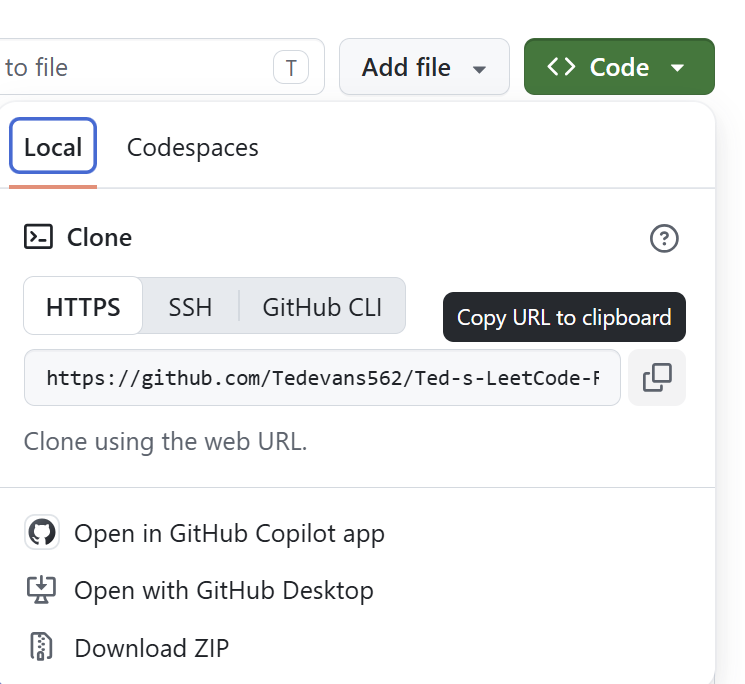
Note: you can alternatively press 'Open with GitHub Desktop' , and this will immediately clone it to your device. I prefer this method as it requires the fewest steps.
Cloning the repo:
Open a terminal - I like to do this in Visual Studio Code, but you can do so however. Navigate to where you would like the repository folder saved to locally.
Type git clone followed by a space, and then the copied url to your repository.

The repo will now be cloned to your local environment.
Step 4 - Switching to a new branch
To explain branching I'm going to use a very simple, non-coding example: let's say your team were tasked to create a drawing of a flower. So far, the team have made an outline.

Beautiful. Now, the team are working on colouring the flower in.
However, whilst the colouring is still in progress, you get some feedback: the flower needs leaves!
Oh no! But the team have already started colouring the flower. Do they have to stop, undo all their colouring, and go back to the original drawing to add the leaves?
Not necessary! Instead, you can create a new branch from the current version of the flower. This allows you to work on the leaves separately, while the colouring continues on the original branch. We can then merge this new feature back onto the main version of the flower.
Branches are a great way of working on new features simultaneously. There are 2 different types of branches:
Main branch = the default branch that holds the productionised version of the project
Development/Feature branch = these branches are a safe way for you to create new features without impacting the main branch.
In your terminal, you make a new branch by typing
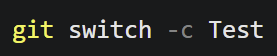
Git switch is what moves you on to the other branch.
-c means you are creating a new branch.
Test is the name of the new branch - you can name it anything (probably should be more descriptive than this).
I will also mention that an older, but commonly used alternative is
git checkout -b Test
git checkout -b Test
Step 5 - Make changes to your branched repo
Now, you can make any changes you wish to the project. Referring to my analogy, I'm going to make leaves for my flower.

Note: these changes will not be saved to your local device UNLESS YOU SAVE THEM. Saving to your local device DOES NOT COMMIT THEM TO YOUR LOCAL REPO. You should be saving as frequently as possible!
Step 6 Adding or staging your changes.
Once you are happy with your changes, you can add/stage them. This essentially "flags" any changes to files you select before you officially "commit" them to your branch (more on this later).
This step is important as you may have made changes to multiple files, but you don't want to commit them yet. So this step basically means "I'm ready for these changes to be pushed to my local repository!"
To do this, you can use either:
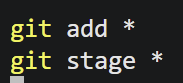
Both are synonymous - the * means "everything", so here we are staging all of our changes. You can refer to a particular file path if you want to specify your changes.
Step 7 Committing your changes
Commit = these are essentially "checkpoints" that you make to your branch. It's essentially a snapshot of your work at a specific point in time.
Once your stages are added, you can officially commit them to your branch - this means the changes are officially in your local repo. You do this by writing:

All git commits require a message, so make sure they are detailed and explaining what changes/features you have added. This message will also be seen by colleagues once we have uploaded them to our remote repository, which will be our next few steps.
How often should you make a commit? Committing too often creates lots of clutter/noise in your repo, but not committing enough will mean that key details will be harder to spot. Ideally, you should make a commit every time you complete a "thought", or a logic unit of work.
Step 8 Pushing your changes to the remote environment
All our changes have been made to our local environment, so how can we ensure others can see and sense-check what we've done? Using the following function, we can upload our new branch and commits to the remote repo.
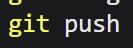
Push = this copies your local changes to your remote repo
Pull from remote/main = when further changes have been made to your repo remotely, you can update your local repository with these changes by pulling them.
Step 8 Making a pull request
This is not to be confused with pulling from remote/main to local.
Pull request = a precursor to merging your changes from your feature branch to your main branch. A pull request essentially asks you/your team to review your work in your remote environment before merging them.
Using my analogy, it's asking the team whether they like the leaves I have added.
When you push your local branch to GitHub, your changes will appear in your remote repository. You can then open a pull request on GitHub.
A pull request (PR) is essentially a request to merge your feature branch into another branch, usually main. It allows you and your team to review the changes, leave comments and suggest improvements before they become part of the main project.

Step 9 Merge branch to main
This is where you merge the changes from your feature branch to your main. Now I can add my leaves onto the flower which is currently being coloured in.
Let's look at the main branch vs my feature branch to see how this merge will take place.
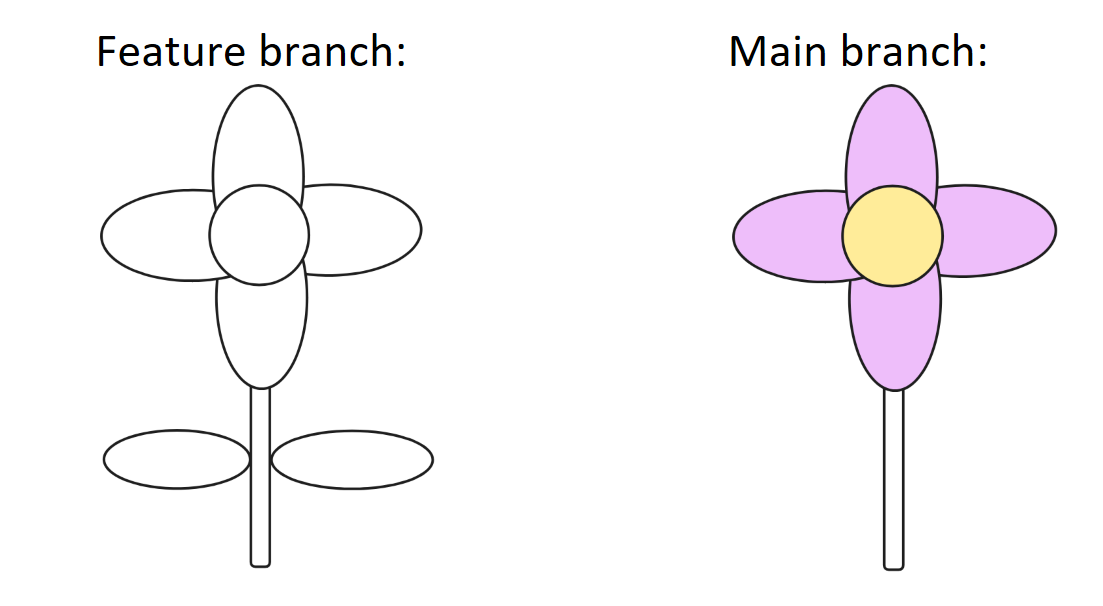
Fortunately the updated sections between the main and feature branches don't overlap. In other words, there are no merge conflicts. So, this means we can merge the feature branch onto the main branch neatly.

Beautiful.
You can merge this by selecting 'merge pull request'.

If your feature is completely finished, you can now close your additional branch and open a new one when needed.