


I wanted to have some practice with dbt without using my company account. As dbt sits on top of a data platform (such as Snowflake, Redshift or Databricks), I also needed to create a personal account with one of these platforms before connecting it to dbt.
For this, I chose to create a Snowflake trial account. Using this link, I made my Snowflake account by selecting "Sign up with Google" instead of filling in my details.
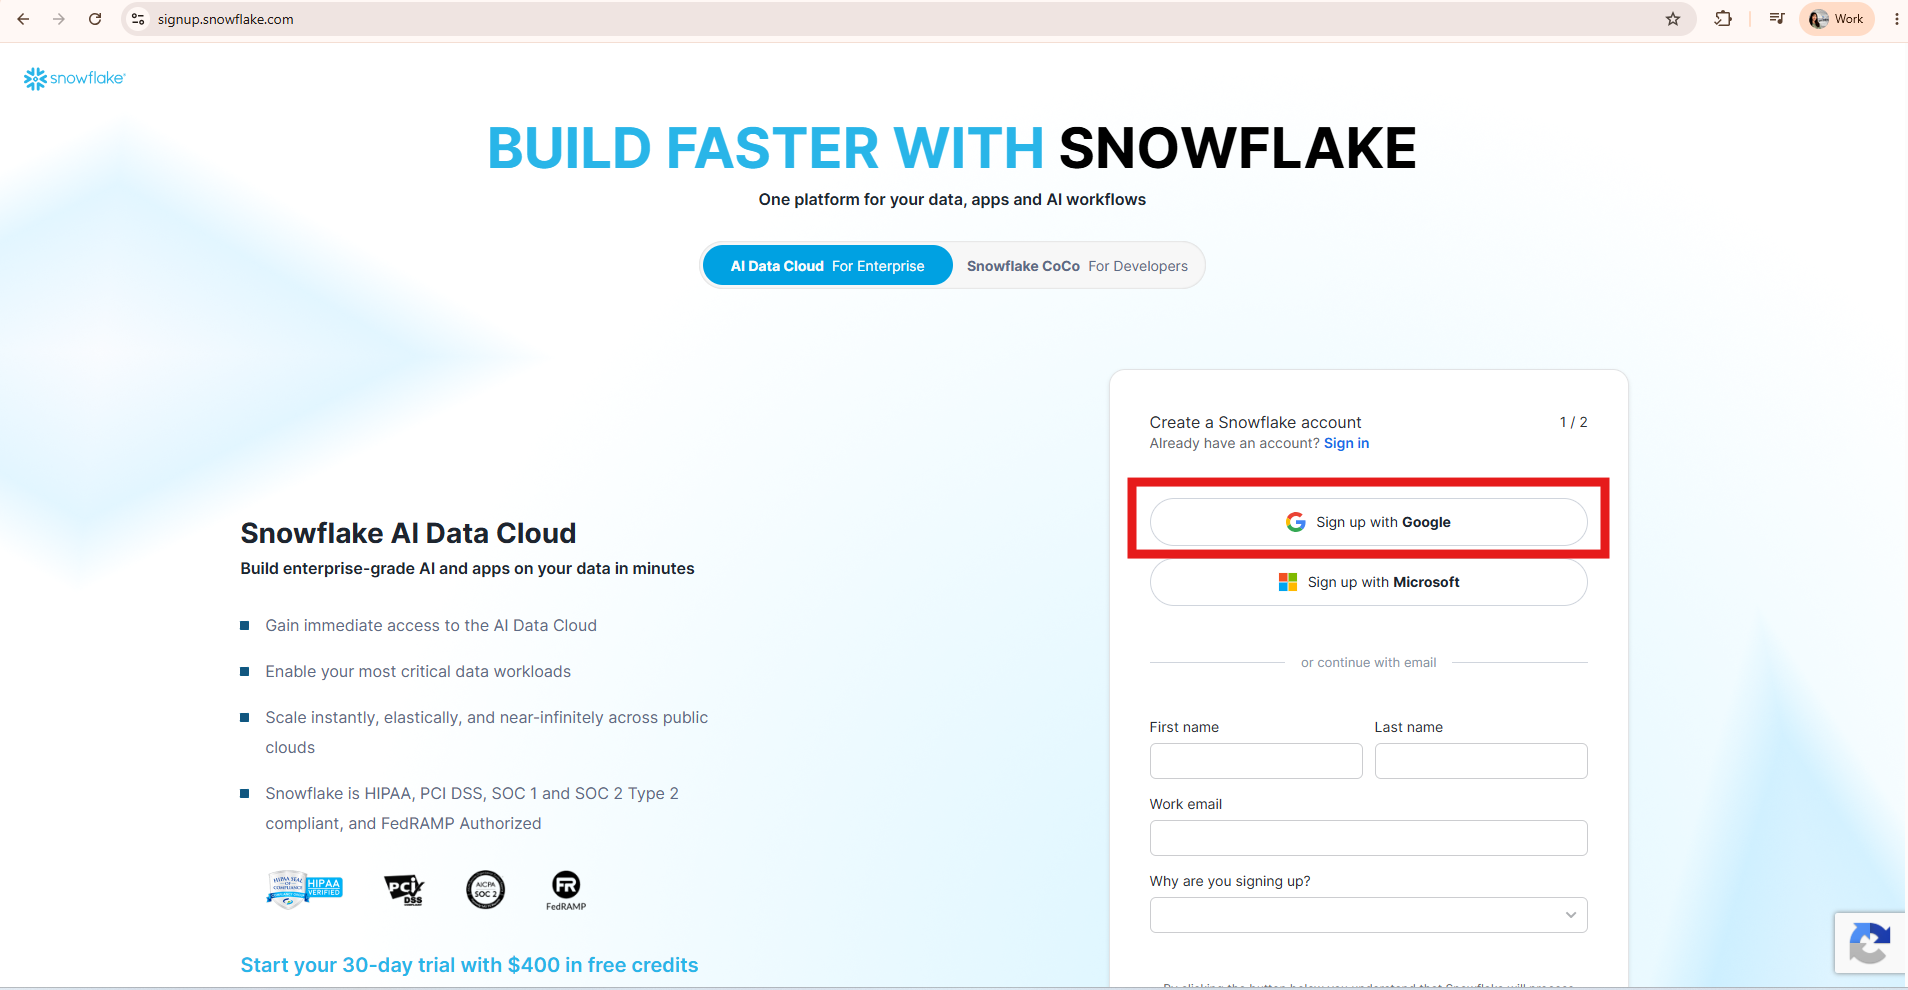
Perhaps this was laziness, or for ease of using the same profile/sign-in method for multiple things, who knows. I didn't realise this choice would soon come to haunt me!
Once the account was made, I simply opened a worksheet and ran some scripts to create my warehouse, databases, and schemas. As I was re-doing the dbt Fundamentals course, I was simply copying over their statements. Here are the first few needed (to create the database objects before filling in data). This is relevant as you will see the names I used for these:
create warehouse transforming;
create database raw;
create database analytics;
create schema raw.jaffle_shop;
create schema raw.stripe;
There are more SQL statements after this which create/populate the relevant tables, but we don't need these for the authentication steps. Feel free to create any relevant tables where needed.
Once this was done, it was time to link this up to dbt. If you're creating a dbt account for the first time, it will prompt you to name your first project:
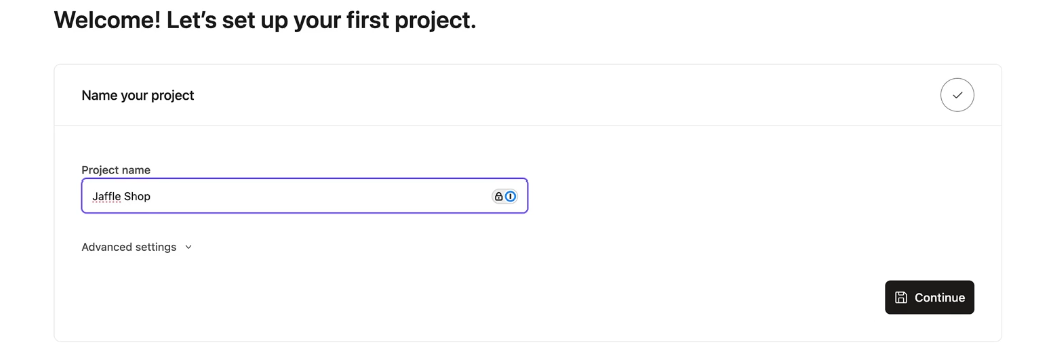
Once done, it will prompt you to create a new connection. Select the data platform you're using and create a name for the connection.
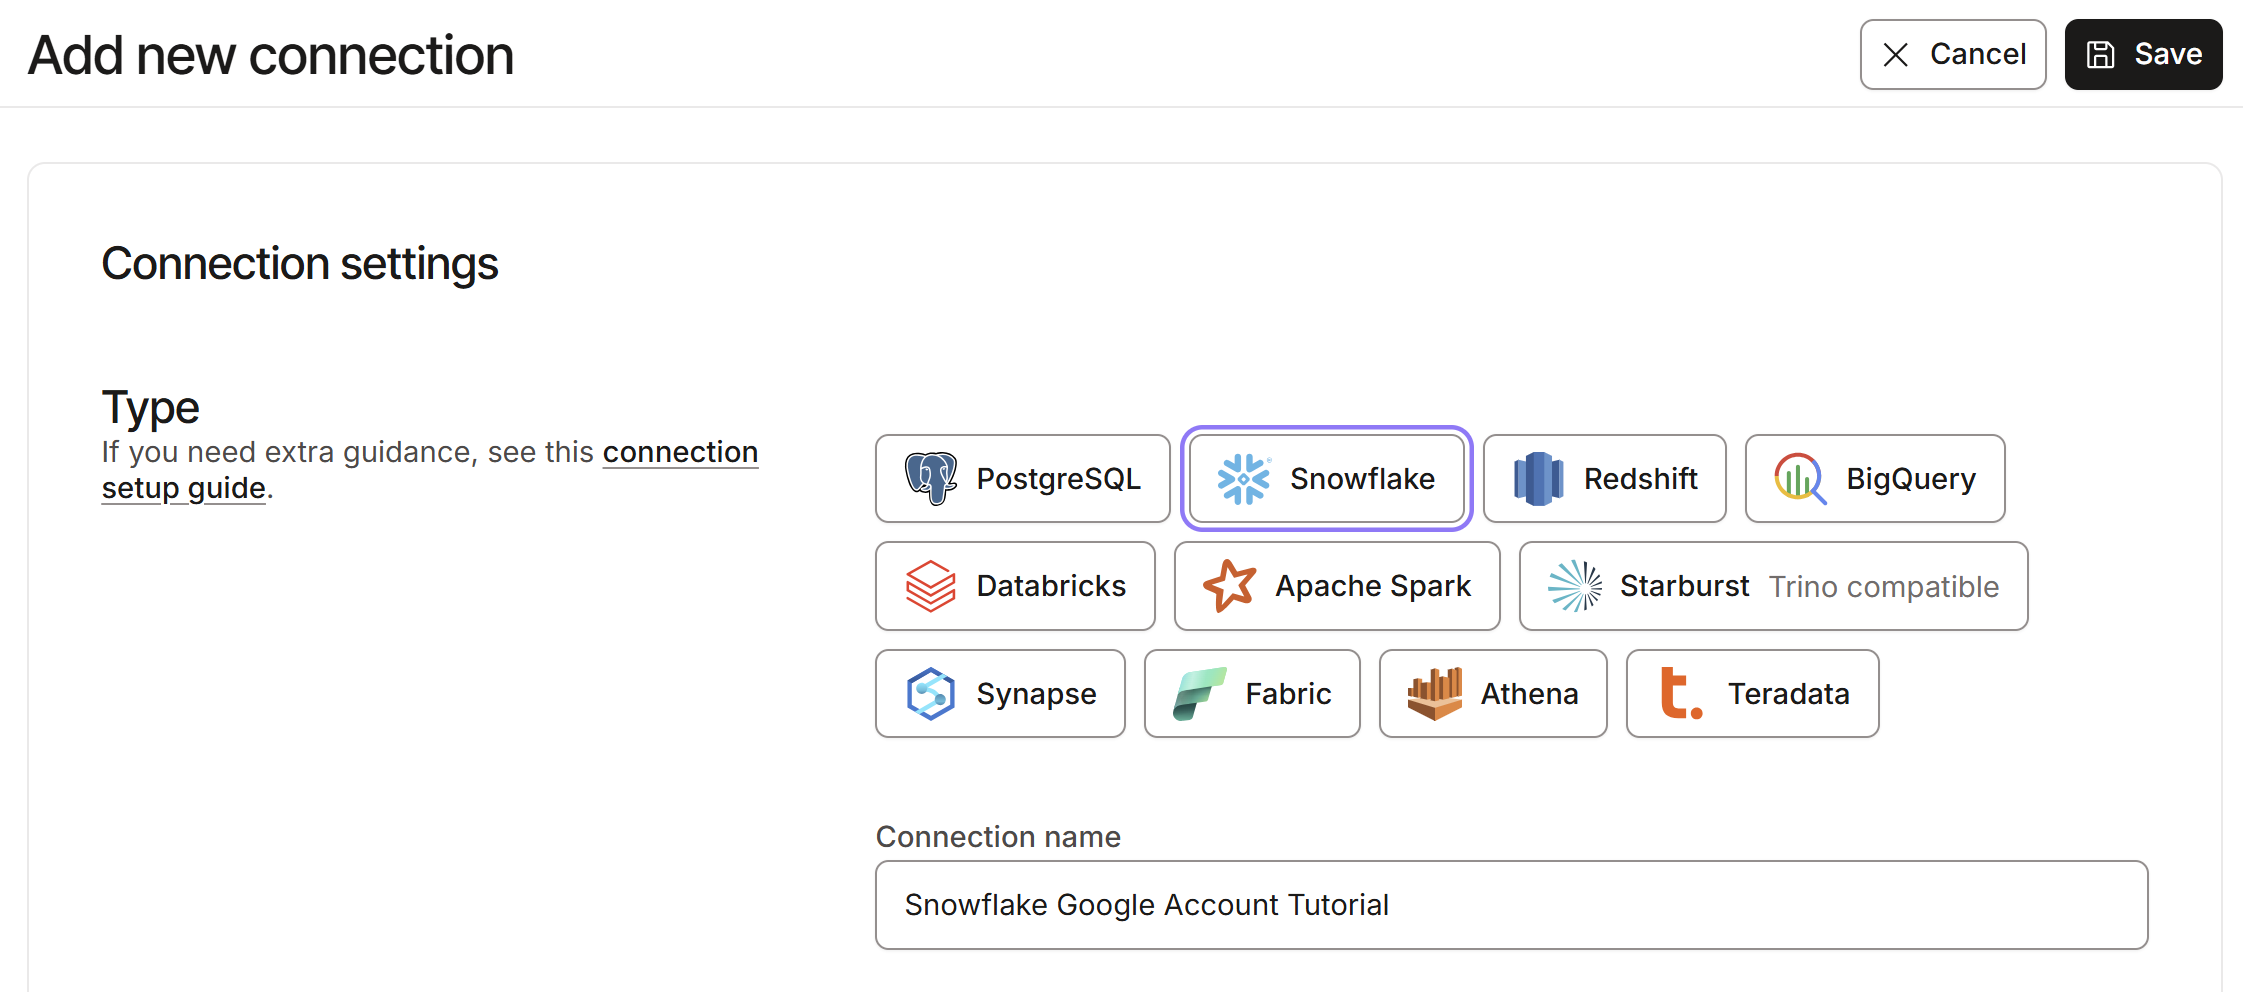
Next, you have to input the following:
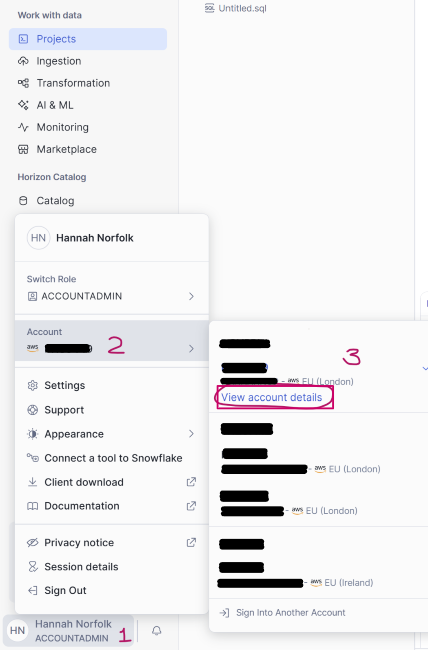
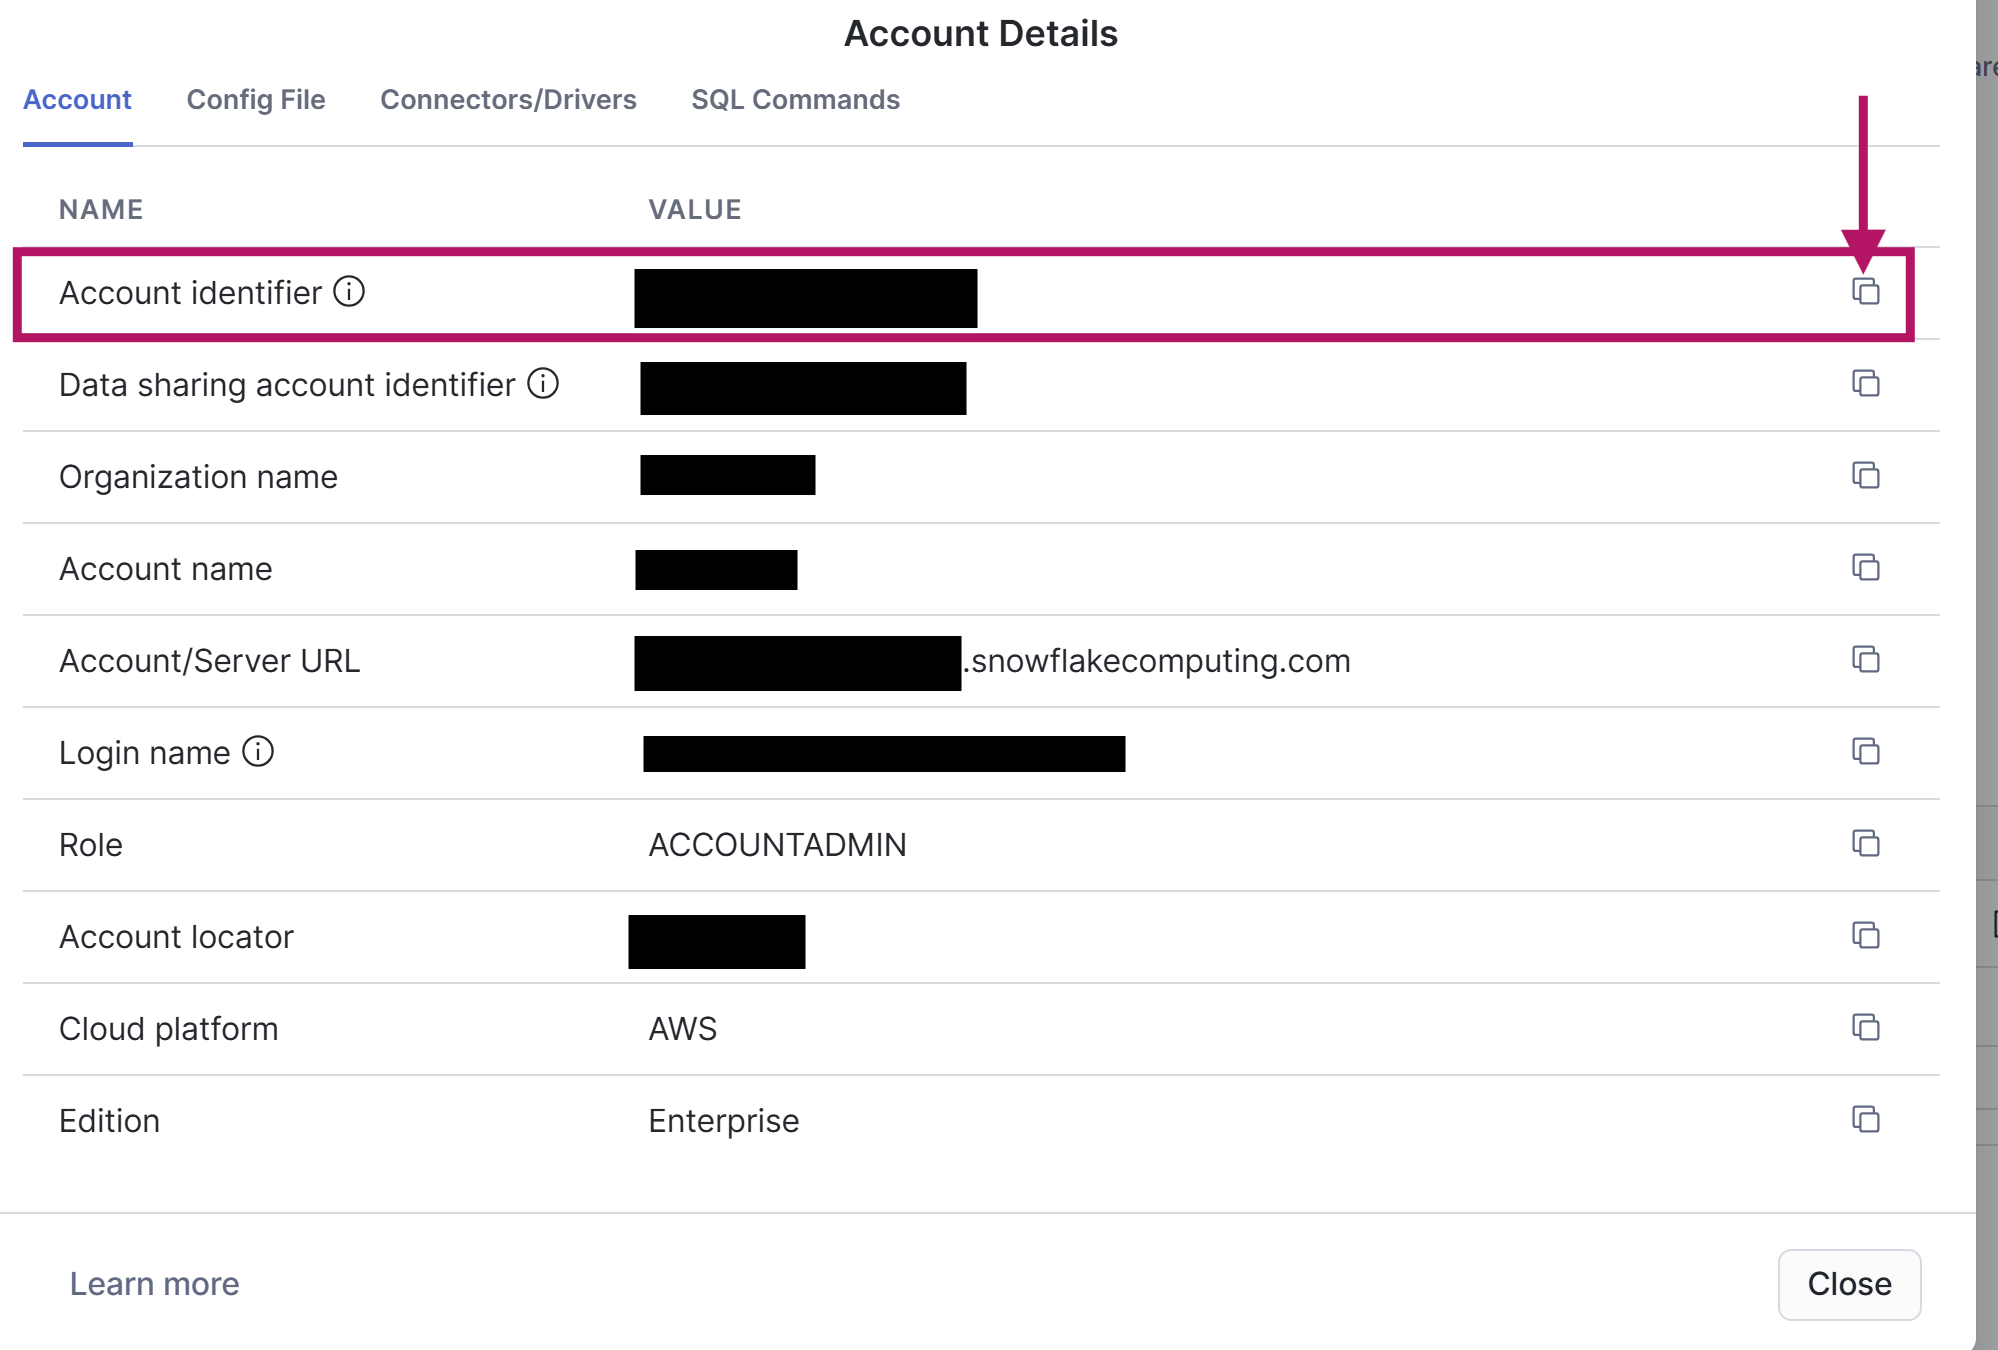
- Account - this is your individual identifier for your account. To find this, select your name on the bottom left of your Snowflake window, and navigate to "View Account Details".
- You need to copy the value from the first line and paste this into dbt - aka the Account identifier
- Database - what database you want the connection to connect to. I've inputted the Analytics database I had just made.
- Warehouse - what warehouse you wish to use for your compute workloads. Use
SHOW WAREHOUSESto see what ones you have available. I'm going to use the warehouse I have made, Transforming.
Next, you'll need to provide your authentication details so dbt can connect to your Snowflake account. This is where things get sticky.
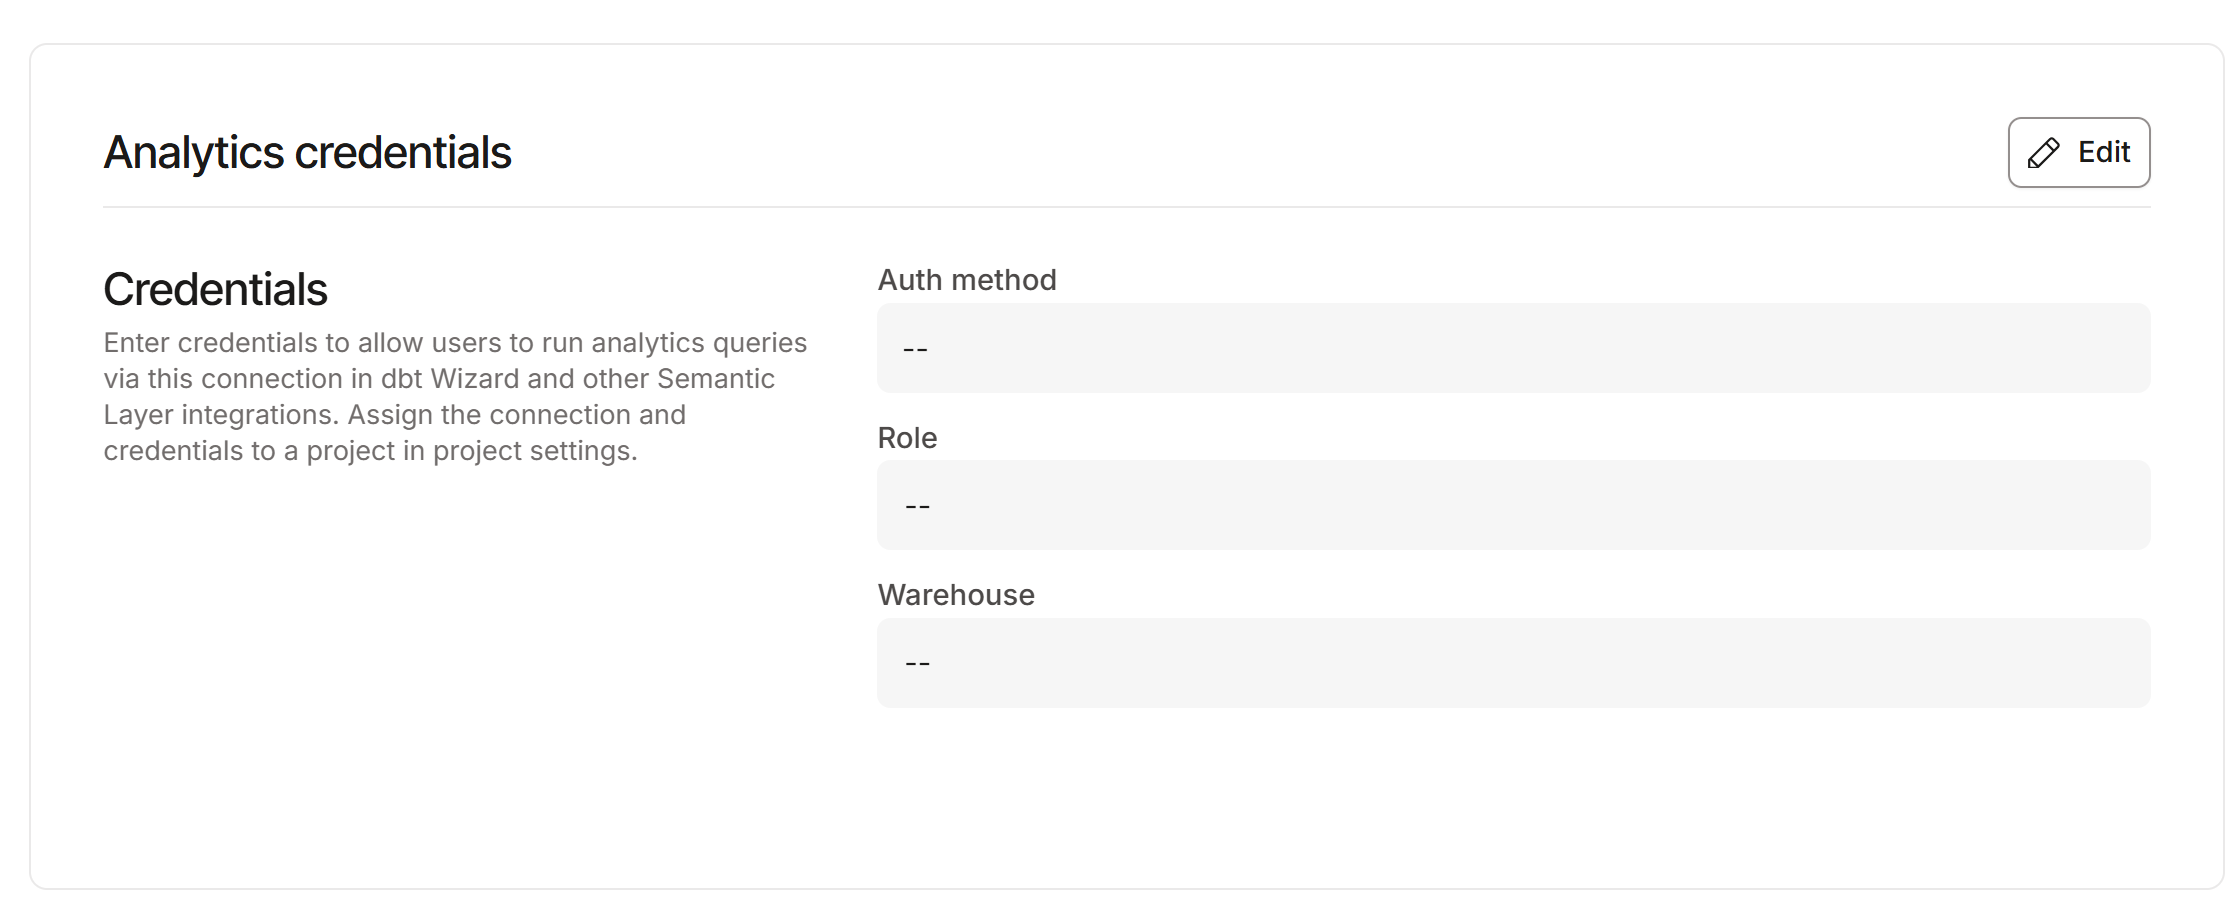
You're given two authentication options: Username/password or Key-pair authentication. Typically, it's easiest to use username/password, as these are both things you know and can remember.
HOWEVER, IF YOU CREATE A SNOWFLAKE ACCOUNT VIA GOOGLE SSO, YOU MAY NOT HAVE A SNOWFLAKE PASSWORD SET UP.
To test this, if you run the following in snowflake: SELECT CURRENT_USER();
Then copy the output of this and paste it into: DESC USER "Paste_copied_username_here";
In the results you will see a row with property "Password". For my account, this is null. This means you cannot use username/password to authenticate here!

This means I had to authenticate via Key-Pair.
How to create a key-pair for authentication (Windows devices)
Key-pair authentication works by generating two mathematically linked keys: a public key and a private key. The public key is registered against your Snowflake user, while the private key is kept securely on your local machine and supplied to dbt when establishing the connection. Snowflake uses the registered public key to verify that the connecting client possesses the corresponding private key.
1. Open a terminal (I used PowerShell for this) and run the following:
py -m pip install cryptography
This installs the python package needed to generate your RSA key pair.
Note: if this doesn't work, you may need to install python beforehand.
2. Create a folder for you to put your keys in by running:
mkdir "$HOME\snowflake"
Where 'snowflake' is the folder name - feel free to rename this to anything you like. Once done, you can then navigate to this folder in the terminal by running:
cd "$HOME\snowflake"
Your prompt should now look something like:
PS C:\Users\YourName\snowflake>
This ensures that the next steps are executed in this folder.
3. Create your python script by running
notepad generate_keys.py
Once the notepad opens, paste the following into it:
from cryptography.hazmat.primitives.asymmetric import rsa
from cryptography.hazmat.primitives import serialization
import getpass

# Generate RSA private key
private_key = rsa.generate_private_key(
    public_exponent=65537,
    key_size=2048
)

# Ask user to create a passphrase
password = getpass.getpass("Enter a passphrase for your private key: ")
password_confirm = getpass.getpass("Confirm your passphrase: ")

if password != password_confirm:
    raise ValueError("Passphrases do not match!")

if not password:
    raise ValueError("Passphrase cannot be empty!")

# Save encrypted private key
with open("rsa_key.p8", "wb") as f:
    f.write(private_key.private_bytes(
        encoding=serialization.Encoding.PEM,
        format=serialization.PrivateFormat.PKCS8,
        encryption_algorithm=serialization.BestAvailableEncryption(
            password.encode("utf-8")
        )
    ))

# Generate and save public key
public_key = private_key.public_key()

with open("rsa_key.pub", "wb") as f:
    f.write(public_key.public_bytes(
        encoding=serialization.Encoding.PEM,
        format=serialization.PublicFormat.SubjectPublicKeyInfo
    ))

print("Encrypted RSA key pair generated successfully!")
This code generates an RSA key pair consisting of a public key and an encrypted private key. The private key is encrypted using a passphrase, which you will be prompted to enter when running the script.
The encryption is handled by serialization.BestAvailableEncryption(), rather than serialization.NoEncryption(), meaning that anyone attempting to use the private key will need the passphrase to decrypt it first.
Make sure you remember this passphrase and store it somewhere secure, as you will need it when configuring your dbt connection. If you lose it, you will need to generate a new key pair and register the new public key with Snowflake.
Save the file (not as a .txt) in the snowflake folder.
4. Generate your keys by running in PowerShell:
python generate_keys.py
Then check by running:
dir
You should see:
- generate_keys.py
- rsa_key.p8
- rsa_key.pub
Your private key will now be stored in your personal user directory rather than a Windows system folder (this was where we created the folder "snowflake").
5. Get your public key
Ensuring you're still in the correct folder, run the following in PowerShell:
Get-Content .\rsa_key.pub
This will output the following:
-----BEGIN PUBLIC KEY-----
RANDOM-STRING-HERE
-----END PUBLIC KEY-----
Copy the central string, excluding the BEGIN and END lines - just the string in the middle.
Register your public key to your Snowflake account
Now, you need to ensure your key pair is linked to your snowflake account.
1. First you need to identify your username to link the key to.
In Snowflake, run:
SELECT CURRENT_USER();
And copy the username in the results.
2. Link the key to that user.
Then, still in snowflake, run:
ALTER USER "YOUR_SNOWFLAKE_USERNAME"
SET RSA_PUBLIC_KEY='PASTE_YOUR_PUBLIC_KEY_HERE';
Ensure this runs without error.
To check this works, you can run
DESC USER "YOUR_SNOWFLAKE_USERNAME";
And check the property RSA_PUBLIC_KEY_FP property has been populated. This indicates that Snowflake has registered the public key and generated its corresponding fingerprint.
Linking your key-pair to dbt
Now this is linked to your Snowflake account, you need to pass these details onto dbt so it can login to your Snowflake account.
1. In PowerShell, run the following to get the Private Key
Get-Content .\rsa_key.p8 -Raw
The output will be similar to your public key and look like:
-----BEGIN ENCRYPTED PRIVATE KEY-----
ENCRYPTED-PRIVATE-KEY-STRING-HERE
-----END ENCRYPTED PRIVATE KEY-----
Note: this is private information and is not for sharing!
2. Copy EVERYTHING from the output, including the —BEGIN..— and —END..— sections.
3. Paste this into the Private Key cell, and add the passphrase below.
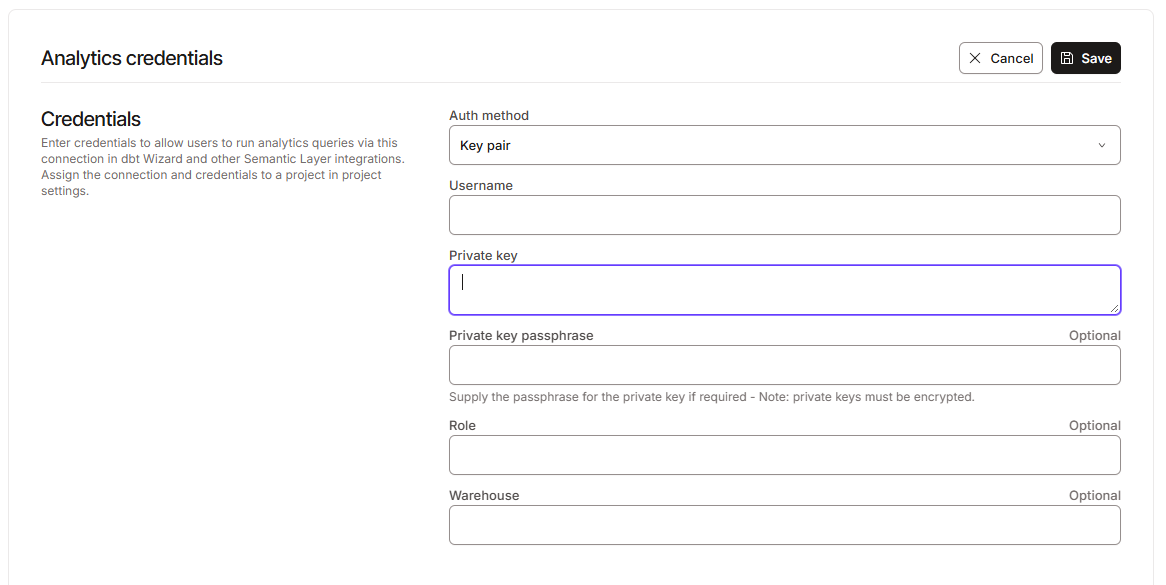
4. Fill out the username.
- Username: In snowflake, run
DESC USER "YOUR_SNOWFLAKE_USERNAME", and copy the value from propertyLOGIN_NAMEin the results, and paste this in the Username cell.
Now, test and save your connection to ensure everything has been set up without issue.
Security Considerations
What is better? Username/password or key-pair? Here are some key considerations:
- Password strength: passwords are more vulnerable to guessing and brute-force attacks, particularly if they are too simple or reused across multiple platforms. Private keys are generated uniquely and are much longer in length, as these aren't memorised by the user.
- Credential security: both username/password and key-pair are only safe if they are both kept a secret.
- Storage: Passwords should ideally be stored in a password manager, while private keys should be stored securely and, where possible, encrypted with a passphrase. An unencrypted private key that falls into the wrong hands could allow someone to authenticate as your user.
- Rotation: Both passwords and key pairs can be rotated. Regularly replacing credentials helps reduce the potential impact if they become compromised.
This is only a brief overview of the similarities/differences. If this is something you are concerned about, it's definitely worth dedicating more time into researching this.
Overall, key-pair authentication may offer security advantages, particularly when private keys are generated, stored and managed properly. However, it isn't automatically more secure than a well-managed password-based authentication method.
Never share your private key or commit it to a Git repository. There are additional ways to keep your key-pair secure, such as encrypting your private key or rotating your keys periodically, which are worth further exploration.