In this blog, we will have a guide on how to build comparison chart using set actions.
To begin, we will use Sample - Superstore data set and we need to add Sub-Category into Rows and we will use Sales later.
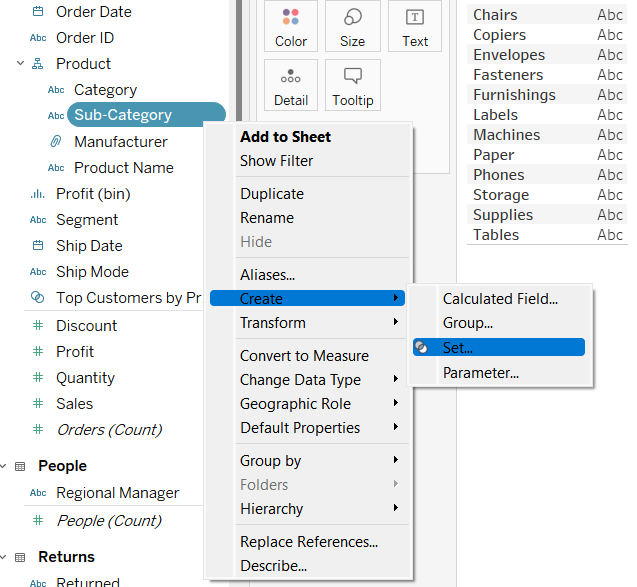
Firstly, we need to create a Sub-Category Set. To do that, we need to right click on Sub-Category and click create and then set. It should look like this:
Once we have clicked on that, we should get a window that looks like this:
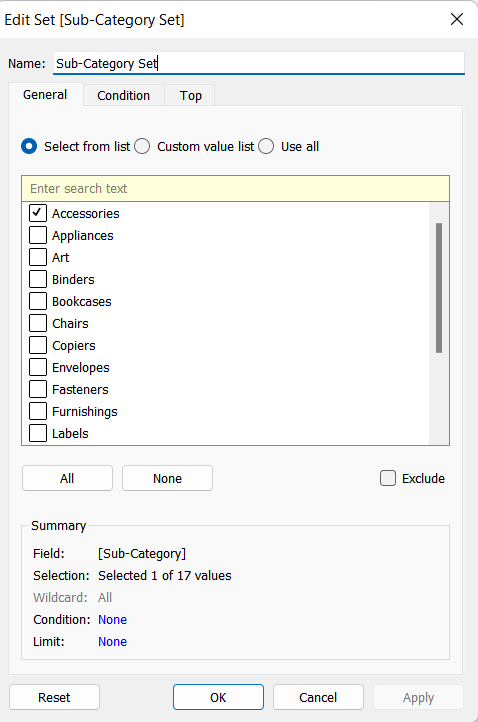
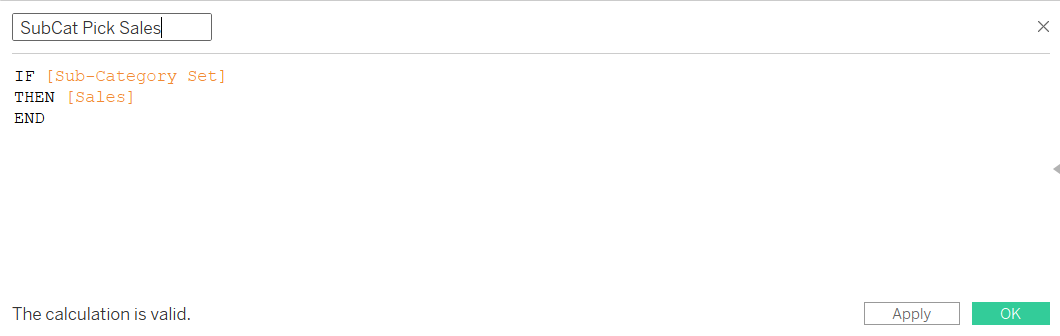
We just need to pick one of the sub-categories for now. Now, that we have a set ready, we need to create a calculated field for when we pick a sub-category, we need to compare the Sales. This is what we need to have in the calculated field:
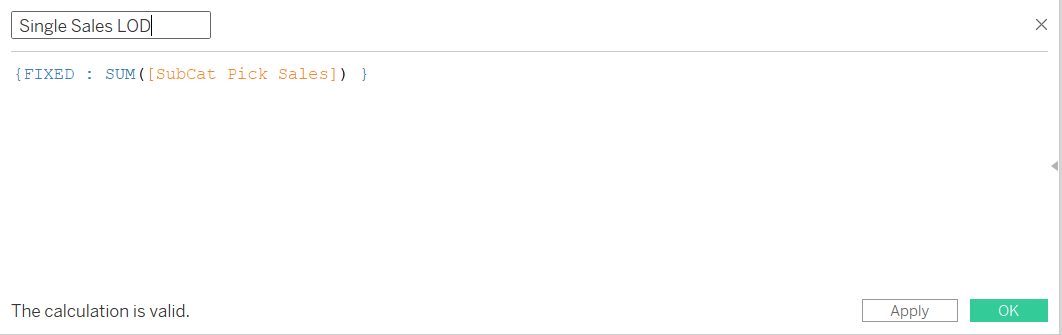
As we have this, we now need to create another calculated field, where we create a level of detail calculation:
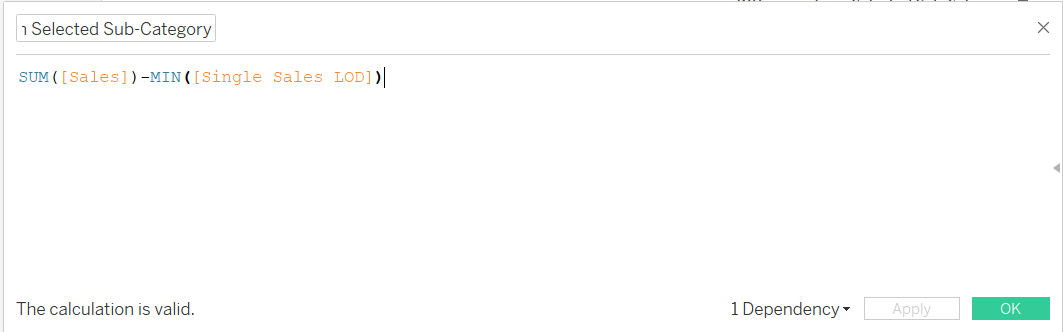
After this, we need one more calculated field that would calculate the difference between the actual sales and sales of the sub-category we have selected which should look like this:
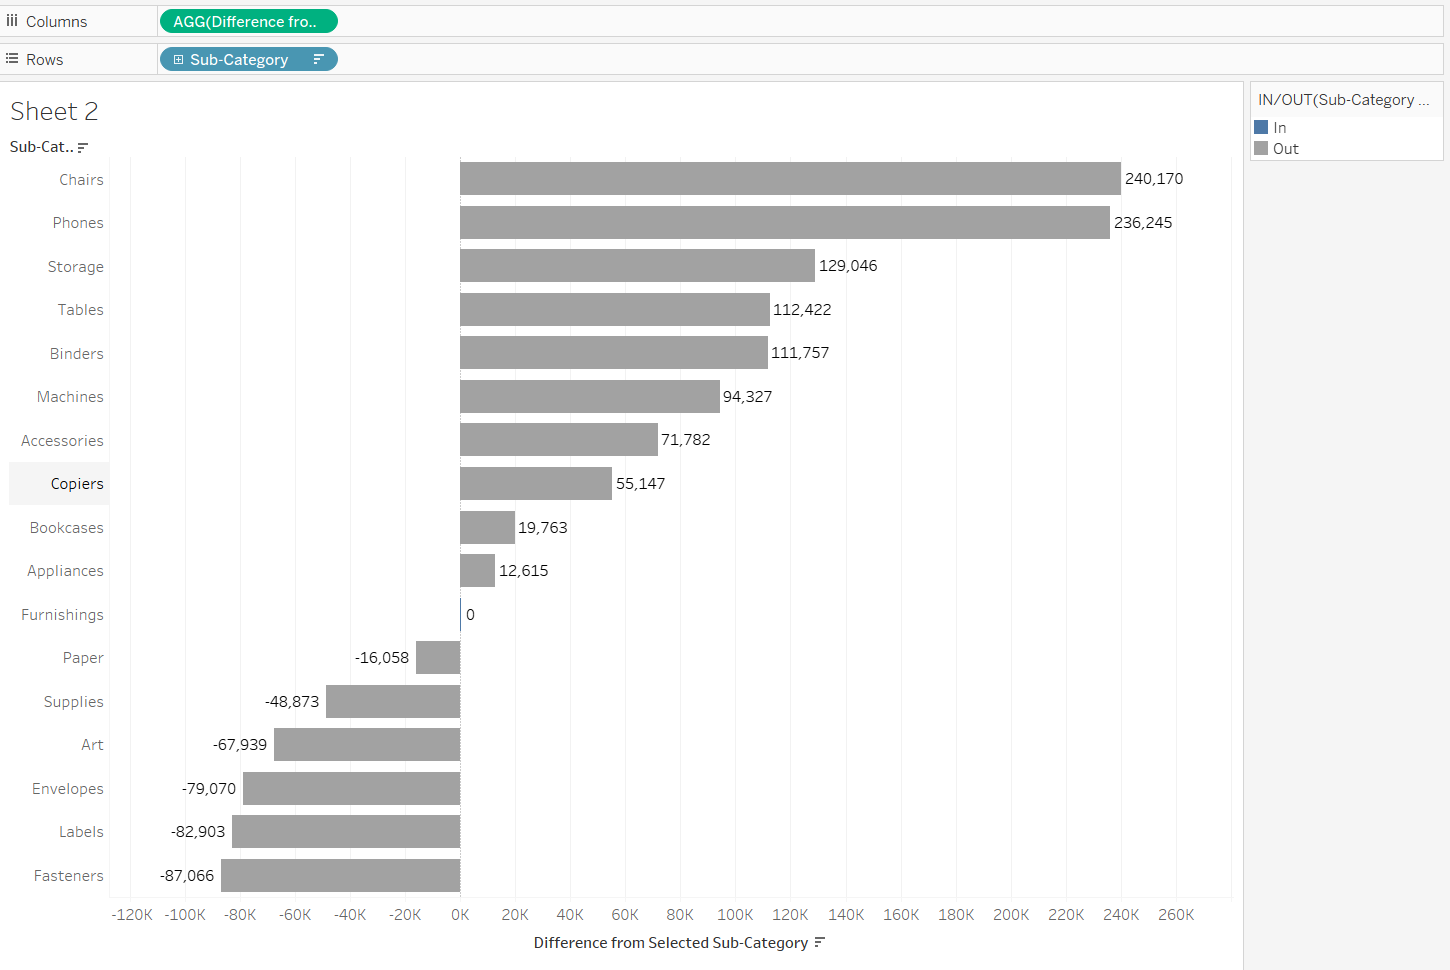
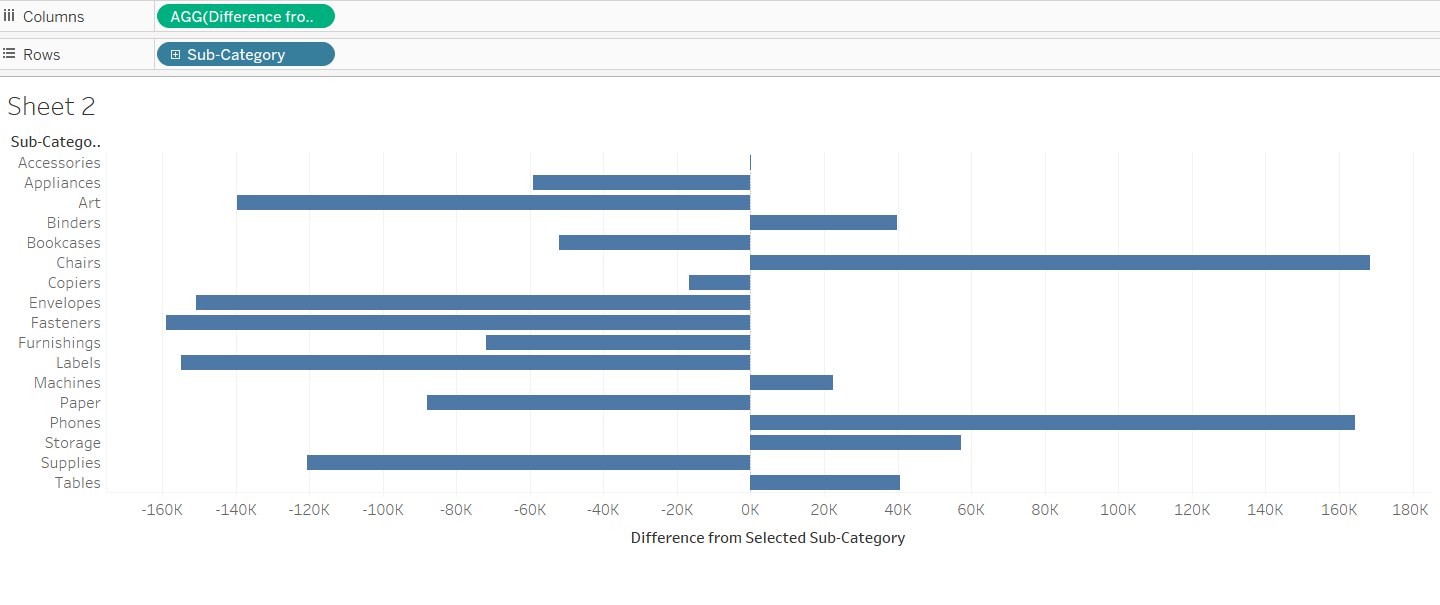
Now that we have all the calculations, we need to add the last calculation on the columns. Then your sheet should look like this:
Now, we need to add a set action. We need to go to Worksheet and then Actions and select Add Action and click on Change Set Values. Then a window like this should pop up.
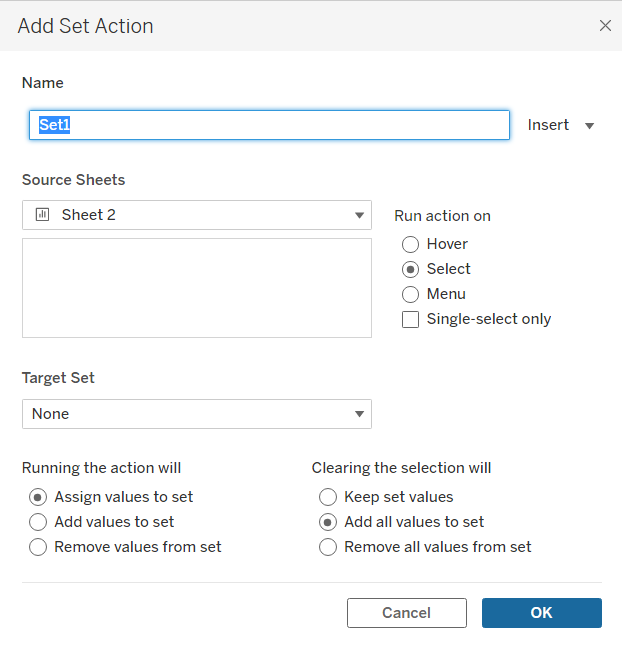
We need to name it something that you would remember, then for the Source Sheet, you have to pick the sheet where you want the action to happen, in this case Sheet 2. For the target set, we need to select the set we have created, Sub-Category Set and pick how the action should happen. We will keep the first choice for the "running the action will" but for the "clearing the selection will" we need to choose 'keep set values'.
Now, the action will work. To add a bit more detail, we can add the labels to the ends of the bars to see the difference in how sales change from the sub-category that is selected and adding the set to colour too.
Here you go! The final result should look something like this: