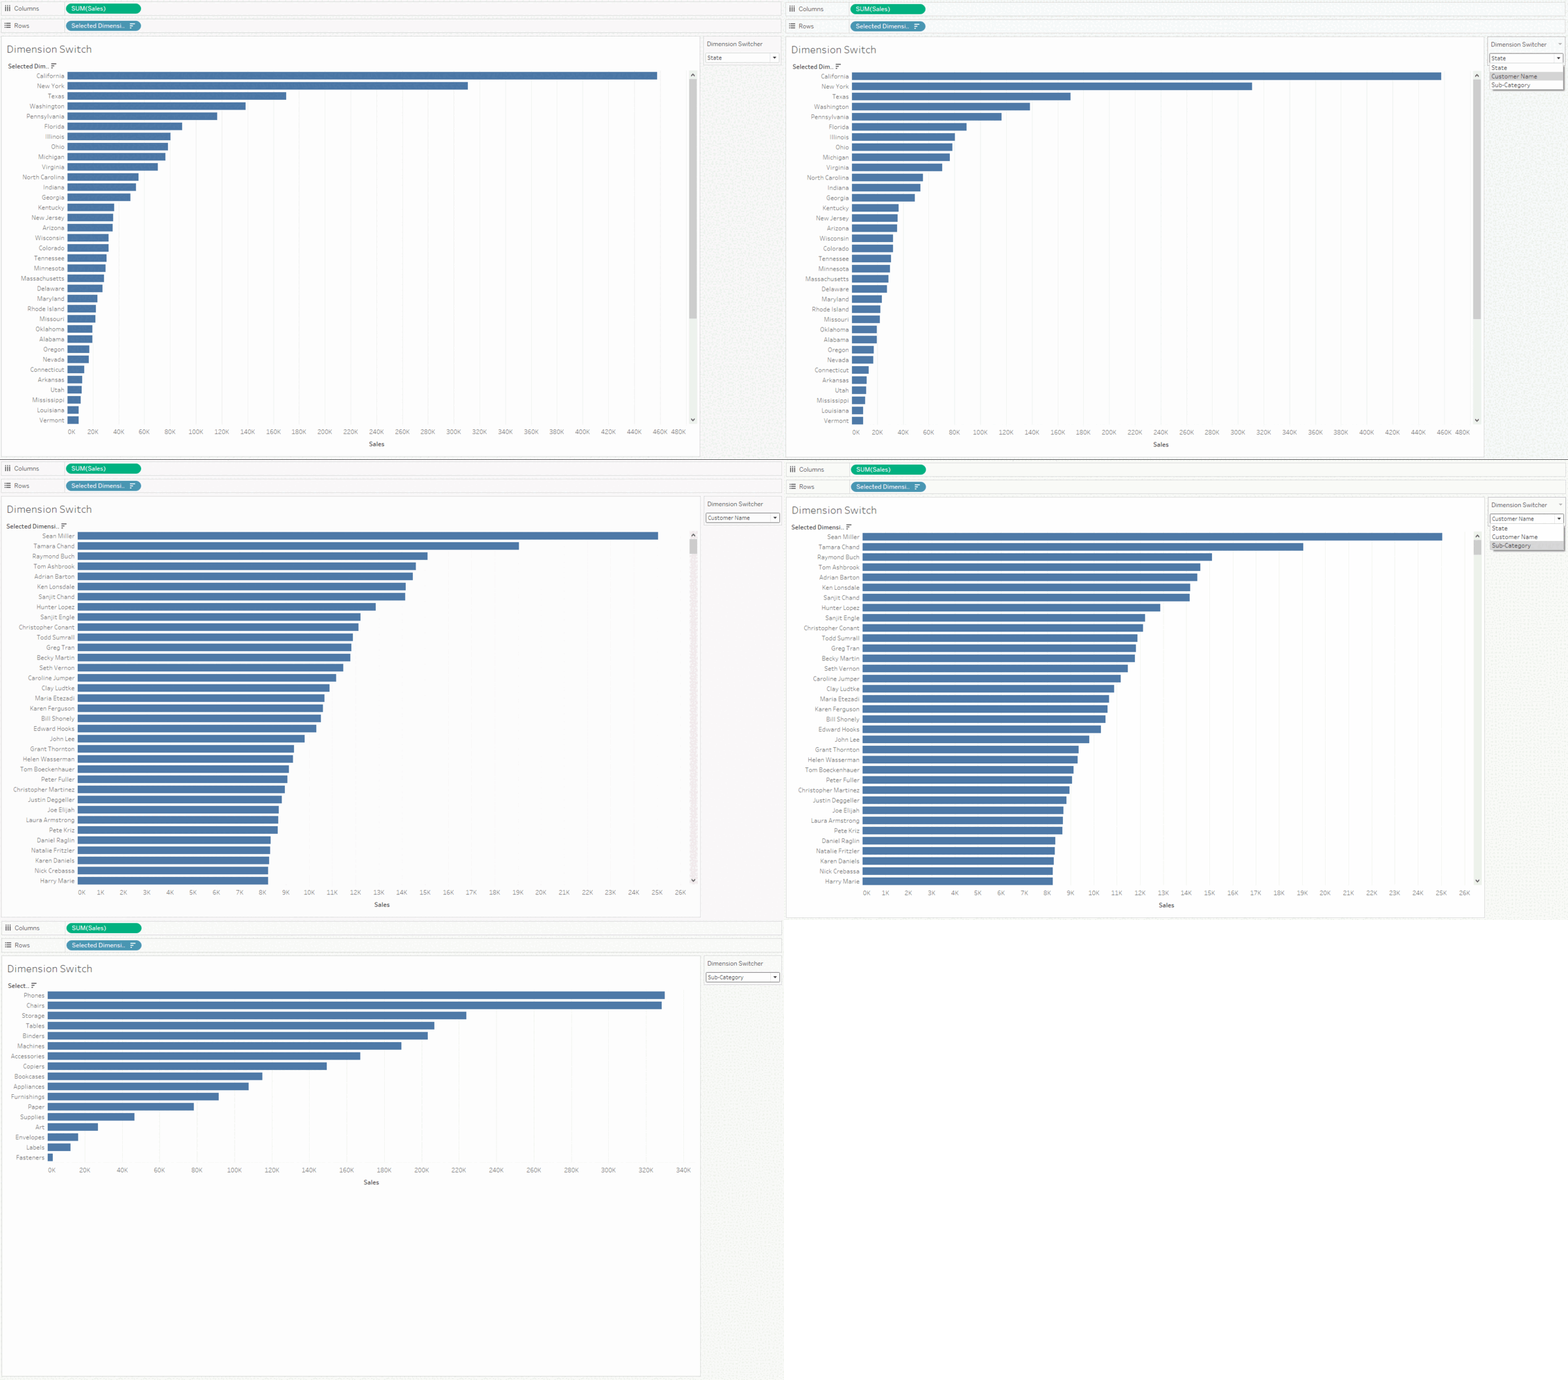
Parameter actions are a good way to allow a dashboard user additional options to choose a parameter. By including a dropdown to select a specific dimension the user has the option to take a look at what she/he is interested in.

1. Create a Parameter
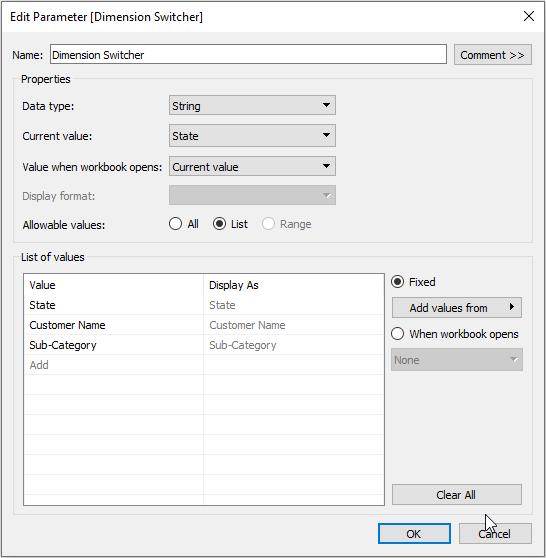
At first a parameter has to be created. By choosing the list selection you are able to specify the dimensions you want the user to be able to choose, as well as the way they are displayed. Therefore you can add strings into the value field that can be used in the next step. It is important to notice that these values are just placeholders and not the actual field names.

2. Create a Calculated Field
The second step is to create a calculated field to tell Tableau what each string specified in the parameter is connected to which Dimension. That’s important because the original parameters are only strings and are not really connected to the columns.

3. Move the created Field into the canvas
To apply the created calculated field it has to be moved into the canvas. Drop the field where you want it to be displayed
4. Show the Parameter
In order to allow the user to make the according selections the parameter has to be displayed.
