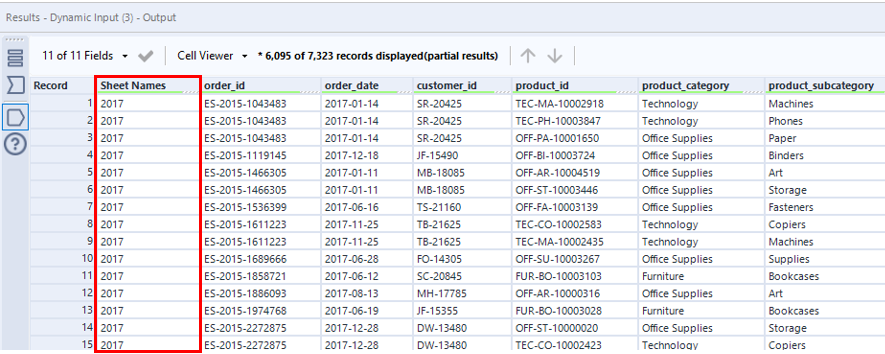
This blog gives a quick tutorial on how to load in multiple sheets from one Excel file into Alteryx all at the same time rather than manually loading them in one by one. There is also an extra section at the end which goes through how to append the sheet name onto the merged data table.
QUICK HOW-TO
First of all bring your excel sheet onto the canvas using one of the following methods:
a. Drag and drop Input Data tool, click on the Connect a File or Database drop down and select your Excel file
b. Drag and drop your Excel file directly onto the canvas from your file explorer
Either one of these methods will bring you to the Select Excel Input config where the default option is Select a sheet.
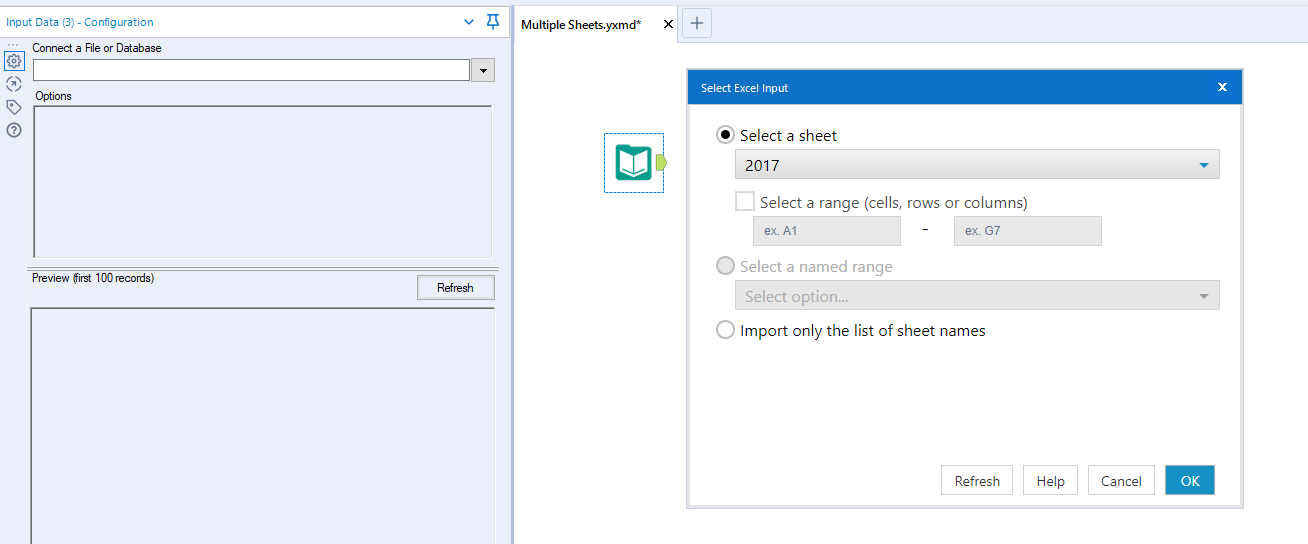
So at this point you could load in each individual sheet one by one but this starts becoming tedious if you have more than a few. Luckily there is a much easier way! Instead of selecting a sheet to bring in, choose the final option to 'Import only the list of sheet names'
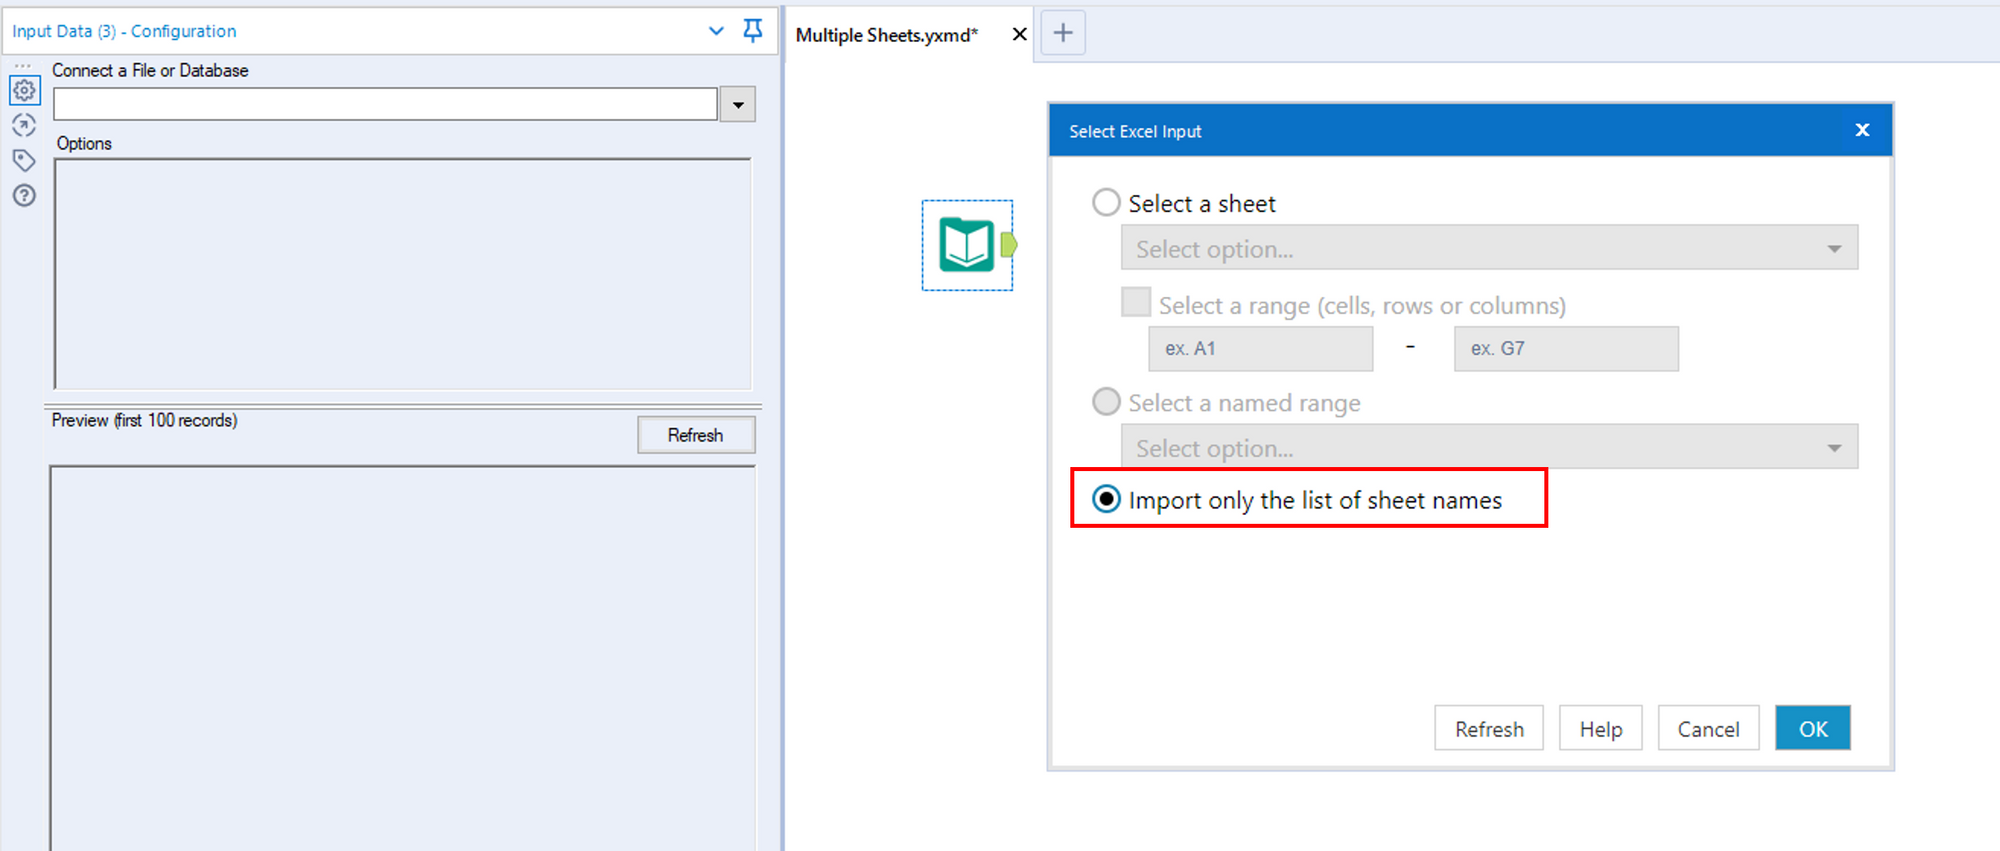
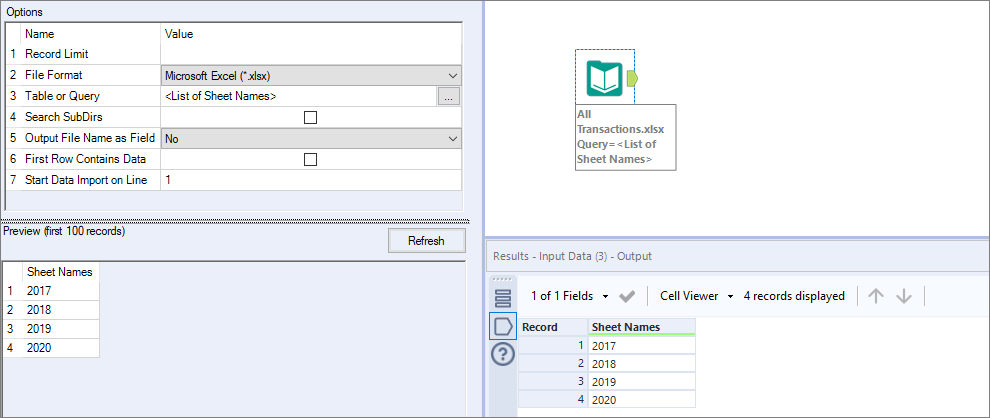
After you click OK and run the workflow, in the results window you'll see it returns one field with a row for each sheet name
Now for the key step, we bring in the Dynamic Input tool and configure as the following:
- Again, find the file path where your Excel file is saved. You will get the same Select Excel Input config as you did in the beginning. Just choose the first option 'Select a sheet' and choose any one of your Excel sheets.
- Edit the Field to 'Sheet Names' which should be the only option from the drop down menu
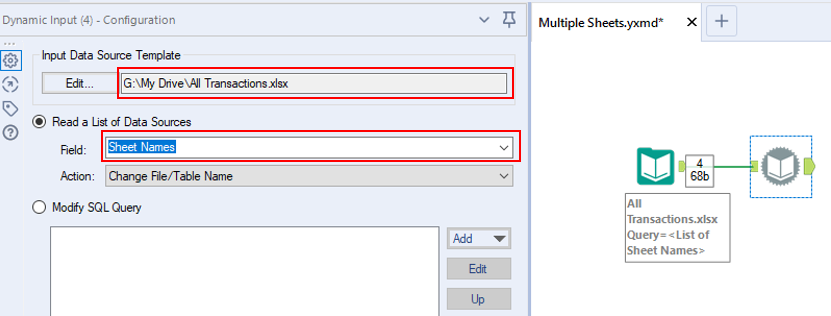
Click run and voila! The output we get is a union of all our sheets meaning the sheets will get stacked on top of one another vertically so it's important that all the Excel tabs have the same schema i.e. they should have the same ordered columns and respective data types.
EXTRA - APPEND SHEET NAME
It may be useful to also include the sheet name as it's own column so that we know which rows came from which sheet. The easiest way I have found to do this is as follows:
Go through the same steps as above until the Dynamic Input configuration. Now instead of selecting Sheet Names for Field, we instead want to select the Modify SQL Query option then click Add on the right hand side.
Now we need to do two things here; firstly, replicate what the first method did in loading in all sheets and then we want to append the sheet name.
So the first selection we want to make is 'Replace a Specific String' which will create our table
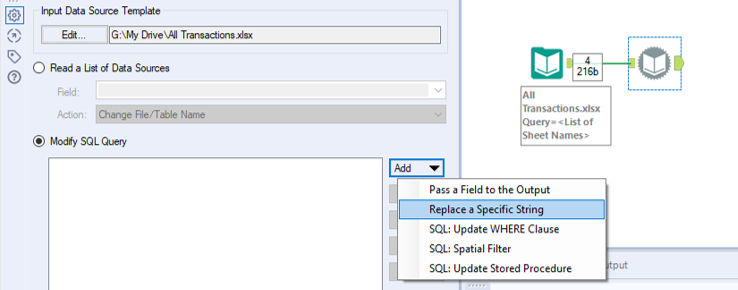
A new config box will pop up but leave everything as the default and click okay, you should have something similar to the following in the query box
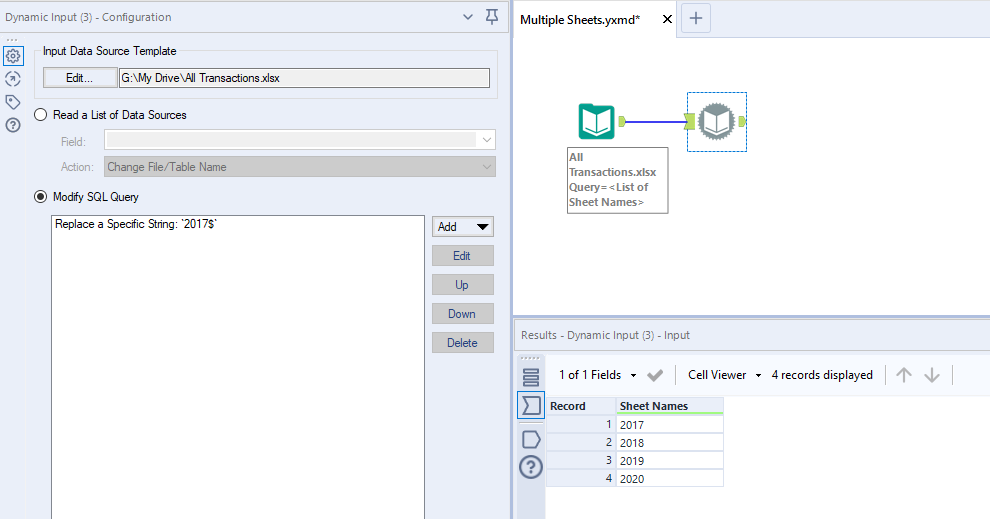
Next we want to go back on that Add drop down and select Pass a Field to the Output. Again leave the default option in the config and click okay, this is where we are asking the Sheet Name to be added to the table
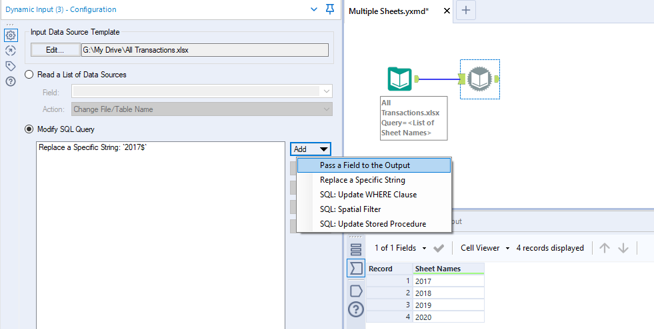
The final query box should look similar to this
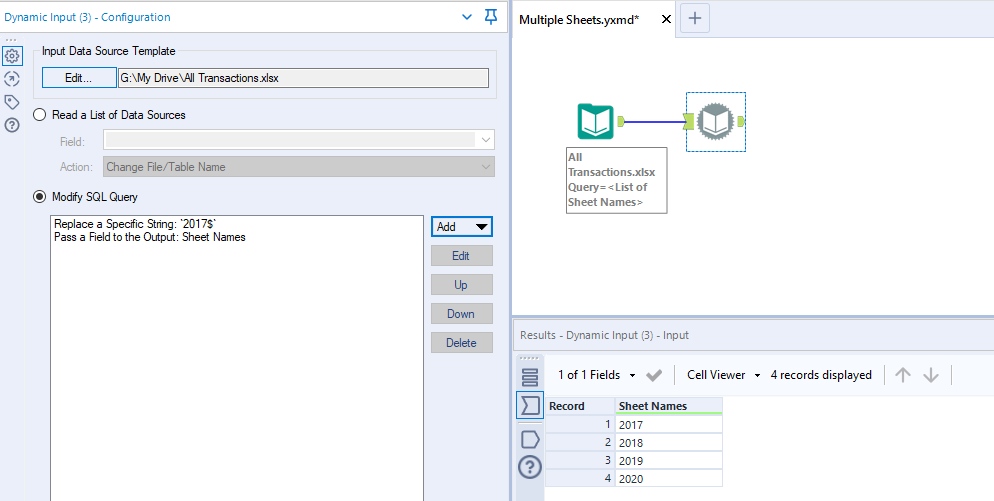
Now click run and you will see the Sheet Name as the first column in your table!
