


This guide will walk you through the process of creating a chart swap toggle in Power BI using bookmarks. The process is broken down into two main parts: building the bookmark infrastructure and associating the bookmarks with specific displays.
Table of Contents
Setting Up Bookmarks
-
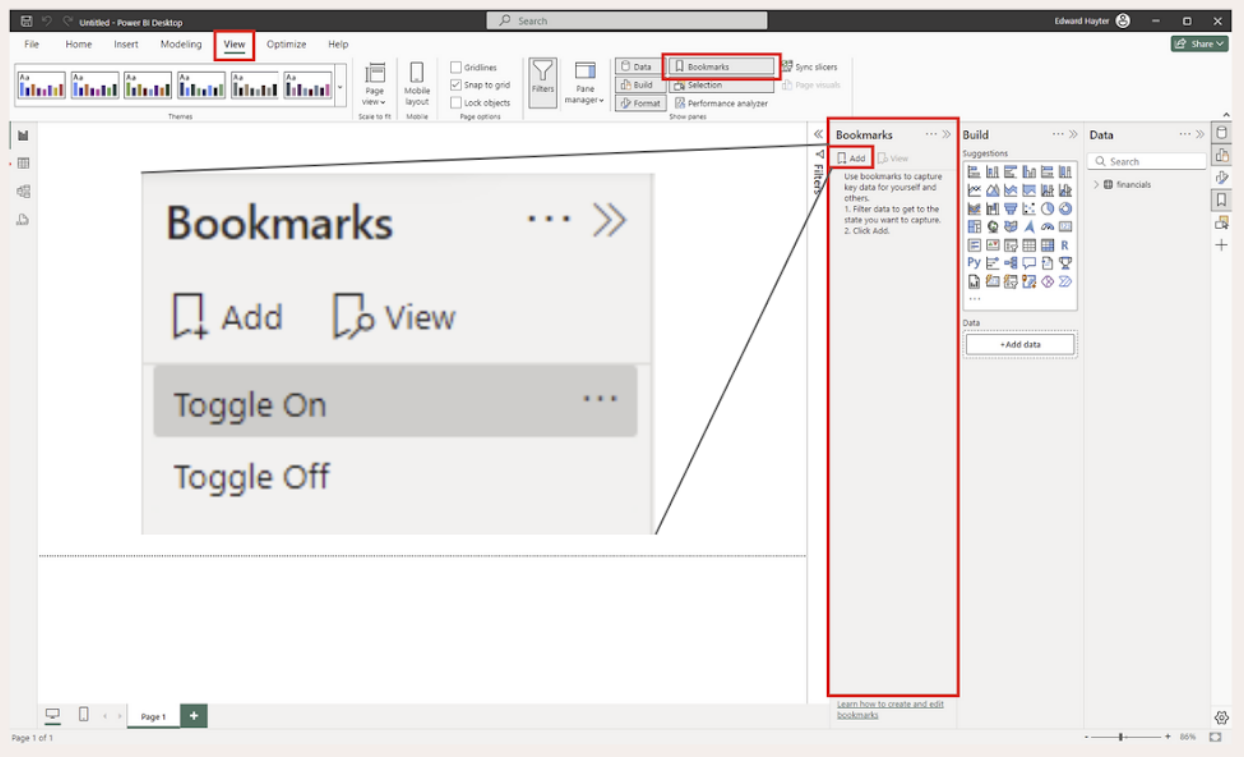
Open the Bookmark Pane:
- Go to
View > Bookmarksto ensure the bookmark pane is open.
- Go to
-
Create Bookmarks:
- Add two bookmarks named after your two states (e.g.,
Slicers Shown&Slicers HiddenorBar Chart Shown&Scatter Plot Shown). For this example, we'll useToggle OnandToggle Off.
- Add two bookmarks named after your two states (e.g.,
Creating a Toggle Button
-
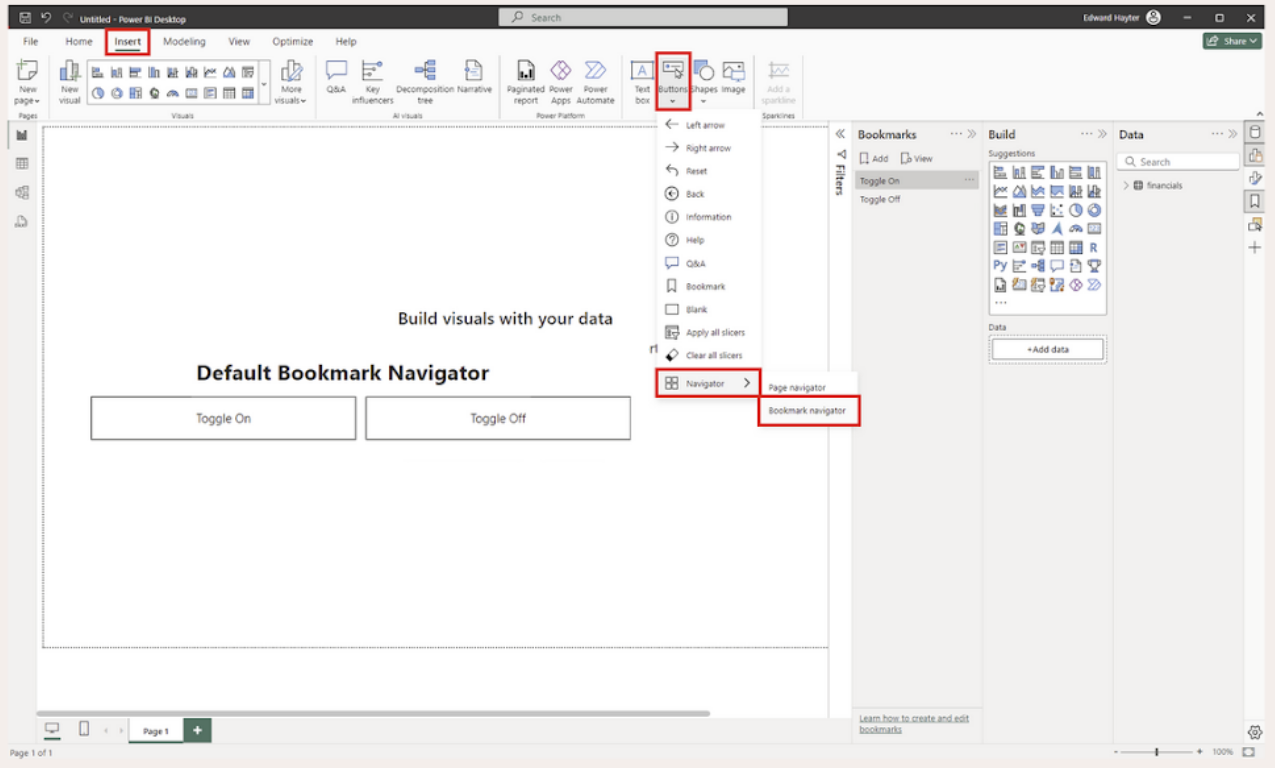
Insert a Button:
- Go to
Insert > Buttons > Navigate > Bookmark Navigator.
- Go to
-
Configure the Navigator Button:
- By default, this will create a set of buttons to navigate between bookmarked states. For a chart toggle, we need a single button with specific configurations.
Configuring the Button
-
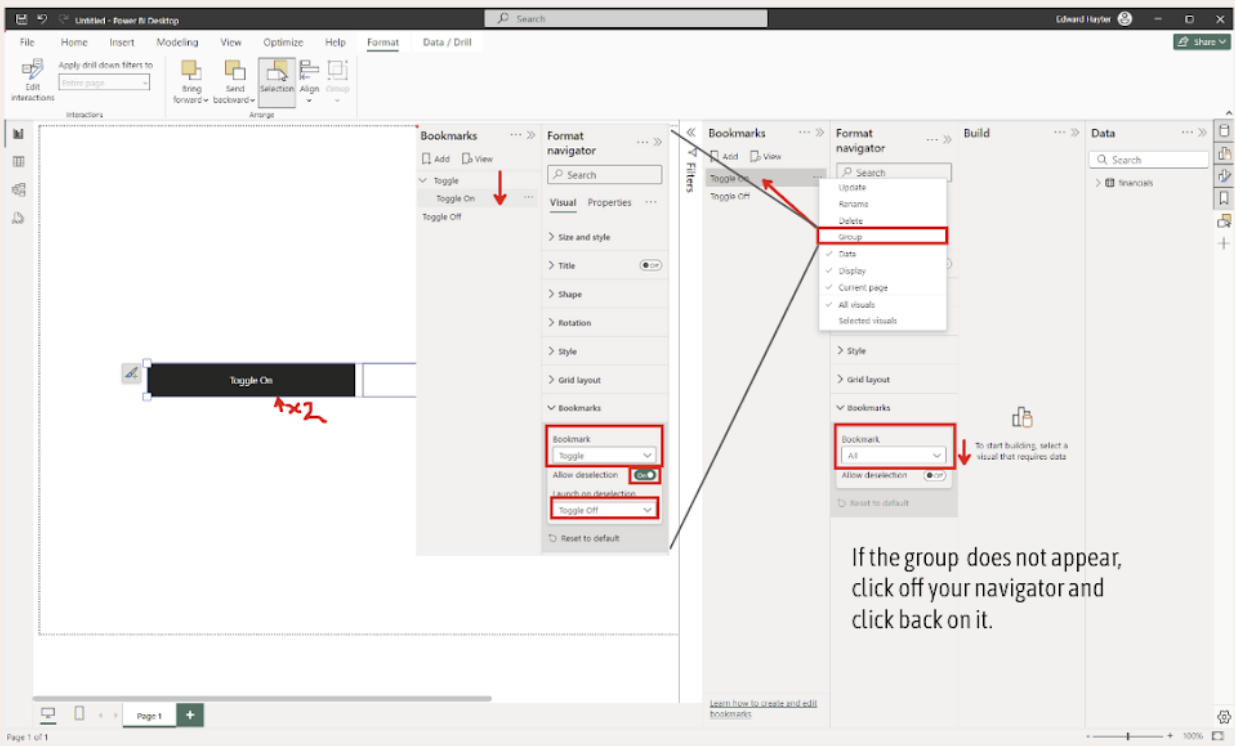
Format the Navigator:
- Inside the formatting options for the navigator, go to the
Bookmarkoption. Here, you can specify that the navigator applies to a group of bookmarks.
- Inside the formatting options for the navigator, go to the
-
Grouping Bookmarks:
- In the bookmark pane, add one of the states to a group. Then, select the group from the dropdown in the formatting options. Note: The dropdown may not refresh immediately; click off the navigator and back on to reopen the formatting config.
-
Enable Deselect Option:
- Enable the deselection option and select your other state to achieve the desired functionality—a single button that toggles between the two states.
-
Customize Appearance:
- Update a bookmark name to a Unicode dot: ⬤. Use alignment, padding, shape, and fill options to customize the look. Set the default format first, then configure the selected format. Control-click the button to toggle between the two states and ensure the formatting is satisfactory.
Finalizing Functionality
-
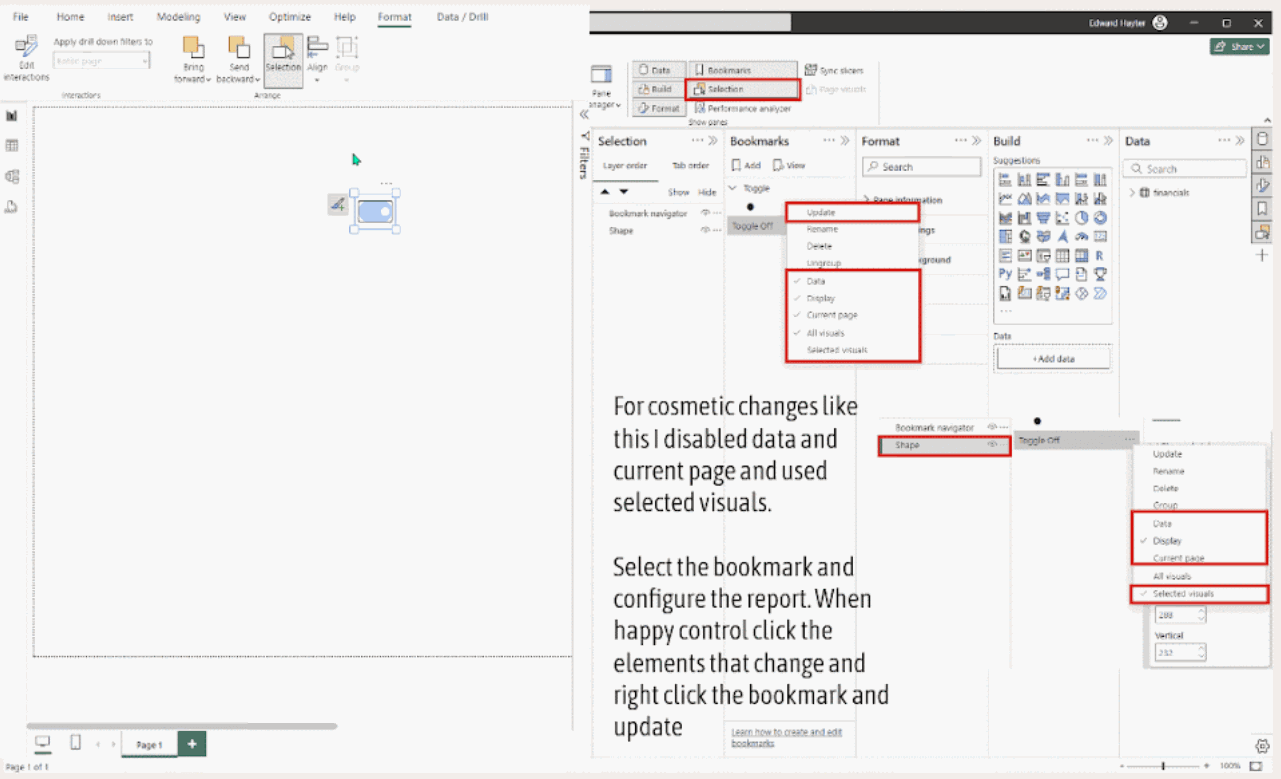
Open the Selection Pane:
- Go to
View > Selectionto open the selection pane. This helps in easily selecting report items and toggling their visibility.
- Go to
-
Configure Bookmarks:
- Right-click on the bookmark to set configurations based on your use case. For cosmetic updates like a chart swap, disable the
Dataoption to avoid saving filter setups in the bookmark. - Select
Apply to selected visualsto control particular components of the report. This is generally the most effective option.
- Right-click on the bookmark to set configurations based on your use case. For cosmetic updates like a chart swap, disable the
-
Update Bookmarks:
- Select the bookmark to update, then hide/show the appropriate objects in the selection pane. Control-click the objects to be impacted by the bookmark, right-click, and update the bookmark.
-
Set Current Page Option:
- The
Current pageoption ensures that when a bookmark is selected via a button, you are taken to the page where the bookmark was originally created. In a multi-page report, this ensures users are redirected to the correct page.
- The
Summary
With the infrastructure in place, you can now focus on the functionality of your chart toggle. Using these steps, you can easily configure a seamless chart swapping experience in Power BI.
Detailed Steps for Configuration
Setting Up Bookmarks
-
Ensure Bookmark Pane is Open:
- Navigate to
View > Bookmarksto open the bookmark pane.
- Navigate to
-
Create Two Bookmarks:
- Click
Addto create a bookmark for each state you want to toggle between. Name them descriptively, such asBar Chart ShownandScatter Plot Shown.
- Click
Creating and Configuring the Toggle Button
-
Insert a Bookmark Navigator Button:
- Go to
Insert > Buttons > Navigator > Bookmark Navigator.
- Go to
-
Configuring Single Button Toggle:
- By default, multiple buttons will be created. To use a single button:
- Go to the formatting pane, under
Navigator, selectBookmark. - Group one of the bookmarks in the bookmark pane.
- Select the group from the dropdown in the formatting options.
- Enable the
Deselectoption and choose the second bookmark to complete the toggle functionality.
- Go to the formatting pane, under
- By default, multiple buttons will be created. To use a single button:
Customizing the Toggle Button Appearance
-
Update Bookmark Names:
- Change a bookmark name to a Unicode dot (⬤) for a toggle switch appearance.
-
Adjust Alignment and Padding:
- Use the alignment, padding, shape, and fill options in the formatting pane to refine the button's appearance.
-
Check Formatting:
- Control-click the button to toggle states and verify the appearance and functionality.
Finalizing Bookmarks and Button Functionality
-
Open the Selection Pane:
- Navigate to
View > Selectionto open the selection pane.
- Navigate to
-
Select Report Items:
- Use the selection pane to easily toggle visibility of items on your report.
-
Configure Bookmark Settings:
- Right-click each bookmark and configure settings:
- Disable the
Dataoption for visual-only changes. - Select
Apply to selected visualsfor targeted updates.
- Disable the
- Right-click each bookmark and configure settings:
-
Update Bookmark States:
- Toggle visibility of items in the selection pane, then update the bookmark by right-clicking and choosing
Update.
- Toggle visibility of items in the selection pane, then update the bookmark by right-clicking and choosing
-
Ensure Proper Navigation:
- If working in a multi-page report, make sure the
Current pageoption is correctly set to navigate users to the correct page.
- If working in a multi-page report, make sure the
By following these steps, you'll create a functional and visually appealing chart swap toggle in Power BI.