


Setting Up Your Tableau Desktop Environment for Success
Jumping straight into Tableau training without configuring your environment first? You’re not alone. Many beginners dive right in, only to run into frustrating issues later. Taking a few minutes to set up your Tableau Desktop environment properly can save you time, improve efficiency, and even prevent data loss. Here are four key steps to get you started.
1. Set Your Language Preferences
Tableau defaults to English (US), but if you’re working in the UK or another region, you may want to change this.
Why it matters:
- Prevents regional spelling errors in field names, labels, and tooltips.
- Ensures consistency when collaborating with teams using different language settings.
How to do it:
- Go to Help > Language Settings and select English (UK) (or your preferred region).
- Restart Tableau to apply the changes.
✅ Pro Tip: If you work with international teams, agree on a standard language setting for all workbooks.

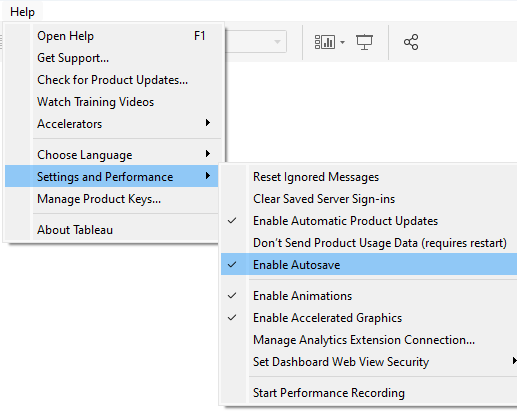
2. Enable Autosave
We’ve all been there when your laptop crashes, and hours of work disappear. Tableau’s Autosave feature can save you from this nightmare.
Why it matters:
- Protects against unexpected crashes or software freezes.
- Reduces the risk of losing hours of effort.
How to do it:
- Go to Help > Enable Autosave.
- Tableau will now automatically save your progress at regular intervals.
✅ Pro Tip: Even with Autosave enabled, save your work manually before making major changes.
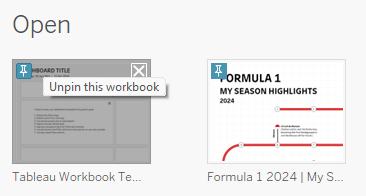
3. Pin Your Template Workbook
If you use a template workbook for consistent formatting and branding, make sure it’s always easy to access.
Why it matters:
- Saves time by ensuring your template is always at the top of your recent workbooks list.
- Prevents accidental overwrites by using Save As instead of modifying the original template.
How to do it:
- Open your Template Workbook.
- Click the pin icon next to it in the Recent Workbooks list.
- Now it will always appear at the top, ready to use.
✅ Pro Tip: Use a well-structured template with pre-set colors, fonts, and layout guides to maintain consistency across dashboards.
4. Move Your Tableau Repository to the Cloud
One of the first lessons at The Data School is about protecting your Tableau Repository. This folder stores preferences, data sources, and custom shapes, and if your laptop crashes, you could lose everything.
Why it matters:
- Prevents data loss by ensuring your repository is backed up automatically.
- Allows you to access preferences and assets from multiple devices.
- Enables collaboration with other analysts by sharing custom shapes, color palettes, and workbook defaults.
How to do it:
- Locate your Tableau Repository (usually in
Documents/My Tableau Repository). - Move it to a cloud storage location (OneDrive, Google Drive, or SharePoint).
- In Tableau, update the repository location under Help > Settings and Performance.
✅ Pro Tip: In a business setting, IT teams often store shared Tableau Repositories in the cloud so that multiple analysts can access common assets.
Final Thoughts
Taking these small steps at the start can make a huge difference in your Tableau experience. You’ll work more efficiently, reduce the risk of losing work, and create more consistent dashboards. Whether you're just starting or refining your workflow, these settings will help you stay organized and professional.
Found this useful? Send to a friend!