


Version Control, or Source Control, in Power BI involves managing different versions of Power BI reports, datasets, and other assets to ensure consistency, traceability, and collaborative development. Here’s an overview of how version control can be implemented in Power BI.
The .pbix files are binary. Unlike text-based files, binary files don’t support text-based diff tools, making it hard to track changes at a granular level. This means that if you want to make an update to a measure or add a specific visual, you can't pinpoint the exact changes in the text. Consequently, versioning Power BI reports in the past required versioning the entire project file instead of just the components that had changed.
Power BI does not have built-in version control features but can be integrated with source control systems like Git and GitHub. Because of this Power BI Desktop introduced a new way to author, collaborate, and save your projects. When you save your work as a Power BI Project (.pbip), report and semantic model item definitions are saved as individual plain text files in a simple, intuitive folder structure.
BENEFITS
- Improved Version Control
Granular Tracking: Changes can be tracked at a more granular level, allowing for better management of individual components.
Text-Based Diffing: Since many of the files within a .pbip project are text-based (like JSON, XML, or M code), standard version control systems (like Git) can easily track changes and support diffing and merging.
- Enhanced Collaboration
Team Workflows: Multiple team members can work on different parts of the project simultaneously, such as one person working on the data model while another focuses on report visuals.
Reduced Conflicts: By breaking down the project into smaller files, the likelihood of merge conflicts is reduced.
- Modularity
Reusable Components: Components like queries and data models can be reused across different projects, promoting consistency and saving time.
Easier Maintenance: Modular components are easier to update and maintain over time
THE .pbip SETUP
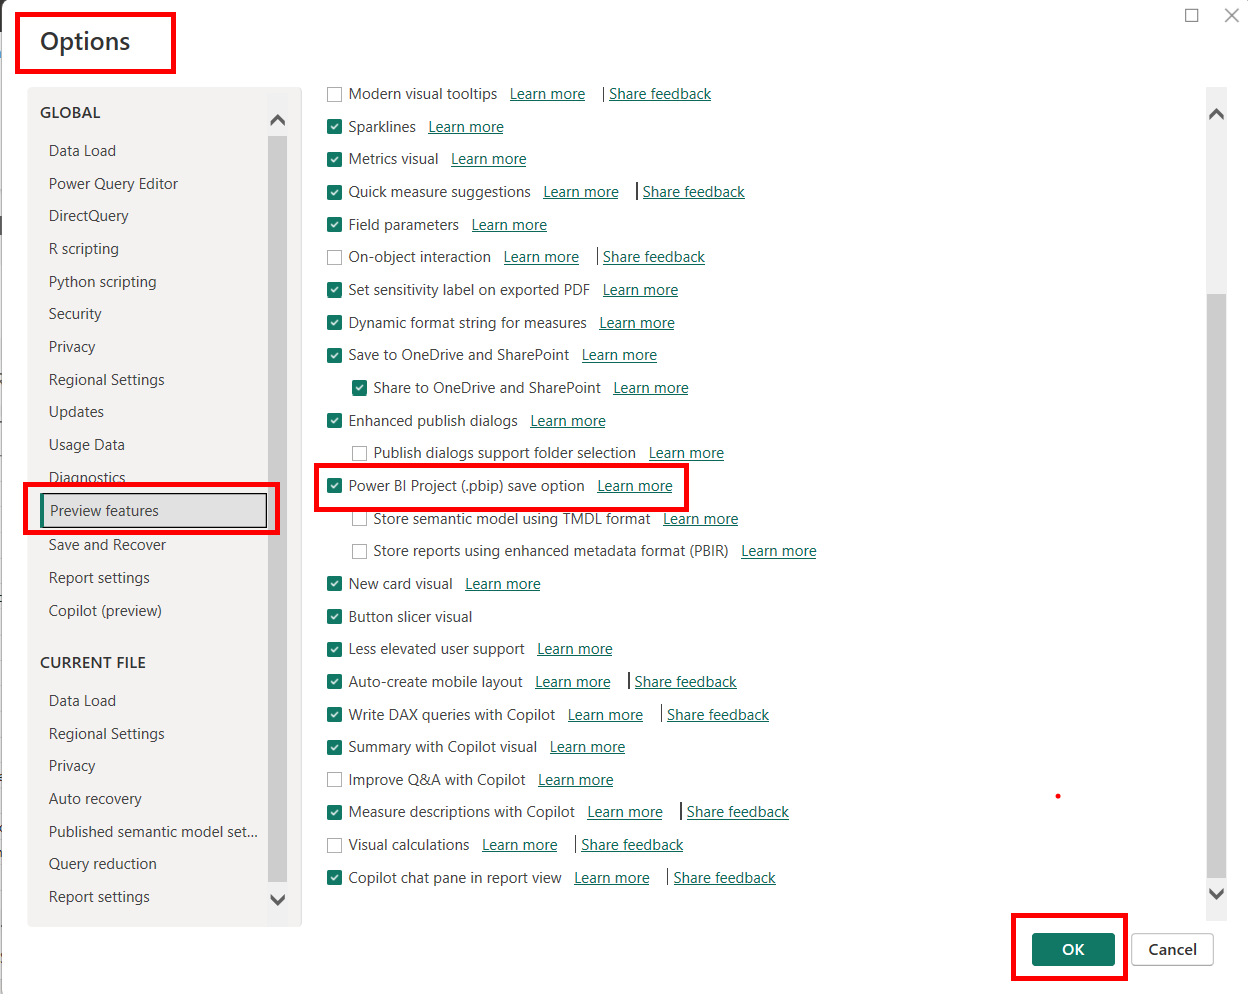
Saving as a Power BI Project in Power BI Desktop is currently in preview, and you must enable it in Preview features.
Go to File > Options and settings > Options > Preview features and check the box next to Power BI Project (.pbip) save option. Restart PBI Desktop to enable.
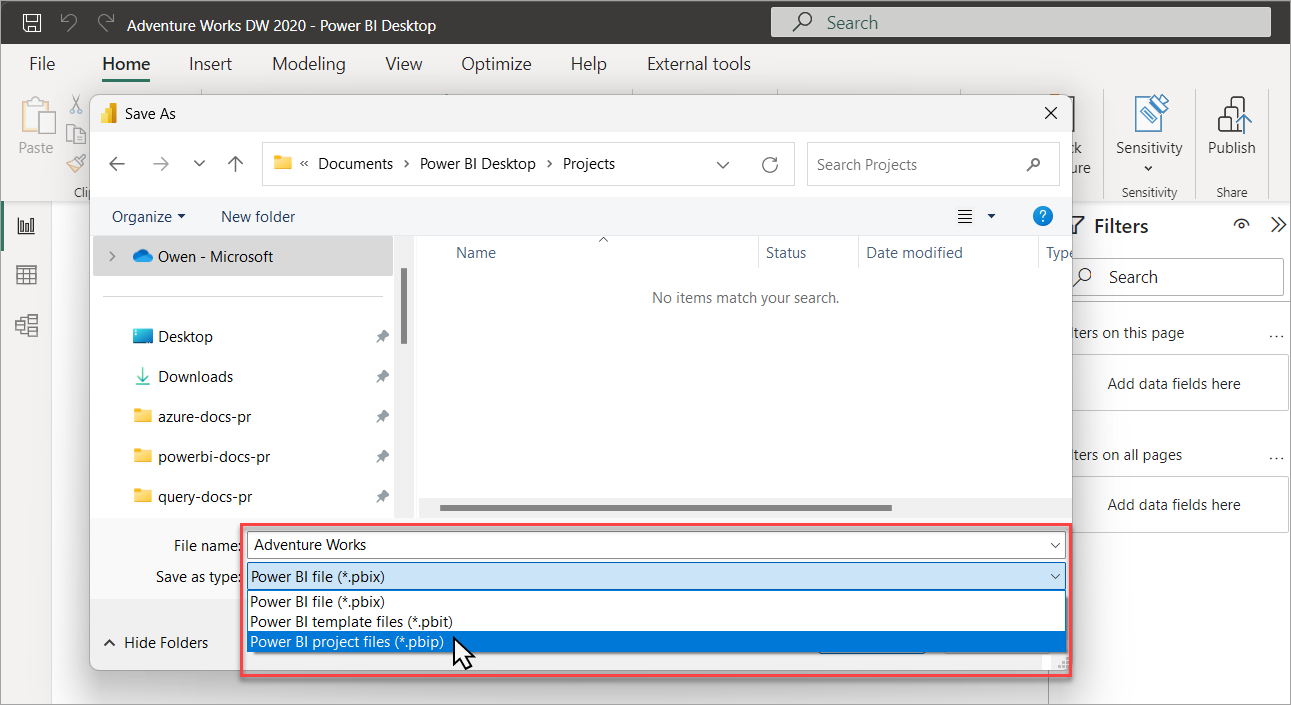
Save as a Project
If you're working on a new project or you opened an existing Power BI Desktop file (pbix), you can save your work as a Power BI project file (pbip):
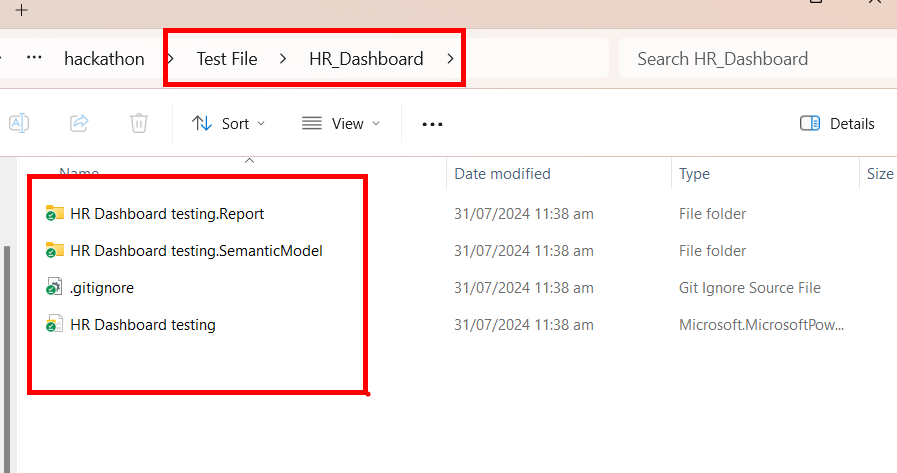
When you save as a project, Power BI Desktop saves report and semantic model items as folders, each containing text files that define the item:
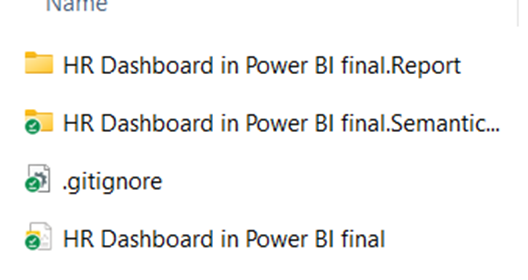
To trace changes made to the report or data models, use the workbook in this folder as this is where the version control is tracked. When you change anything in the report or create a new measure, save the file and changes will be made in the folder.
Fabric Git Power BI Workspace Integration
Prerequisites
- Premium capacity license
- Fabric enabled
- Active Azure account registered to the same user that is using the Fabric workspace
More details on integration can be found here
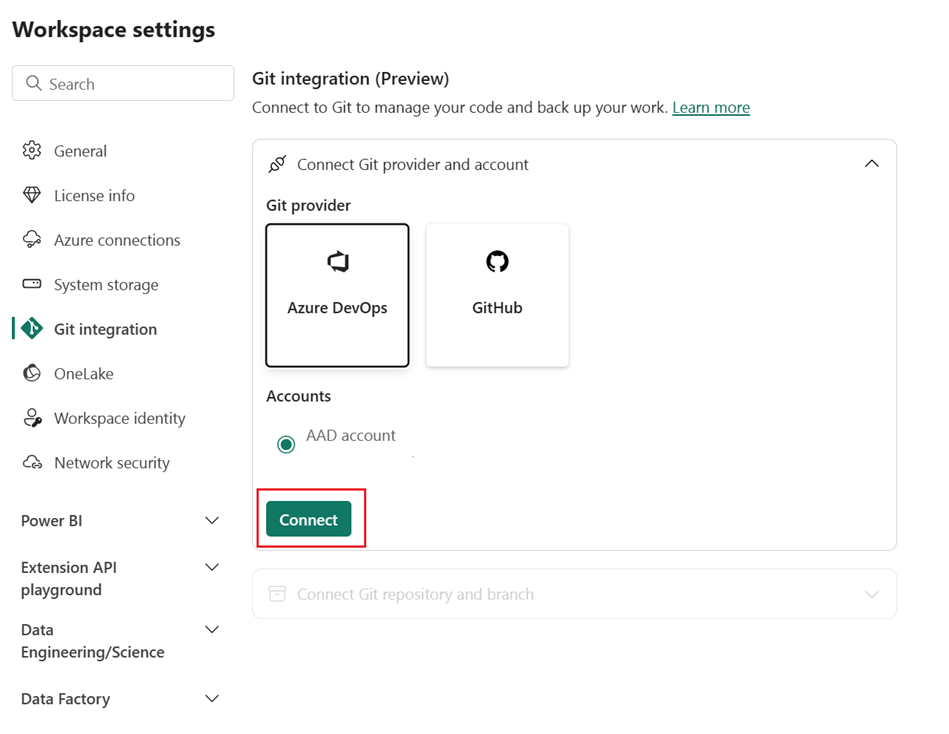
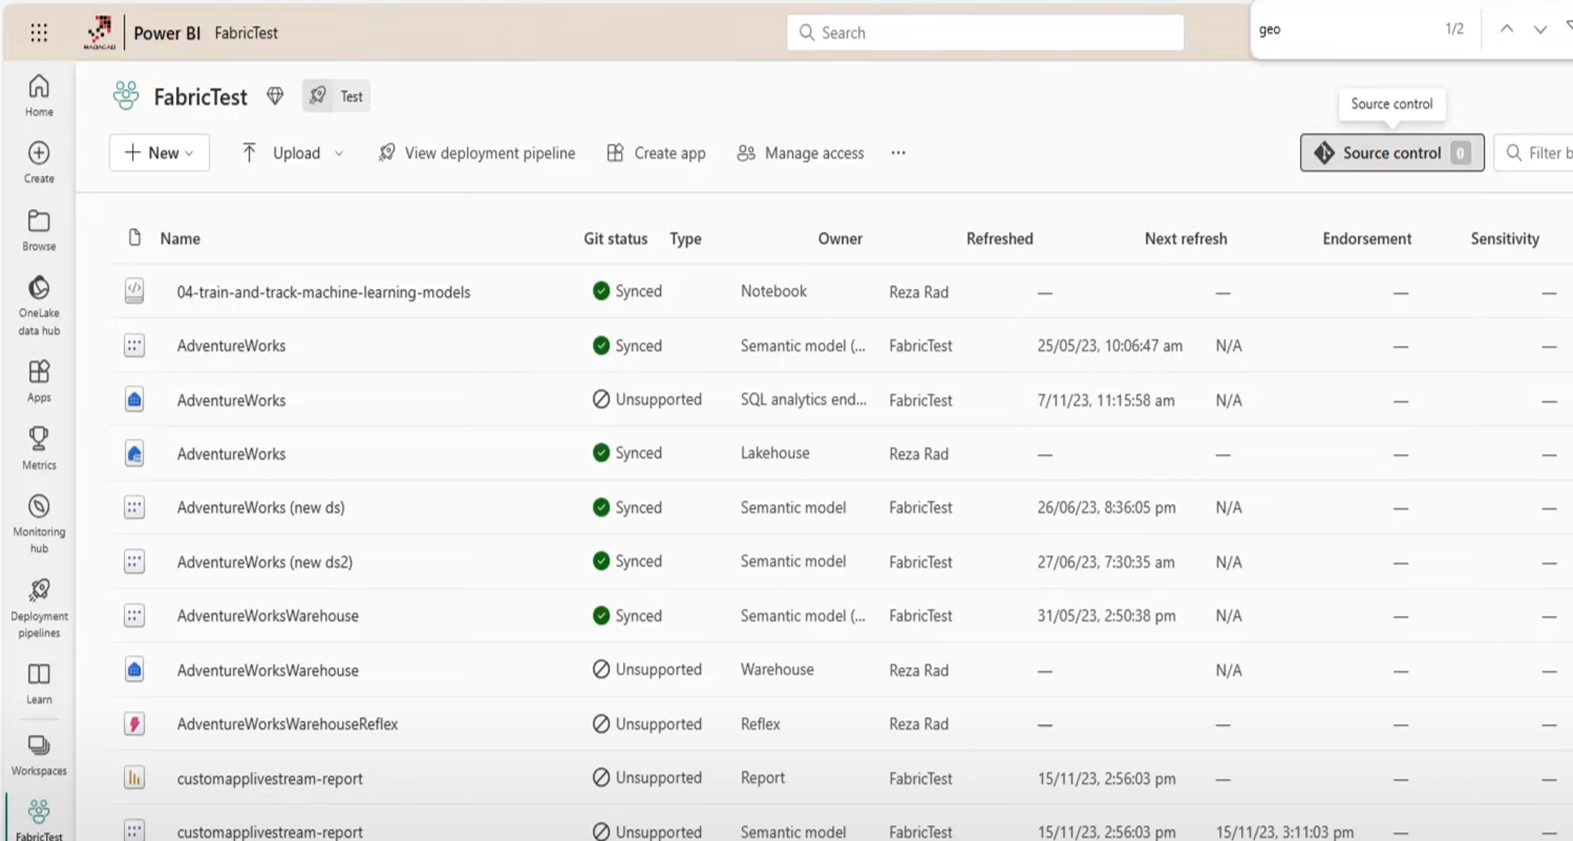
In the Microsoft Fabric or Power BI workspace, navigate to Workspace Settings and select Git Integration. Select your Git provider. Currently Azure DevOps and GitHub are supported. Fill in the details accordingly.


After you connect, the Workspace displays information about source control that allows the user to view the connected branch, the status of each item in the branch and the time of the last sync.
Version Control in GitHub Locally
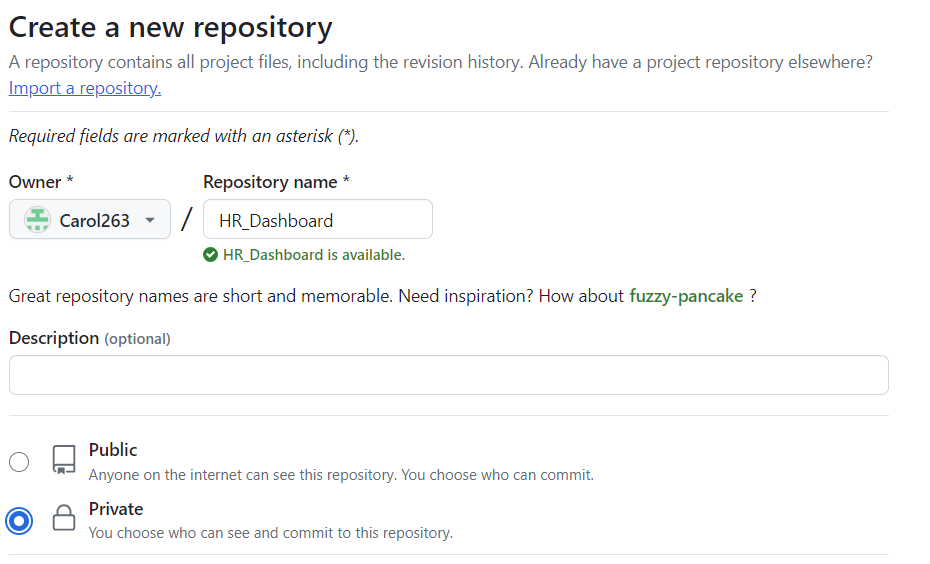
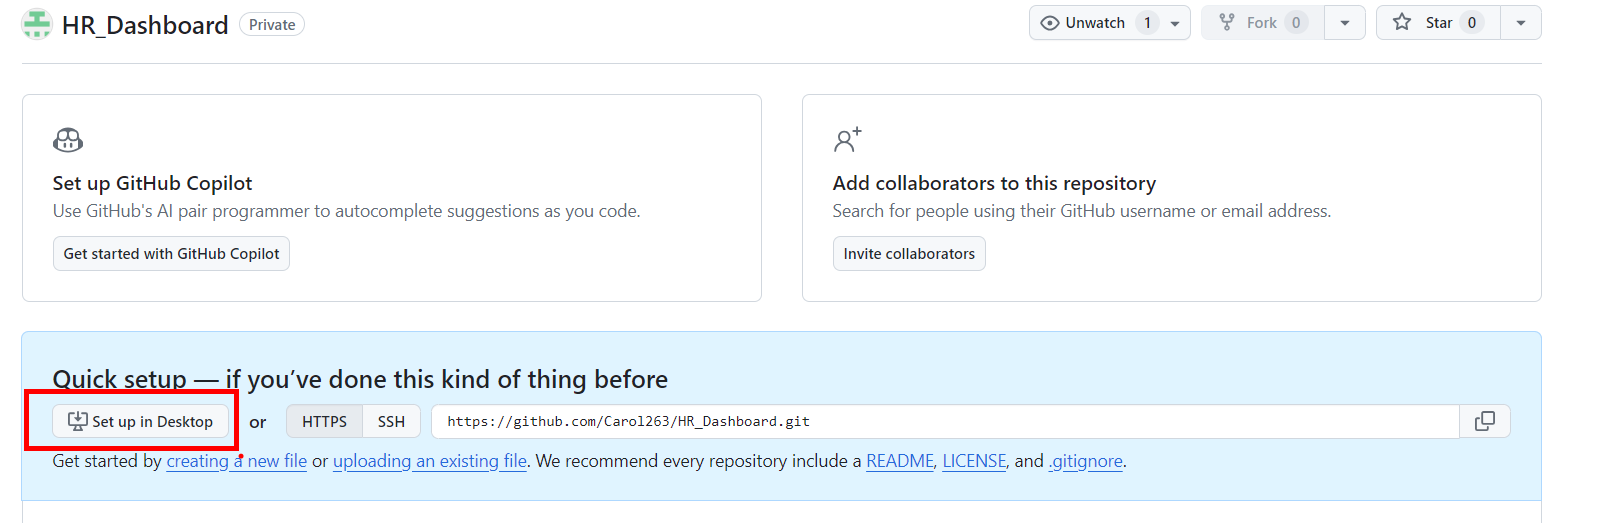
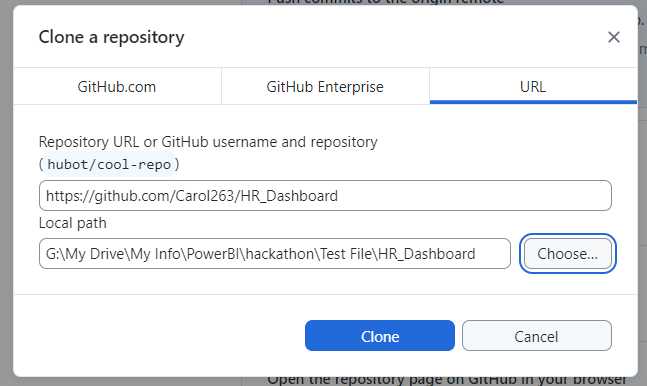
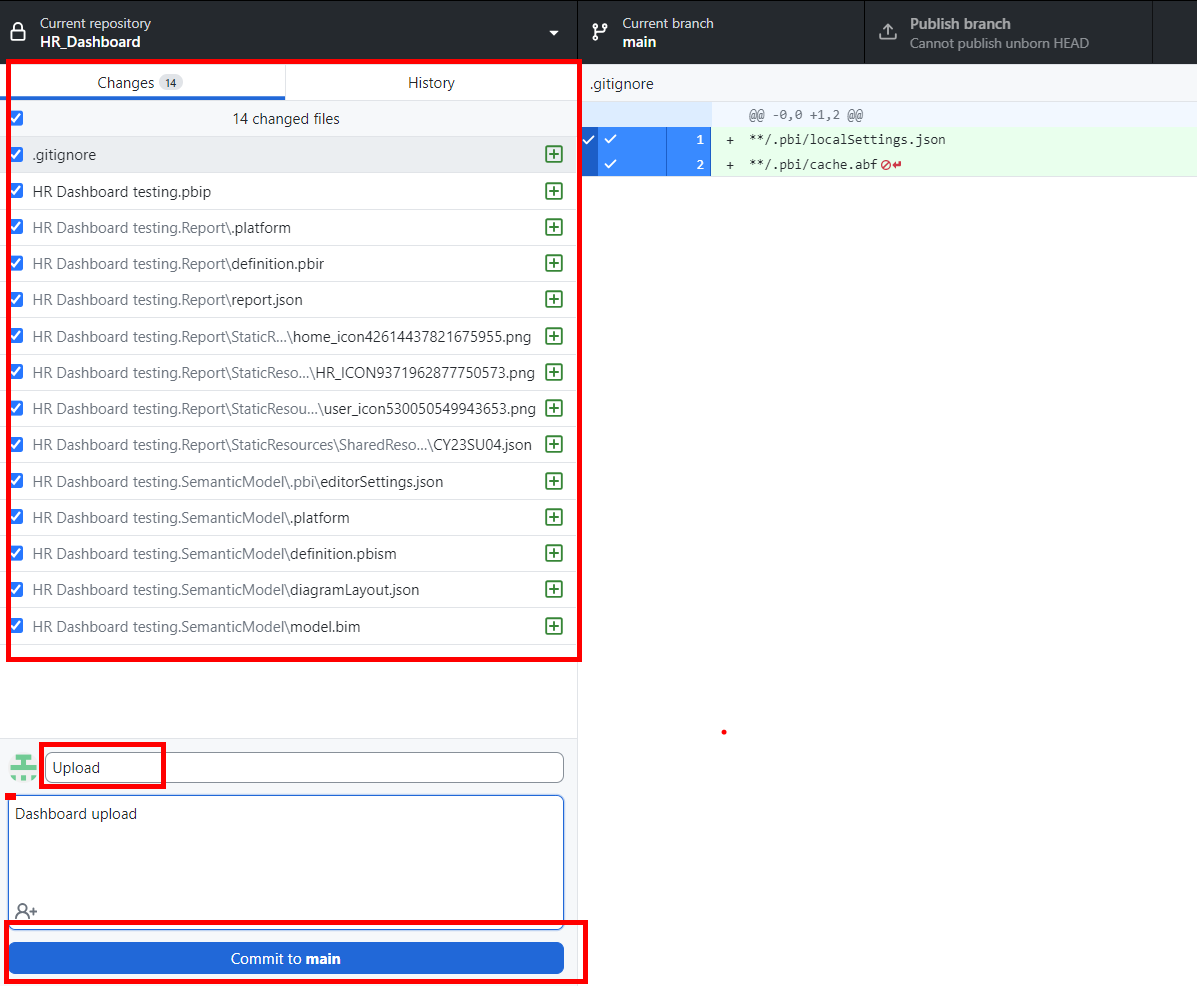
Step 1: Create a repository in GitHub and set up in desktop. Then 'Clone'.
Step 2: Save your Project .pbip into this folder.
Step 3: Return to GitHub Desktop and you will see the new items that you have seved into that folder. Name the change (Update model.bim which where your text code is saved) and give it a desciption. Click 'Commit'.
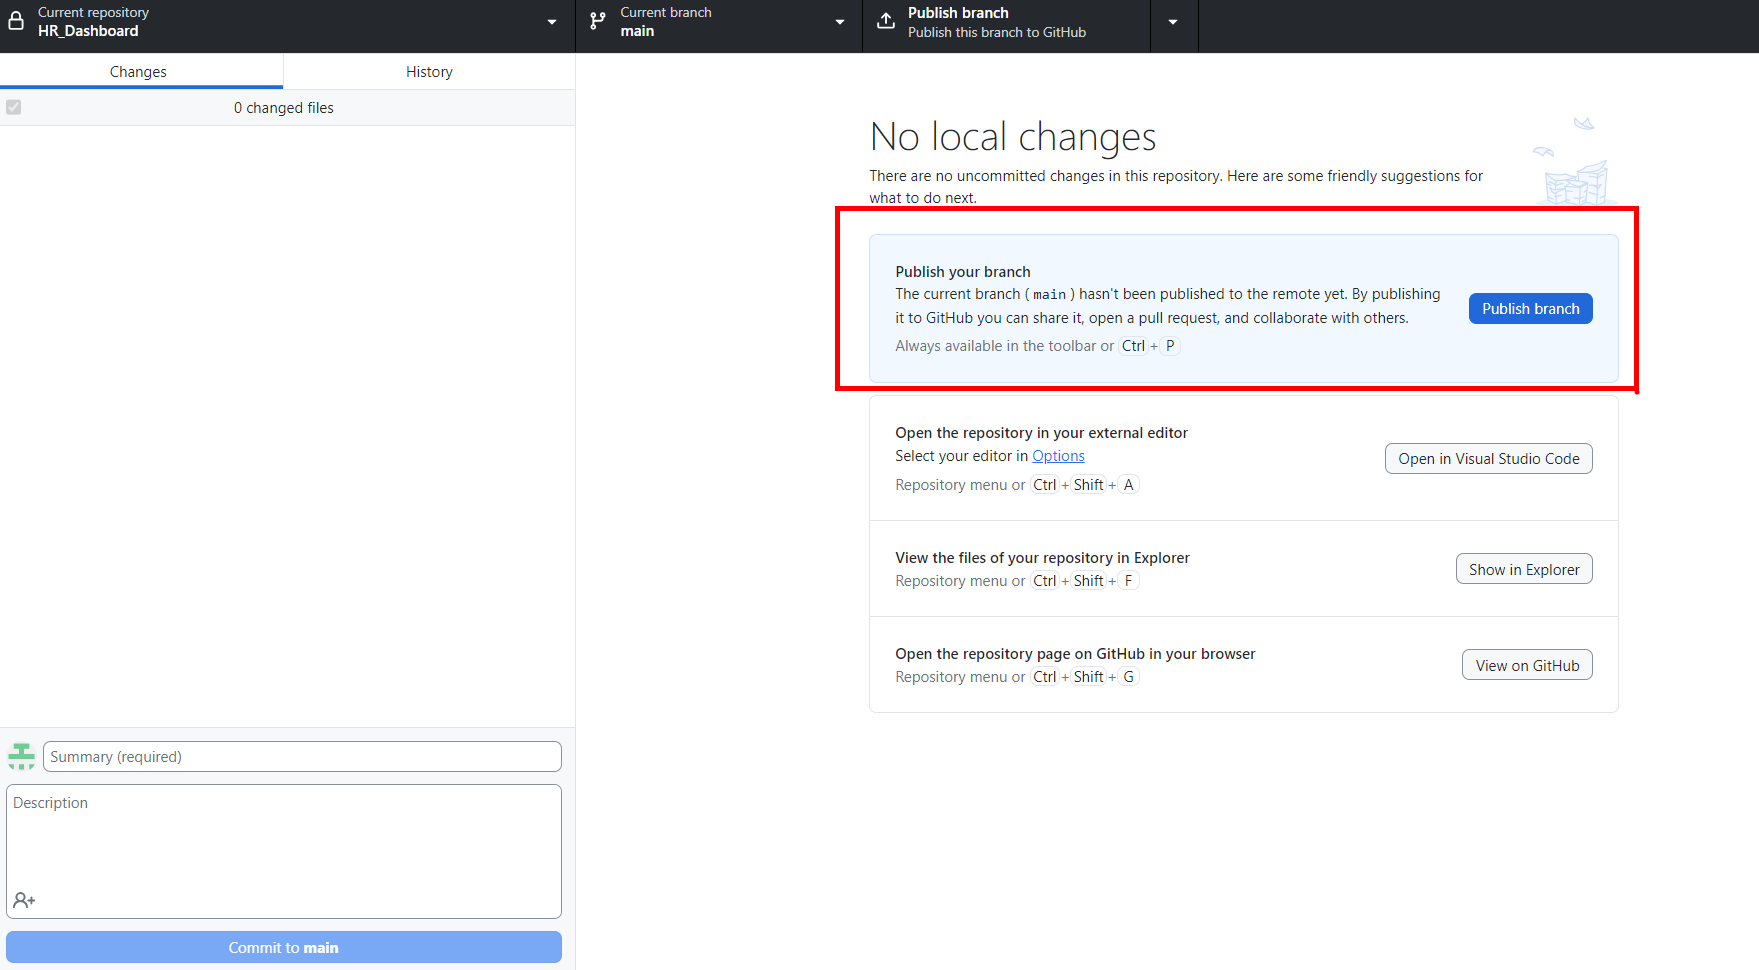
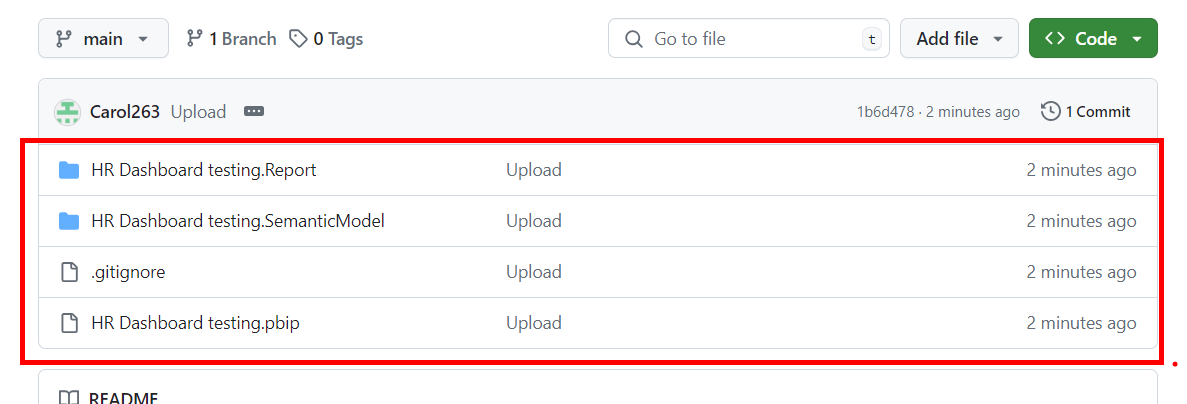
Step 4: 'Publish branch'. This will push the files to show on your Github Profile online.
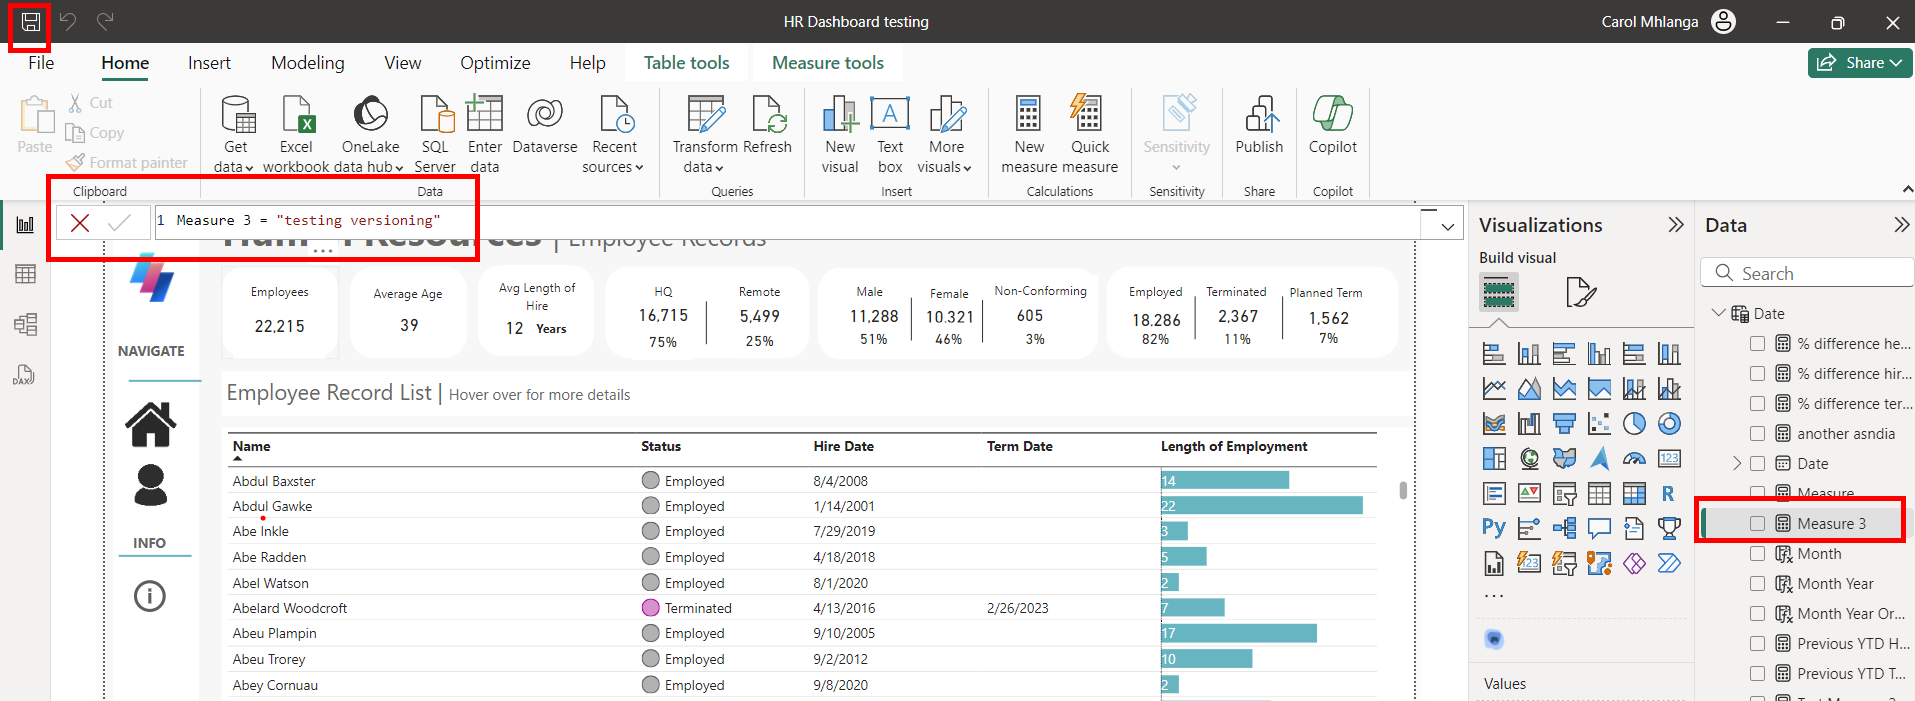
Making Changes to your Report
When you make a change to your report and save it, changes will be highlighted in GitHub for you to describe and commit to. In the example below, I created a new measure and saved the file.
Changes will appear in your Github Desktop
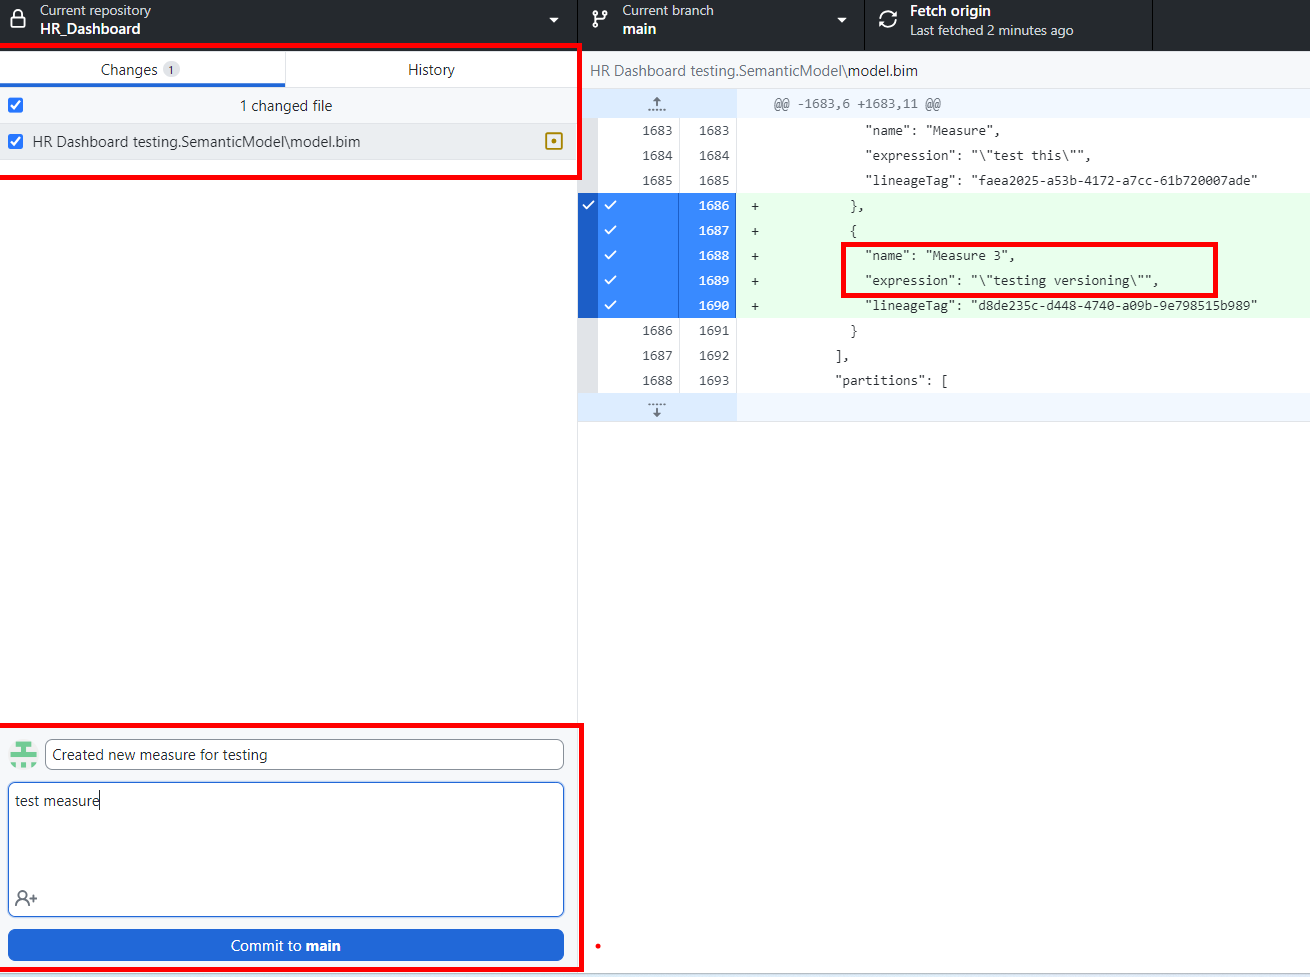
This time we are going to push to origin because we are updating it with a new Version.
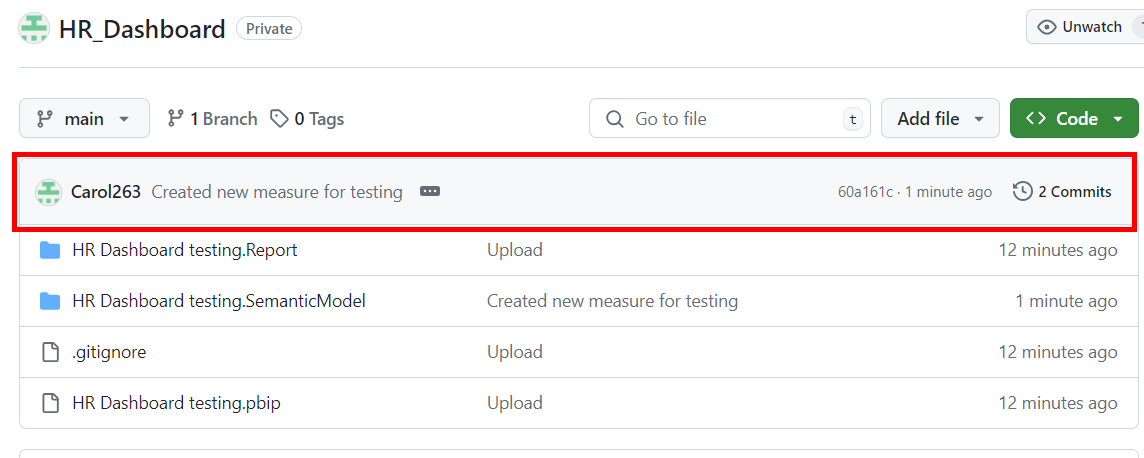
Now you can see the new Commits and who created that commit and when. If you click the new Commit, you can see the code/text made in the model.bim.

If there are many developers working on the same Report, changes can easily be tracked and updated. If you delete something in the folder, you can revert back to the previous version.