


Today I will be working through how to connect to the Ravelry API, and export information from their website in the form of data tables via Alteryx. In this example I will be collecting information for different yarns available on Ravelry.
I have input the link to the Ravelry API above.
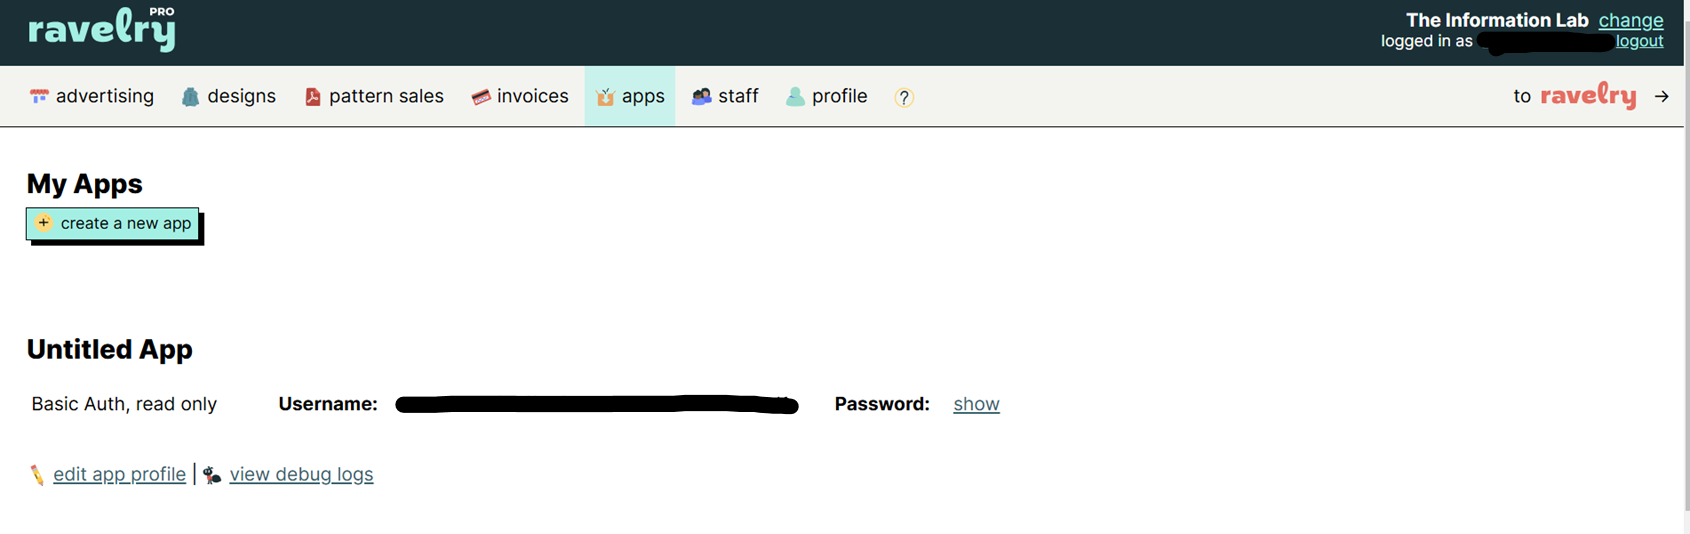
Step 1: Create your developer account, follow this link (https://www.ravelry.com/pro/developer) and create an account. Once you have created your account you will then be able to see the option to create a new app. In this example I will be using the read only credentials. You should then be able to see a username and password appear. Copy those down as we will need them later.
Step 2: Now we have our developer account we can get into Alteryx! Open up Alteryx, and we are going to start by bringing in a text input tool. Inside this tool we will create three columns, one called username, one called password and one called URL. Under each of these columns, put your username and password that we created in step one, and for the URL field paste this URL https://api.ravelry.com . Now we want to add an extension to this URL depending on which area of Ravelry's data we want to investigate. In my case I want to look at each yarn page, so as stated in the documentation I want the /yarns.json extension. In the documentation note this also requires an id parameter, which adds a ?ids= to the end of the URL. Overall I should have this URL in my URL field: https://api.ravelry.com/patterns.json?ids=
Now in real life after the ?ids= would be a number relating to a pattern ID, since I want to collect multiple different patterns I will leave this blank, and we will fill this in later. This is what your text input tool should be looking like:

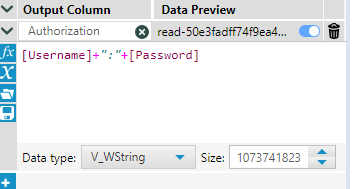
Step 3: Next we want to format our username and password correctly. To do this introduce a formula tool after the text input. Create a new field called Authorization and the formula will be:
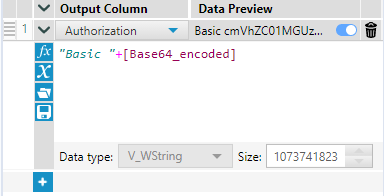
Step 4: Now we have this formula, we can bring in the Base64 Encoder tool, in the configuration pane ensure authorization is selected in the drop down.
Step 5: Next we will introduce another formula tool, and update our authorization field with the following formula:
Step 6: Now we have one row set up correctly, we can come back to generating rows for a range of different page id's. To do this bring in a generate rows tool, but do not connect anything to the input anchor. Choose create new field, call this ID, type Int32. Now your initialisation expression should be the first ID you want to call, in this case I will start at 100. My condition expression will be ID <= 5000, and my loop expression will be ID+1. This essentially generates a row for every number between 100 and 5000.
Now bring in an append tool, and join the last formula tool we created to the T anchor, and the generate rows tool to the S anchor. Then add a formula tool after the append tool. Here we can link the URL to the ID we have created in each row using this formula:
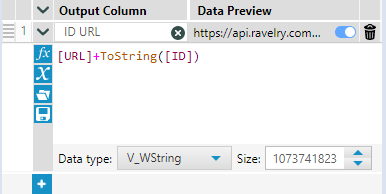
Which will now have a URL for a unique page id for each row in the table.
Step 7: Lets tidy up our work a bit now, and bring in a select tool. Here we are only going to keep relevant fields, so we will keep all fields other than the URL and the ID field, since we have now concatenated these to make our ID URL. This is what our flow should be looking like at this point.
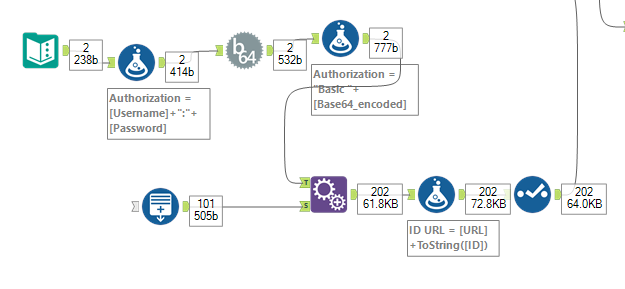
Step 8: Now we have a table where one row is a different ID URL, we can start setting up the download tool. Bring the download tool onto the canvas and connect it up to the select tool. To configure the download tool, first of all ensure in the URL box in the first tab (basic) that ID URL is selected. Next move to the headers tab in the download tool configuration. In here ensure that the field we made called Authorization is ticked. Everything else should be automatically set up, however just incase make sure Data connection manager is ticked, and output is set to string. Everything else should be unselected.
Step 9: Next attach a JSON Parse tool to your download tool. We use this tool as earlier we had chosen to download the data in the format of JSON, which you will be able to read the raw JSON in the DownloadData field created by the download tool. The JSON Parse reads the raw JSON and converts it into a readable format.
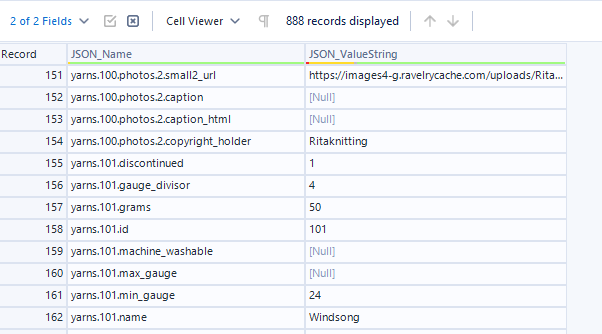
Step 10: We now have all of the data we want, we just need to clean it up to be structured in a sensical way. Add a select tool after your download tool. The only fields we care about at this point are our JSON_Name and JSON_ValueString fields. We can discard everything else. The JSON_Name field contains all of our field headers in the format yarns.idnumber.fieldname (e.g yarns.100.discontinued). In this specific scrape, the yarns pages give me 154 fields per ID, so if I scroll down around row 154 I can see it moves onto the next ID and the field names repeat again.
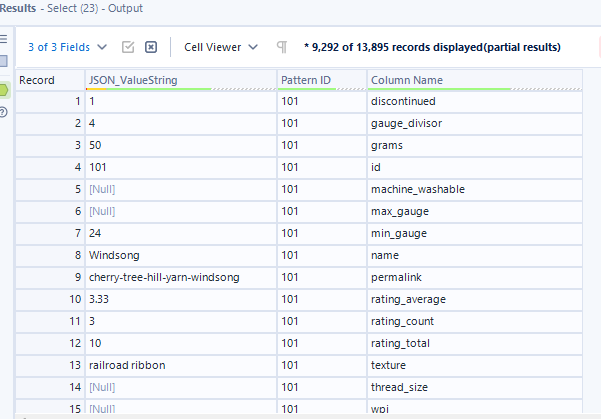
In order to extract those field names, we want to perform a split using the Text to Columns tool, with the delimiter being the full stop. If we split this into three columns, we get one column containing "Yarns", one containing the page ID, and the third containing the field headers.

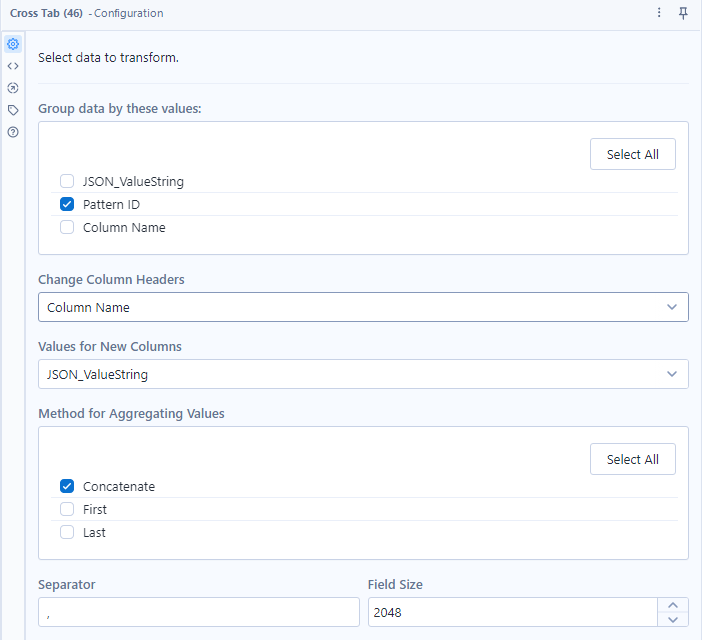
Once we have split that column on a full stop delimiter to get the field headers, we can clean up our fields again and remove an unnecessary fields. Now we have one field containing the column headers, and one column containing the values for those fields. Since we have gotten rid of the ID number from the header names, the header names repeat over every ID, meaning we can do a rows to columns pivot. This will then take each time a row contains that header name and place all the values beneath it. This is my cross tab tool configuration:
This is what the data structure looks like before the cross tab tool:
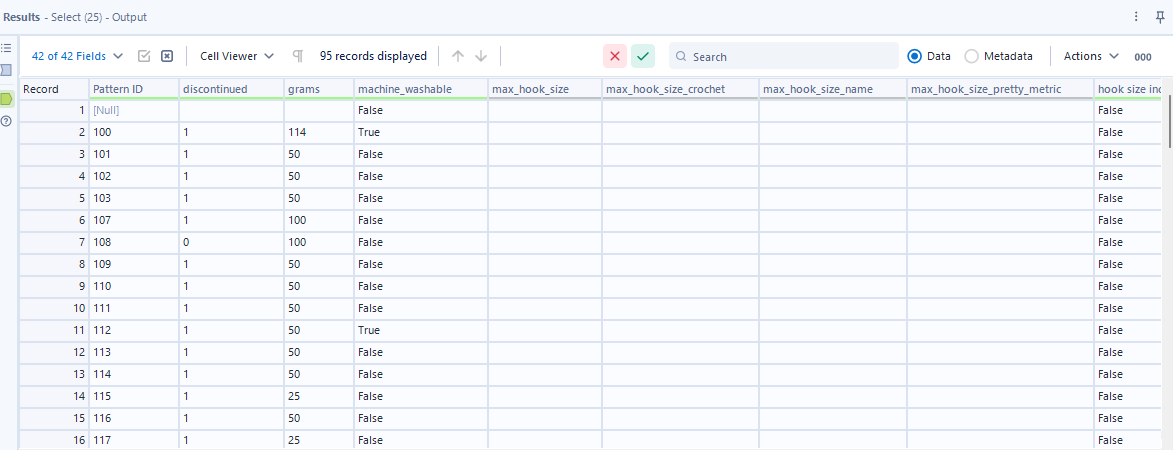
And this is what the structure looks like after the cross tab tool, unfortunately some of my fields have empty values, however the principle still remains:
Step 11:
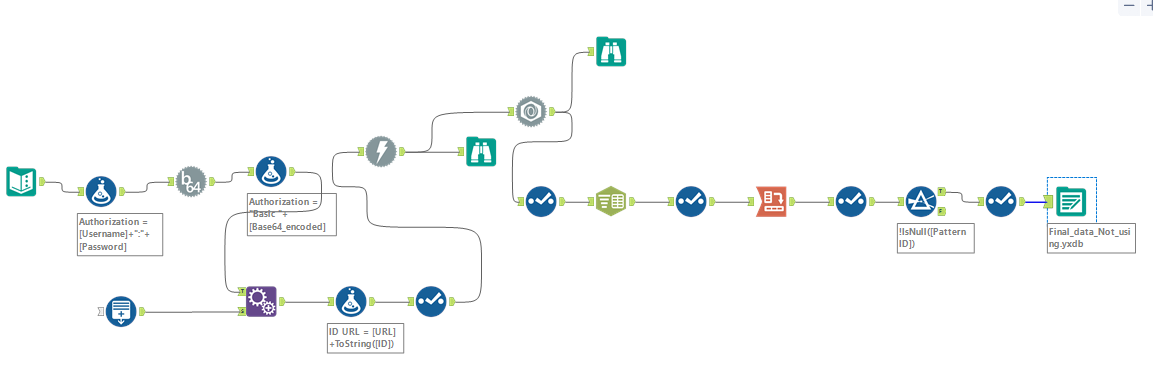
Now our data structure is almost complete! The last thing we need to do now is clean up some last bits, so I will again check there are no unnecessary fields that need to be taken off, filtering out any rows where patternID is null, and then outputting the data! Here is what my final flow looks like.
From this point there is much you can do, you can explore the different URL's available, for example in this example I have scraped information on the Yarns listed in Ravelry's wesbite, there is also an entire world of crochet and knit patterns available for you to scrape the information of!