


I am back again with another Power BI interactivity blog, this time, we will be looking at how to add a drill through to our power BI workbook. A drill through is an action which takes you from one page to another, based off a linked data field. In this blog, I will show you how to connect two power BI pages based off a location. We will be using the sample superstore data set. To follow this, you will preferably need to start with a finished dashboard that has two pages that you wish to connect through a drill through.
First, I will show you how the drill through action works before explaining how we add it to our dashboard.
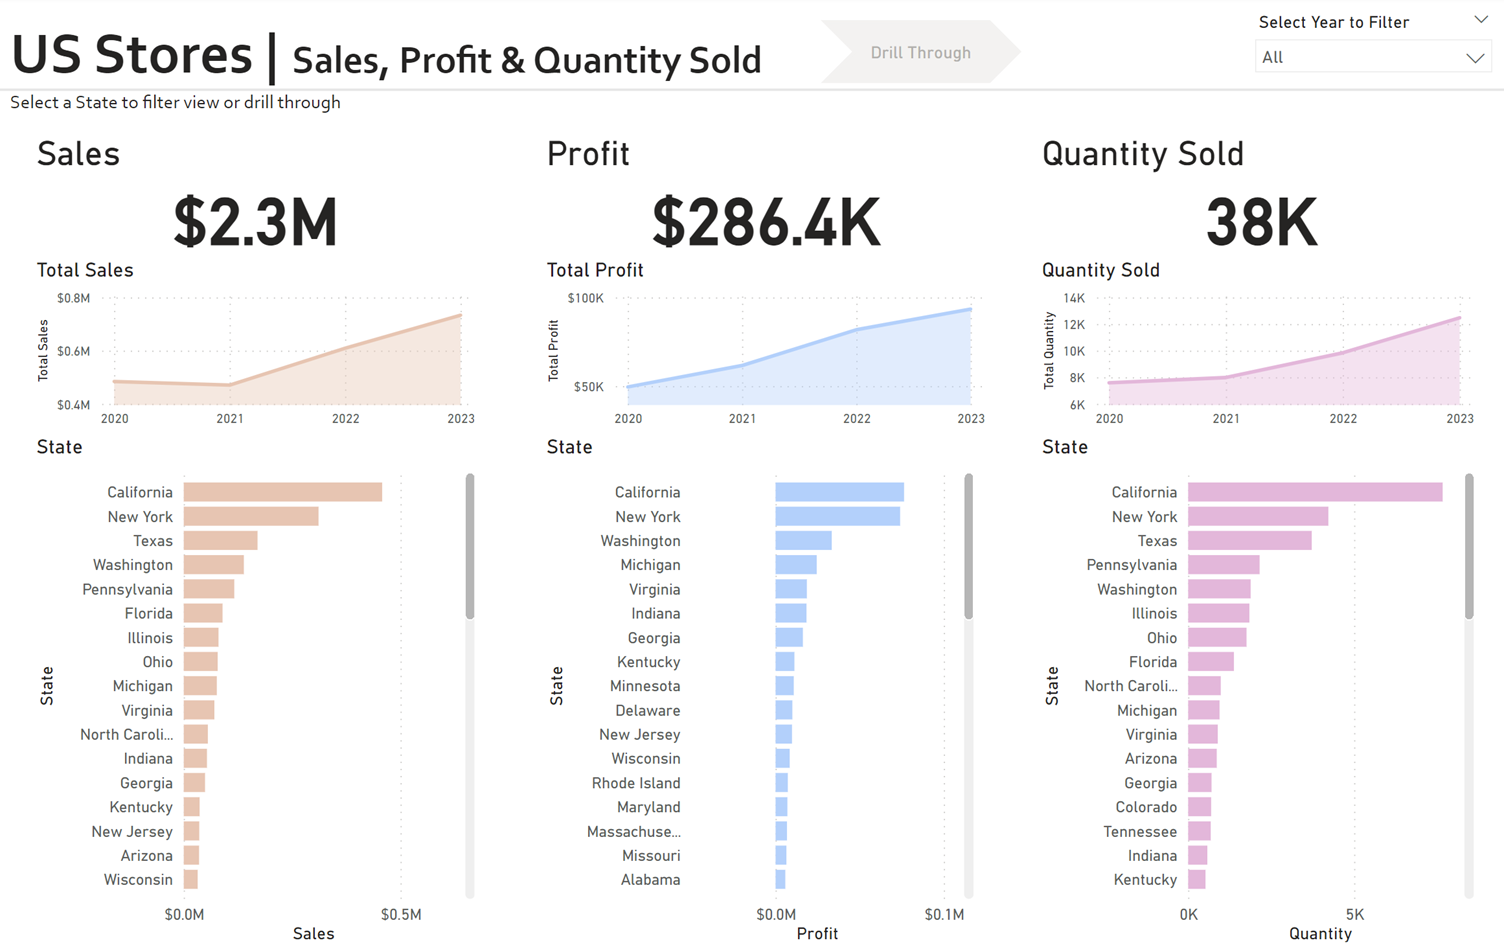
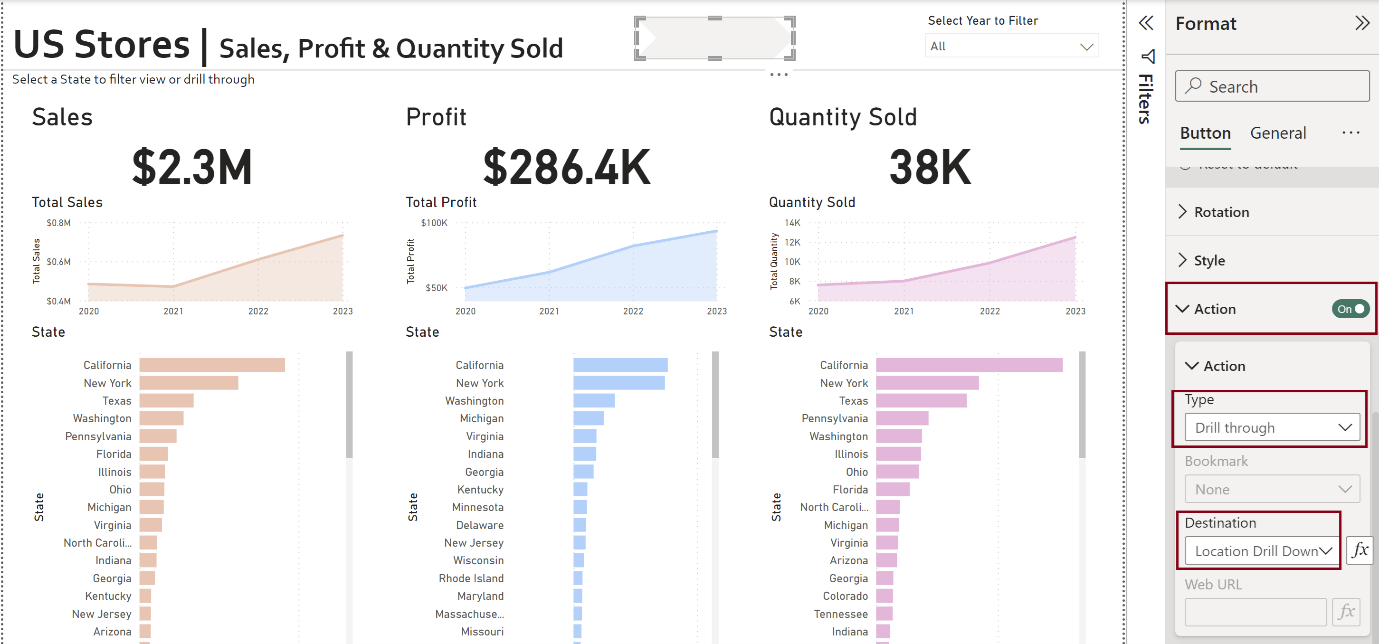
This is our first page view. We can see our store sales profit and quantity. These are broken down by state in the three bar charts.
Now, I can select a particular state and click on the drill through button (note, if you are doing this in power bi desktop, you will need to hold CTRL when clicking on the drill through button to make the action work)

Once we click on the drill through button, we will be taken to a new page in the workbook, which has a view showing product sales, and has filtered this view to only show us product sales for the state of California.
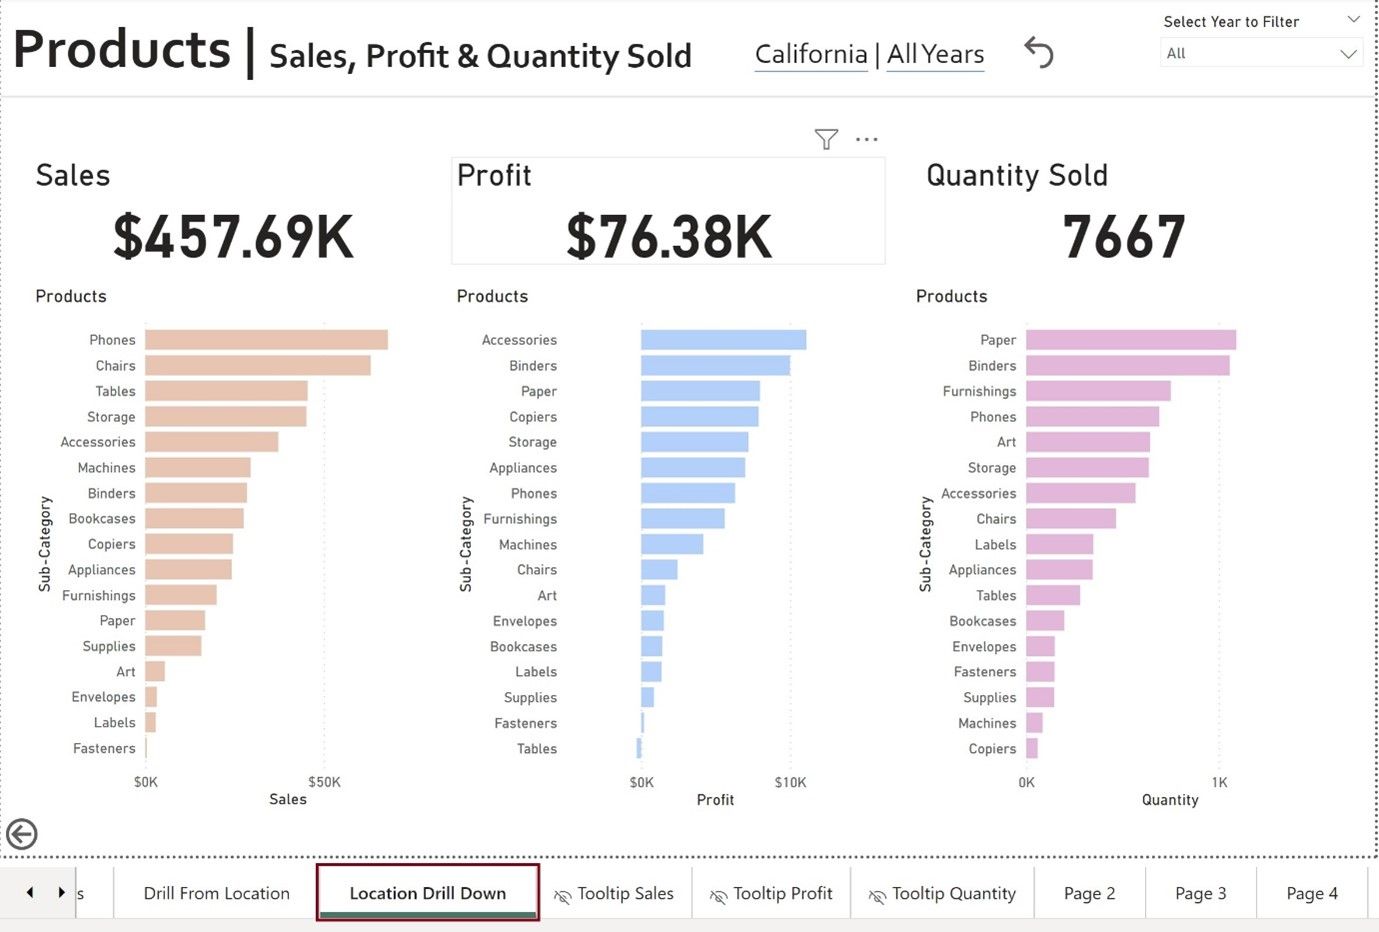
I labelled this sheet ‘Location Drill Down’, as this is the page we end up in as a result of the action. This is actually the page we will want to start on when we are configuring this action.
The first thing that we will need to do is add the ‘state’ data field to the drill through box in our visualizations pane.
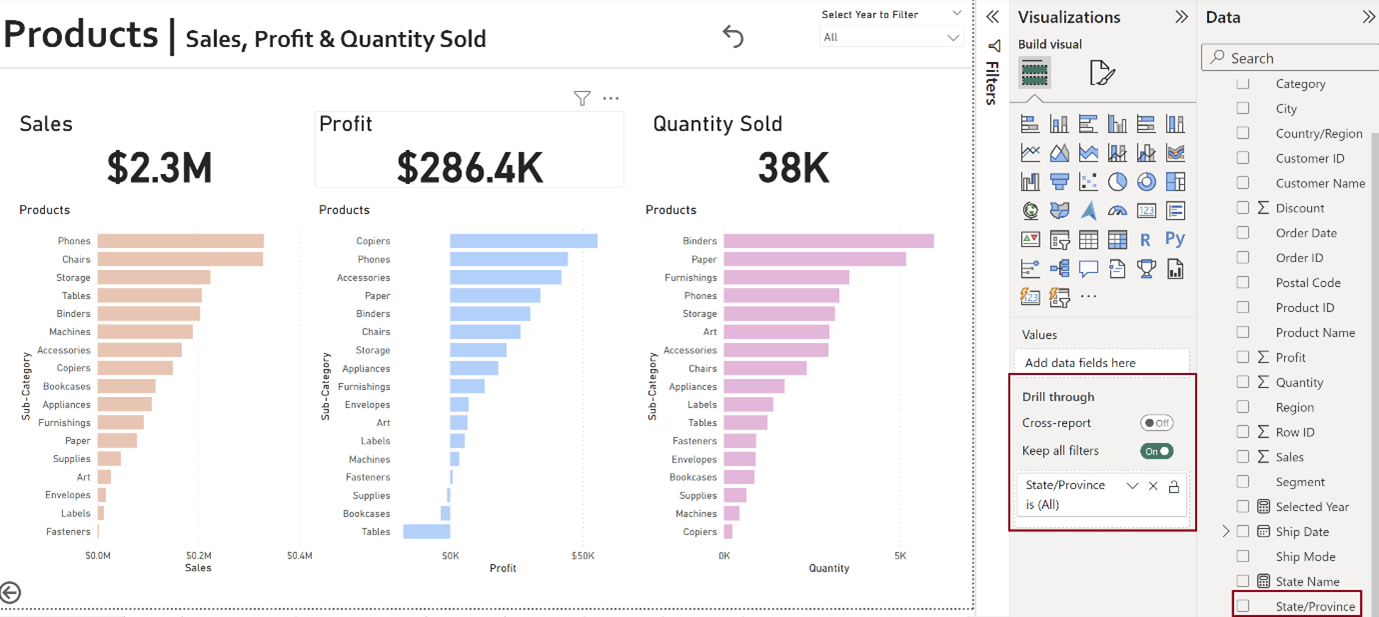
Remember, this is in the page we want to end up in, which is the product breakdown.
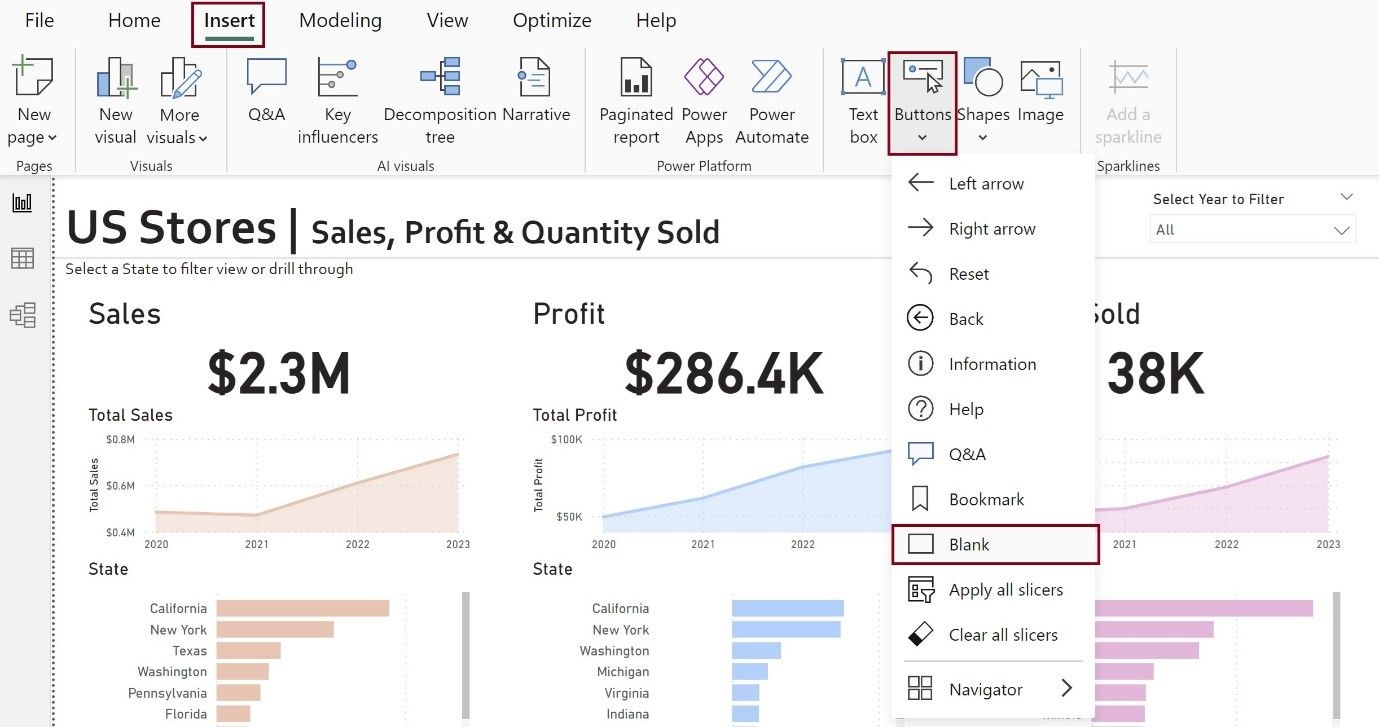
Once this is added, we can return to our ‘starting’ page, as we will have to configure the drill down button as well. To add a button, we go to the top ribbon > insert > buttons. I usually choose a blank button shape, as you can configure the shape later with more options.
Now that we have our blank button, we can give it a shape of our choice and we need to add an action too. First, we have to click on the blank button to see the settings appear in the ‘format pane’. You can then select from the range of possible shapes, in this case I have chosen the ‘Chevron Arrow’.
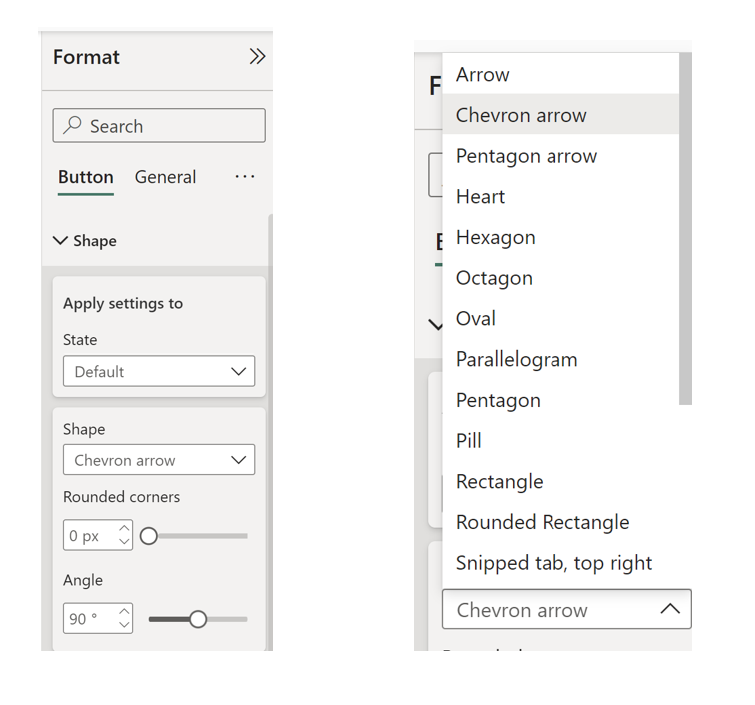
Now that we have our shape, we just have to remember to add our action. There are three things you will need to do to configure the action. Turn the action ‘on’, select the type of action to be ‘drill through’ and select your destination page, which will be what ever you have labelled the page which is the final destination.
Once these are set, you will have a working drill through! A blog to follow on adding a dynamic title which can be seen in the second screenshot, showing which state we have selected in our drill through.