


Parameters in Tableau Prep can be a very useful tool if your flow is to be used by other users looking to download cleaned data for specific parameters only. Today we will look into setting one up!
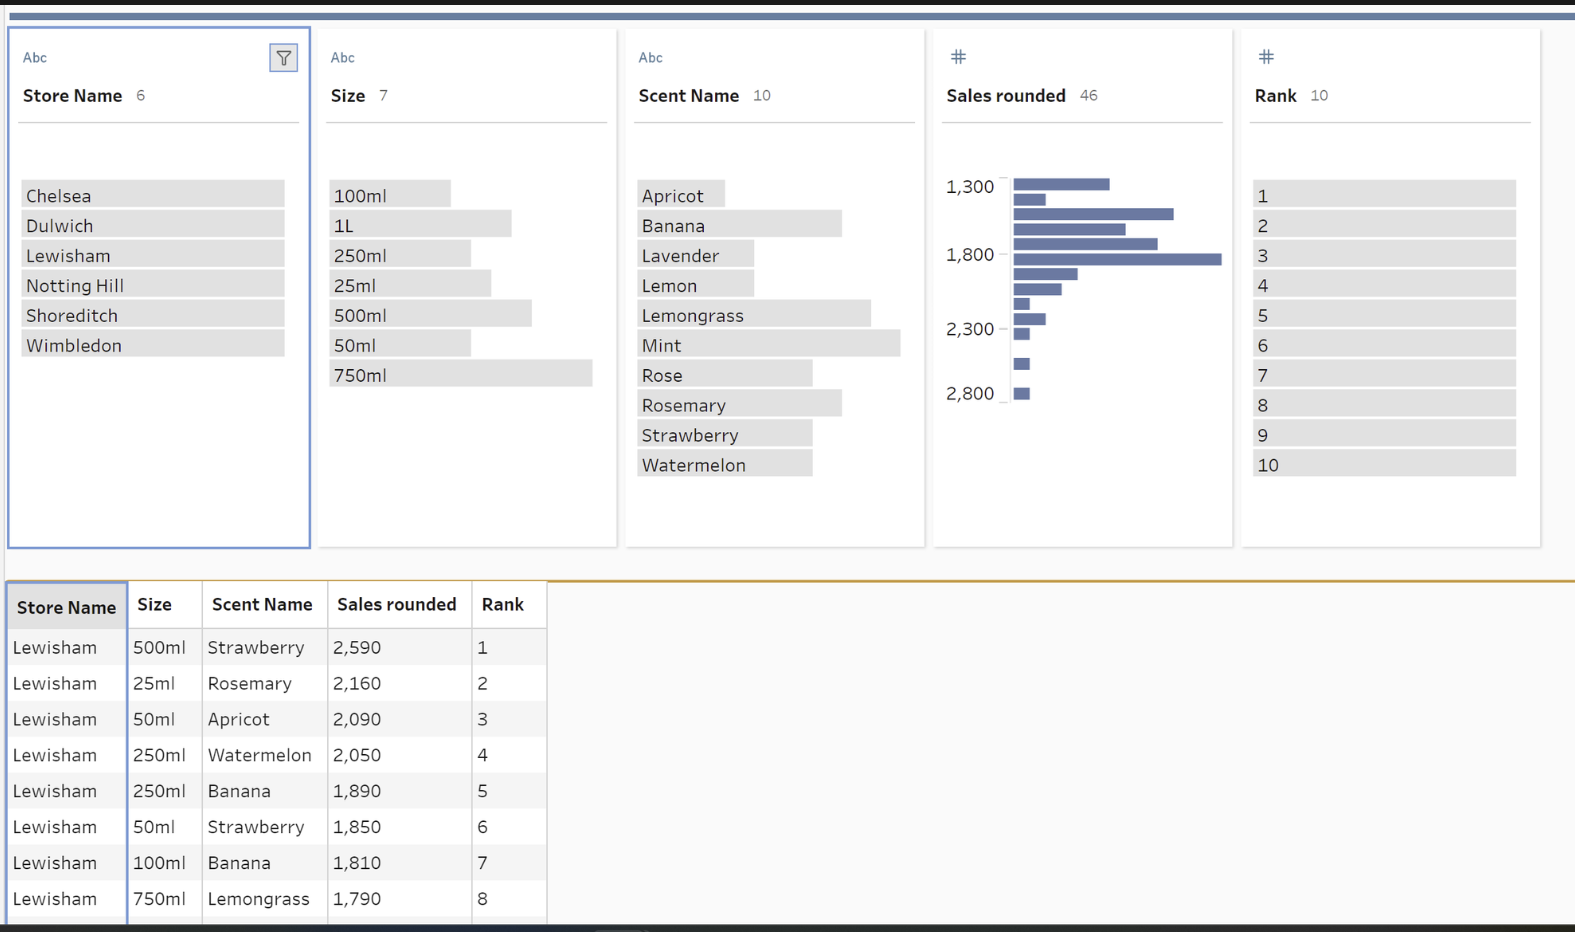
To set it up I’ll be looking at the example of Top soap sales for six different stores. I’ll create a parameter to filter out a store.
First you need to open the parameter option in the toolbar at the top of the screen. Then click Create Parameter:

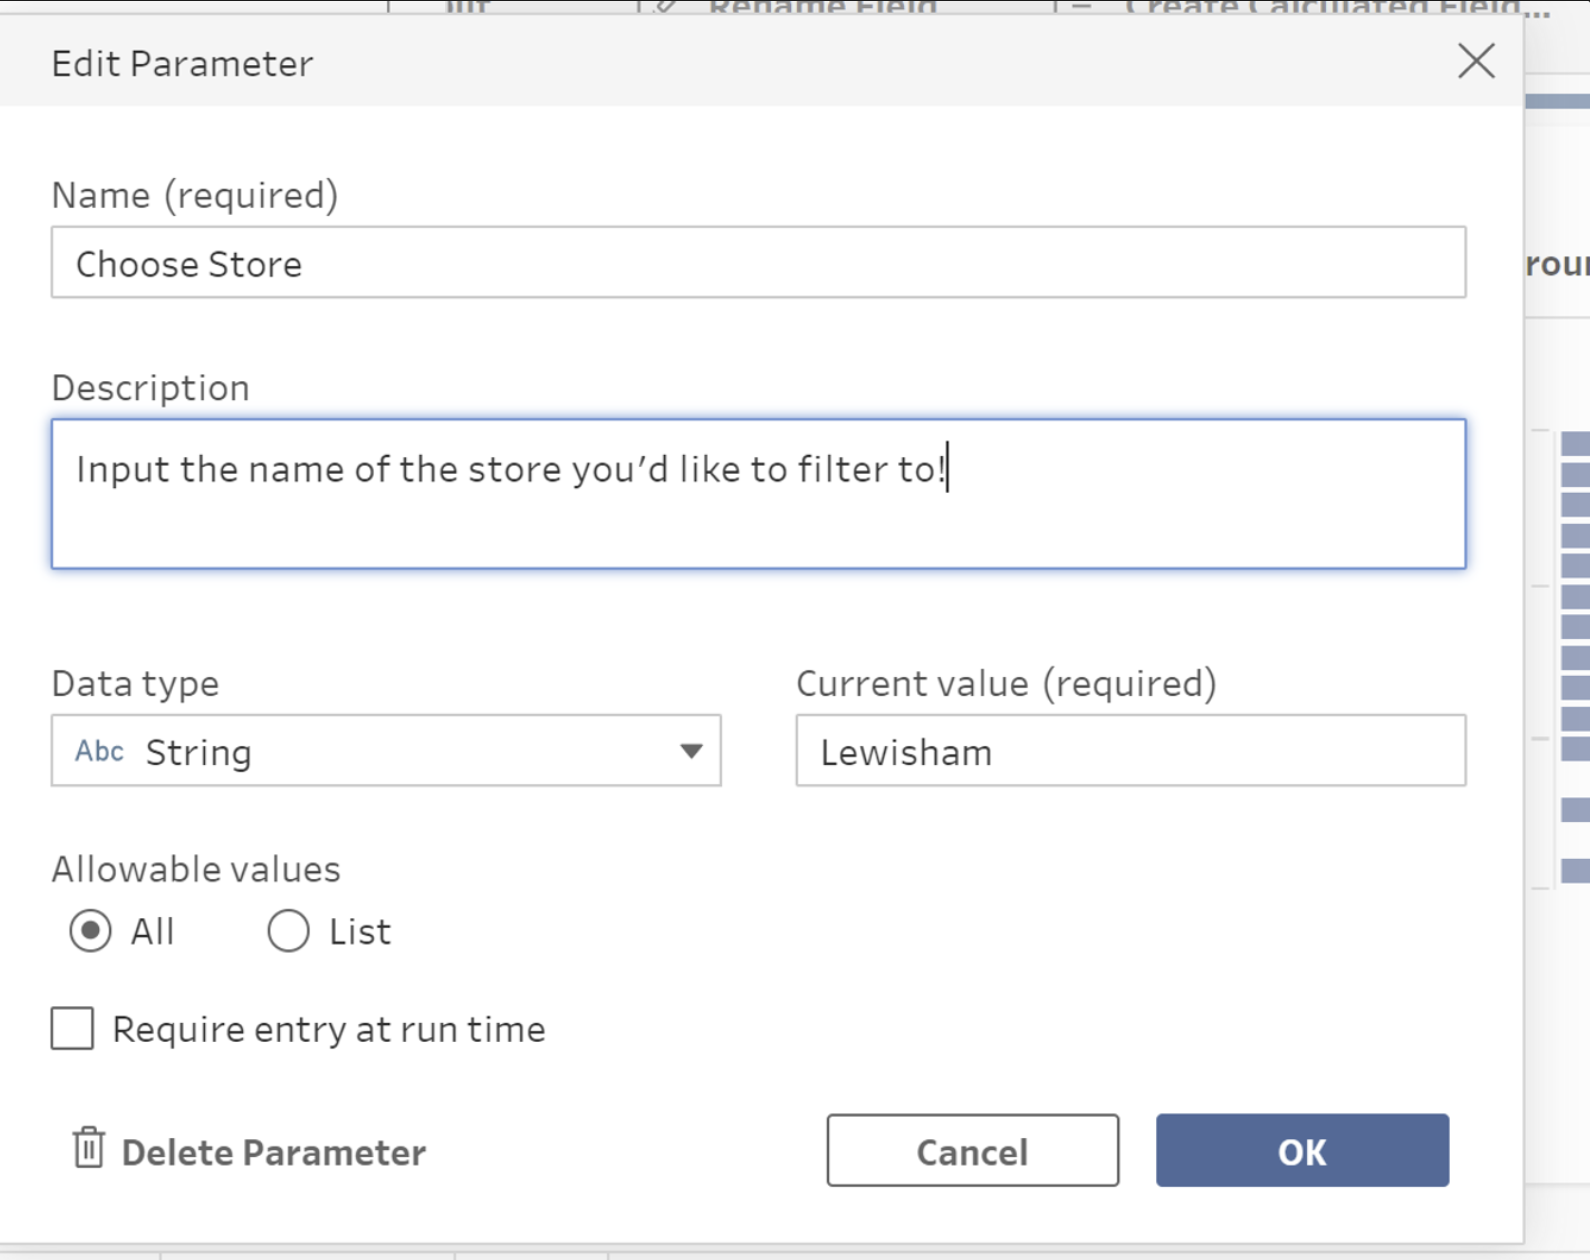
After that you can see a couple of different options. First, you need to name your Parameter. You can add a description to ensure that any other user is aware of how it works. Then you can select the Data Type - here we will be looking at text names, hence I’ll be setting it to string (make sure your data type matches the data type of the field you want to filter to!).
After than you have to set up the filter values. You can either set the Allowable Values to All, meaning that the user will have to manually enter the name they want to filter to or set up a List.
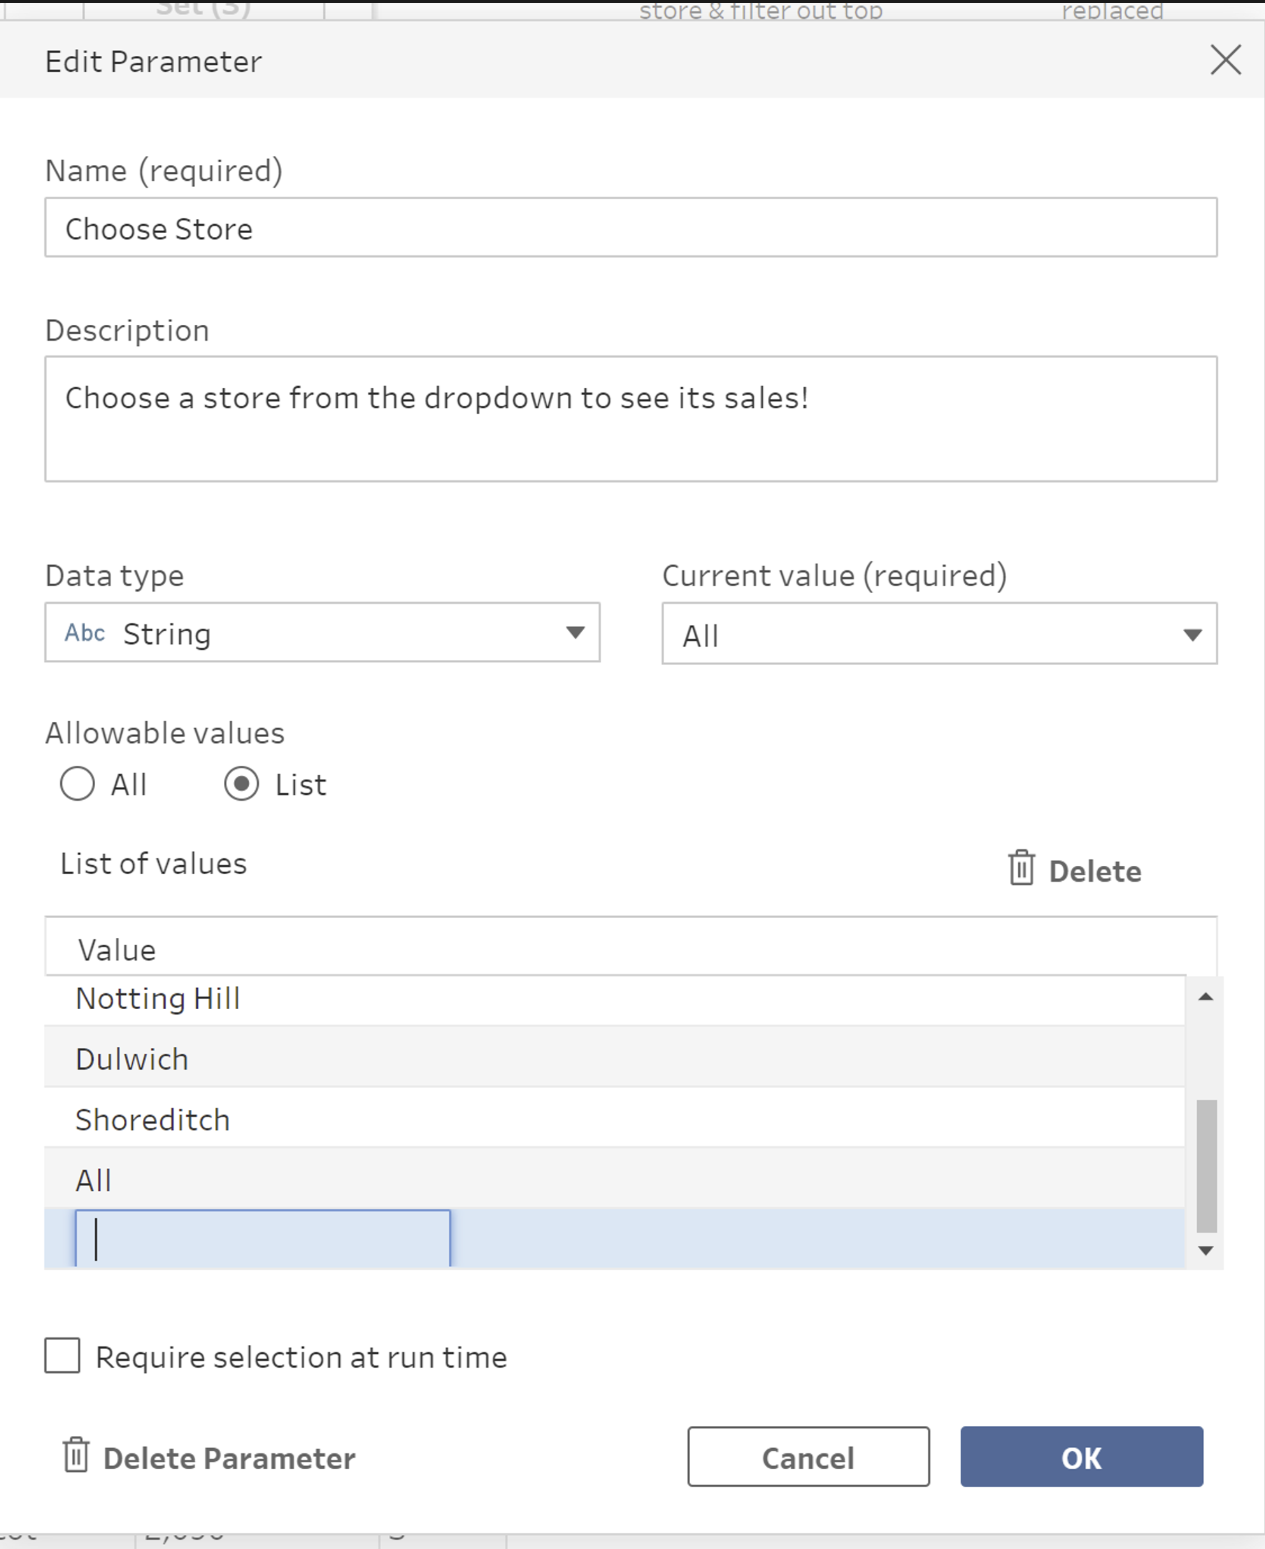
Setting up a list requires you to input the filterable options one by one, manually. There are no automated checks in place so make sure you check for any spelling errors. Later I will be showing how to filter out for All options as well, so if you want that to be included as well, add an ‘All’ option as well (otherwise by default parameter will force you to filter out to a single value when set up).
Now, to add your parameter as a filter, click on the Filter Values option (marked in red). Then, add a calculation which tells Prep to filter the field of your choice (here: [Store Name] by the Parameter). Notice that Parameters appear in purple in the calc fields.
If you added the All option in your dropdown, add an OR clause to your calc as shown below (in green).

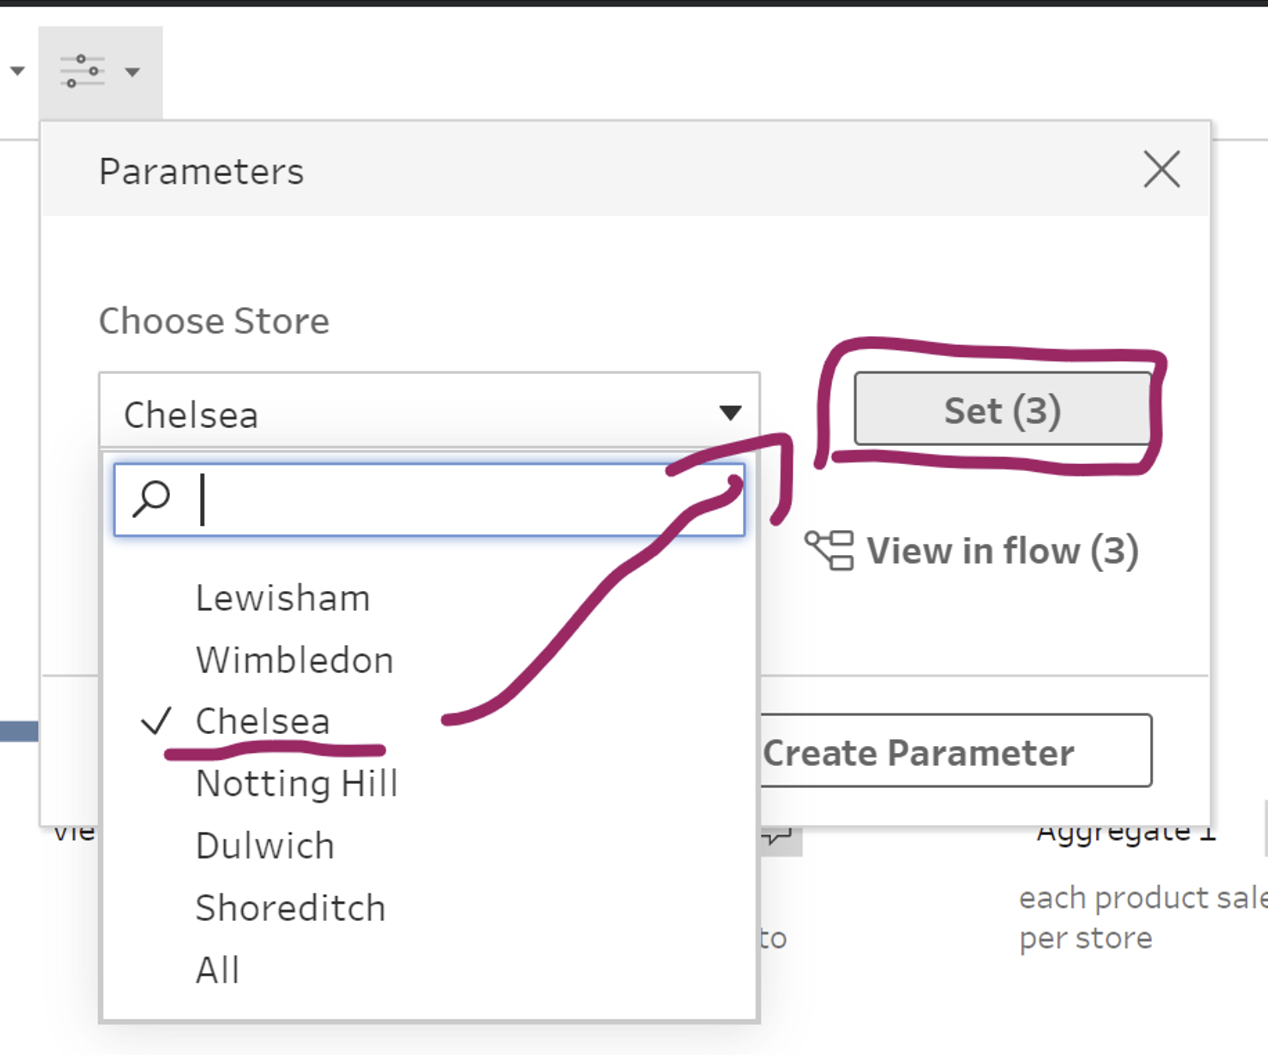
Now to check if your parameter is working, go back to the parameter field and check the Value you want to filter to. After that, click Set (notice the number in brackets - it refers to the number of steps which use the parameter).
If you want, you can also use the parameter to name your output. To do that, in your output step, click on the parameter icon and add the parameter you want to see. After running the output, your file will have the parameter in the name!
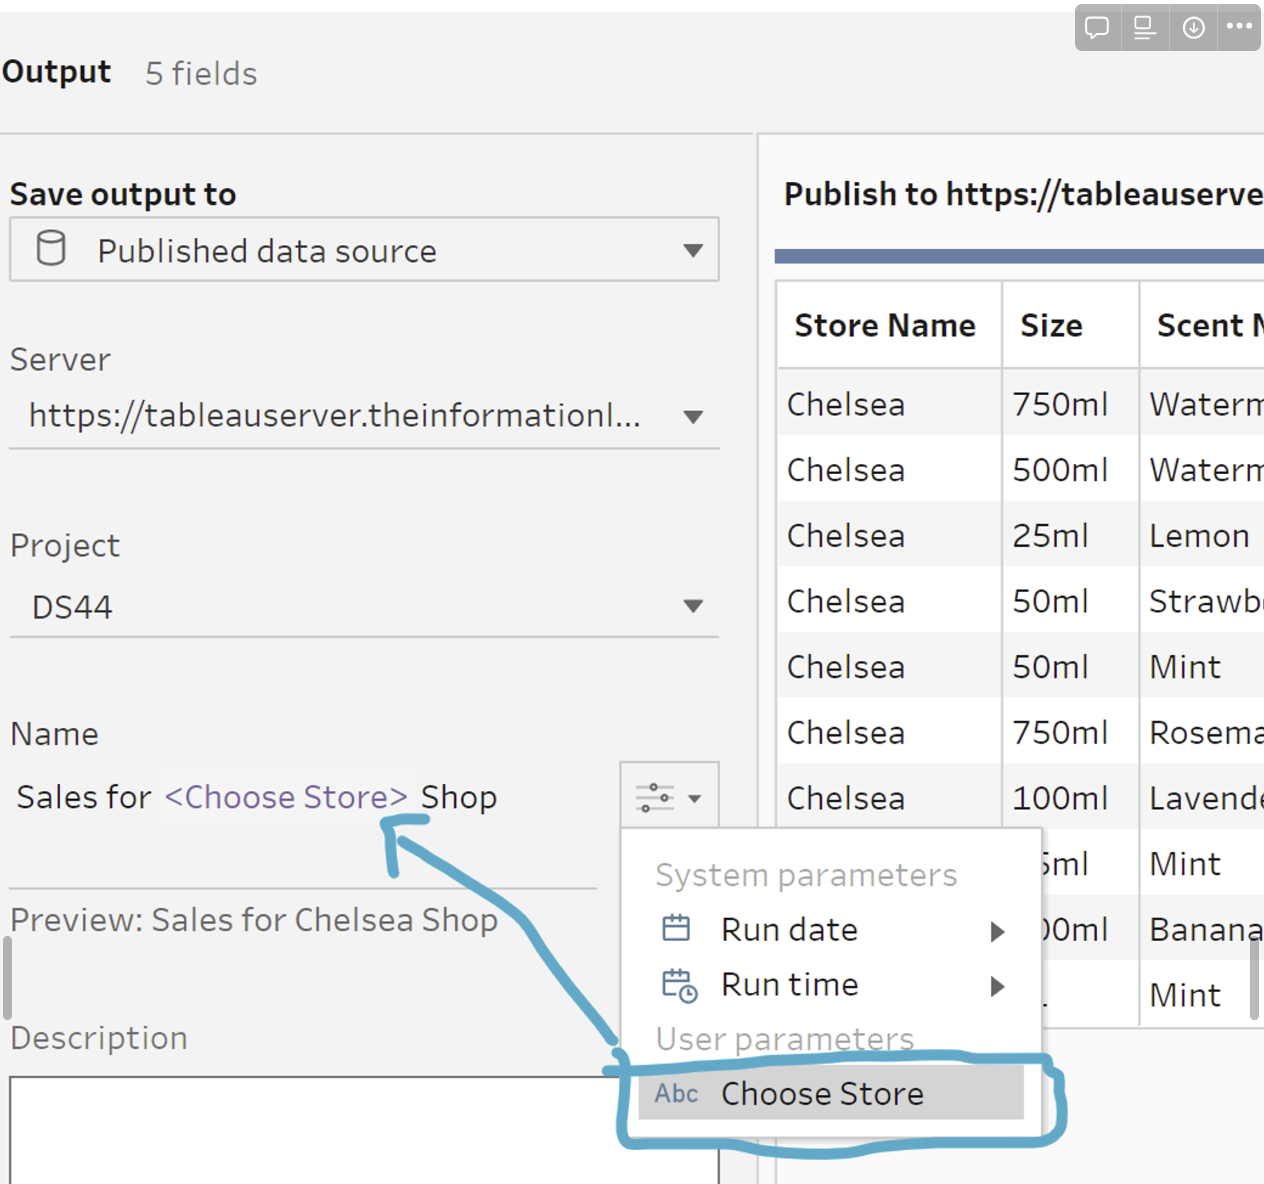
If you want, you can also use the parameter to name your output. To do that, in your output step, click on the parameter icon and add the parameter you want to see. After running the output, your file will have the parameter in the name!