


We’re now in the second week of data engineering training, and even in just over a week we’ve covered a lot, so it’s been a lot to take in but in a good way, and it’s been exciting learning something so new. One of the things that stood out to me the most was setting up a data engineering project, because it’s the first thing you do whenever you start a new one, so it felt like a good place to start for my first data engineering blog.
Before you write any code in a data engineering project, there are a few steps worth doing first. In this blog I’ll walk through the setup we used in training, which was in Python and VS Code on Windows, so the commands might look a bit different depending on your tools, but the ideas behind each step are the same.
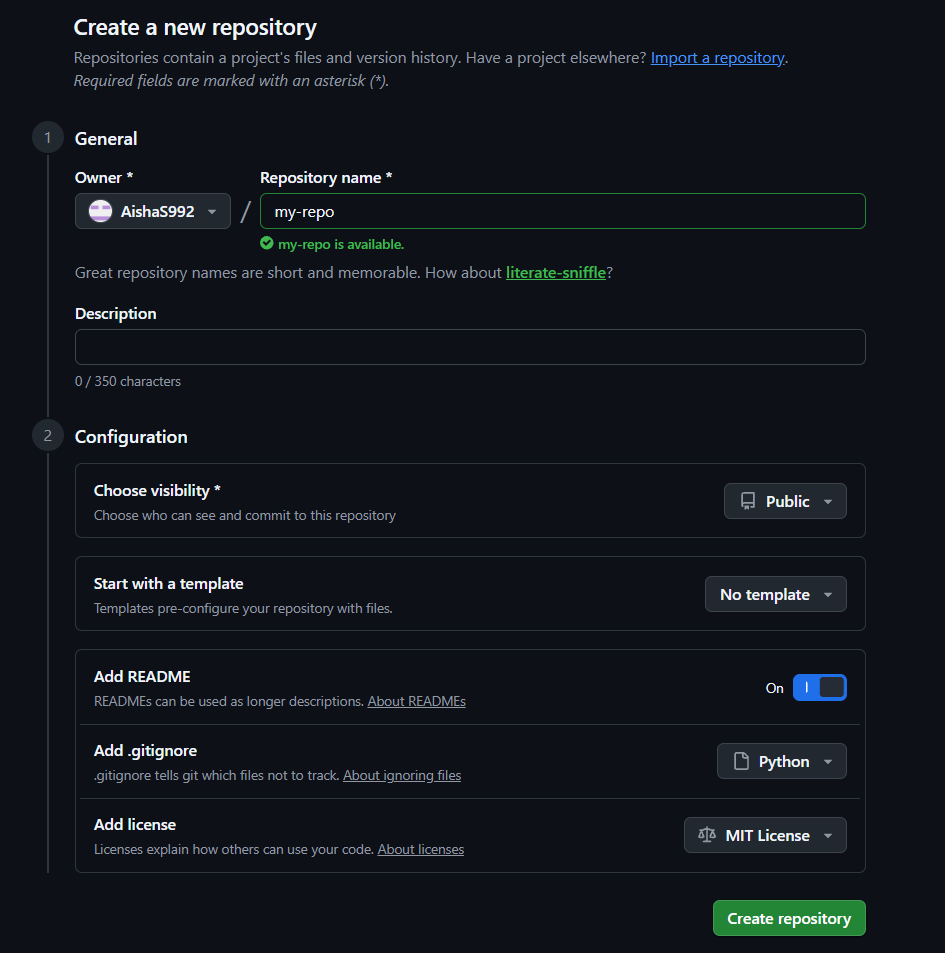
Step 1: Create a repo on GitHub
A repository (repo) is where your project lives on GitHub. When you create it, turn on Add README and choose a .gitignore template to add two files:
- README.md: explains what your project does, why it’s useful and how someone can get started with it. Even if you’re the only one using the project, future you will thank you for it.
- .gitignore: tells Git which files not to track, so they never end up on GitHub. GitHub has templates for different languages, and we used the Python one.
If your repo is public, it’s worth adding a license, and MIT is a common choice. It means anyone can use your code, but you’re not responsible for how it’s used or what might break.
Step 2: Clone the repo and open it in your code editor
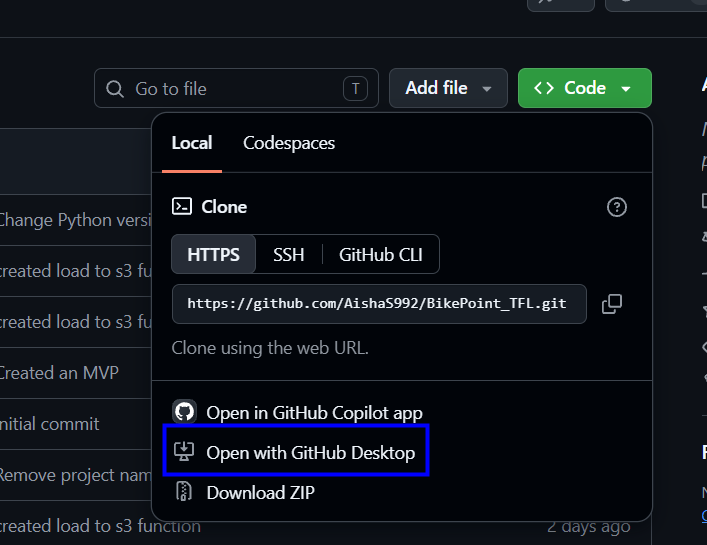
Cloning makes a copy of the repo on your laptop, so you can work on it locally. Clone it from GitHub or GitHub Desktop, then open the folder in your code editor. We used VS Code.
Step 3: Create a virtual environment
What is it? In Python, a virtual environment is a self contained area of your laptop with its own Python and packages, kept separate from everything else.
Why do you need it? To avoid conflicts. If Project A needs pandas 1.3 and Project B needs pandas 2.0, installing both on your system causes problems, and fixing that can take hours.
How do you set it up? In the VS Code terminal on Windows, we ran:
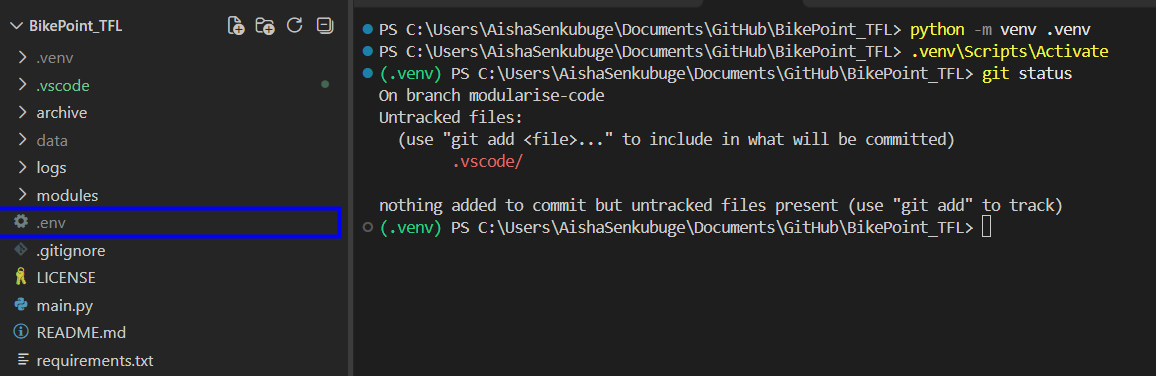
python -m venv .venv
.venv\Scripts\activate
On a Mac, the second line is source .venv/bin/activate. You’ll see (.venv) at the start of the terminal line, which means you’re now working inside it.

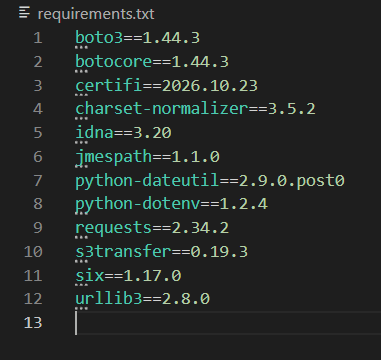
Step 4: Install packages and create requirements.txt
What is it? A file listing the packages your project needs.
Why do you need it? So your code can run on someone else’s laptop with the same package versions.
How do you set it up? Install the packages you need, then save them to the file. For our extract scripts, we installed requests and python-dotenv:
pip install requests python-dotenv
pip freeze > requirements.txt
If you’re cloning someone else’s project instead, run pip install -r requirements.txt to install everything in one go.
Step 5: Create a .env file
What is it? A file that stores your secrets, like API keys, usernames and passwords.
Why do you need it? So you never type secrets straight into your script, where anyone could see them once it’s on GitHub.
How do you set it up? Create a file called .env and add your key:
API_KEY=your_key_hereThen read it into your script. In Python, we used the dotenv package:
python
import os
from dotenv import load_dotenv

load_dotenv()
api_key = os.getenv('API_KEY')
Step 6: Update your .gitignore and check it
The .env only keeps your secrets safe if Git ignores it. For our projects, we added these to the .gitignore:
.env
.venv/
data/
logs/
Then run git status. If .env isn’t listed, it’s being ignored and you’re safe to commit and push.
Reflection
What I found most interesting is that every project started with these same steps, whatever the data was. We used this setup for both the BikePoint and Amplitude projects, and it’s now a checklist I can reuse. It’s tempting to jump straight into the script, but getting the setup right first keeps your secrets safe, lets your code run anywhere and means future you can understand what you built.