


If you've had experience working in Alteryx you know that you can create both macros and Apps using Interface Tools. Recently, I was working on a workflow where I wanted to create an App based on a given year and specific top Ns. When I began the process I noticed that when running the App I wasn't getting the appropriate results. Here's where Chained Apps came in to save the day.
What is a Chained App?
A Chained App is multiple Apps that rely on the output of the previous App to inform the results of the proceeding App. This means that one App must completely run before the next App is launched. The benefit of Chaining Apps is that you are able to create one output and then manipulate it further in another, rather than doing the process all in one go. Why is this a benefit? It ensures that you won't miss results because they don't coincide with every value set in your App.
Steps for Creating a Chained App
Step 0:
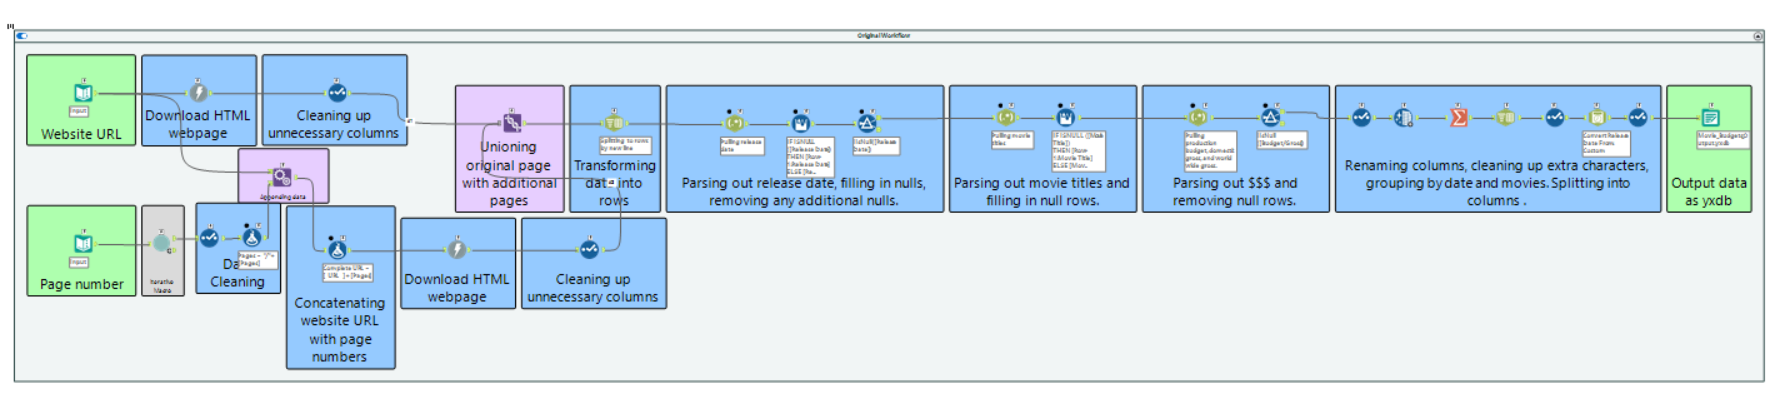
This is only if you don't have a dataset. In my case, I was web scraping data from a website that provided movie release dates, titles, production budgets, domestic gross, and worldwide gross. My original workflow can be seen below. From this workflow, I output my data as a .yxdb as I will be using it again for my App.
Step 1:
Create a temp folder on your computer. This will be the location where you will save your Output files from the built apps.
Step 2:
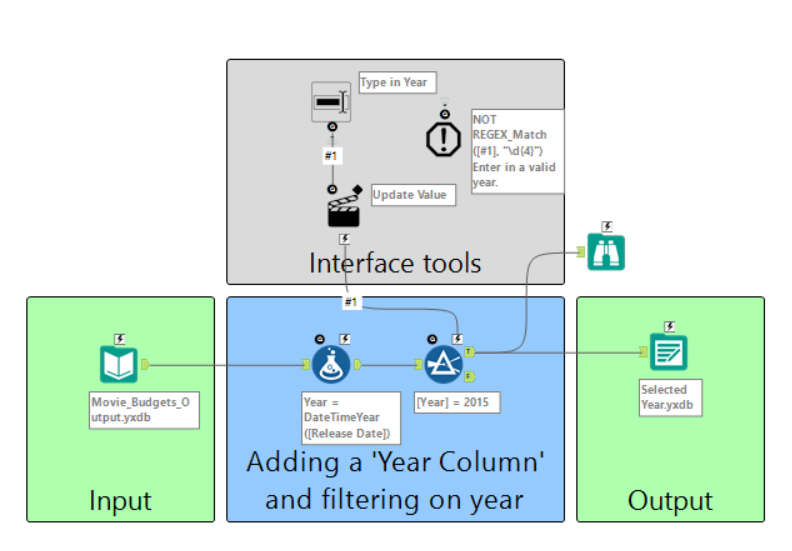
Build your first App. This should be the view you want your users to first see when opening the App. Save in the temp folder. Don't worry about configuring your properties in the Interface Developer yet. As you can see in the image below, I saved this output as 'Selected Years'.
Step 3:
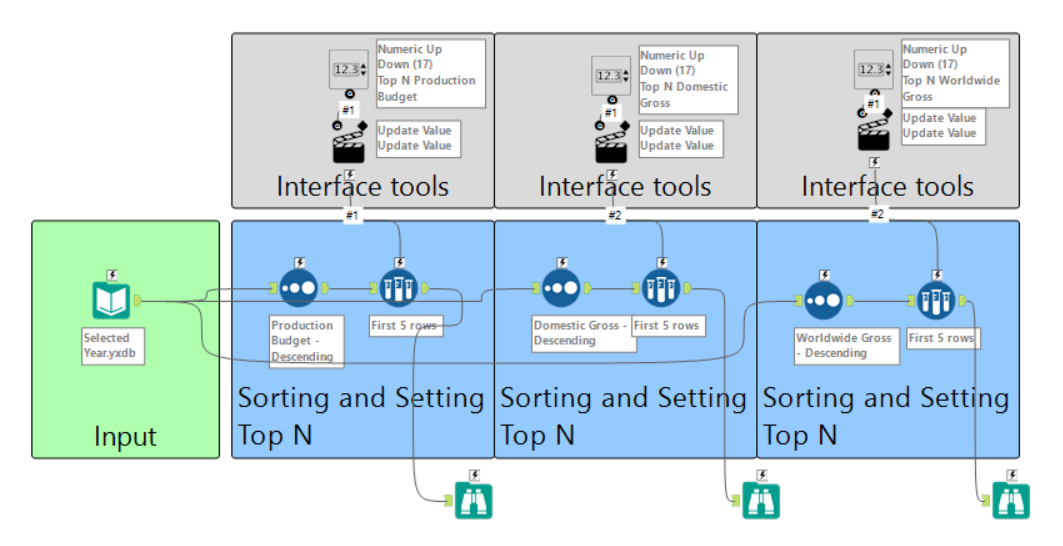
Build your second App with your first app's output file, for me this is 'Selected Year'. This should be the view you want your users to see once they have selected fields from the first view. If you are creating more than two views, you will have to create an output and save it into your temp folder as you did with the first App output.
Step 4:
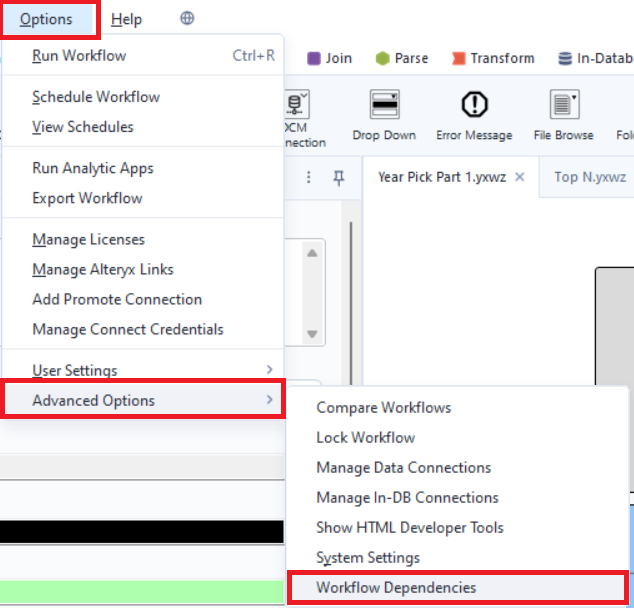
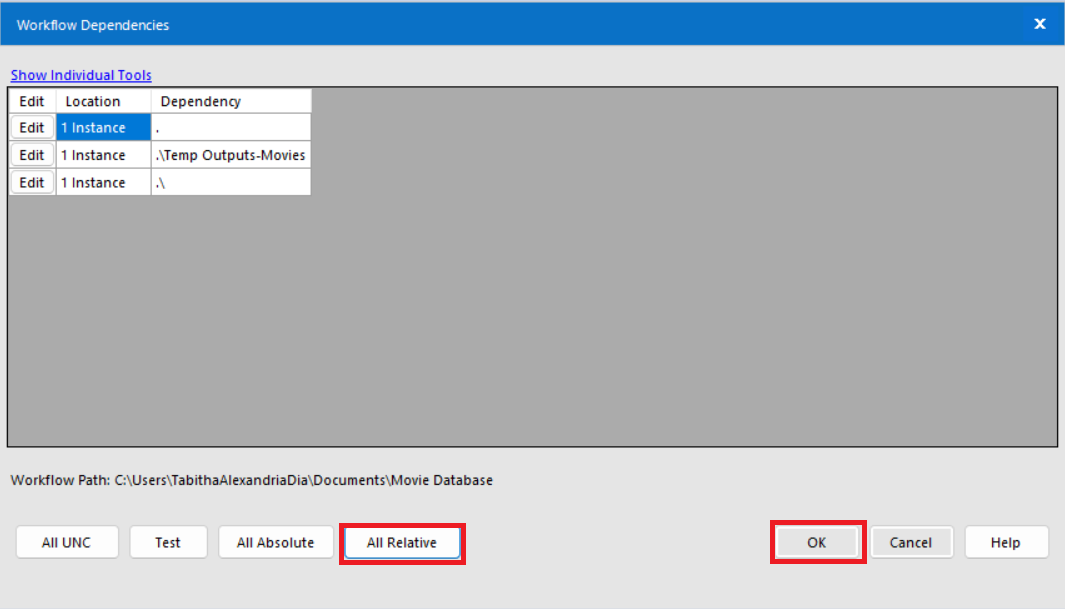
Going back into the first App we will now configure the App so it is able to interact with the other App that has been built. To do this we will have to make all files relative. This can be done by:
Going to 'Options' -> 'Advanced Options' -> 'Workflow Dependencies' -> clicking 'All Relative' -> 'OK'
Step 5:
Now, we will go into Interface Designer and configure our properties. If Interface Designer isn't showing up you can click Ctrl + Alt + D or access it in 'View'. Here we will go into properties to show our view.
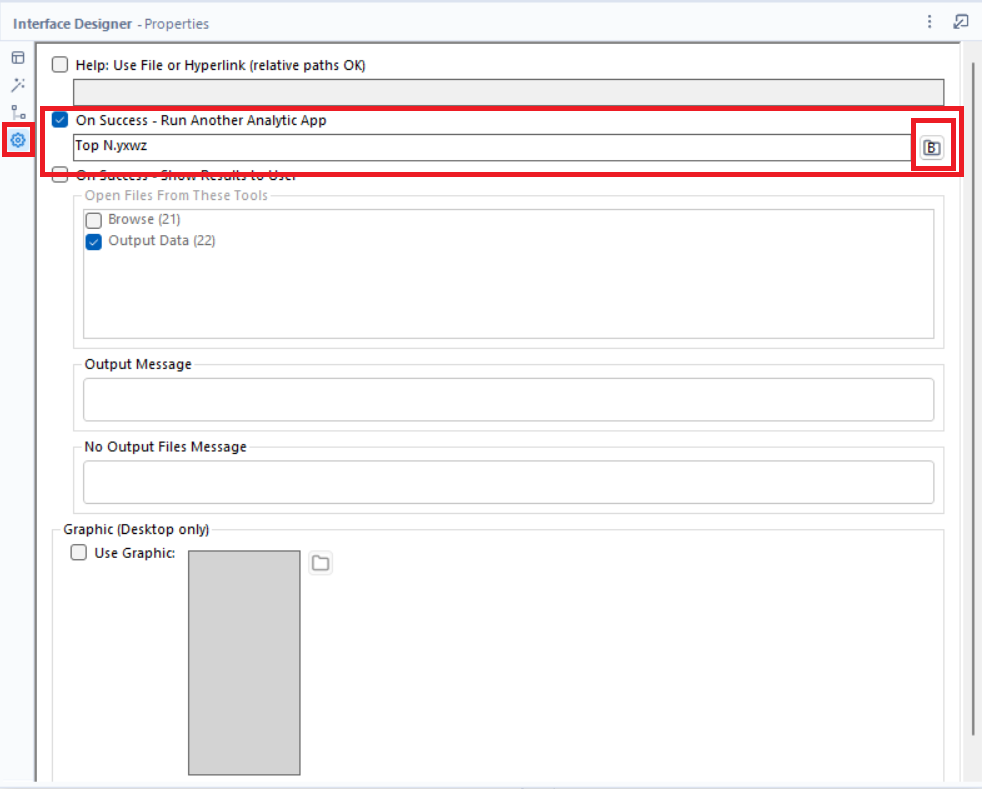
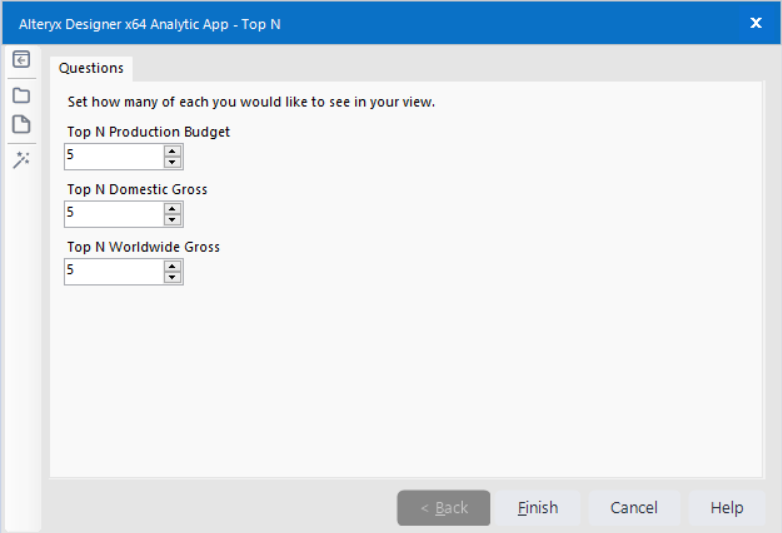
Unlike the configuration of a regular App we will check off 'On Success - Run Another Analytic App'. Click the folder icon on the right and select the other App you want to run after this first App is done. For me, this will be 'Top N.yxwz'.
Step 6:
Repeat step 4 with your second App.
Step 7:
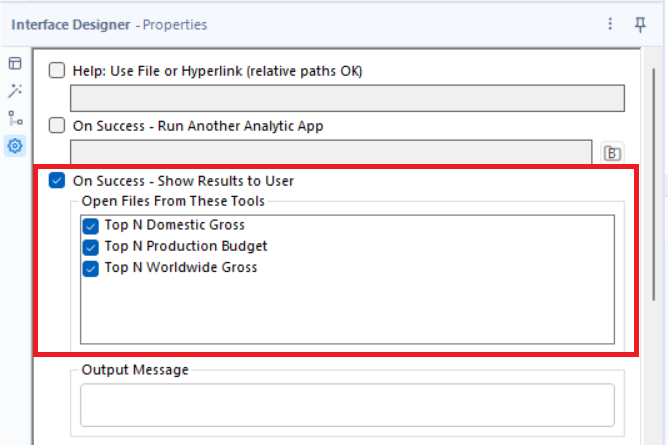
Once you complete step 6 you can now go into Interface Designer. This time since it will not be pushing through to another App we will click 'On Success - Show Results to User' and check box the browse tools you want to display to the user.
Step 8:
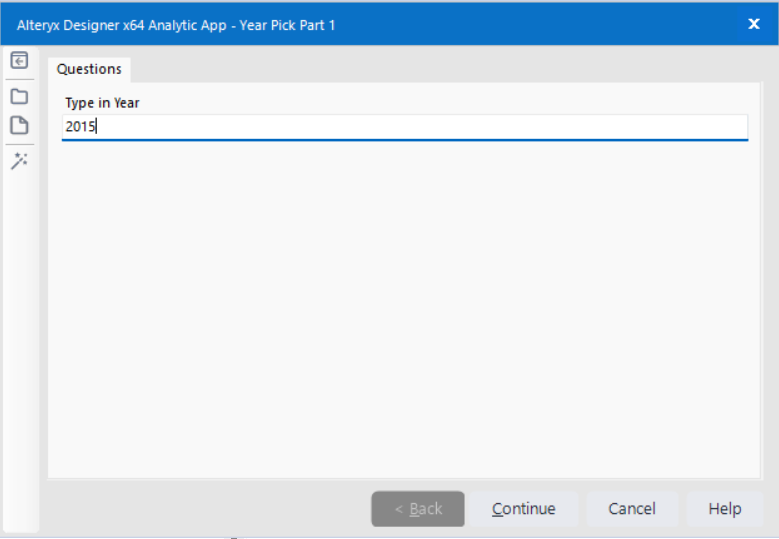
Make sure to save all your work and test out the App. If everything is done correctly you should have two Apps (or more). When I begin running my first App and click 'Continue' I am taken to my Top N App.
That's how to quickly create Chained Apps in Alteryx, happy building!