When publishing a workbook on Tableau Server, there might come a time when you would like to show certain data only to the relevant people or hide some sensitive data. For example, you might want your sales team to only be able to see their own sales at an individual level. This is when User Filters will come in useful.
For permissions at a project level to only allow certain users/groups to access the workbook, please refer to Charlie’s blog post on the subject.
There are 2 ways of creating User Filters.
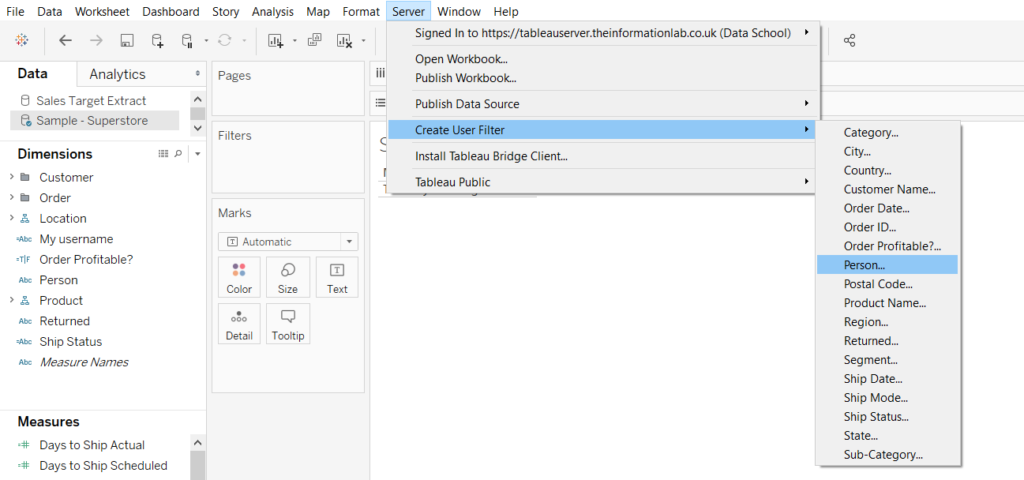
The built-in way: using the Superstore data set, click on Server in the top ribbon, Create User Filter and choose the field you would like to filter on. If you would like to only allow a salesperson to view their sales data only, click on Person.
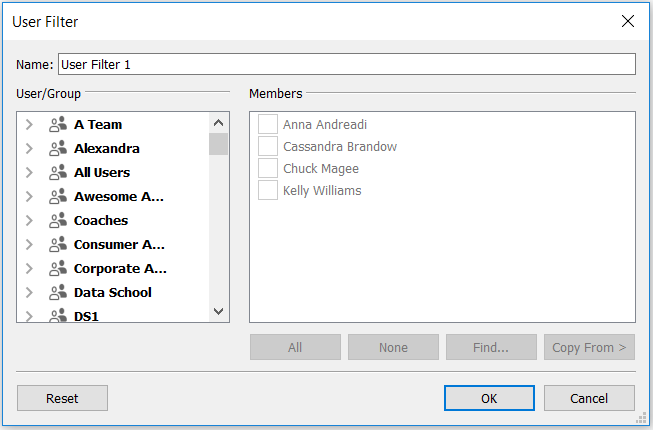
In the pop up window, select from the group of users the name of the salesperson (or in our example whoever in your company you would like to pretend being “Chuck Magee” et al.) and tick the corresponding member to assign them to that person.
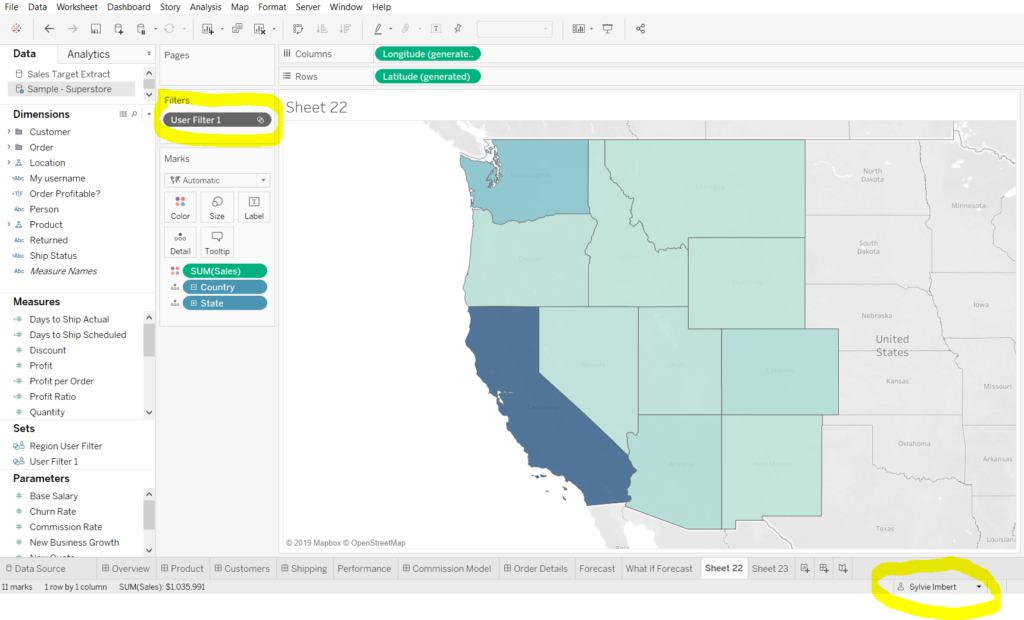
Drag the newly created set in the Filter card to activate the user filter. You can check that the filter is working by changing the name at the bottom of the sheet to someone not linked to the workbook: if the sheet returns blank, then it is working; similarly if you change it to the name of the person that you have assigned to Anna Andreadi (myself in this instance), you should only see data for the West region.
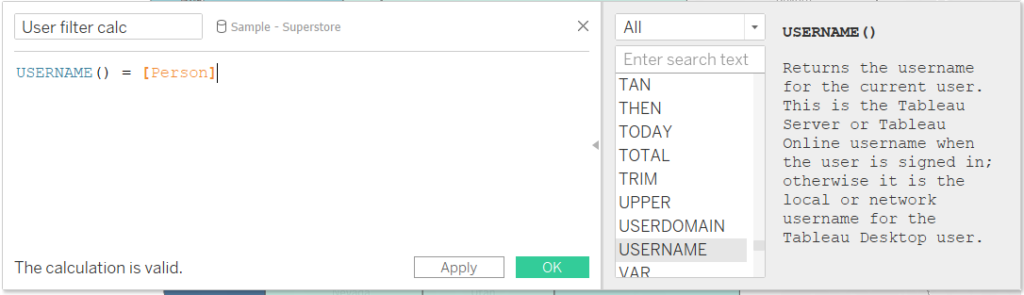
The dynamic way: via a calculated field. It might seem a bit of hard work to do so, but it really isn’t and it means that it will update any time someone joins the company. Create a calculated field using the calculation below ([Person] being the field you wish to filter on) and drag it to the Filter card, filtering on True.
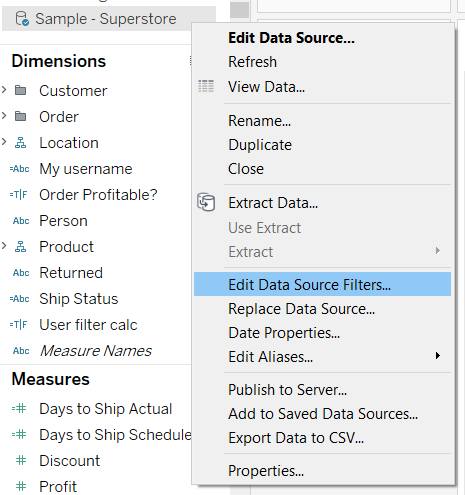
For both techniques, to ensure that the filters are secure and no one that isn’t authorised to see the views have access to them, right click on the data source, Edit Data Source Filters and add the newly created User Filter, making sure you are viewing the workbook as yourself (the owner) and then tick all the members.
When publishing the workbook, if you would like to keep the sheets completely private, select a person not relevant to your workbook under “Generate thumbnails as user”, which in turn won’t show a preview of the workbook on the thumbnail.

Finally, you can make the data more secure by first publishing the data source (.tds) on the server (making sure no one can access the data at workbook level as outlined at the beginning of this post) and then publish the workbook (.twb).

