The multi-row formula tool allows you to write expressions that reference the row preceding and/or the row following an active row. The tool gives you the option to update an existing field or create a new field and can be very useful if you need to reference multiple rows of data.
This blog will go through each aspect of the configuration window (see below), using examples to explain certain elements.

The first option is to choose whether you would like to update an existing field or create a new one.
- Update Existing Field : This allows you to update certain rows in an existing field, which you can choose in the drop down menu.
- Create New Field: This allows you to create a new field which you are able to rename and specify the data type/size.


For Example
In the data set below we need to replace the Null Values in the Year column with the correct year.
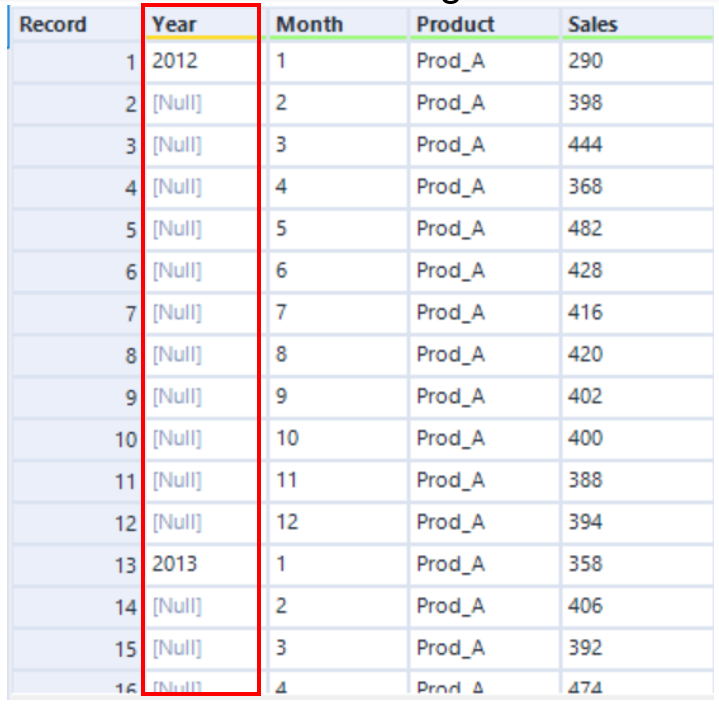
I.e We would like to replace the first null value with the ‘2012’ value in the preceding row. However we do not want the whole year column to be 2012 as this data set also includes other years (Eg 2013). Therefore once we reach a row with a new year, we would like the null values following this year to update correctly too. Configure the tool as per the below:
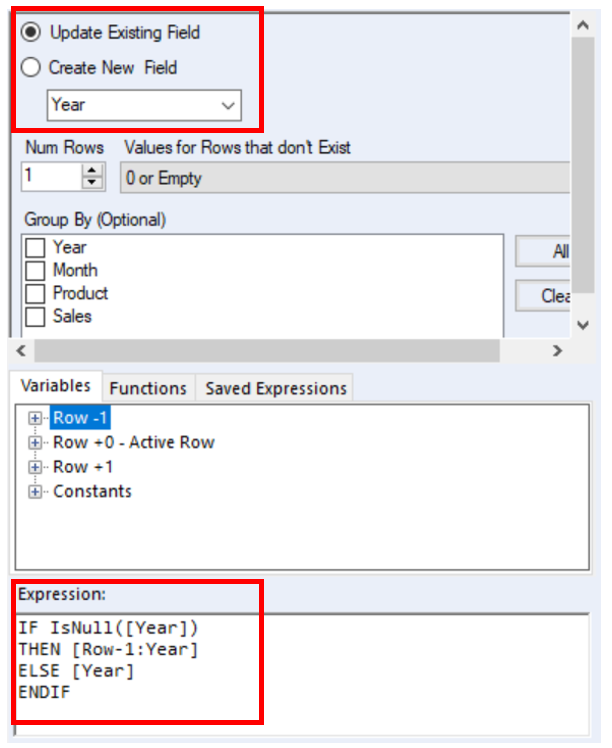
We have chosen to ‘Update Existing Field’ – the ‘Year’ Field with the following expression:
If IsNull([Year])
Then [Row-1:Year]
Else [Year]
Endif
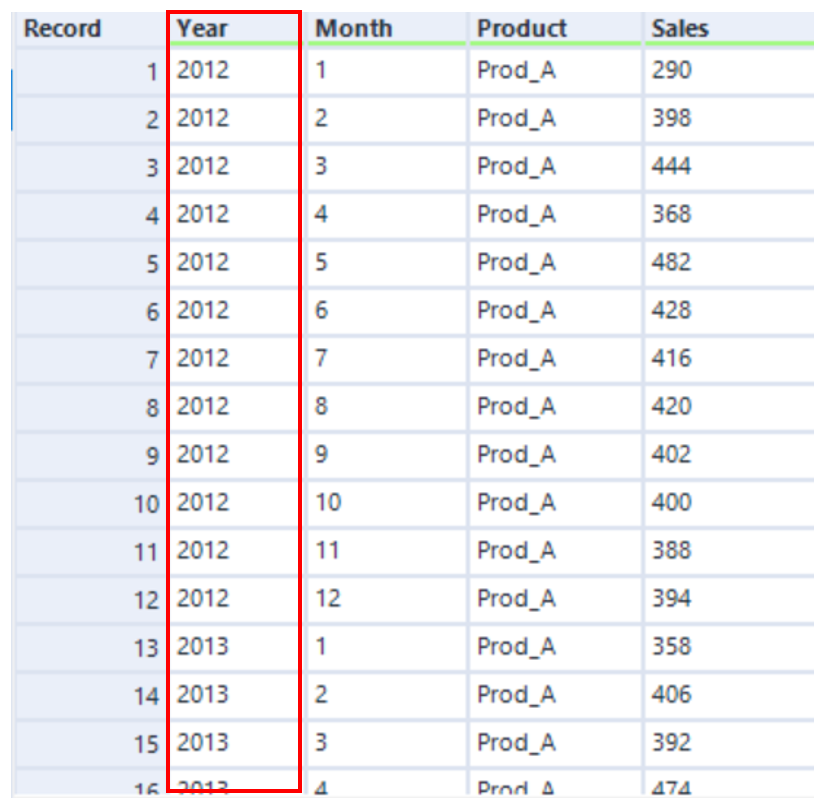
This expression is saying that if the Active Row in the ‘Year’ column is Null then update this with the value in the preceding row. However if the Active Row is not Null then keep the current value. This configuration would produce the below:
Num Rows
This option allows you to choose how many preceding and/or following rows you would like to reference in your expression. Changing this number, affects the number of variables in the pane below.
- Row -1: the row before the active row
- Row +0 (Active Row): the row you will be updating with a value
- Row +1: the row after the active row
Increasing the number of rows will increase the number of variables (i.e if you were to enter 2 into num rows – you would also get Row -2 and Row +2 in the variables pane).

Values for Rows that Don’t Exist
This option tells Alteryx what to use if it needs to reference the value of a row that does not exist. For example if you are using the first row of data, Alteryx will need to know what the value for row-1 is… which doesn’t actually exist. It gives you 3 options:
- Null: Non existent rows will become Null values
- 0 or Empty: Non existent rows will become 0 or left empty
- Set to Values to Closest Valid Row: Non existent rows will become closest valid row
Group By
The Group by option applies the expression to each group independently. This is best explained through an example.
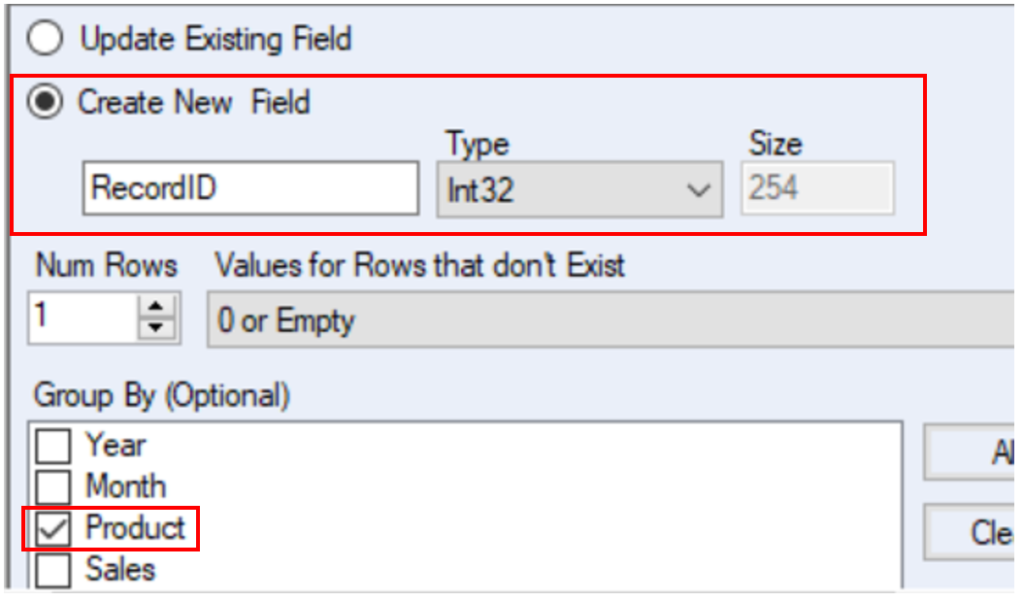
Say we want to assign a unique ID to each month of sales for each product. We would configure the tool to ‘Group By: Product’ as per the below. This means that the unique Record ID will restart for each different product (as we want each product to be numbered independently).
This would produce the following output. Notice that when the Product changes from Product A to product B the Record ID resets to 1.