This is something with a lot of potential. Let’s say you are gathering your own data (eg. via web scraping or APIs) and you want your visualisations to be up-to-date without the need of you running the data workflow manually. It is actually something I’ve learnt during our Friday project of web scraping and API week with Andre.
The first part of the project was to web scrape a meteorological institute website to get weather data for the Netherlands. Easy enough. (Although there was a bit that I’ll blog about. If you wonder how to download zip files and un-zip them automatically in Alteryx, look out for my next blog posts.)
The second part was to schedule the workflow to run daily and set up a dashboard that would use the updated data, so that whenever you access the dashboard you know it’s the latest information. Not so easy.
This project was quite nice because we were working in pairs and we had Thursday afternoon and Friday morning for it. By the end of Thursday, Joe and I had our workflow ready, we just needed to upload the data to Tableau Server so that we could have a live connection there. Just…
This turned out to be quite a hefty task actually and so I decided to share it with you. Especially that I think it’s an important thing to know. OK, so how do you go about it? (It might be a lengthy post so if you’re not interested in the journey but the solution, you can head to the end of the post.)
Step 1. Logistics
First of all, think about the final outcome. To schedule an Alteryx workflow you’ll either need Alteryx Server or Scheduler (read more here). The advantage of Alteryx Server is that you set it once and don’t really have to worry about it. With the Scheduler, you’d have to make sure your local computer is running. Thankfully, we have an Alteryx Server so we could go with that.
How do you want the users to access your viz? Is it just you, do you have a Tableau Server that you could publish your viz to? The connection to data will have to be a live connection since we want the viz to use the latest data. This means that Tableau Public is rather a no-go since not all live connections are available there.
Step 2. Publish to Tableau Server
In our case, we wanted to publish our viz on Tableau Server and so it made sense to publish the data there as well. It turned out that there even is a ‘Publish to Tableau Server’ tool in Alteryx. Great! And so the struggle began… (Spoiler alert: this didn’t work but I’ll still explain the tool and why it didn’t work)

As part of the connectors section, this tool, allows you to publish your output as .hyper or .tde on a Tableau Server. First things first. The newest version is not the best so I’d advise you to delete the current version (if you have it) and install 1.09 (I ended up using 1.09.2). The path to where you might find Publish to Tableau Server tool is C:\Users\[your_user]\AppData\Roaming\Alteryx\Tools. I have found a folder there which was named ‘Publish to Tableau Server’ or something along those lines. Delete it and instal the mentioned 1.09 from Alteryx Gallery. Whenever you’re using Publish to Tableau Server, now you should have the option to choose the tool version when you right-click on it:

Ok, so now that you’re using 1.09 version, you can actually connect to the Tableau Server. All the information about the server itself and your credentials are set up in the configuration pane:
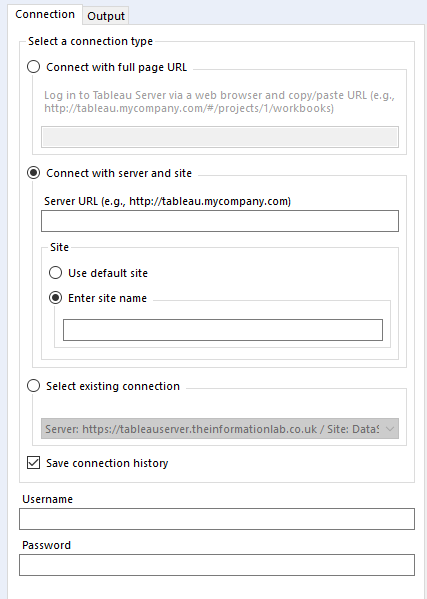
An important thing to remember: include https:// when typing in the server URL. I would suggest to use a specific site instead of the default one. You can also save the connection so that you don’t have to type all of it in every single time. You will also need to provide your credentials just as you would when accessing Tableau Server via a web browser.
The next tab allows you to specify where you want to publish your data to:
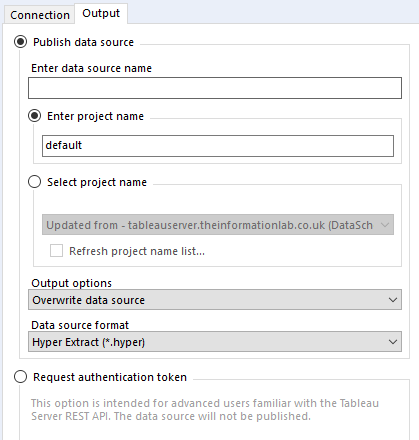
What you can do here is to populate the project names list from Tableau Server. To do that, you need to select ‘Select project name’ -> Updated from and check the ‘Refresh project name list…’:
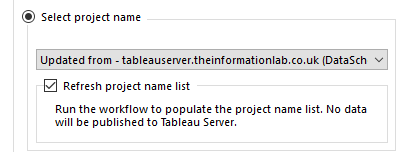
You’ll have to run the workflow and then you’ll be able to access the list of the projects. Another important note: if the ‘Refresh project name list’ is ticked, the data will not be published.
When you have the project list updated, simply select the project you want to publish to (you might need to create it via browser) and give your data source a name. You have three options on how to save the data:
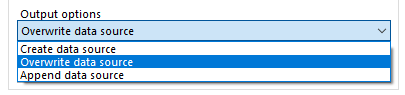
whatever you choose, will depend on your task at hand. In my case we went with overwriting the data source just because it was easier. Sometimes appending the data might be a better option. I’m not sure if overwriting will automatically create a new data source if it doesn’t exist. Just to be sure, we ran the flow once creating the data source and then changed it to overwriting.
A few things to mention… Apparently if you select .hyper as the output file it may incorrectly show up as .tde. It is, however, a .hyper file (according to documentation/forums). The file may look empty on Tableau Server when you just open it to explore it (eg. using Ask Data). To make sure it is not empty, just download the data and open it in Tableau. In my case it turned out it wasn’t empty after all.
Step 3. Publish to Alteryx Gallery (Why this didn’t work?)
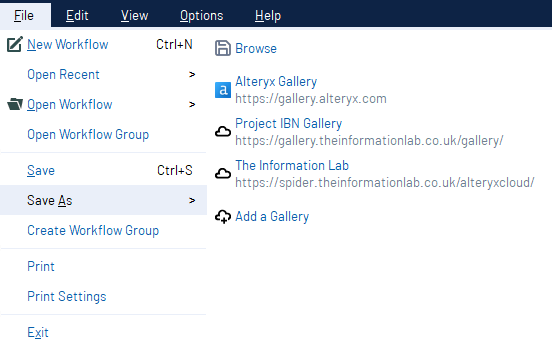
Publishing to Alteryx Gallery/Server is very easy. File -> Save As -> your gallery, if you don’t have any set up yet (you should still have Alteryx Gallery), just click on Add a Gallery. This will open a window where you should type in the Gallery URL and then log in:
When you publish your workflow to Alteryx Gallery (Alteryx Server), you’ll get a message about the workflow’s assets, similarly when you export your workflow as a packaged workflow. There, you can select all extra files (macros, configurations, etc.). There were actually a few connected to Publish to Tableau Server tool, including one with authentication details. Despite including these files, it seemed that running the workflow from the gallery resulted in an authentication error from Tableau Server. This seemed to be quite tricky because I checked all possible boxes that would include those files but for some reason, the authentication did not work. And so I decided to try something else (after a suggestion both from Andre and Ben).
Back to step 2. Output data to SQL database
We’ve done probably a session on using SQL databases with Alteryx so I wasn’t quite sure how to approach this without all of the settings given to me. Thankfully, Andre helped a lot and pretty much set up the connection for me. The connection is chosen in the Output tool itself. (Maybe I’ll write a blog on it one day, who knows? But for the time being, you’ll need some extra resources to find out how to do this.) This turned out to work successfully from my local machine – yay! But then so did Publish to Tableau Server tool.
Step 3. Publish to Alteryx Gallery (Why this didn’t work?)
I did the same as I did when I was publishing my flow with Publish to Tableau Server tool, except this time there were no boxes to check that could hold the authentication details… Not a good sign.
Unsurprisingly (at least to Andre…), I got an error when I tried to run the flow from within the gallery. It turned out to be most likely linked to the lack of credentials information.
Great, it was pretty late by that point and we still didn’t manage to fulfill the project requirements. At that time, Ben reminded me that I can set up the connection in the gallery that I could use straight away from Designer. He also reminded me that we’d apparently done it already!
Back to step 2. Output data to SQL database (connection from the gallery) [this worked]
To set up SQL connection in Alteryx Gallery/Server you’ll have to be an admin. Alternatively, ask the administrator of your Alteryx Gallery to do it for you.
To access the admin site, click on the cog in the upper right corner and select (surprise, surprise) ‘admin’. From there, go to Data Connections, in the panel on the left, -> Add New. You should see something like this:
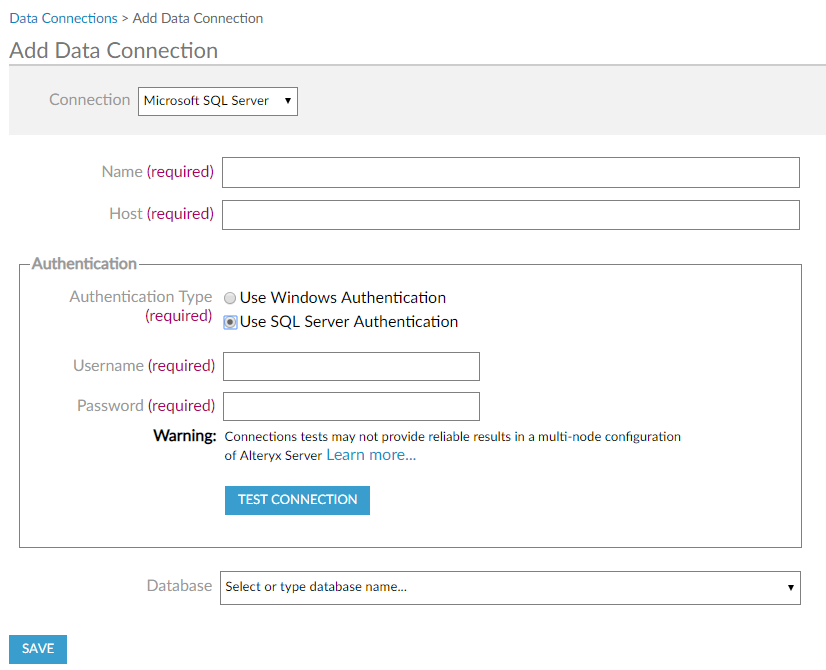
In this case, I wanted to use Microsoft SQL. The name of the connection is just something you can easily identify in your Alteryx Gallery Data Connections. I called mine [FirstnameLastname]_[name of the server]. For authentication type, I selected SQL Server Authentication where you can type in your credentials (this is the part I had problems with both with Publish to Tableau Server tool and SQL connection from Alteryx). Hit ‘test connection’ to make sure everything works. Finally, select the correct database you want to access. Make sure to click save!
In the Data Connections, find your new connection. It should have 0 users and 0 studios assigned. To change this, click on the pencil icon. You should now see the following:
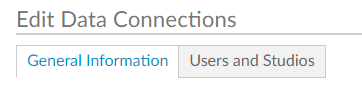
You’ll also see Name and Connection boxes. Connection text box will have the odbc connection string which summarises the connection details (what you set up in the previous step). You can actually change it if you’re more familiar with the topic, but let’s leave it as it is for now.
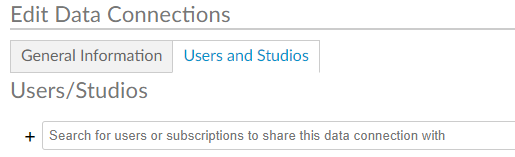
In users and studios tab, you’ll be able to add users or private studios to the connection. Simply use the search bar to find the users (eg. yourself). They will show up below and you should see an updated number for users in the Data Connections view.
The cool thing about this is that if you go to your Alteryx Designer, you can find that database connection right there. Drag and drop input tool on the canvas. In the configuration, click on the arrow next to Connect a File or Database -> Saved Data Connections -> [your Alteryx Gallery] -> [your saved connection]. And that’s it! you can as easily as that connect to that database and you don’t lose your credentials. You can set it up in the same way for output tool.
Once I’ve done this and changed the configuration of the output tool, I tried to run the flow on my local machine. It didn’t work because the odbc connection string had a driver that I don’t have on my computer. You could change the string in the connection settings (General Information tab in Edit Data Connections). I actually didn’t mind in this case because I was running low on time and decided to publish the flow and run it from the gallery. (I would advise to actually double check things first on your local machine.)
Step 3. Publish to Alteryx Gallery and Schedule the Flow [this worked]
After publishing my workflow to the gallery, I ran it from there. The good news is… It worked!
OK, to actually run the flow in the gallery, you have to locate your workflow. You can go to Private Studio and find the name you gave it. this will take to a page with a big icon that you can change. You’ll see the name of your workflow, the private studio it belongs to, the version control, the description from metadata of the workflow and information about the runs; something like this:
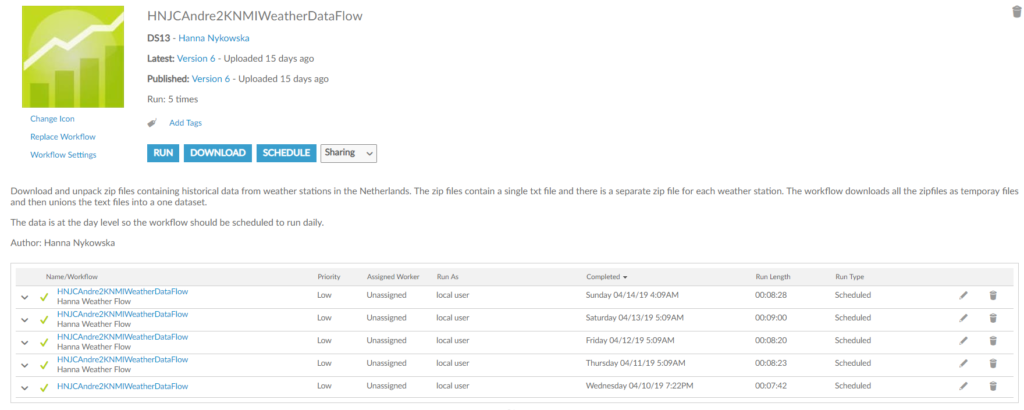
You can see there are three blue buttons: RUN, DOWNLOAD, SCHEDULE. To check the workflow works fine in the gallery, just hit RUN. Make sure you do this before scheduling. There’s no point in scheduling a workflow that doesn’t work.
To schedule a workflow, hit SCHEDULE. This will open a pop-up window where you can configure your private schedule:
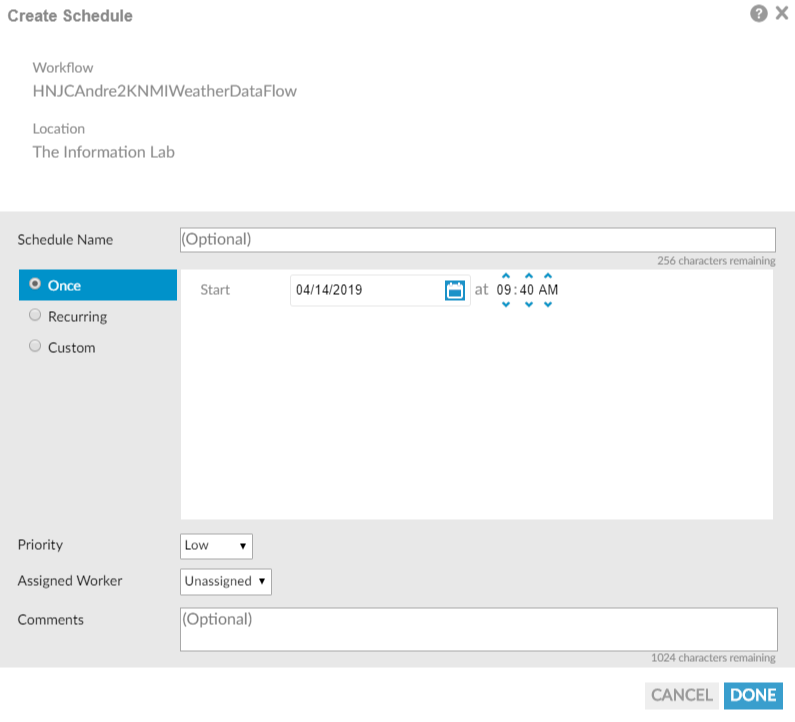
As you can see, you have option to schedule a single run, recurring runs or custom (specific days or times that are not easily put into a pattern). I went for a daily recurring schedule at 4 AM so it is unlikely to clash with other potential schedules. You can add a name and comment for an easier identification of its purpose (both for yourself and other users).
To double-check your schedule is set up correctly, go to SCHEDULES (the panel on the left). You should see your schedule in the list with the workflow you scheduled. You can also check there if the schedule is active or complete and when is the next run happening.
Step 4. Publish to Tableau Server [this worked]
Now that your Alteryx workflow is all good and happy with all scheduling set up, you can work on your viz. Make sure you connect to the same SQL database from Tableau and this should do the trick.
If you use live connection, you can just publish your workbook to Tableau Server as it is. Go to Server -> Publish Workbook. You have to be logged in to be able to do this. Just find the project you want to publish to, type in a name (or select it from the list if you’re re-uploading) and hit Publish.
I would, however, recommend using extract. It will work faster and so the user experience will be better. When you’re publishing, you’ll have the option to select a ‘Refresh Extract’ schedule. You can opt for None but why would you read this blog then? You can also select one from pre-configured schedules on Tableau Server. If you want to have a different schedule than available, go to Tableau Server via web browser -> Schedules -> + New Schedule this will open a pop-up window where you can configure the schedule:
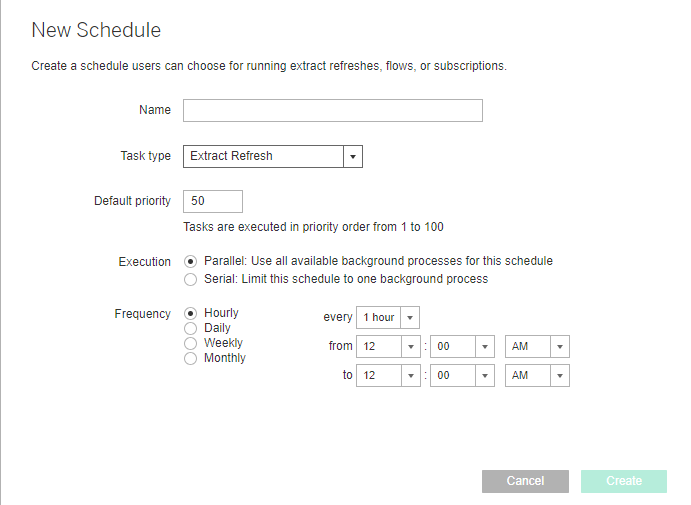
Make sure to choose Extract Refresh as task type and configure the rest according to your requirements. Then go back to Tableau Desktop and pick that schedule when publishing your workbook.
That’s it!
All in all, this turned out to be quite a difficult task but also something that everyone who works with Tableau and Alteryx should do at least once. It helped that it was a project and that I had to figure it out myself. Sometimes if you just follow along, you don’t really remember that well what you had to do and why you had to do it.
Hopefully, this post is useful to others. It will certainly be useful to me whenever I have to do this task again.
Thanks for the reading, byeee!