During our web scraping and API week with Andre (which was soooo good!), I stumbled across Rick and Morty API. What started as a short in-class project ended up being an exciting few days personal project during which I created my Rick and Mortuary viz:

I got to admit, I wouldn’t have come up with the idea for this if it wasn’t for my fellow cohortian Jon. I also owe the title to him. Thanks, Jon!
What I want to describe in this post, is how I got the grave shapes and the character icons. It all comes down to the custom shapes in Tableau with a bit of help from Alteryx.
Hand-drawn Custom Shapes (headstones)
I have created the headstones myself using Paper app on iPad. It’s a free app that was recommended to me by Carl. I have bought the full version (a few pounds for six months so not too bad) but I don’t think it’s necessary in this case. The fun part was just drawing the shapes. I then sent them to my email and edited them on my computer. It doesn’t really matter which program you’re planning on using for that as long as it allows a transparent background. I ended up using Paint 3D.
Every shape for your shape ‘palette’ has to be a separate file. A thing to keep in mind is to make sure the dimensions are as consistent as possible (ideally making all custom shapes the same size). That way they will also be the same size in Tableau. If the shapes have varied sizes it may indicate that there is something dictating the size and thus confusing your audience.
Once you have your shapes in separate files, go to Documents -> My Tableau Repository -> Shapes. In there, create a new folder and name it something meaningful (this is the name that will show up in Tableau in the shapes dropdown list). Then make sure your custom shapes are in that created folder.
Now, open Tableau and connect to any data source. Go to a sheet and change the mark type to Shape. Click on Shape -> More Shapes. You should see a pop-up window:
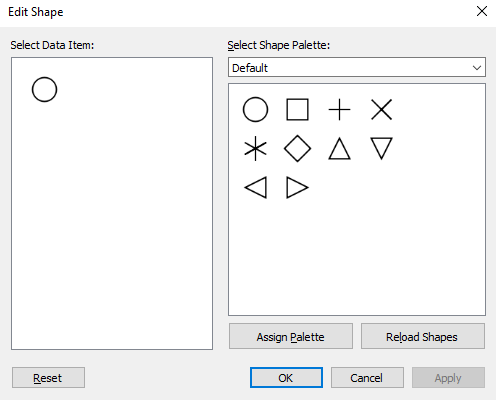
Click on the drop down and in the list, you should see the name of the folder you created with the shapes inside:

RickAndMorty_Graves in my case:
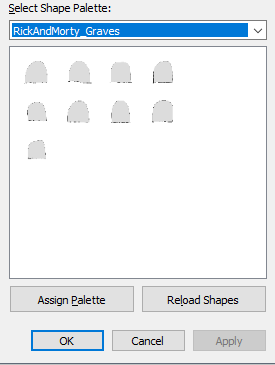
If you click on Assign Palette the shapes will be automatically assigned to available values (to have any values, make sure you put a dimension on Shape in the Marks card). If you have more values than shapes in your palette, some values will have the same shapes assigned. Which worked great in my case.
I wanted the graves to look fairly similar but to have some variability and so I drew nine different gravestones shapes. With 150 characters or so, all of my gravestones were reused but it’s also not that easy to notice those that are exactly the same shape.
Downloaded Custom Shapes via Alteryx (character icons)
As much as drawing my own shapes was fun, I didn’t think it would work well for the characters. Mostly because I wanted every character to have its own icon/avatar and for it to look like they look in the series. Sadly, I don’t have the time nor the skills to do that. There was, however, another solution available.
The API that I used for getting my data also had character icons. This meant that I could download all of the images straight from the API. When I downloaded the data, I also downloaded the links to the images of character avatars. To find out how to do that in detail, look out for a blog post on APIs soon.
Step 1. Get your URLs
Using the API I got a data set with a field of image URLs. A single URL per row, a single row per character. In the data, I also had the character ID which is unique for each character. I had more fields in my data set, but I don’t think they are relevant in this situation.
Step 2. Download Blobs
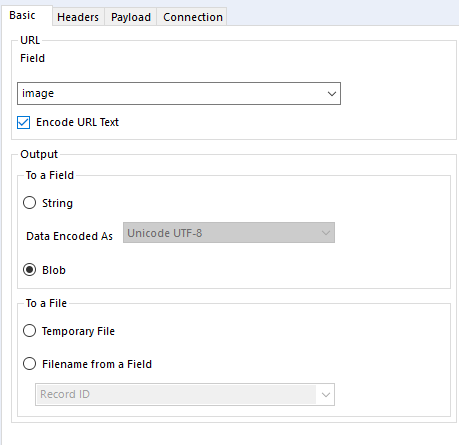
You need to download the images. Use a download tool and set output to Blob:
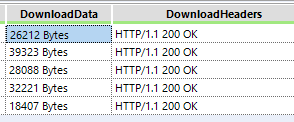
Instead of a string, you will have an object in your DownloadData and the results pane will show you the size of it:
Step 3. Convert Blob to Image
To do that, you’ll need to use the Blob Convert tool and configure it to Convert From a Blob Field to PNG, GIF or JPG. The DownloadData field is the Blob Field you need to specify:

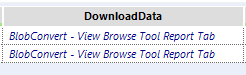
To view the images, you’ll need to use a browse tool just as suggested in the results pane:

Step 4. Prepare the file path
To save the images as files, we’ll need a file path. That’s where the character IDs ([id] in my case) come in handy. Use the formula tool to build the file path. This is what I used:
'C:\Users\Hania\Documents\My Tableau Repository\Shapes\RickAndMorty_DeadCharacters\' + [id] + '.png'As you can see, my file path goes straight to the Tableau Repository Shapes folder. That saves me the effort of copying the files into that location. Then I pass the ID field (if it’s a number, use ToString() function). Important thing: include ‘.png’ at the end of the file path so that the file is definitely a png.
Step 5. Save the images with Render tool
Report tools are something that I haven’t played much with until my Alteryx Advanced Exam. This is when I’ve found out about various functionalities such as displaying and saving images. Woohoo!
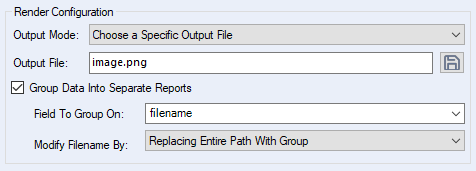
To save files, you’ll need to use the Render tool. The configuration is a bit tricky but it’s definitely doable. Set the Render Configuration to Choose a Specific Output File in Output Mode, write anything ending with .png in Output File, make sure you tick the Group Data into Separate Reports box. Then find your field with the file path in the drop down (filename in my case) and set Modify Filename By: to Replacing Entire Path With Group:
In Report Data section I haven’t changed anything.
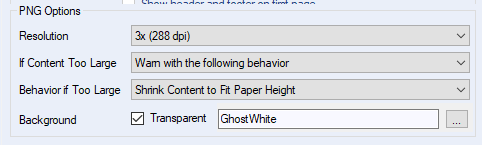
Moving on to PNG Options, I set the resolution to 3x (highest quality) to make sure the images are nice and sharp in Tableau and ticked the Transparent Background box:
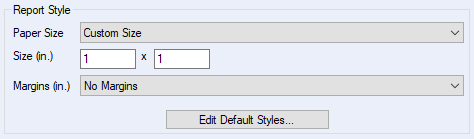
Now, the Report Style section is actually quite important. The default Paper Size is Letter which will very likely add a lot of white space to your images. I didn’t want that. To change this, pick Custom Size from the drop down and here the fun begins. The size you actually want will depend on the images you download. Mine were squares and I didn’t want them too big so I set the size to 1 x 1 in. This is something I played with using the trial-and-error method and recommend the same… Lastly, make sure your margins are set to No Margins.
All you need to do now is run the flow. Once that’s over, open Tableau and make sure your shapes are available and look as you want them to.
Step 6. Assign the shapes to the characters (or whatever you’re working with)
OK, now that your shapes are nice and ready to play with in Tableau, connect to your data (characters data in my case). In the marks card, change mark type to Shape. Then Drag the ID field (the same you used when creating the file path) onto shapes. Right-click on the pill -> Sort, chose Alphabetic from Sort By drop down and keep Sort Order on Ascending. Then click on Shape and select your Shape Palette from the drop down. The shapes should be ordered alphabetically based on their file names. Since we already sorted the ID field to be in the alphabetical order as well, if you now click on Assign Palette, the shapes should be correctly assigned to the right characters.
Once this is done, click OK which will close the window. The good news is that you can change the sort of ID field and it will not affect your assigned shapes. Not until you open the Shape pop-up menu and re-assign them. The shape assignment is stored in Tableau so if you create another sheet, you don’t have to repeat this process as long as you use the same field on shapes.
That’s it! Hope you’ve found it useful and thanks for reading. Byee!