Most guides to macros in Alteryx copy and paste the phrase “a macro is a workflow that has the flexibility to be run as a single tool within another workflow”. I don’t find this a particularly informative definition.
Instead, to put it in R terminology, a tool is like a function. The built-in functions are nice, but sometimes they don’t do everything you need them to because you’re a data maverick who don’t live by nobody’s rules but dammit you get results That’s when you write your own function, store it in memory, and use it in the rest of your code. That’s a macro.
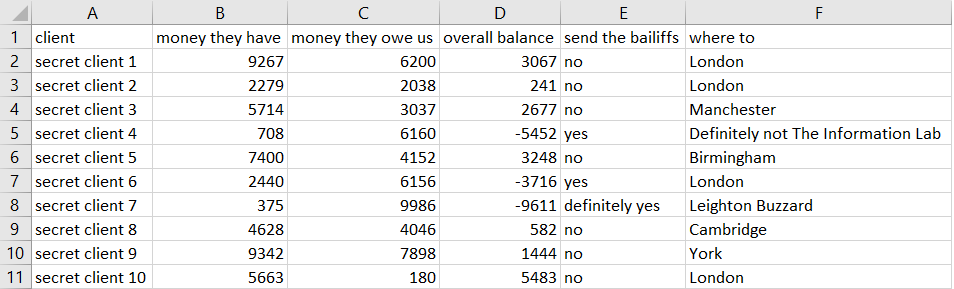
Let’s take the same banking data from yesterday’s post:
Let’s say that we want to arbitrarily fine all the clients for something. We could just whack in a Formula tool, take the “money they owe us” column, add 500 to it, and output it into a new column called “what they owe us now”. That would look like this:
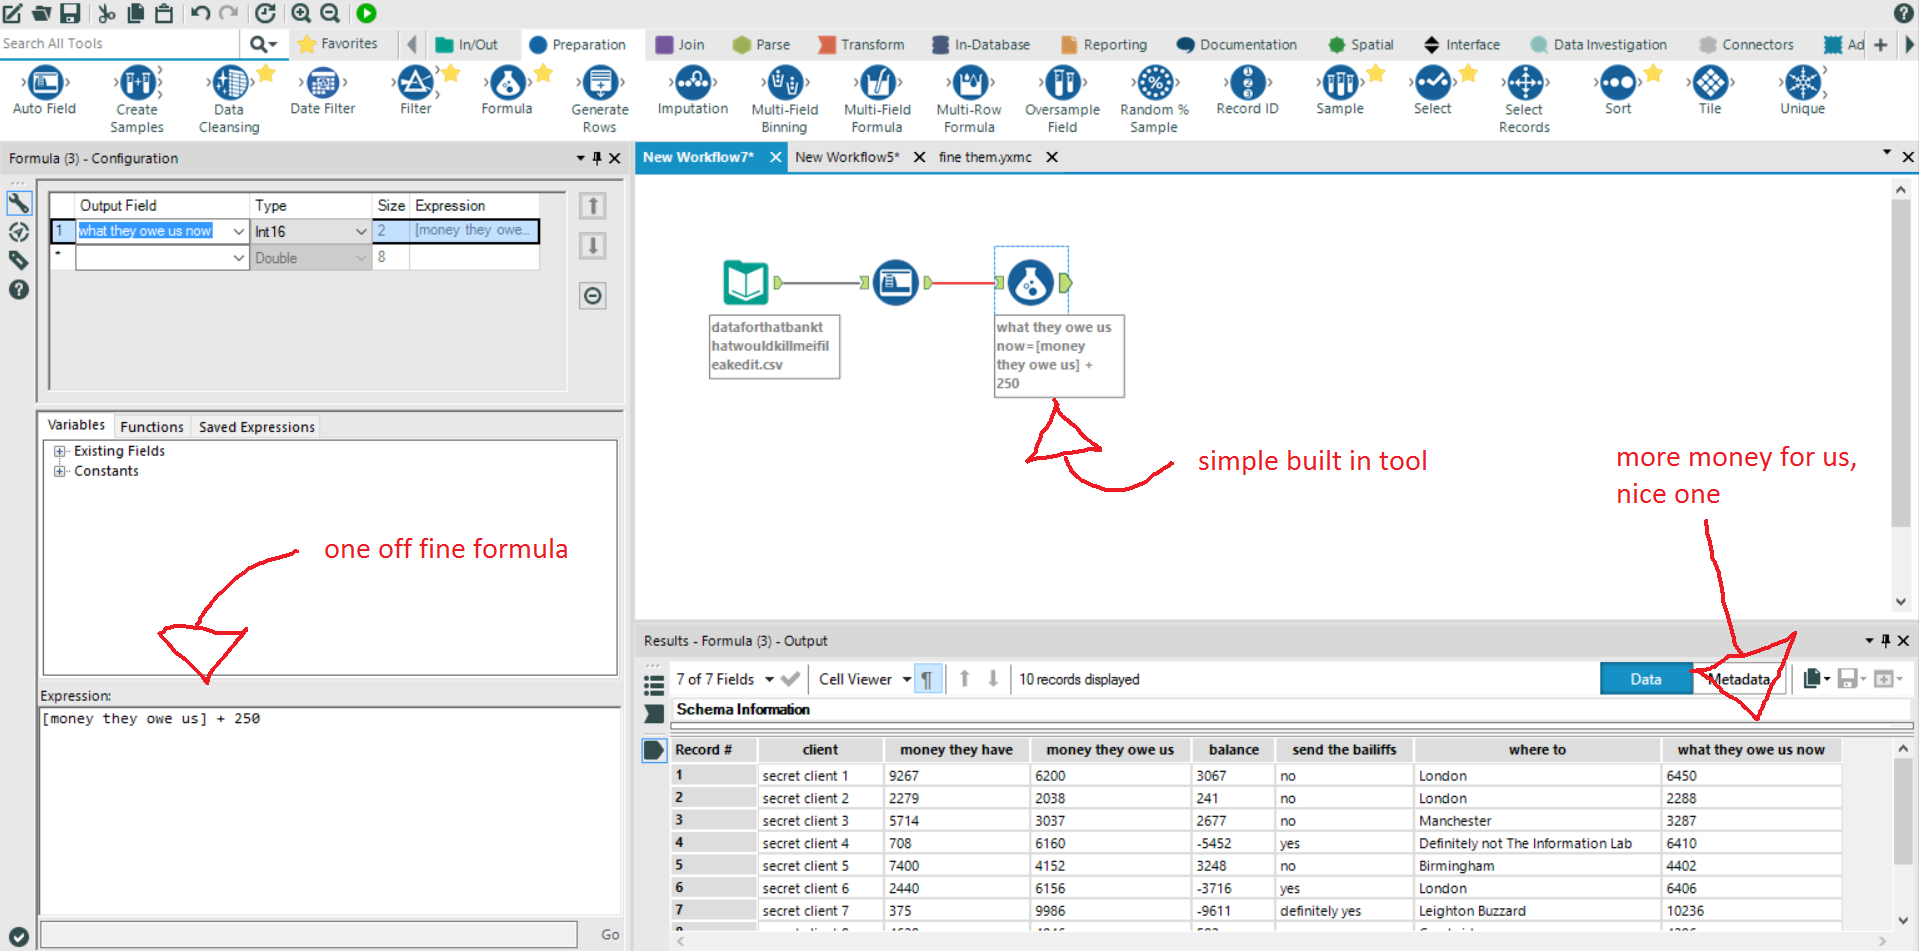
This is the equivalent of creating a new column in R by doing something like this:
df$whattheyoweusnow <- df$moneytheyoweus + 250
That’s all well and good, but it only works for this specific amount in this specific workflow. We might want to change the amount we fine them, or fine another load of clients in another workflow where the column headings are different. We could change the formula manually each time, but that’d be a faff. In R, it’d be easy enough just to change the column names and fine amount, but it’d be annoying if we had to do this loads of times.
Instead, we could write a macro. This would be a bit more complicated, but a lot more suitable for later and wider use. In R, we’d specify the thing to change and the fine at the start, create a function to fine the clients, and then use those variables throughout.
thingtochange <- df$moneytheyoweus

fine <- 500

finethem <- function(x, y) {

x + y

}

df$whattheyoweusnow <- finethem(thingtochange, fine)
(this is probably a bit more complicated that would actually be necessary in real life, but it’s just an example)
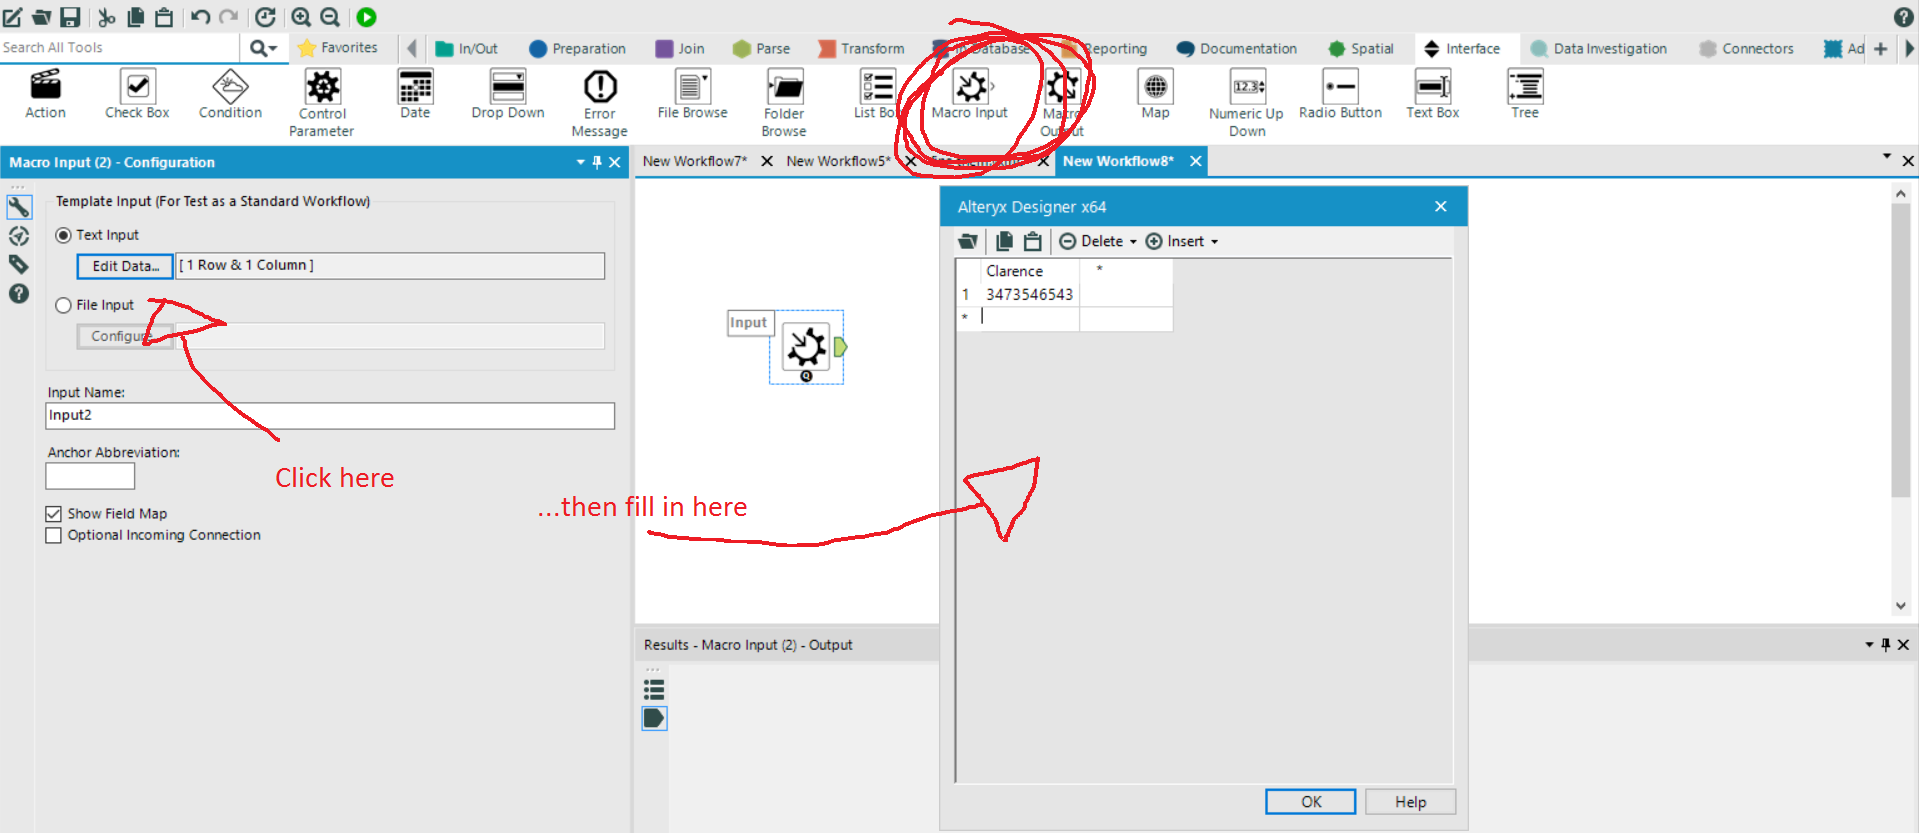
In Alteryx, the first thing to do is create a new workflow. We’ll write the macro in here.
The macro needs some input data, so drop in the Macro Input tool. We know we’ll be dealing with a column name (“money they owe us” in the original file, who knows what in other files) and some numbers in that column, so the macro needs some dummy values. Click on Edit Text and put in a placeholder column name (I’ve called mine Clarence) and some numbers. Also, make sure “Show Field Map” in the configuration screen on the left is ticked.
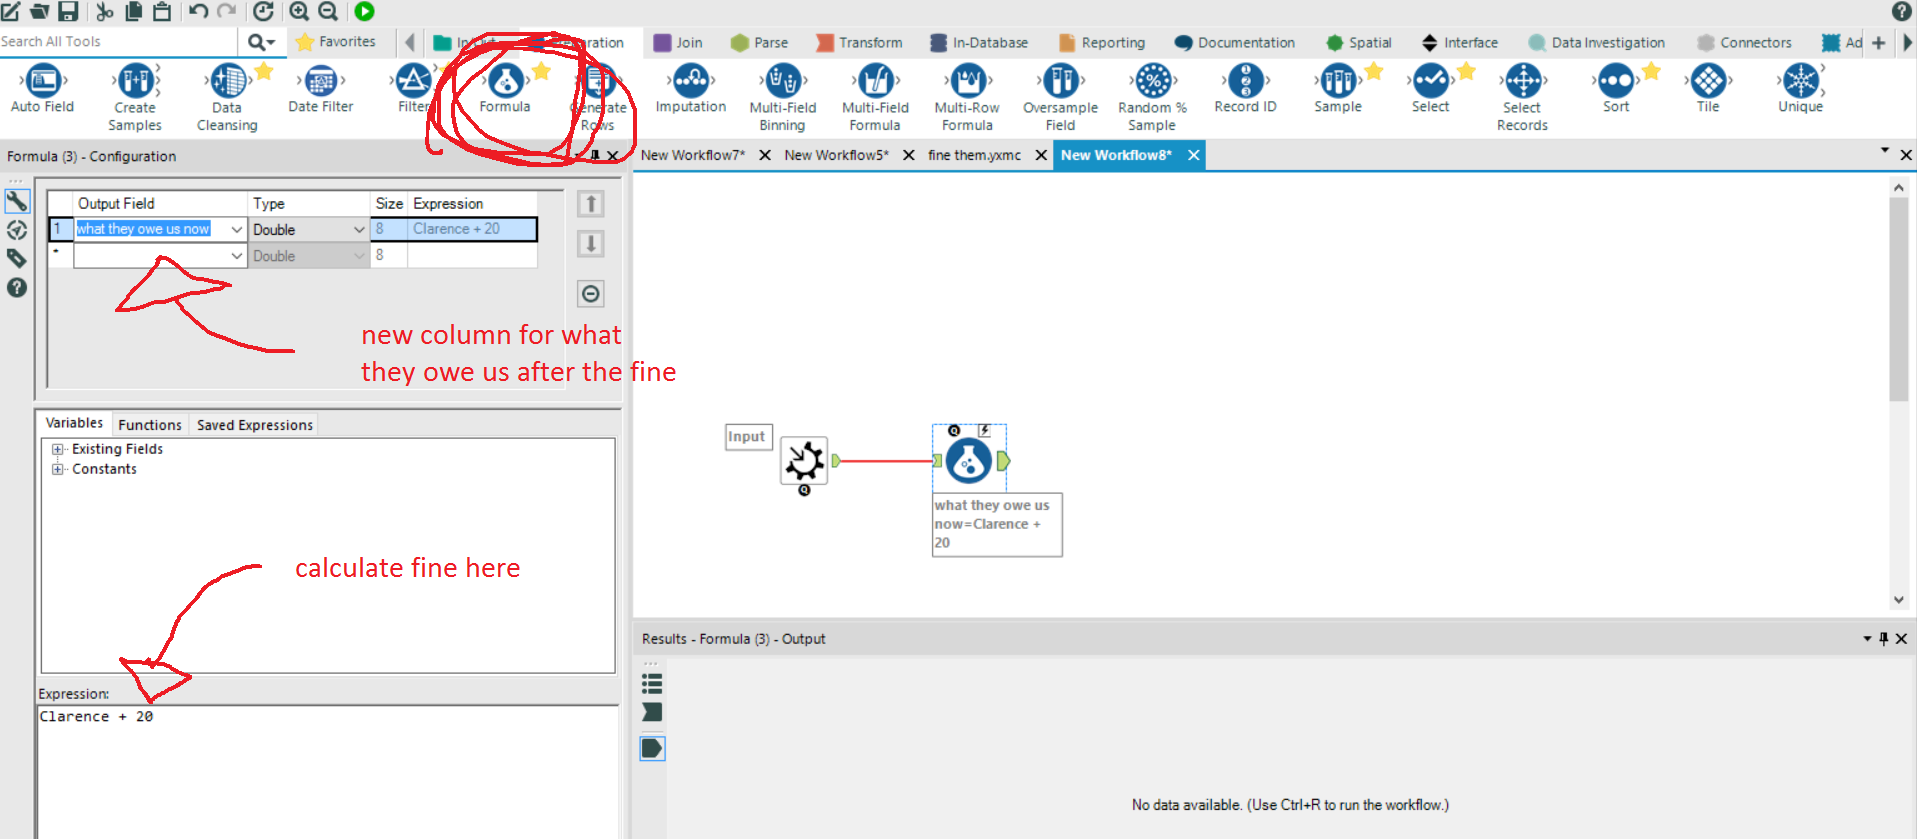
Then, put in a Formula tool and set it to create a new column for what they’ll owe us after being fined, and put in the expression that adds a number to Clarence. I’ve set it to twenty here, but it could be anything.
This is mostly the same as you’d do normally, but here comes the macro part. First, add a Numeric Up Down tool to be able to set the amount to fine the clients. You can choose max, min, and default numbers here.
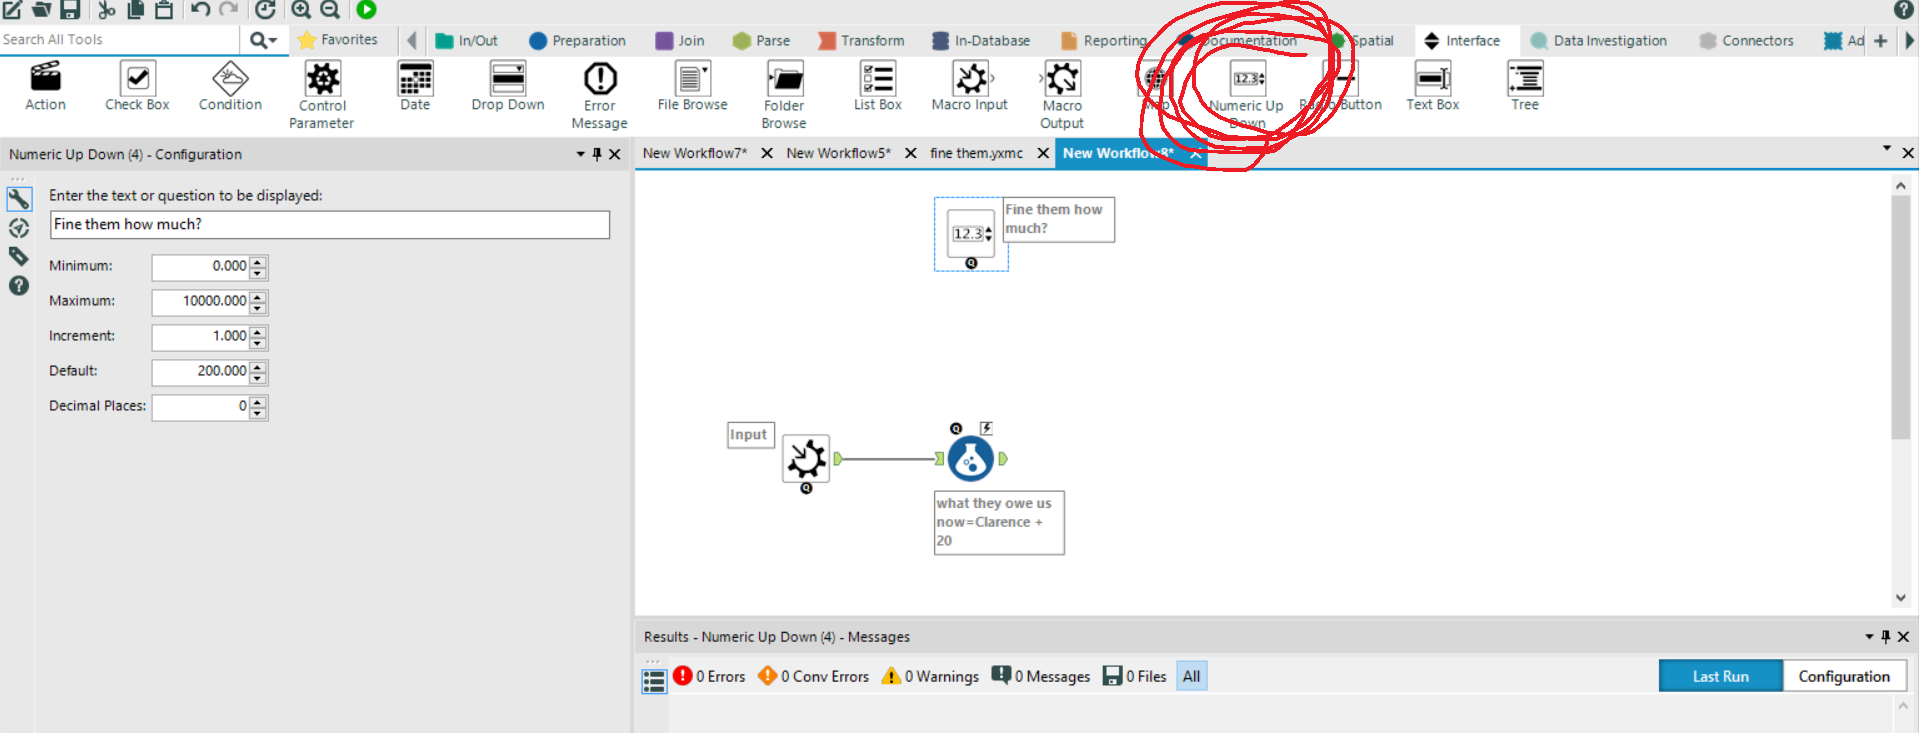
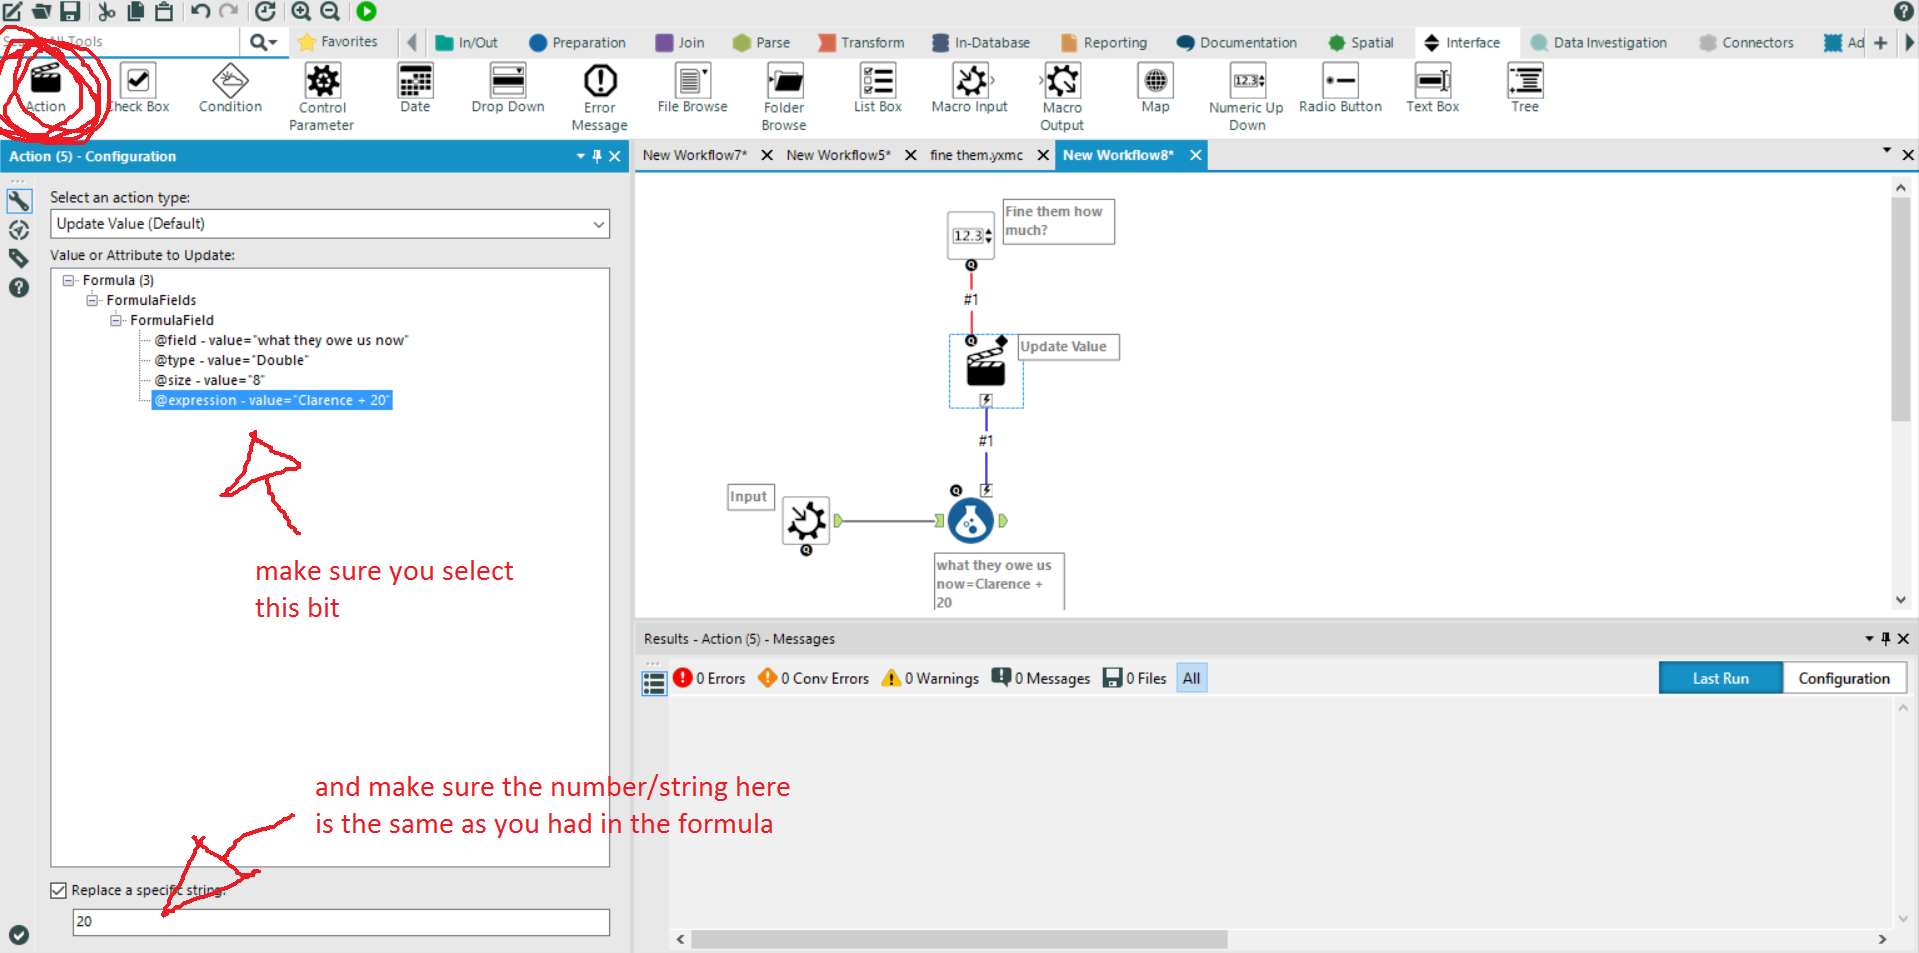
Then, add an Action tool between the Numeric Up Down tool and the Formula tool. In the Action tool, click the part of the formula field that lists the expression you wrote in the Formula tool (in my case, “Clarence + 20”). Then make sure the bit at the bottom says you’re replacing a specific string, and set it to the number you had in the expression in the Formula tool.
Finally, drop a Macro Output tool into the view and connect it up to the Formula tool. It asks for an output name, which again can be anything you like.

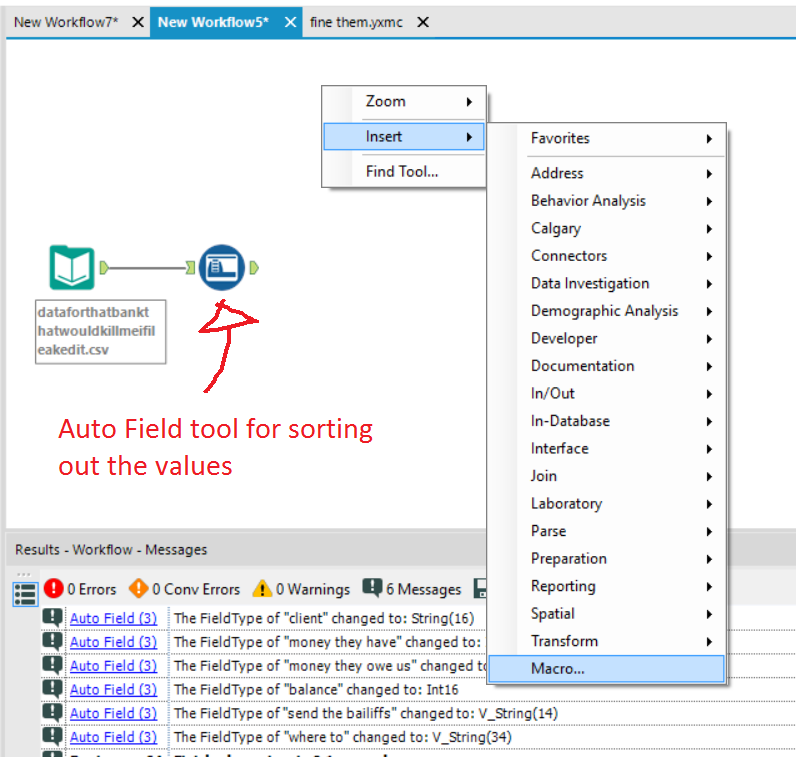
You can now save your macro, and then start a fresh workflow for processing the data. Drag the Input tool on, put your file in, make sure the values are okay… then right click the workflow canvas, go to Insert, and click on Macro.
This will drop your macro into the workflow. Click Run, and you can see that it works perfectly!
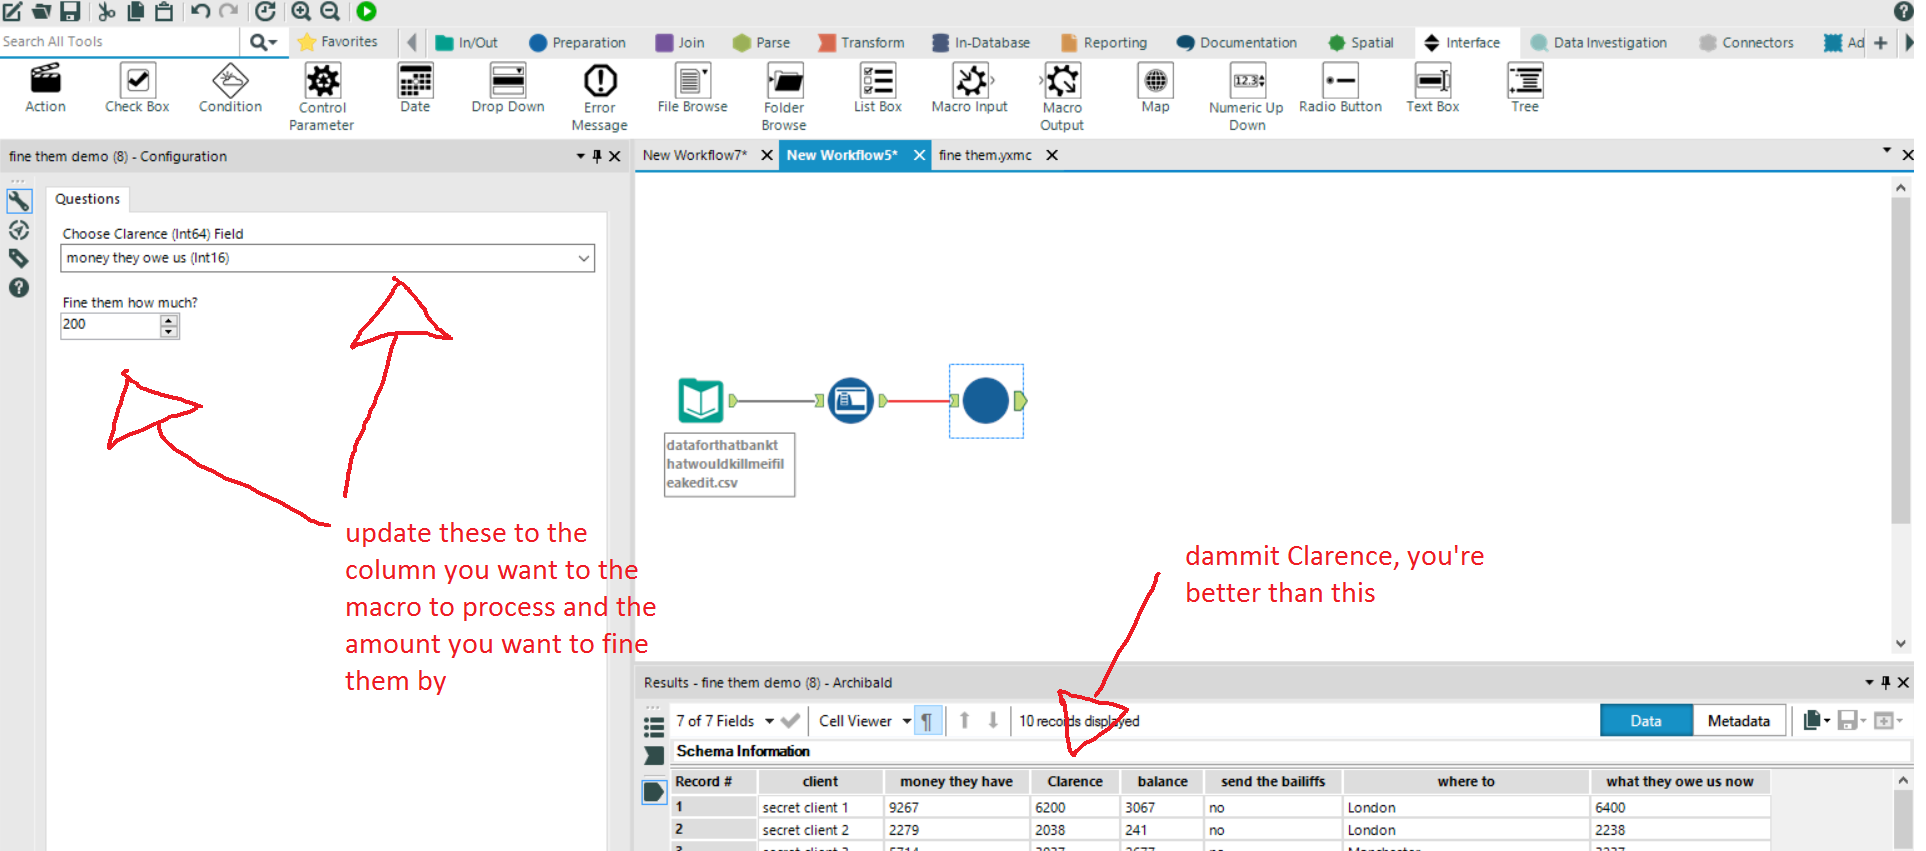
Well, almost. Clarence is still hanging around. This is because the macro will automatically overwrite the initial input column with whatever you’ve named the dummy variable. You could just originally name the dummy variable to be the same as the input column you’ll be working with, in which case “money they owe us” would be renamed as “money they owe us”. Thing is, for different workflows using different initial data sources, the columns might be called different things anyway. So, let’s go back to the macro and add in one last thing that’ll rename the renamed column back to what it originally was.
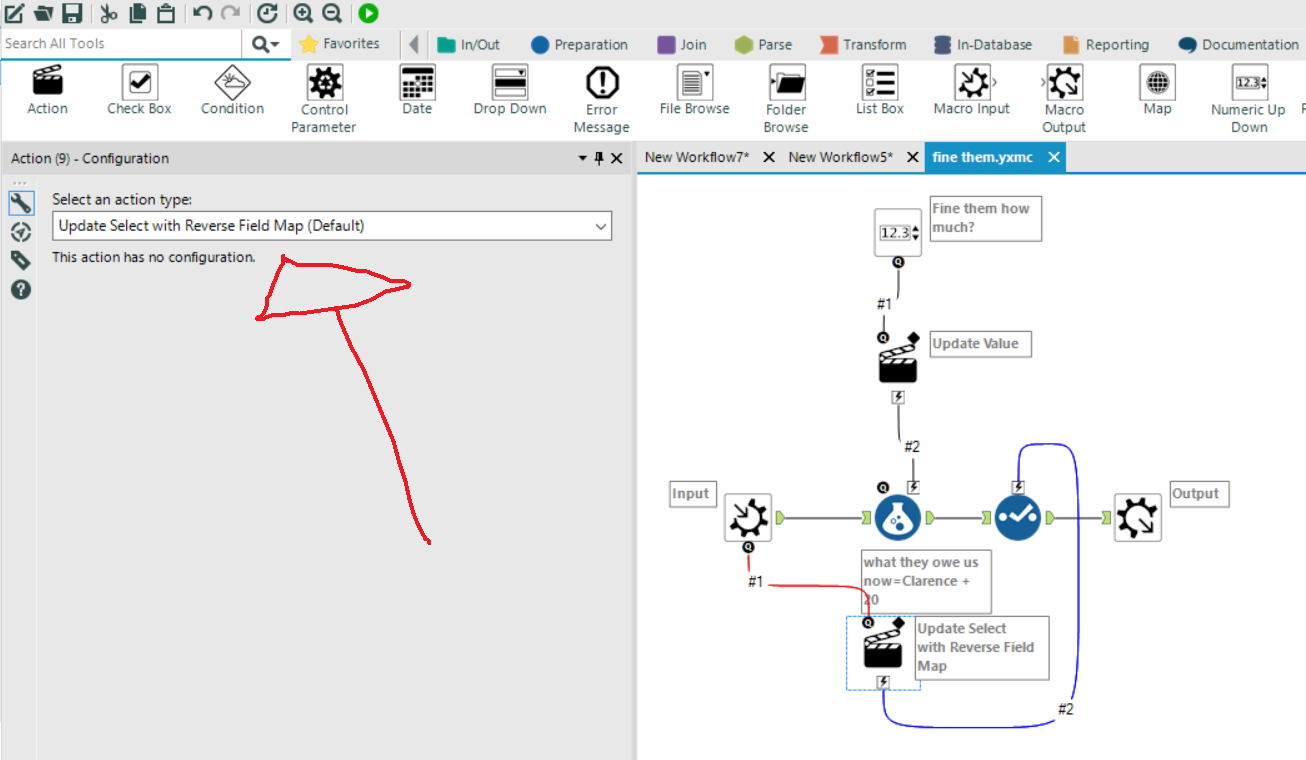
First, add a Select tool between the Formula tool and the Output tool. Then, add an Action tool, and put it between the Input tool and the Select tool. In the Action tool, make sure the action type is “Update Select with Reverse Field Map”. What that does is store the original input column name. Once the Formula tool renames that to Clarence, this Action informs the Select tool to rename it as what the original input column name was.
Update your macro, make sure the newest version is in your main workflow, and voila. No more Clarence.

This does, admittedly, take a lot more effort to explain with screenshots rather than simple R code changes. On the other hand, the visual style of Alteryx makes the flow so much more intuitive, which is rather nice, and clicking the little green arrows at each stage of the process beats typing head(data) each time.