This is going to be a series of posts trying to make three types of macros in Alteryx accessible to anyone: Standard macro, batch macro and iterative macro. This first post will cover:
- Standard macro:
- Definition
- Uses
- How-to
Standard Macro
First things first. What is a macro?
Depending on where you are coming from, you may see macros as something you create in Excel after pressing the “record” button (maybe to perform that tedious weekly reformatting in a sheet you receive by some other department before you can even start working with it). You may see it as a series of functions acting linearly on your data. You may see it as a module that can be kept separately from your main libraries. Or you may not have any idea about what a macro does at all. Alteryx describes macros as:
…a workflow or group of tools built into a single tool that can be inserted into another workflow. Create a macro to save an analytic process you perform repeatedly. Use the macro within a workflow without having to recreate the analytic process each time.
Let’s unpack that definition and see the different uses for a standard macro.
.
Re-use workflows
The first and most obvious use: Create a macro to save an analytic process you perform repeatedly. You design a workflow, run it, confirm that it works and then realise you have to run it each and every week with a slightly different data as input. Or maybe you want to apply different calculations to your processed data. You could just create different workflows for each week/analysis (copying and pasting the tools) or you can pack the whole workflow into a macro and use it as an input for your next steps.
This is one of the great points of Alteryx: the intuitive interface that makes it quite clear –visually— how different tools are acting on our data. First, we read the file. Then we change some options. Add a column. Summarize it. Etc. The output of each tool is the input of the next tool. Or, more broadly, the output of a group of tools is the input of the next group of tools.
Let’s imagine…
…a scenario where we have a workflow with 12 tools. The first 4 tools read the data and format it in a way amenable for the last 8 tools to obtain some useful information. Conceptually, we have two sets of tools: those used for formatting and those used for calculations.
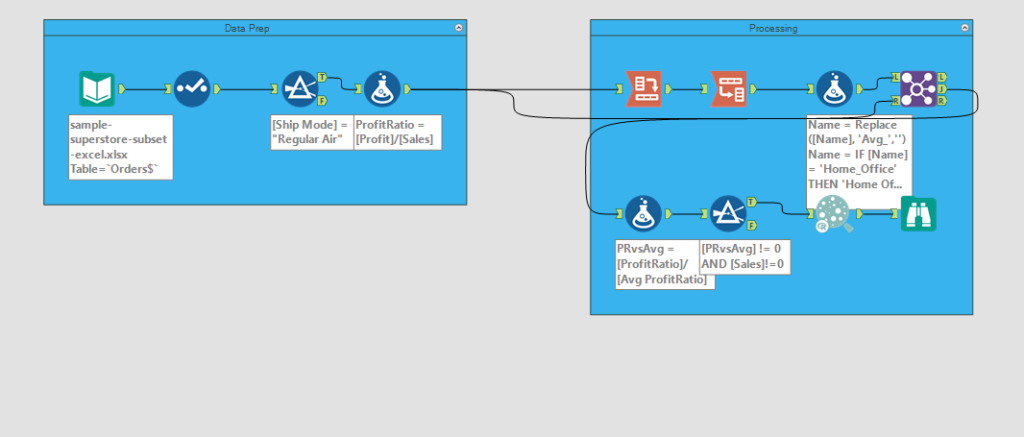
Data prep and calculations in a sample Alteryx workflow
Let’s say that we have our workflow working and calculating something useful for us, maybe the average profit ratio for orders shipped by regular air with different priorities to our different segments.
Great!
Let’s imagine…
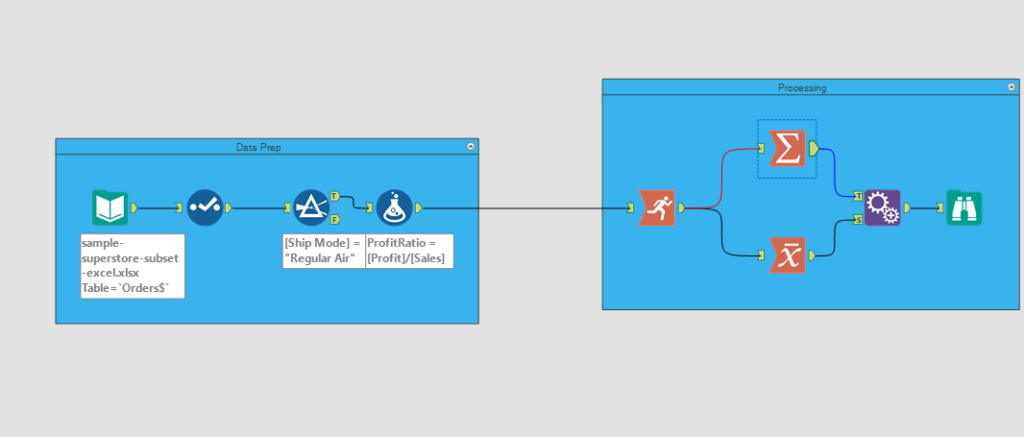
…that we want to calculate also a weighted average and a running average . The input data is the same. The reformatting steps are the same. The only thing different is the calculation part. Options?
We can copy the required (and configured) tools from our original workflow into a blank new canvas, and then build the calculation part.
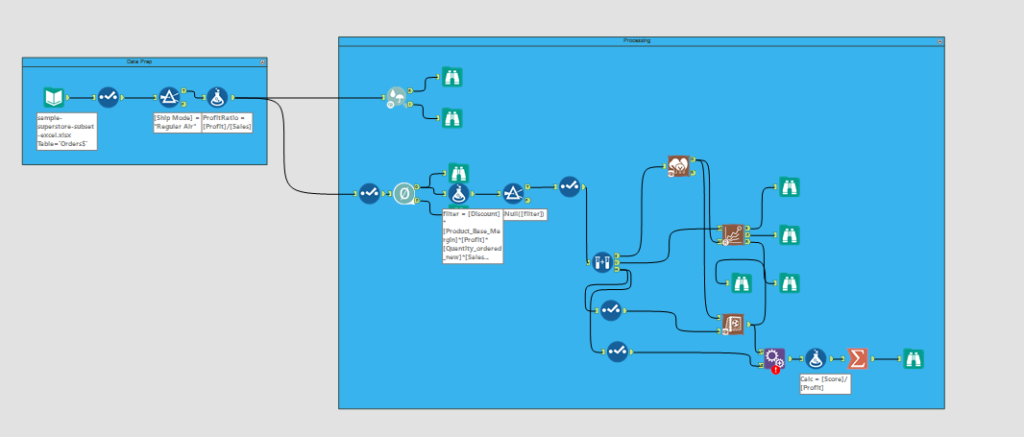
Perfect! Next time we are asked to perform yet a different set of calculations for the same data and following the same reformatting steps we can repeat this process: copy the tools to a new canvas, complete the workflow as required. For instance, testing a forest model:
Alternatively, we can group the reformatting steps into a single macro tool, whose input is the raw data and whose output is the input for the calculation tools. Then we can create the different workflows just by inserting the reformatting-macro followed by the different group of calculations.
What is the benefit of doing that?
Before I answer that question, let’s move to the next use:
.
Single-point of maintenance
Let’s continue with our example. We have one input and three different workflows that share the data preparation part.
Let’s imagine for a second that we have even more processes sharing these steps. Now envision an upgrade at the department you are receiving these data from that changes the data you receive in any way (maybe you receive it now pivoted, or in xml instead of csv, or with a semi colon instead of a comma, or…you name it).
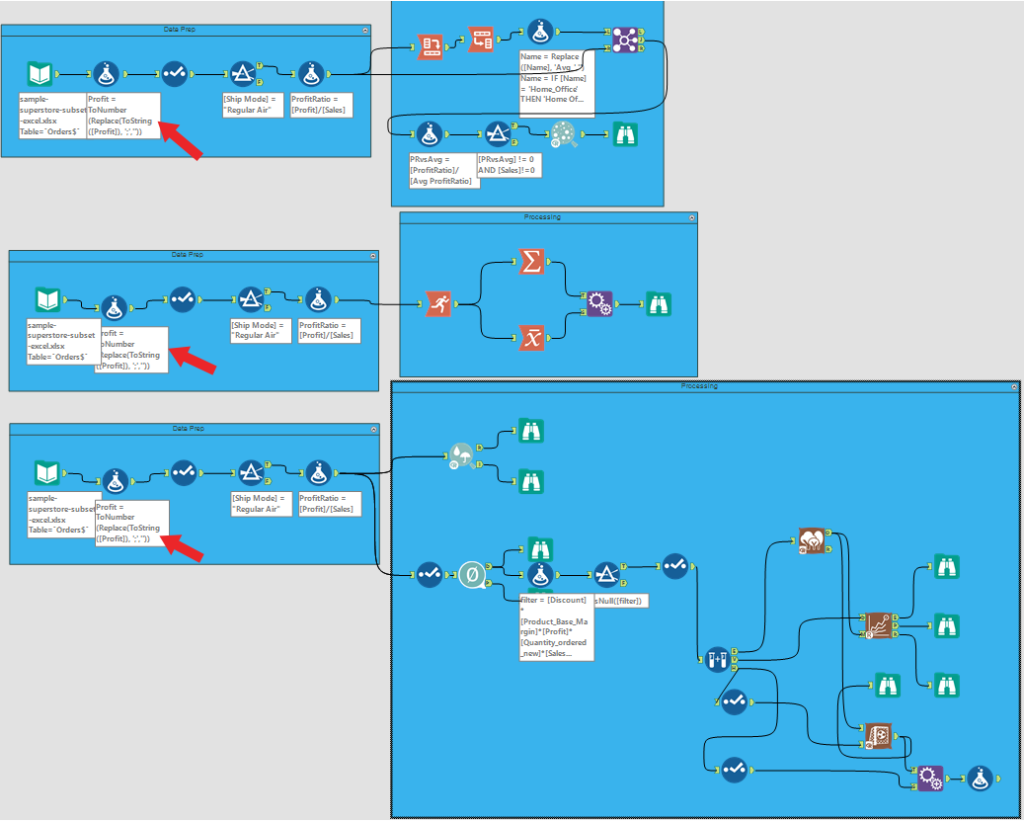
Copying and pasting means each workflow needs to be modified (red arrow) when the data changes
If we just copied all the tools from the original workflow into the different workflows, we now need to update each and every one of the workflows to match the new data.
![]()
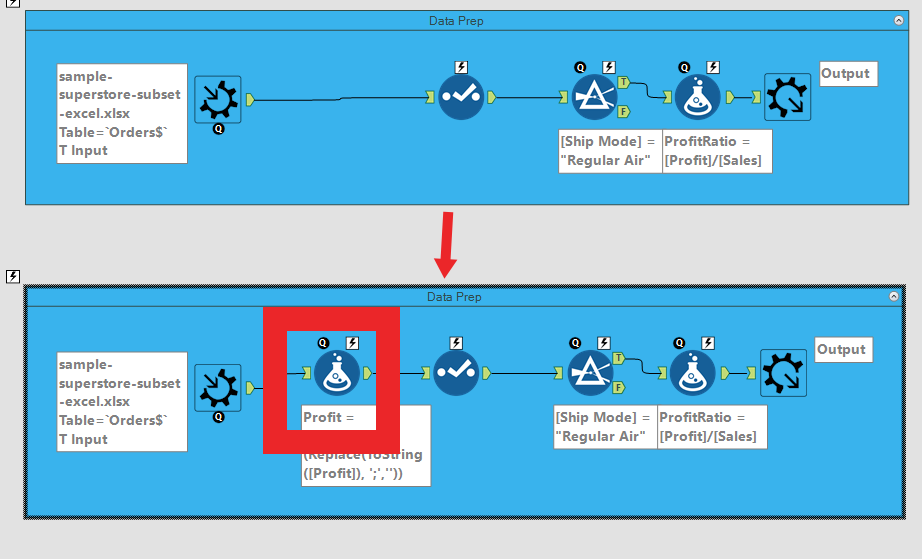
One single change in the macro modules
If, instead, we used a macro to define the data formatting, and then inserted the macro in the different workflows…we just need to update that single macro…
![]()

The workflow is unchanged — all the modifications happen inside the macro (once!)
and all the workflows that use it will be immediately (and hands-off) updated. One single change has modified all our dependent workflows.
.
![]()
Split tasks
Let’s expand the scenario to a workflow with multiple groups of tools and sections. If several people are going to be developing this workflow, it may be useful to split it into tasks that each can develop independently. The team can, beforehand, agree on the output of the first set of tools and on the final outcome, then each person/group can work in a single piece of analysis, and everything can be combined to obtain the final workflow.
.
How-To
Probably the most straightforward way of writing the macro is just prepare a regular workflow, test it and then click on the canvas. Go to the configuration window and select “standard macro” from the dropdown menu. Change the input to macro input and add an output tool. For a detailed step-by-step guide check Phil’s and Philip’s posts.
Any comments, please leave them here or reach me at @dsmd4vid.
