In my initial application for The Data School, I created a dashboard looking at road casualties in London which looked a little something like this:
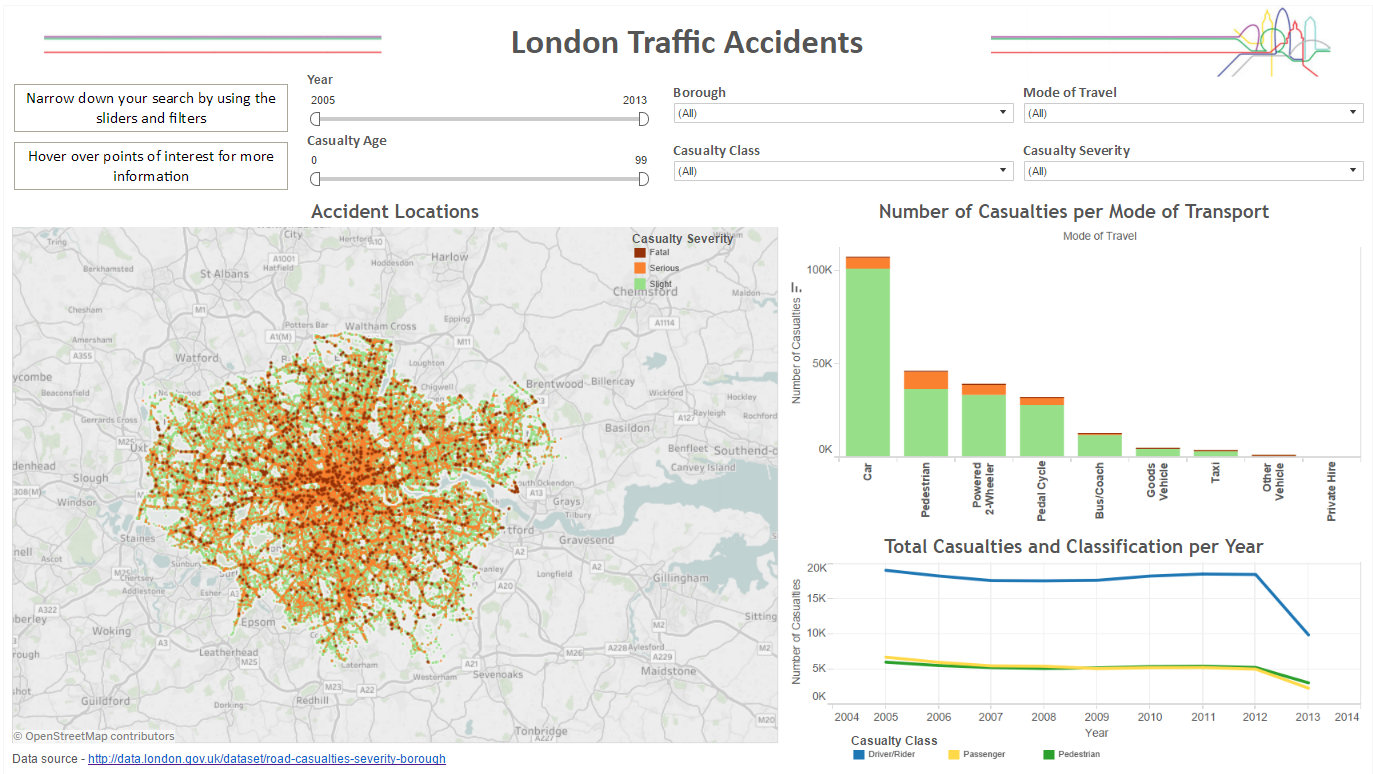
(Click on the image to go to the viz itself)
In the first week, we were challenged with remaking our initial application pieces. I found it quite difficult to think of how I could change it, not because I thought it was amazing and couldn’t be made better (this was certainly NOT the case…), but because it was a classic case of once you’ve seen it, you can’t unsee it. I really struggled to come up with ideas that were different, and better! But there was one thing that came to mind – I wanted to change my map. It was far too cluttered to make any sense, and to be quite frank, it was ugly. What’s the remedy for this? A filled map! Just like this one in fact…
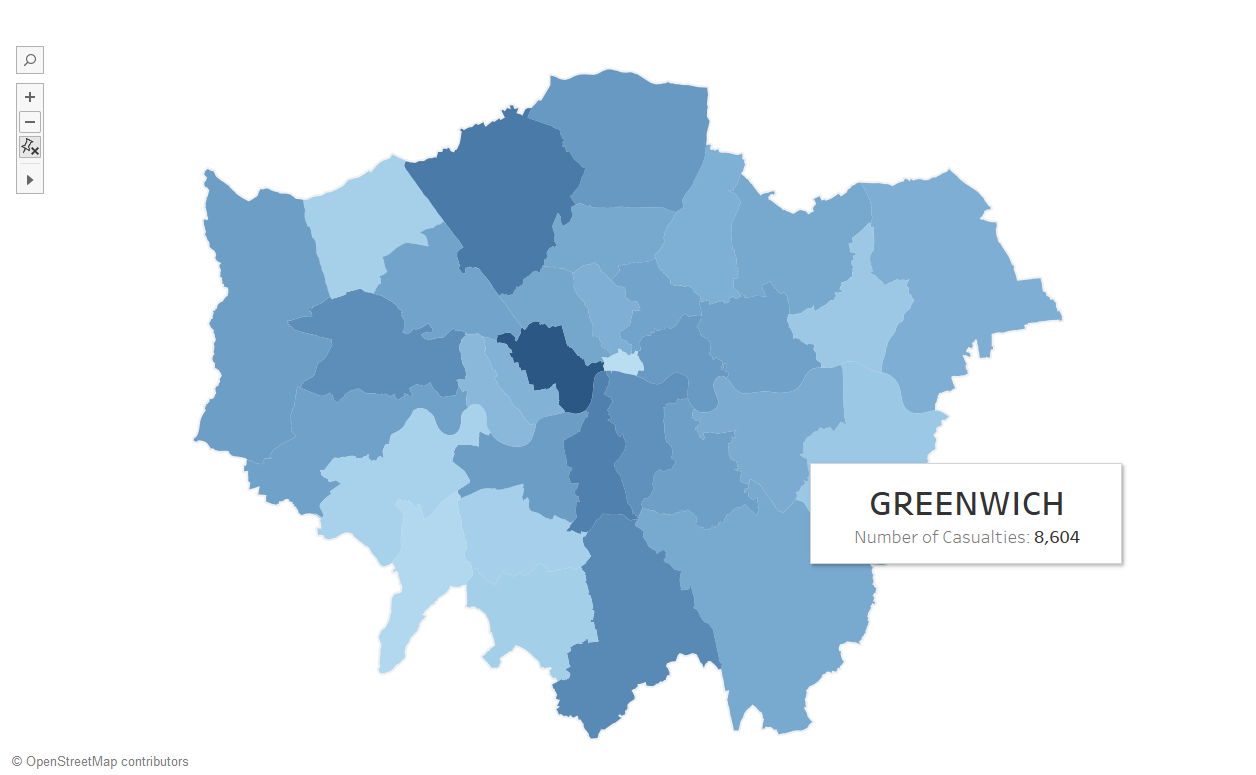
I wanted to create a filled map by borough, but had no idea how to. After asking a few people for help, I got a push in the right direction. Firstly I had to download an Excel file which contained the longitudinal and latitudinal coordinates of the perimeters for each London borough. After that, I opened both the London borough data set and the TFL data set in Tableau, and continued with the following steps:
- Using the Borough Coordinates data set, build the basic filled map which is separated by the boroughs.
(Make sure the ‘path’ field is a dimension before dragging it on to the marks card) - Create the connection between the data sets:
Data -> Edit Relationships -> Custom -> Add -> (link on the fields which contain the borough names).
(This is called ‘Area Name’ in the Borough Coordinates data set, and ‘Borough’ in the TFL data set) - Drag ‘Number of Casualties’ on to the colour shelf on the marks card.
- Edit the tooltips to make them more clear.
And that’s it! Now it is SO much easier to see where the most accidents happened. Check out the video below to see these steps in action…
[youtube https://www.youtube.com/watch?v=vLJt3_G0RXE&w=560&h=315]
If you’re wondering what else I did to change my initial application, you’ll have to wait for my next blog post where I’ll explain what I did and why I did it.
To be continued…