
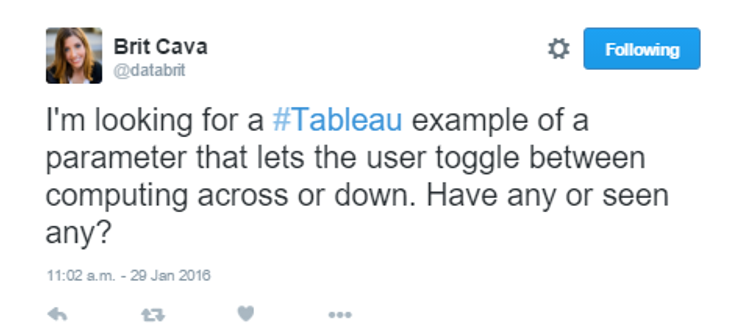
Last Friday on the train home to Leicester I came across the following tweet from Brit Carva (@databrit)…
I responded with the following…

Now what Brit probably doesn’t know was that no workbook actually existed at the time of me saying this, I was lying; however I knew it was definitely possible so straight away got to work. Within 4 minutes I had sent Brit a link to the workbook.
The guide will be based on the example outlined in Brits tweet, looking to switch table calculations between ‘Table Across’ or ‘Table Down’ on the running total. But it is possible with all manor or table calculations that you may wish to switch between.
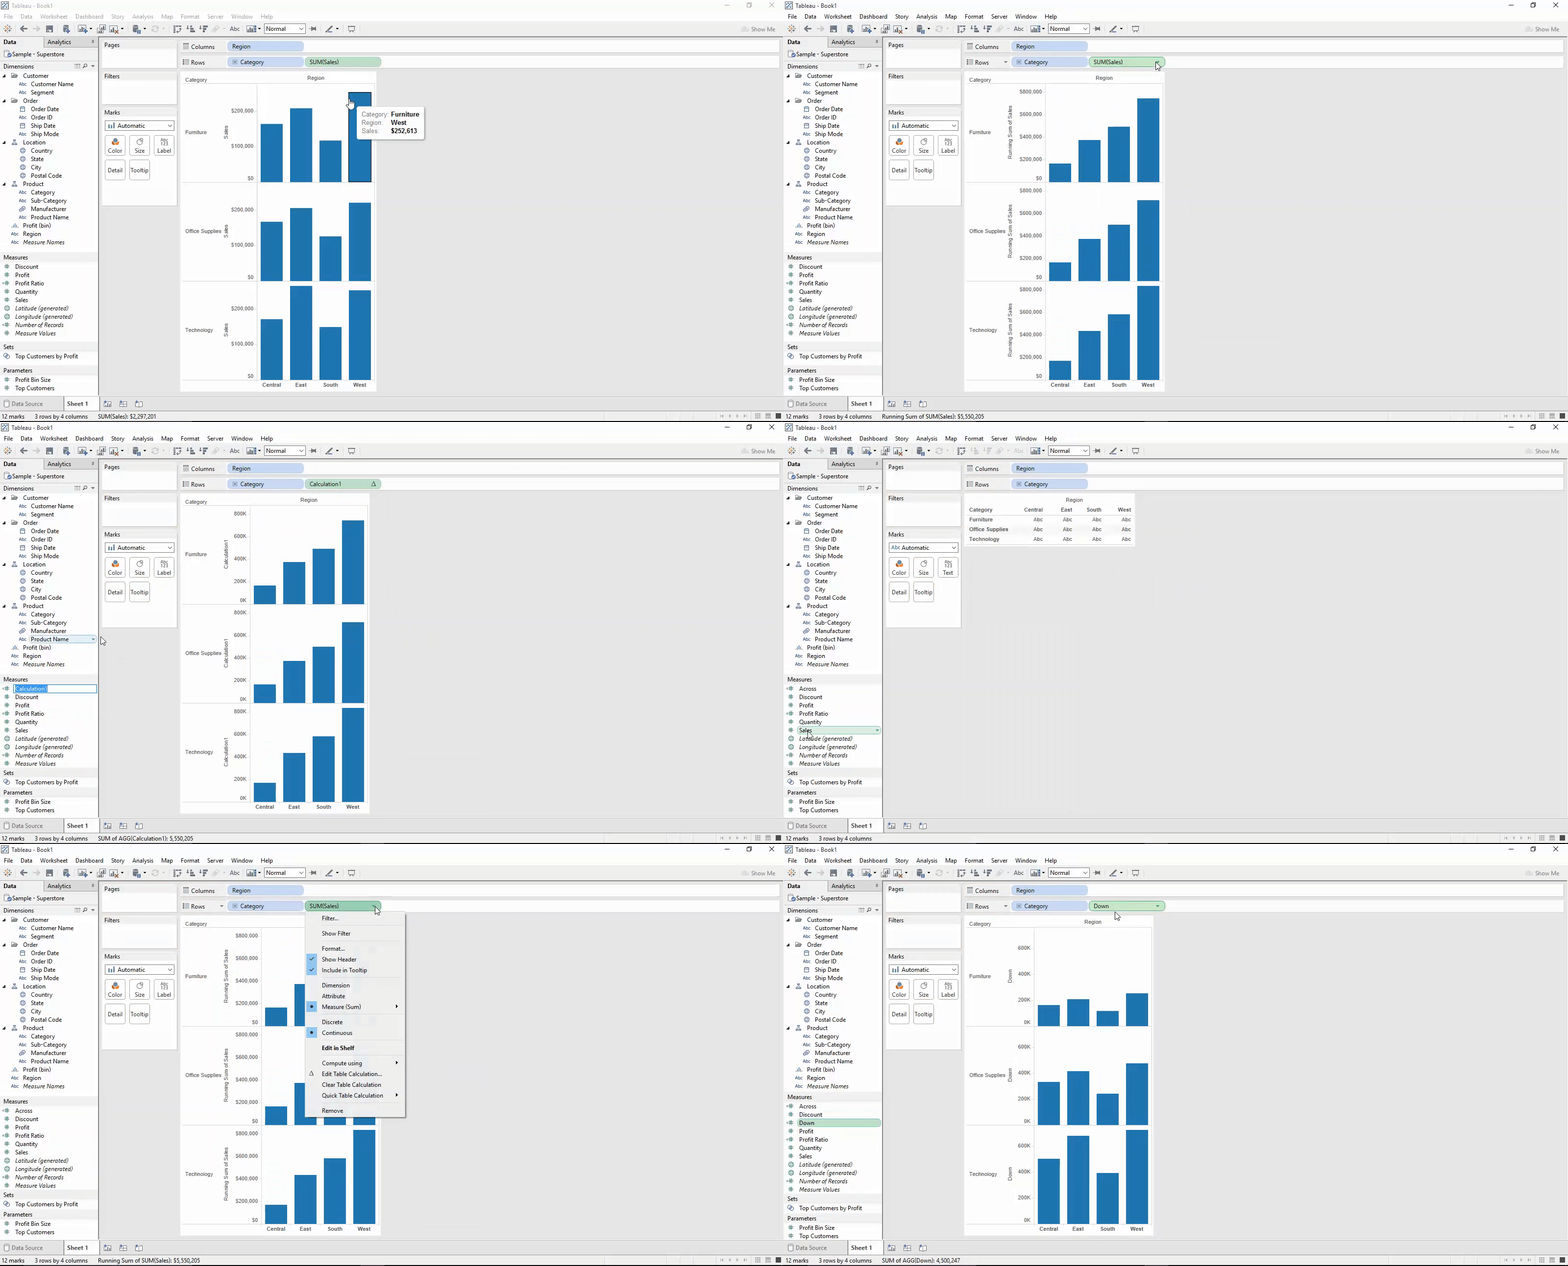
- Create your table calculations as individual calculated fields. Drag the measure to the rows/columns shelf, add your desired table calculation and drag to the data pane and name as appropriate. In my case I did this process twice and have called my calculated fields ‘Across’ and ‘Down’.
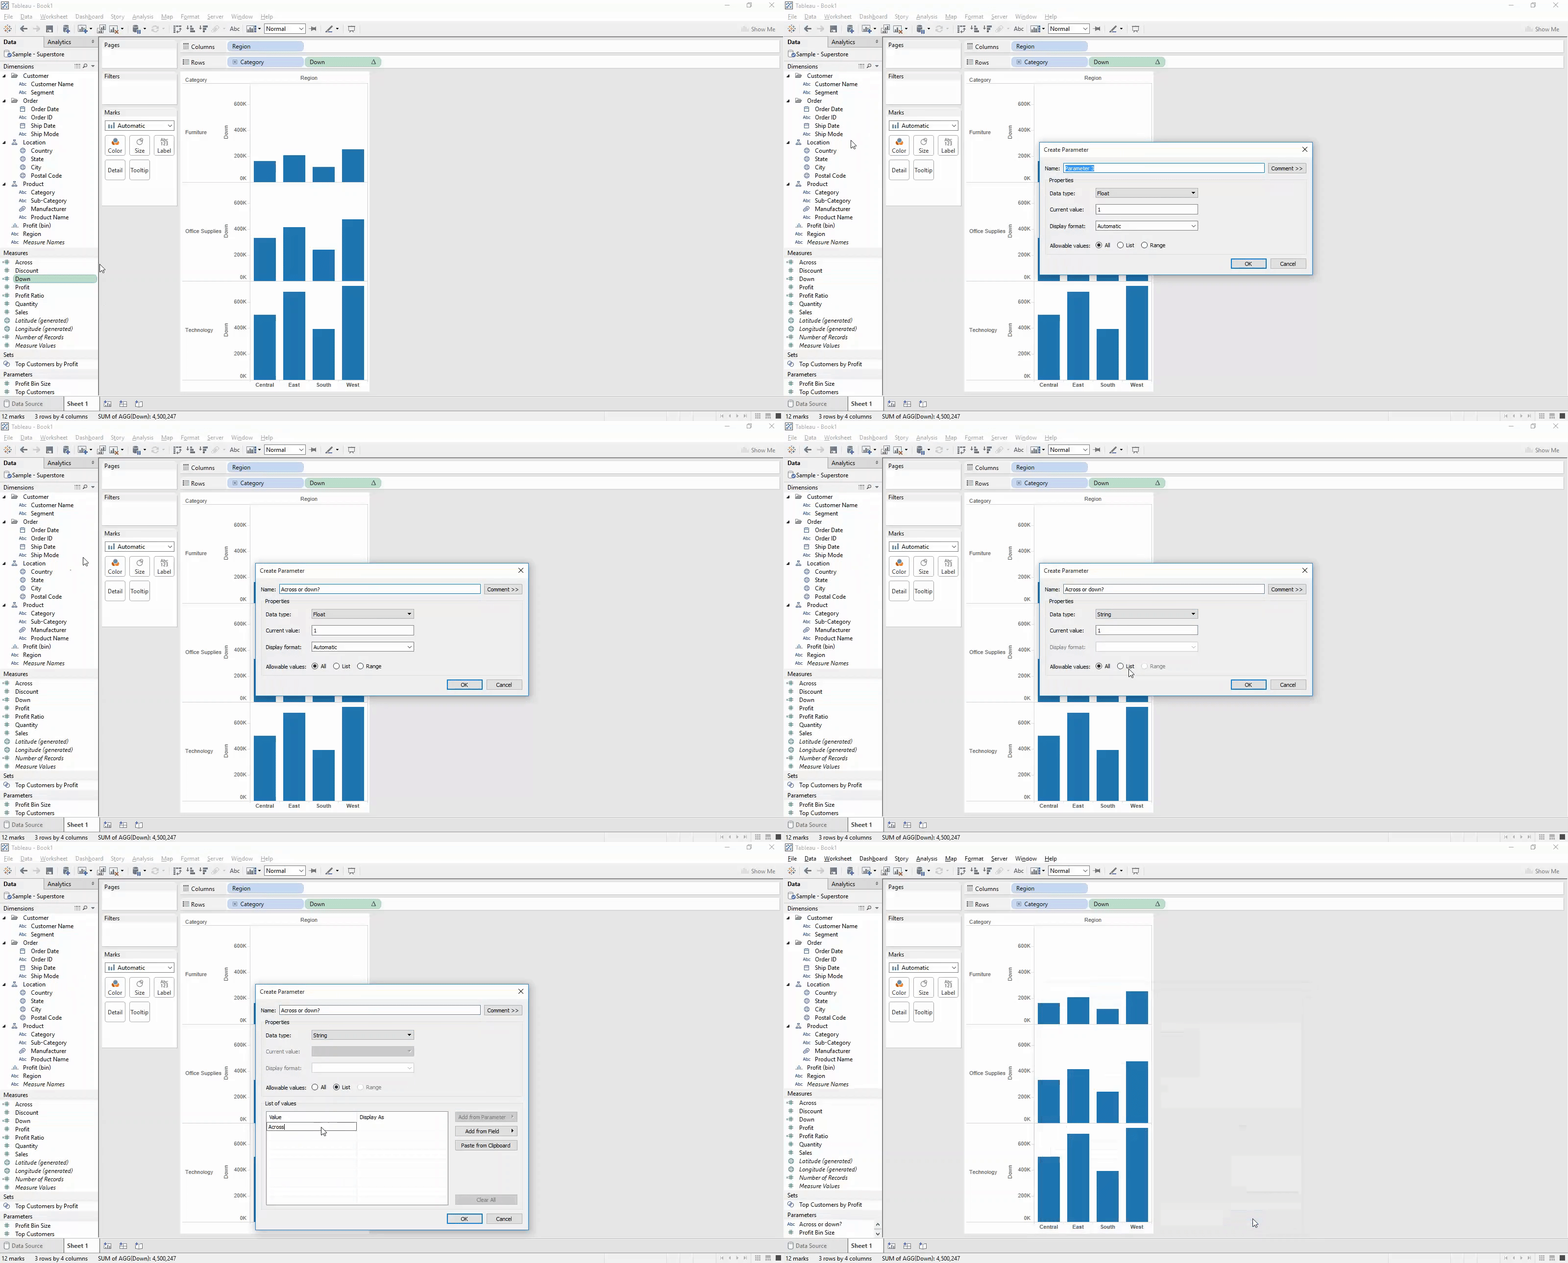
- Create a parameter which will allow your users to select which table calculation they wish to review.
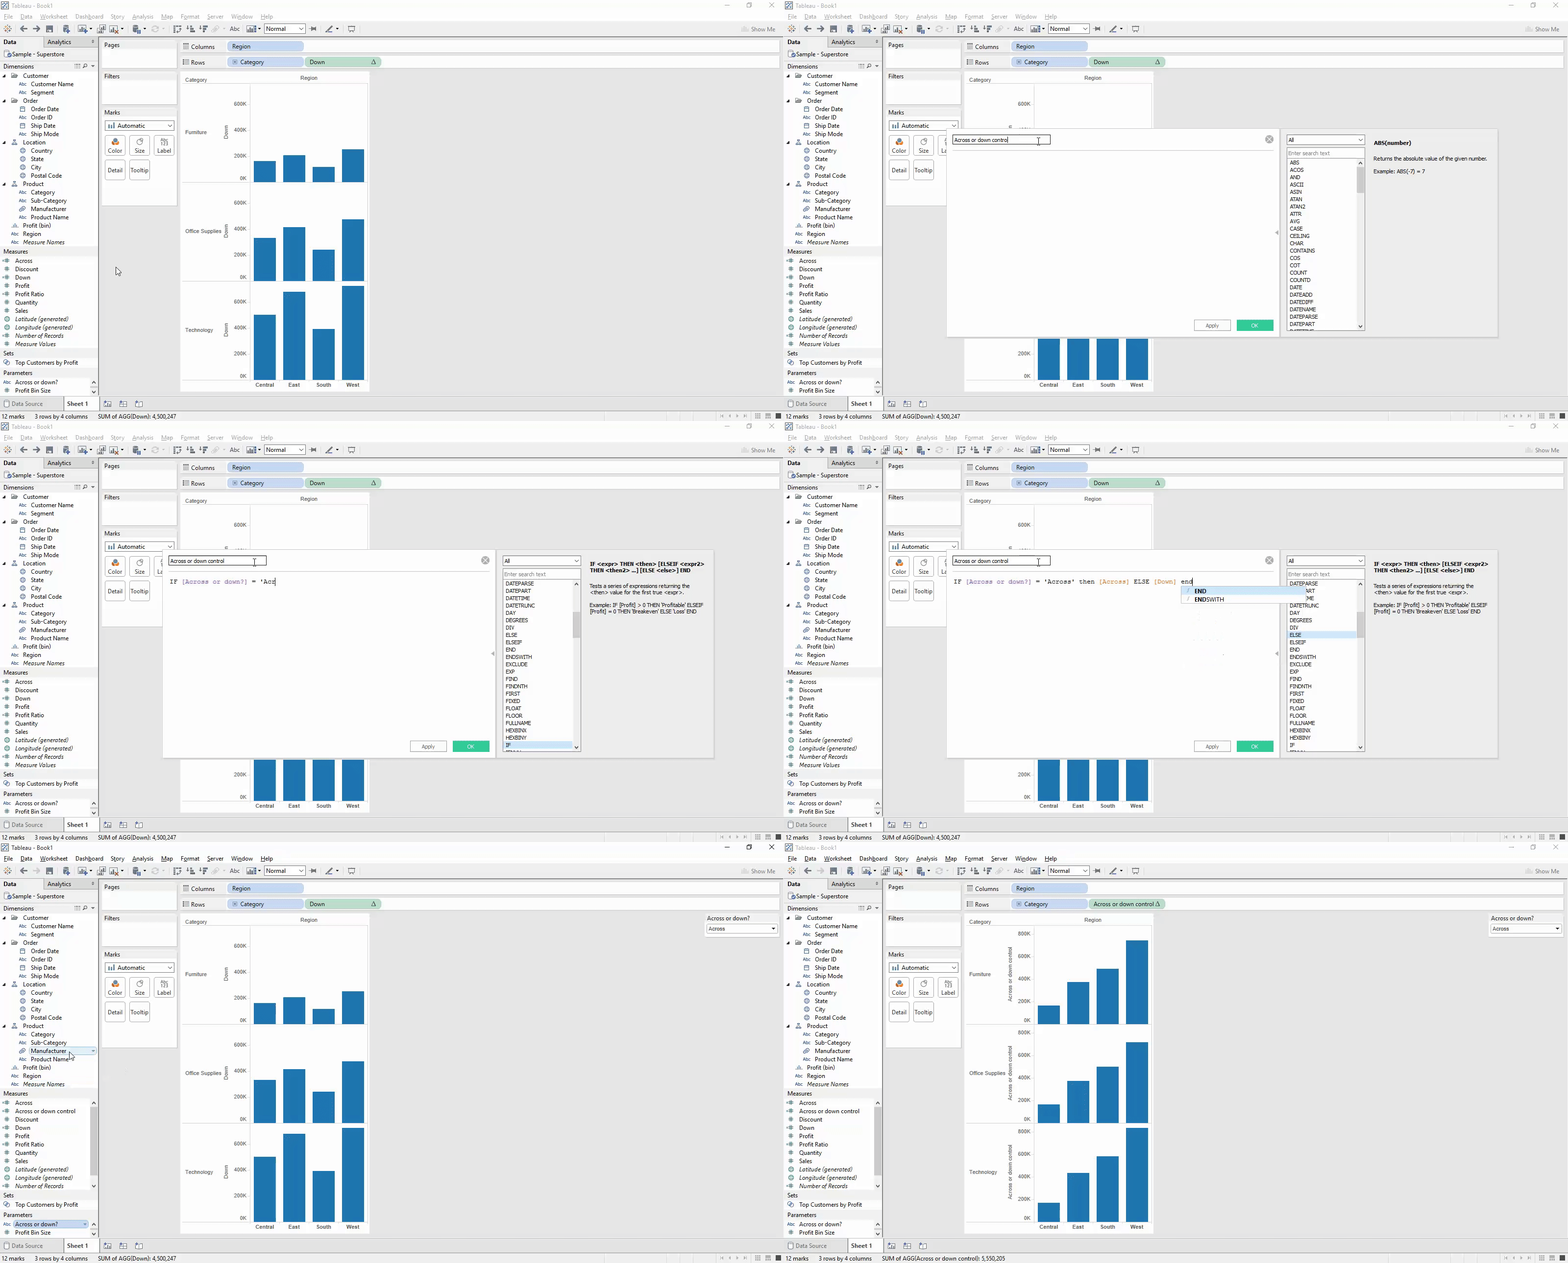
- Create a calculated field which controls what you parameter actually does. In our case, when a certain method is chosen by the user we want the value to show for that select. So it is a simple IF formula.
IF [Paramter] = ‘Table calculation 1’ then [Table calculation 1 – calculated field] else [Table calculation 2 – calculated field] END
Or in my example…IF [Across or down?] = ‘Across’ then [Across] else [Down] ENDNow if you have more than 2 examples a CASE and WHEN statement may be more appropriate…
CASE [PARAMETER]
WHEN ‘Table calculation 1’ then [Table calculation 1 – calculated field]
WHEN ‘Table calculation 2’ then [Table calculation 2 – calculated field]…WHEN ‘Table calculation X’ then [Table calculation X – calculated field]
END
- Drag your ‘parameter control calculated field’ into the view, and show your parameter control.
- Watch it work… HOPEFULLY… For some unknown reason this doesn’t always work and may need additional configuration. If this is the case then follow the remaining steps.
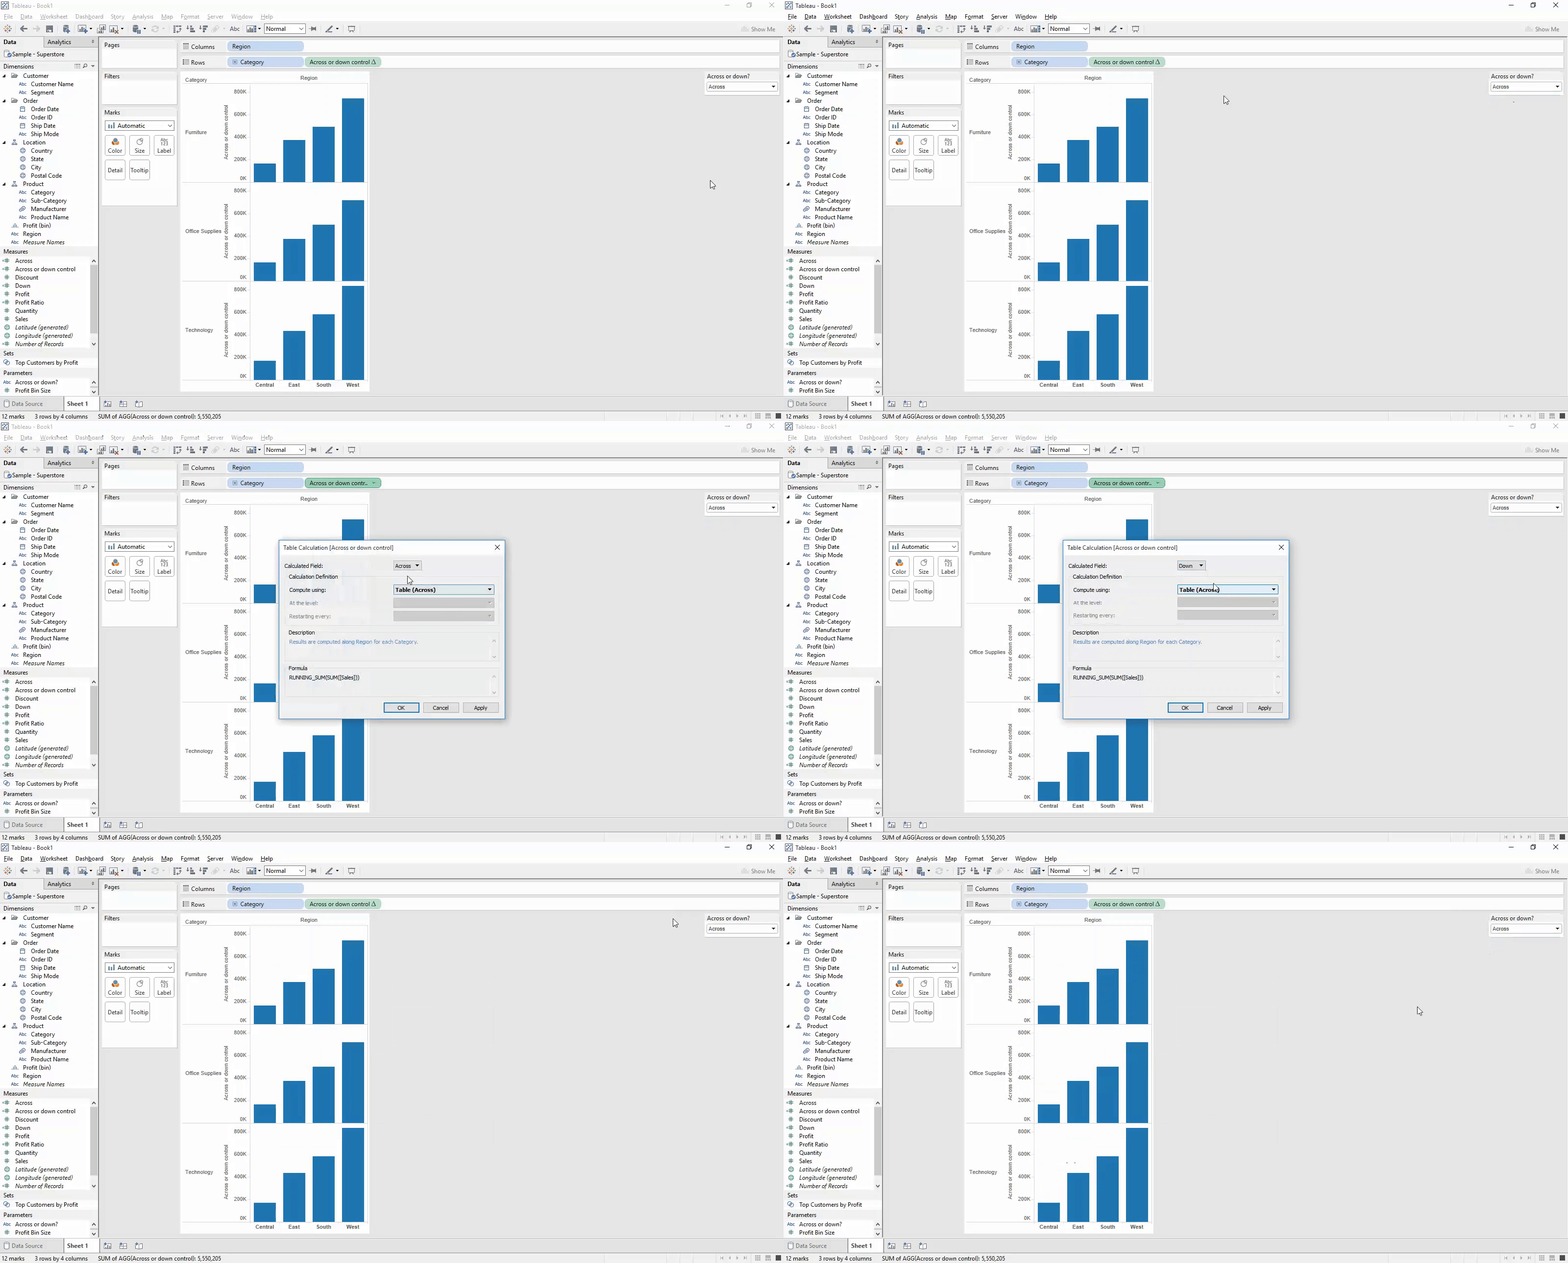
- Right click on your ‘parameter control calculated field’ pill that is in the view and select ‘Edit Table Calculation…’ from the drop down.Now you will see something you may not have seen before at the top of the configuration panel, a ‘Calculated field:’ header. Now what Tableau may have done is reset how your calculated fields are working (again I don’t know why). All you have to do is select each of your calculated fields from the drop down and ensure the details are correct, and amend where they are not.Crisis averted!
I hope this guide has proven useful and if you have any queries then please post 🙂
The video below shows me completing the task in full.
Ben
#VizLikeAnArtist
